BayView Bungalow | Kitchen Renovation Reveal!!
Room Makeovers
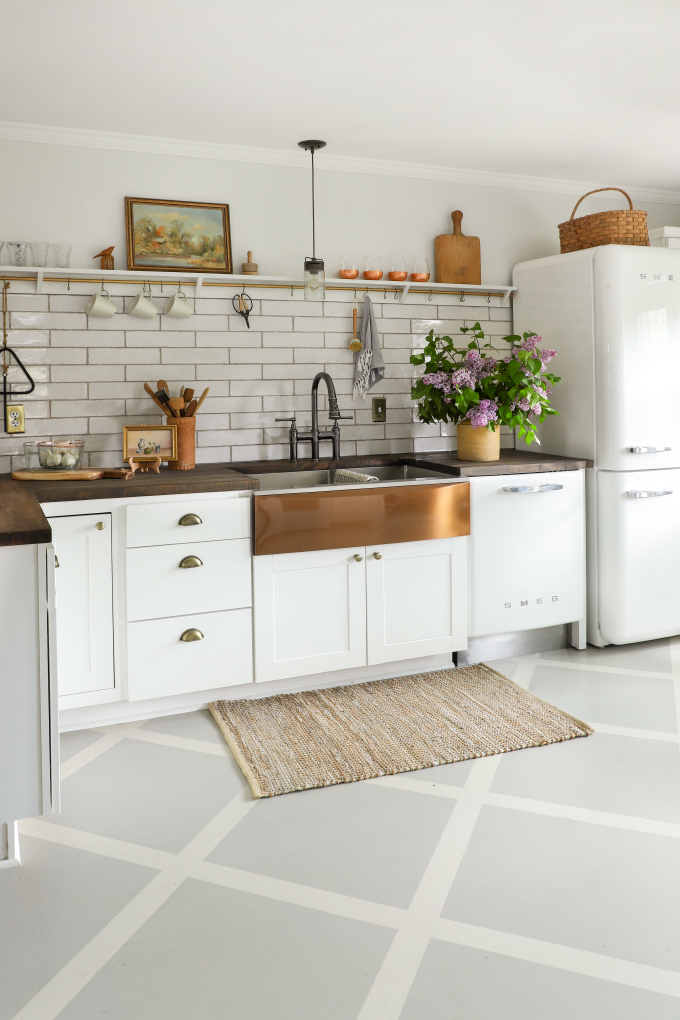
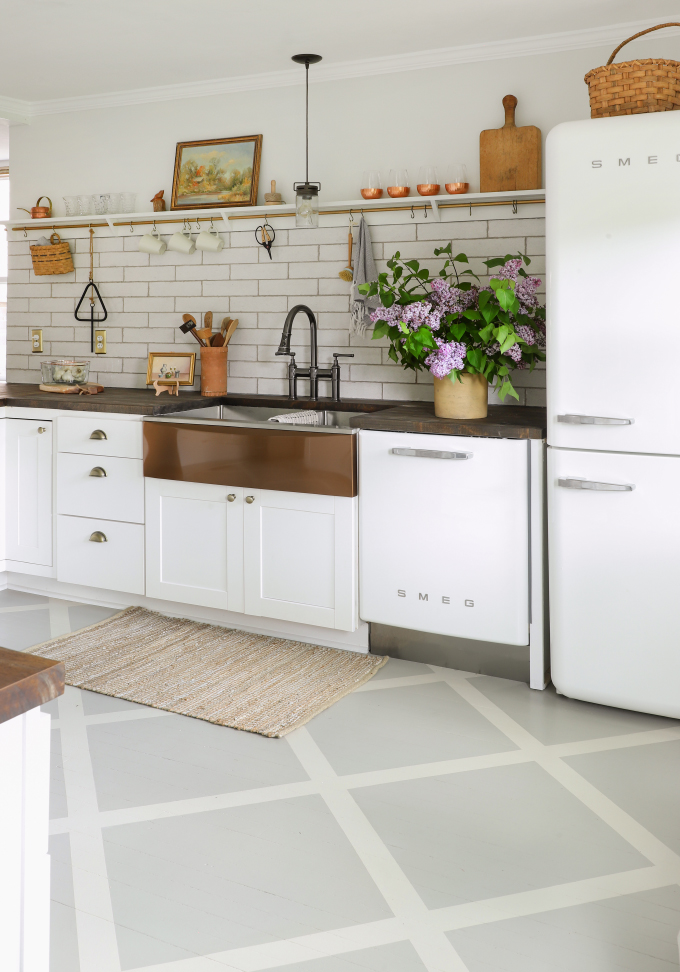
The newly named “Bayview Bungalow” kitchen is done!! And I am in LOVE!!! I asked Mr. Yolo if we could move back into this house, because this kitchen makes me SO DARN HAPPY! The DIY pot rail? The painted floors! That sink! The fridge!! Sadly we won’t be living in here anytime soon because it’s a short-term rental and guests will be on their way soon. But let me show you around this kitchen renovation that started with just installing a backsplash, and evolved into a whole kitchen refresh!

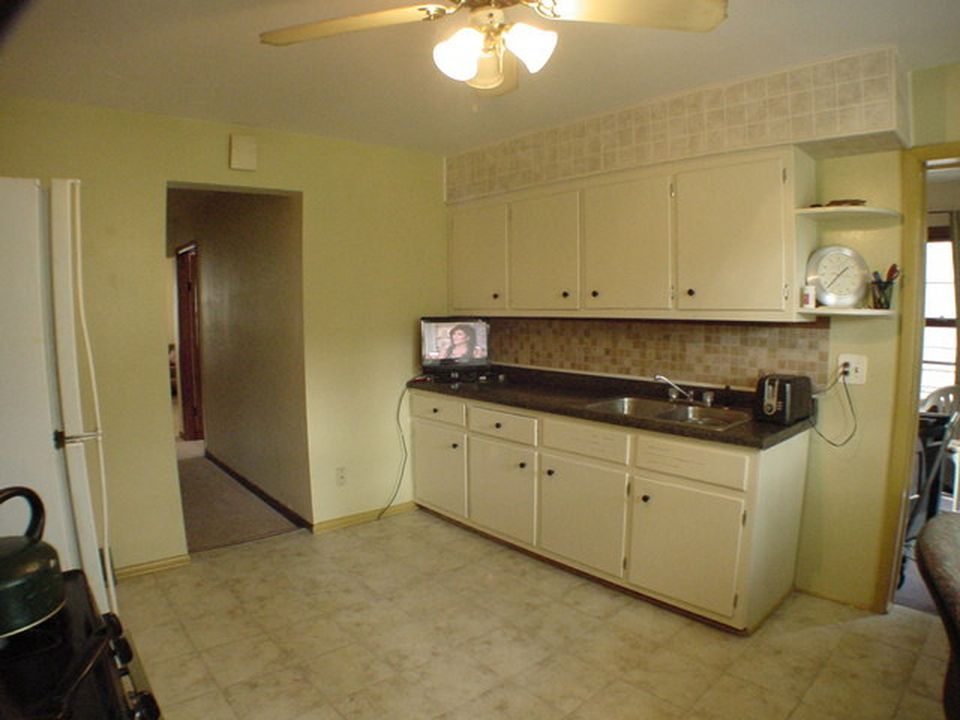
This is the WAY before of this kitchen! Mr. Yolo bought this 1898-built house when he moved back to Wisconsin from Las Vegas 5 years ago. He and his parents gutted it, opened up the house to be more open concept, and totally redid the kitchen.

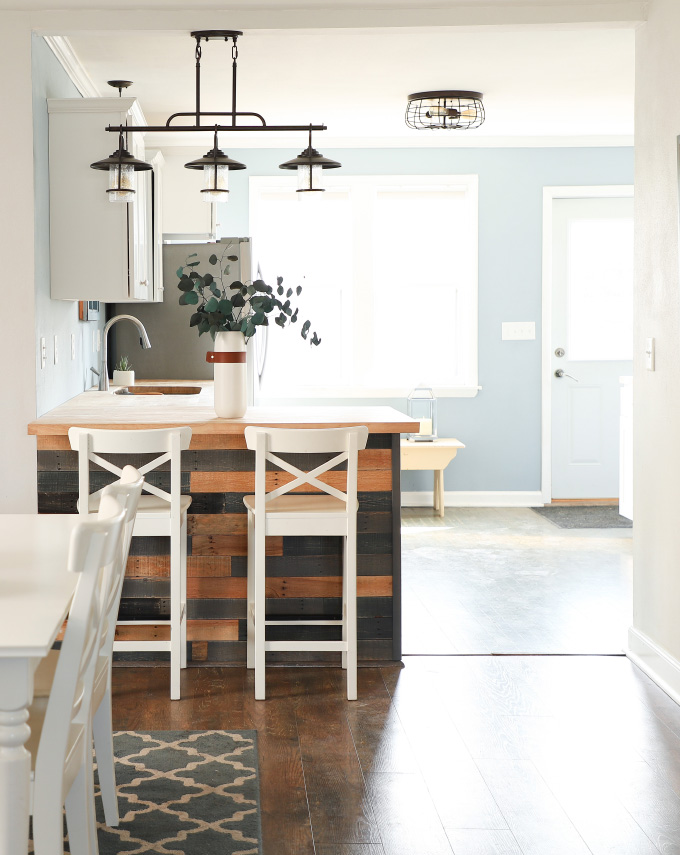
Here is how it looked a couple of months ago! He did an amazing job on the kitchen. The white cabinets from HOBO (sadly no longer in business) brightened up the kitchen, and Mr. Yolo loves blue, so stayed in that color palette. He lived here for a few years before we got married and moved into the Barnhouse. And there was a couple things he still had to finish, like a backsplash…and then I started to kick around some other ideas…and one thing lead to another…

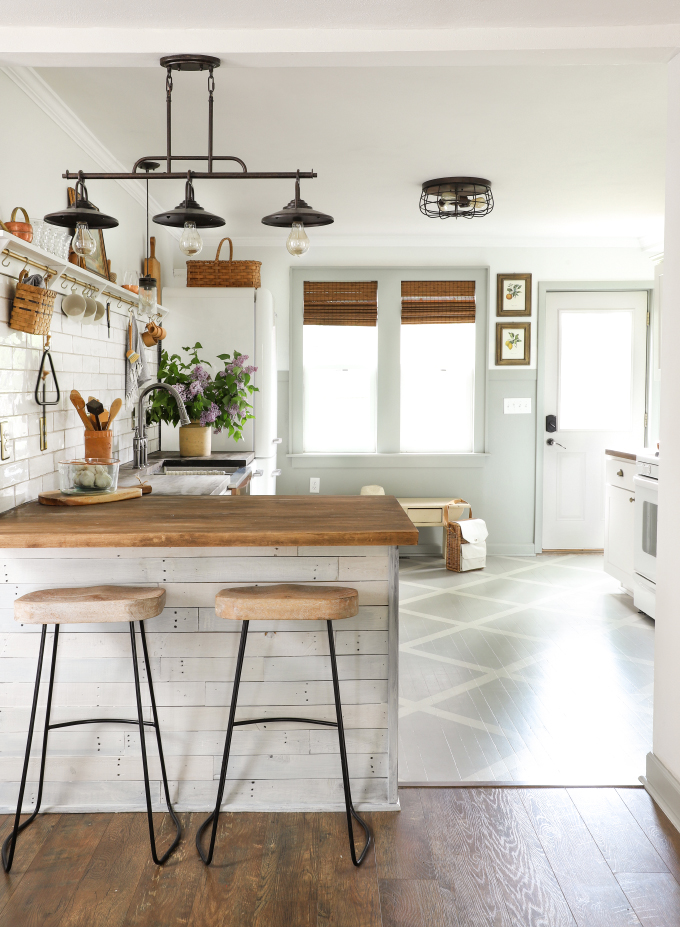
…and this is where we ended up!!! It honestly feels like you stepped into the countryside, even though the house is right in the city! Before we get too far, let me say that the first renovation that my hub did on this kitchen was wonderful, and I am so thankful that he trusted me to undo some of his work (bye bye upper cabinets!) and add the “I SPY DIY” touch to the space. We do these upgrades for a few reasons 1) It’s fun for us to create beautiful spaces! 2) We get to try out new product (like wood floor paint), show you the steps and troubleshoot so you don’t have to, and 3) We like to invest in our properties so they stand out on the short-term rental market.
I also want to say thank you to the sponsors that brought this place to life, and stuck with us through the pandemic. I will have info-packed posts coming up with ALL the details on the painted wood floors with Rust-Oleum, and details on installing the Elkay sink, plus answers to all the butcherblock countertop questions. So stay tuned!!
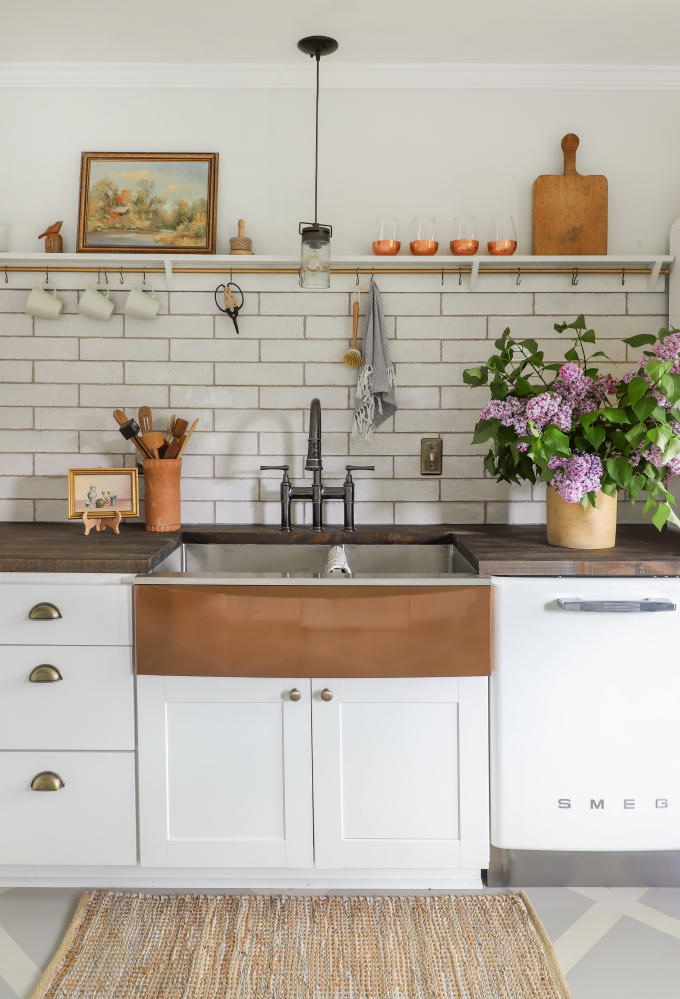
Ok, so lets dive in! The first thing to go was the upper cabinets, and I KNOW this is not for everyone. My initial pitch to Mr. Yolo was to just remove the one free floating upper on the left and add open shelving….and then I got the idea to DIY this Brass Pot Rail (check out my steps on IGTV) and all the uppers on this wall came down! For those that are freaking out about storage, yes, there is much less, but we use this home for short–term rentals, so we are suppling all the dishes and glassware, and have no problem fitting everything for the guests. So for us, it works great!

The Elkay sink is GORGEOUS and, wait for it, the front is INTERCHANGEABLE! I have a whole post coming with the details, so stay tuned!
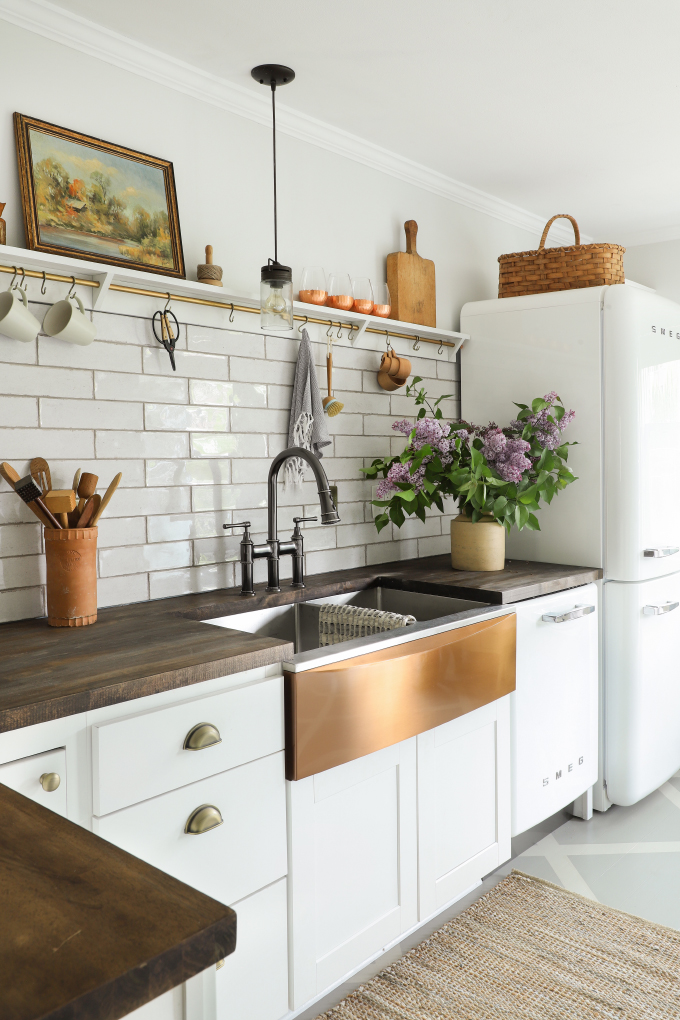
The backsplash that started it all! We actually had this Annie Selke Tile, from The Tile Shop left over from the DIY Duplex. It’s so beautiful, and I knew it would look great in this kitchen too. We used London Fog grout, for a soft contrast. And played around with the height. Ultimately, this just felt right in the space, high enough to hang things on the pot rail, but not too high that you couldn’t grab a glass off the shelf.
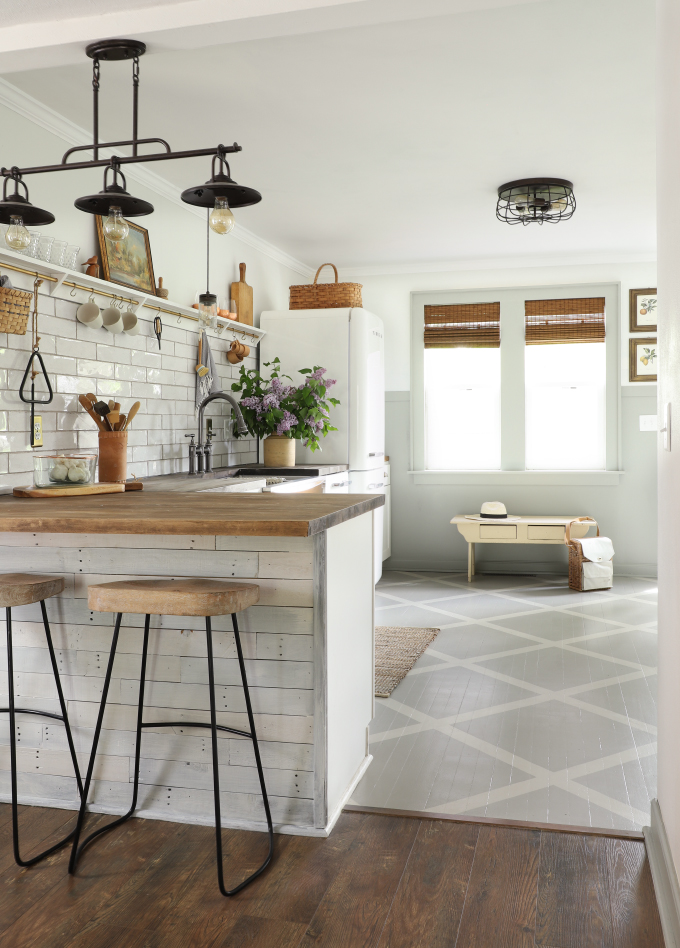
And then my sweet painted wood floors, I could go on forever talking about how happy I am with how they turned out, but I have a VERY in-depth post coming out tomorrow with all the DIY details and answers to your questions.

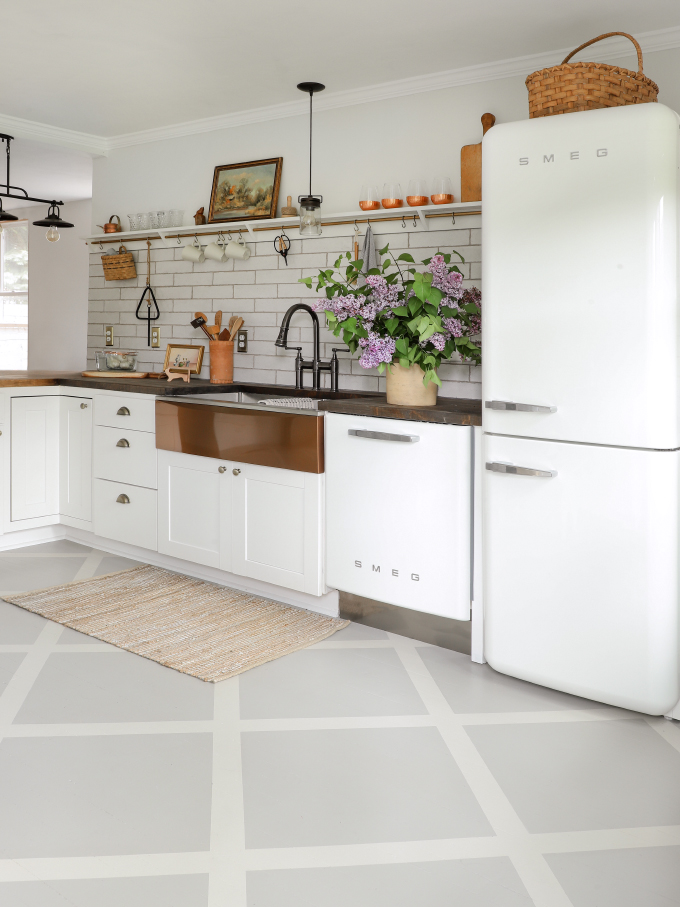
I had such a fun time mixing in vintage pieces I already had, because no antiquing during quarantine 🙁 The painting on the shelf was a thrifted one hanging in our bathroom, and it caught my eye when I was getting ready one day. I knew the colors would be perfect for this kitchen. The owner of a local shop Curated Home Decor dropped off the little art piece on the counter and the copper rimmed bowls because she knew they would fit perfectly! The picnic basket on top the fridge is from another local vintage shop Millhouse Goods. And all the containers and wood boards were thrifted finds I had stashed away for a rainy day .
All the details on the changes we made, and shopping info after the break!
This “Before” is actually after the first renovation Mr. Yolo did 5 years ago, it just needed the I SPY DIY touch!
So many little changes! Let’s do bullet points :
– I whitewashed the front of the peninsula with Varathane Antique White stain. I might actually need one more coat to cover up a few of the previous blue planks.
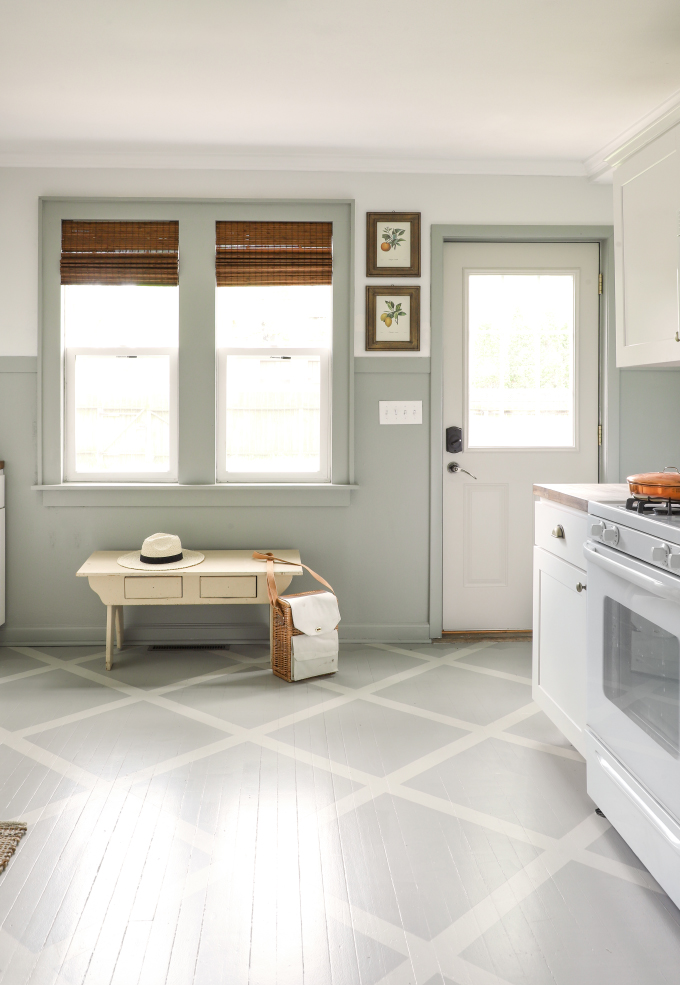
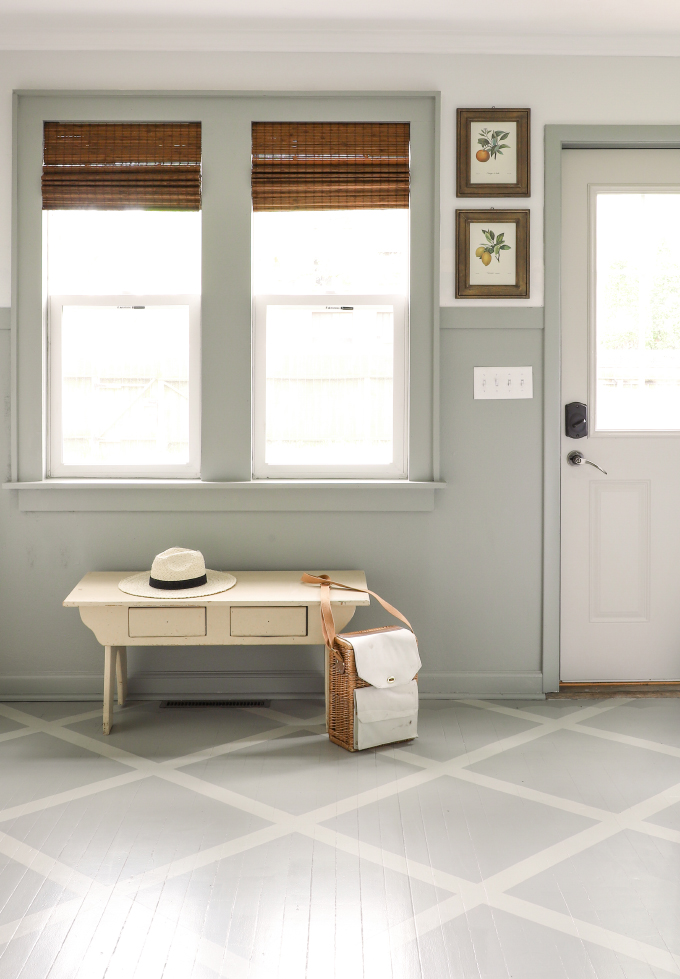
– The window were original to the house, and were in rough shape. So we figured while we were working on all this, might as well put in new window and redo the trim. I have a WINDOW highlight over on @ISPYDIY Instagram with all the details! I also got these bamboo Roman shades on Amazon, and I am SUPER happy with them. You can just pull them closed and open without a cord, and they add needed texture and dimension to the kitchen!
– I tested WAY too many paint colors for the back wall/trim and ended up with a darker version of my favorite color (Silver Celadon) call Old Celadon by Behr. It’s the most beautiful dark sage (Eggshell finish!)
– I had talked about wrapping the header in wood to create a faux beam with some barn wood we salvaged…ultimately there was not a hard stop so the end of the “beam” would just be floating…and the fact that it was faux was just way to obvious, so we decided to skip it…for now, ha! I might still figure out a way to make it work.
– You might ask, why are there no pictures of the other side of the kitchen?! We worked with SMEG on the appliances for this kitchen (how COOL is the fridge and dishwasher!!) and we were planning on a new range, but that darn pandemic hit, and things got delayed, so we still have the hand-me-down oven. We still need to connect the appliances, and give them a test run. I’ll do a review of them over on IG Stories!
-I had plans for getting brass lighting, but then the ones ended up working with the other dark metal accents in the kitchen, so I just removed the bubble glass from the pendents over the peninsula, and checked off lighting as DONE!
– We actually used the Osyter Shell floor paint for the back door too!
– I found these brass pulls and knobs on Amazon for a great deal! $40 update that really ties in the other brass accents in the kitchen. The outlet covers are also inexpensive brass one I picked up a Menards. It’s all about those little details 🙂
– We stained the butcher block countertops Minwax Dark Walnut, stay tuned for a full post with all the details!
SHOPPING LIST
Rust-Oleum Home Floor Coating in Oyster Shell and Windsor Gray with a Matte Coating
Annie Selke Ceramic Wall Tile 3X12
Elkay Crosstown Sink
Elkay Explore Faucet
Loloi Edge rug
SMEG Dishwasher
SMEG Refrigerator
Bamboo Roman Shades
World Market Cooper Glasses (similar)
Butcherblock stained Minwax Dark Walnut (stay tuned for a full post!)
Brushed Antique Brass Cup Drawer Handle
Brushed Antique Brass Knob
Kitchen pendant (old from Menards)
Vintage Picnic Basket from Millhouse Goods
Vintage Copper rimmed bowls and countertop art from Curated Home Decor
Vintage: Bench, landscape art, fruit art, utensil containers, vase, wood board
EXPLORE MORE: Room Makeovers


So awesome! I wish you did long term rentals…I’d be there in a heart beat!
This is so beautiful. I would love to live in this house.
We did something similar in my kitchen (removed all the uppers); we replaced the bottom cabinets with IKEA cabinets and found hat we gained a TON of storage. The kitchen is much lighter and brighter and for me, functions such better. I have rails in places where I need them (i.e near the stove where cooking utensils are hung)….
Sign me up! I’m inspired!
My daughter and I have been following your Renos. Do lovely. We’d like to visit her there in Bayview in June .I’ve sent you a couple requests to know if this might be ready to rent for a few days the week of June 22nd. Any chance