The Loft Kitchen Before & After!
Before & After, DIY PROJECT
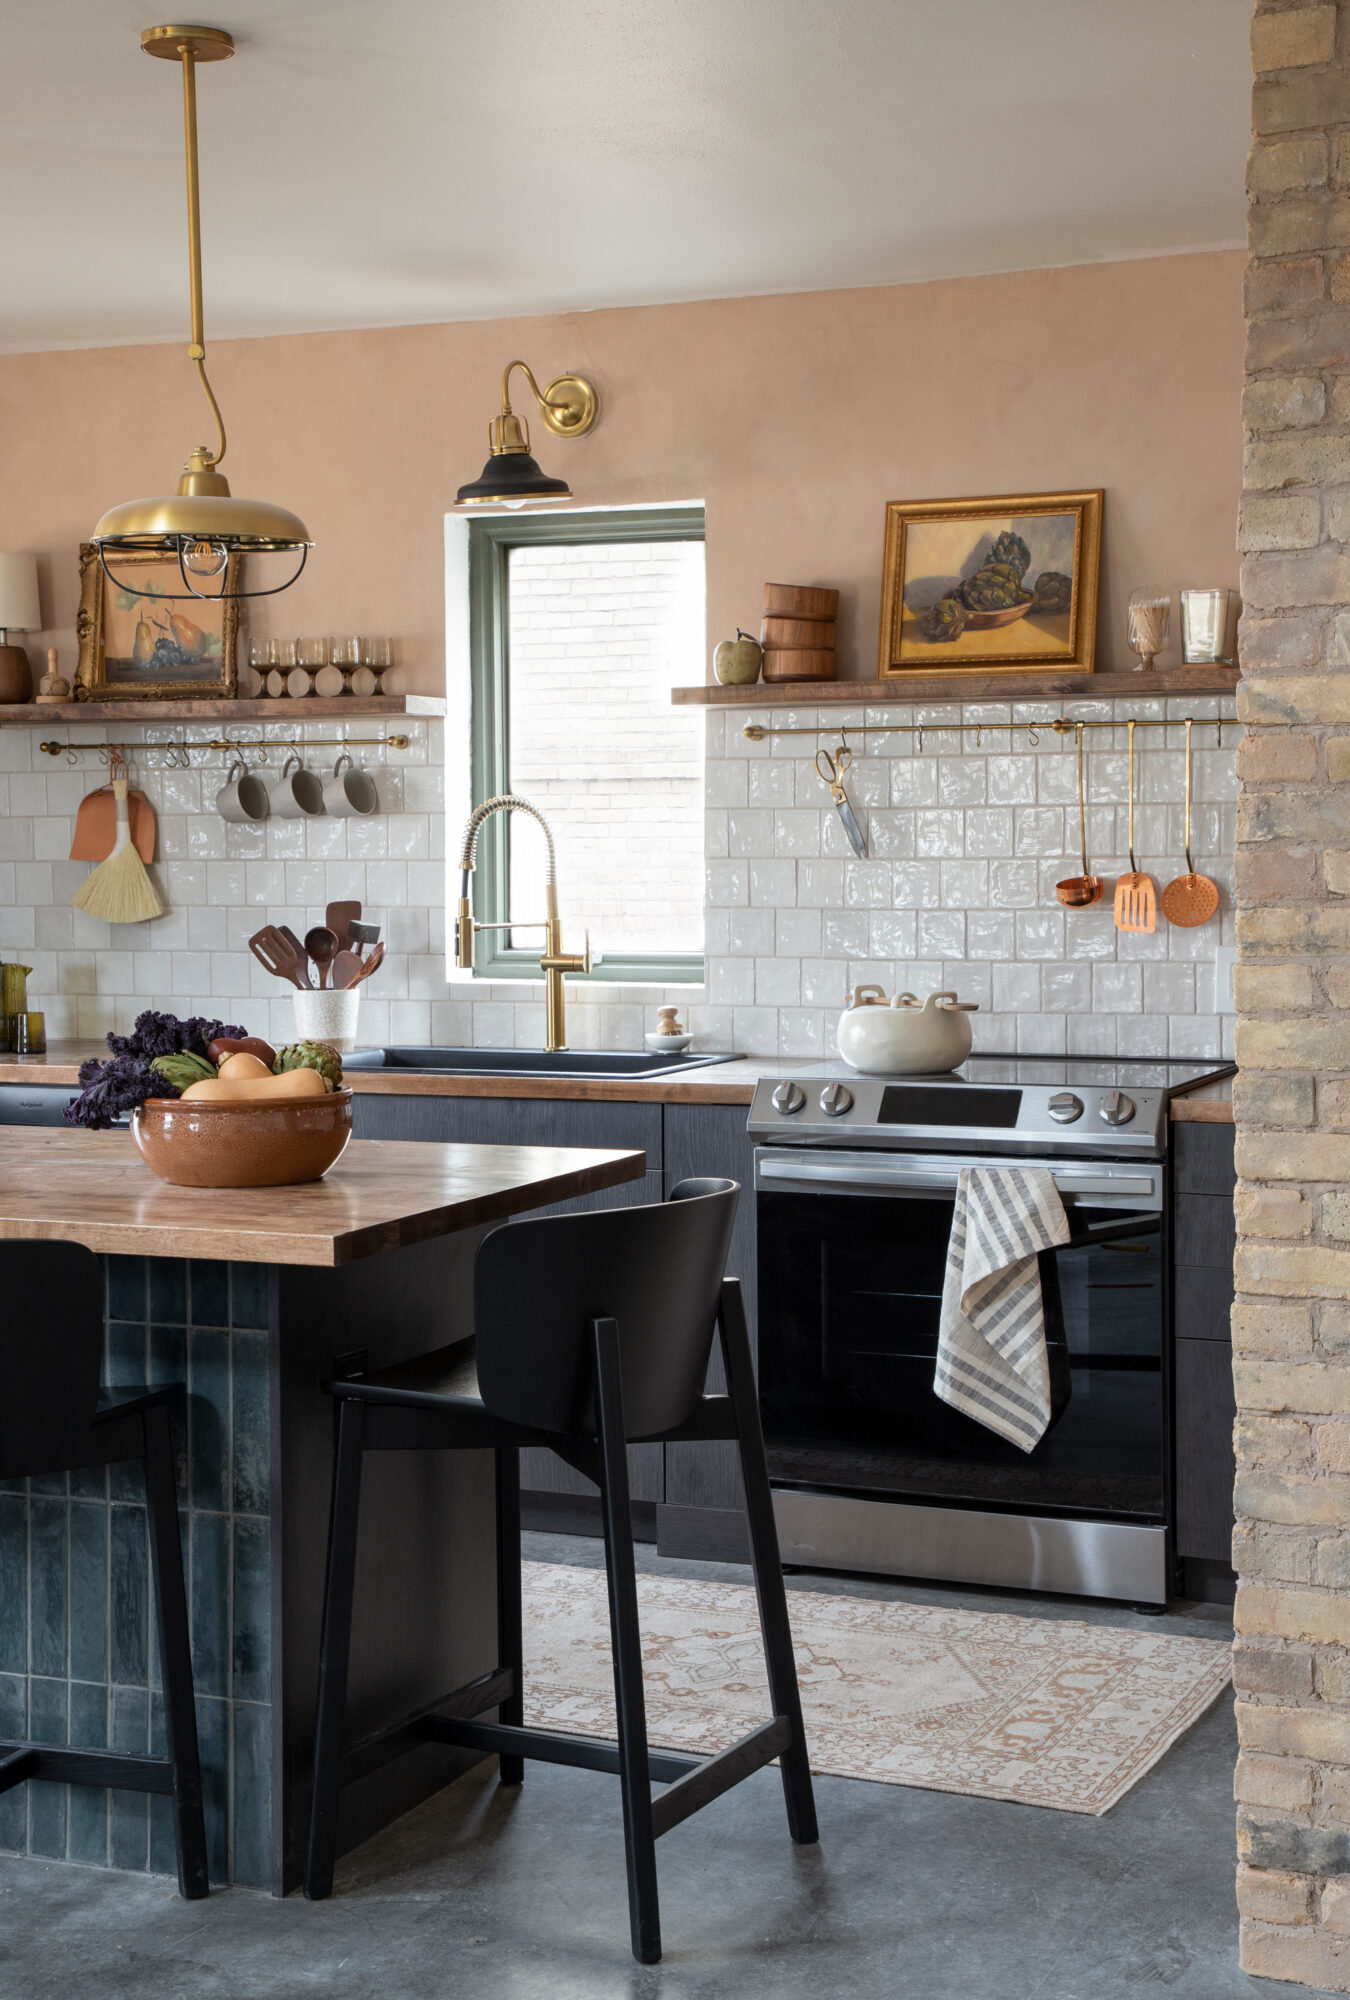
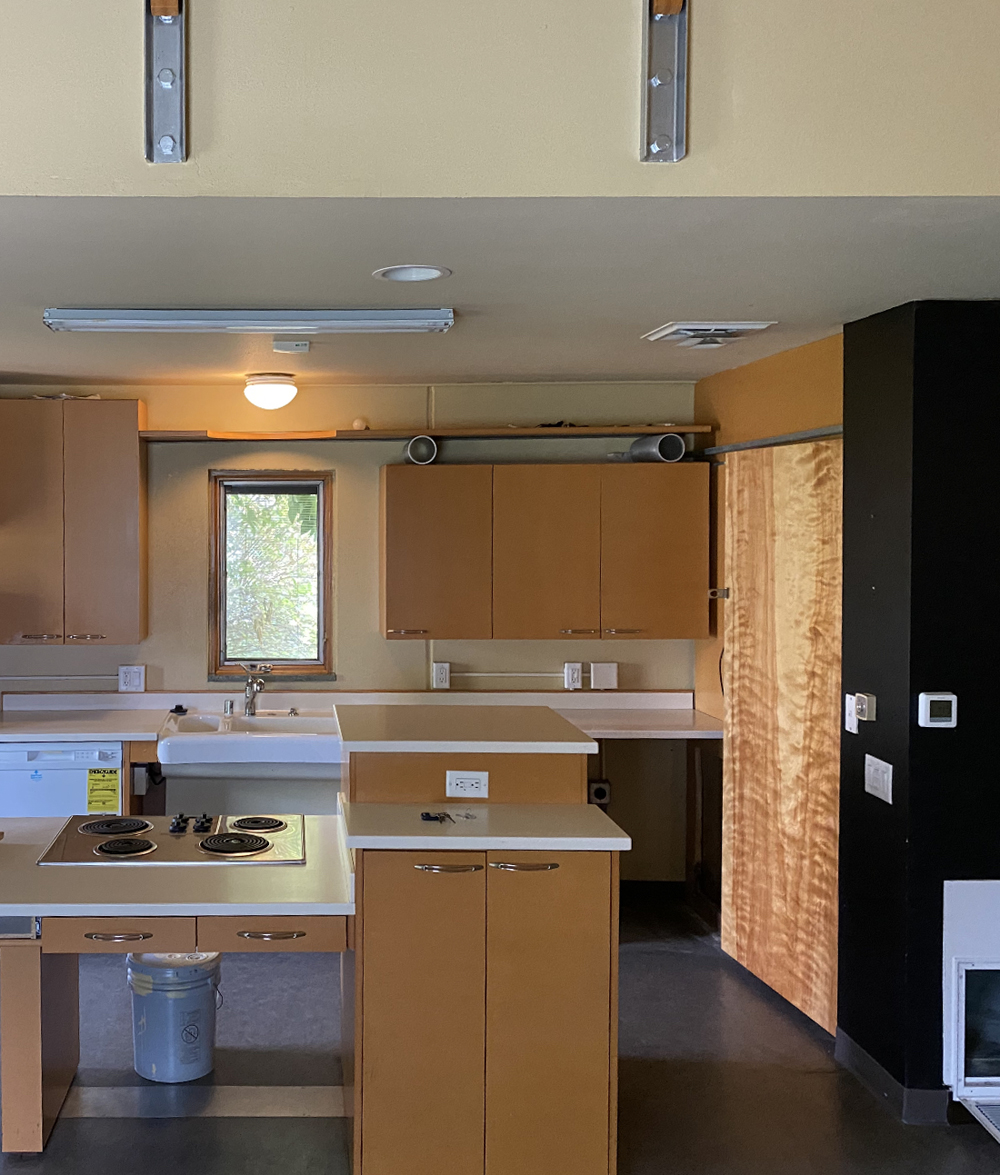
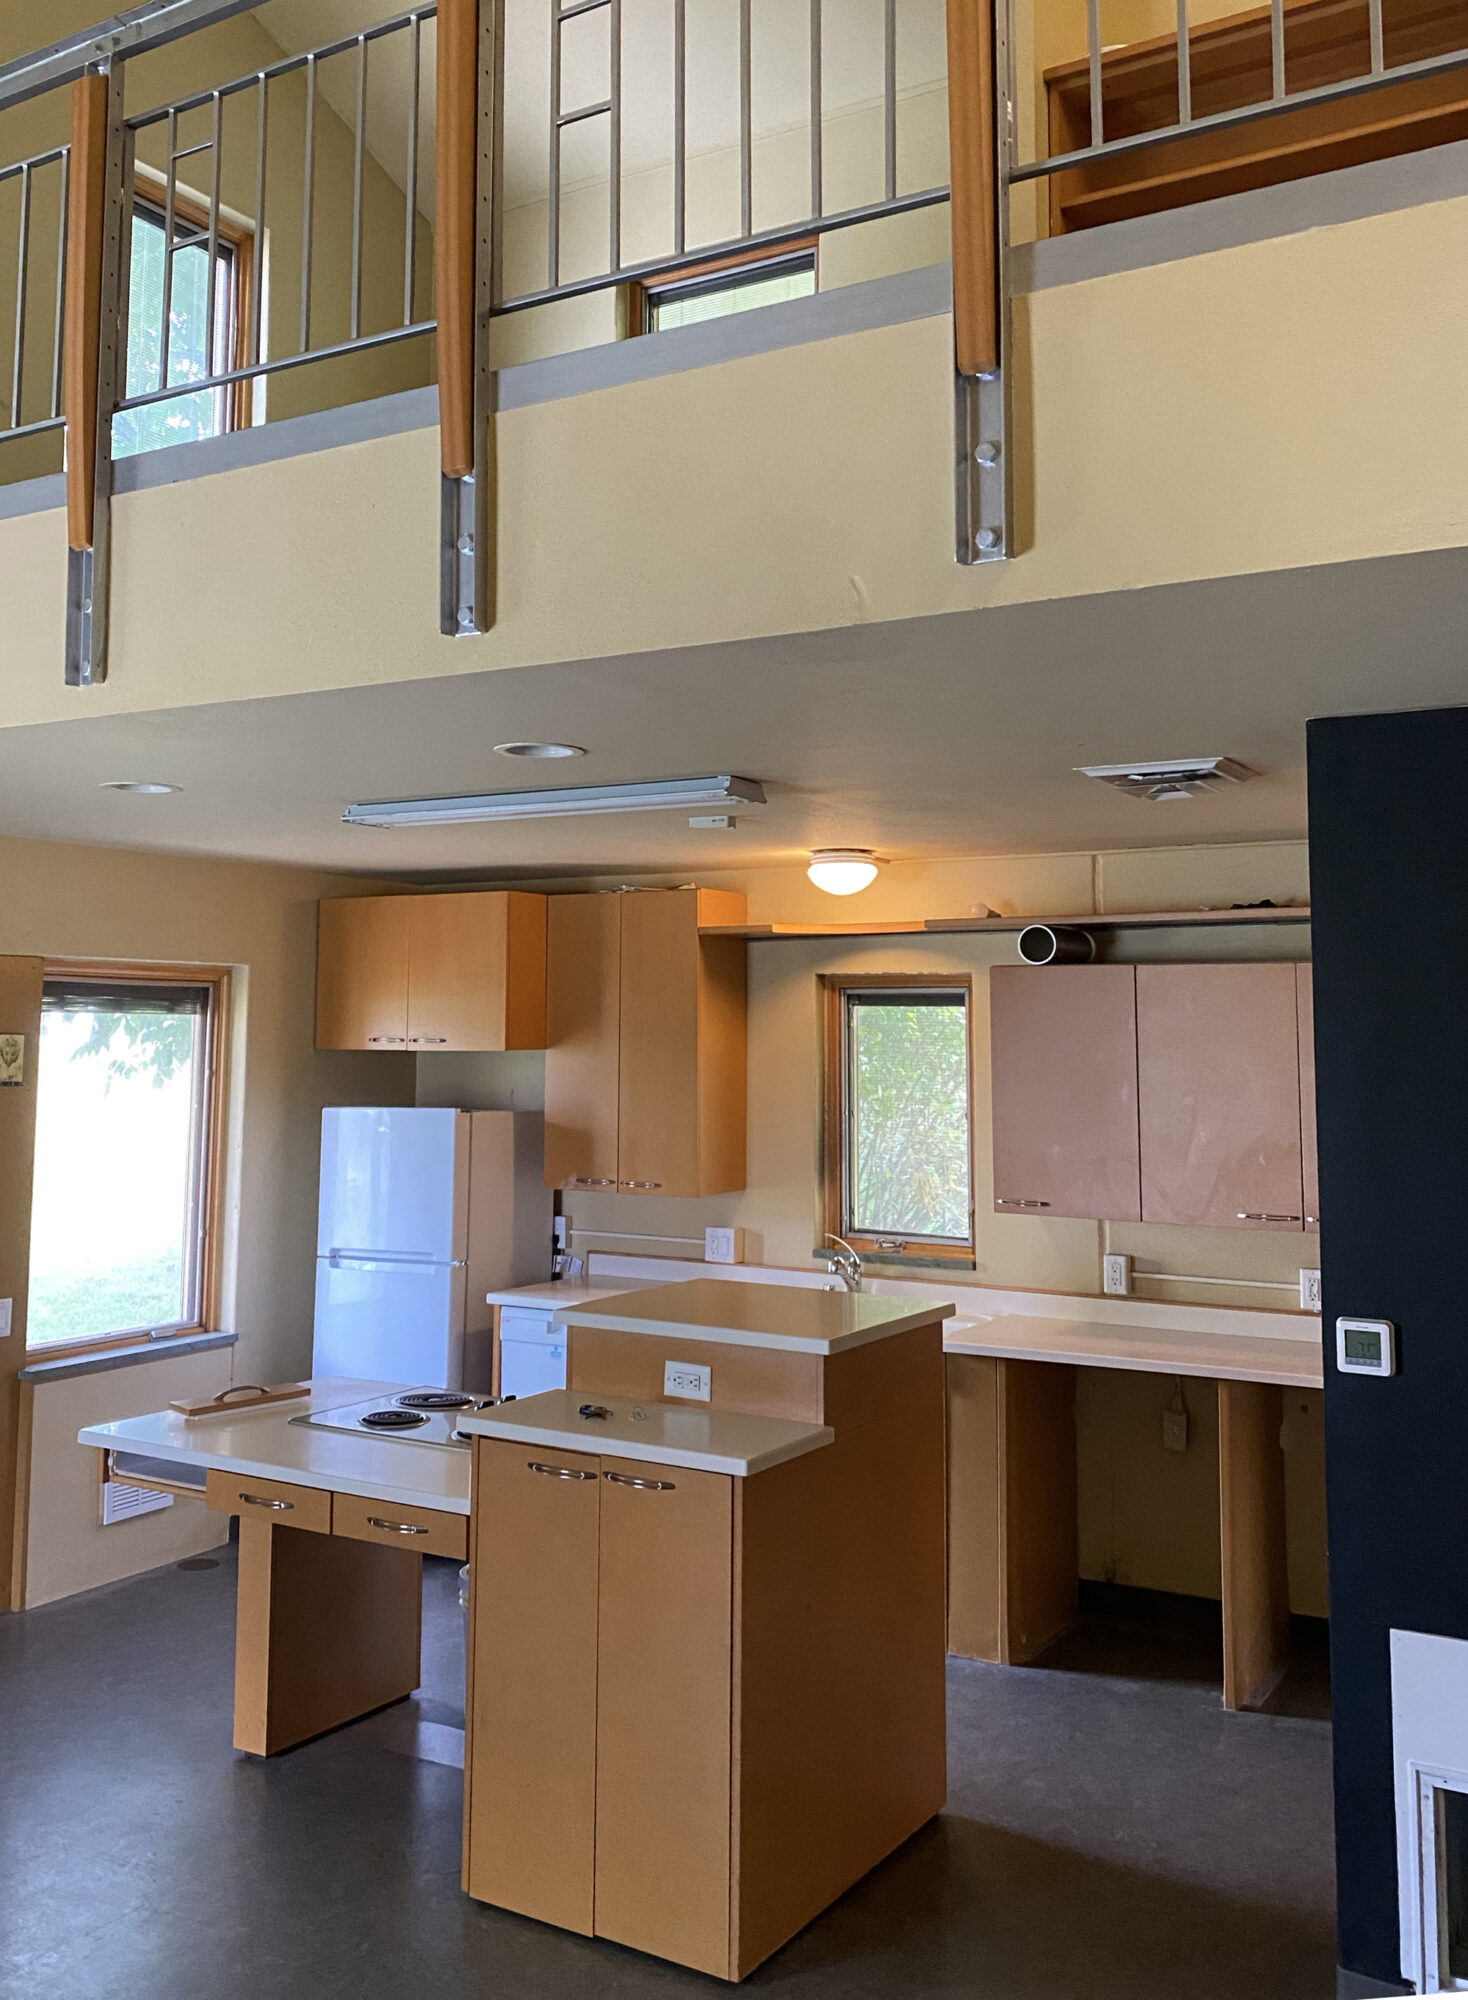
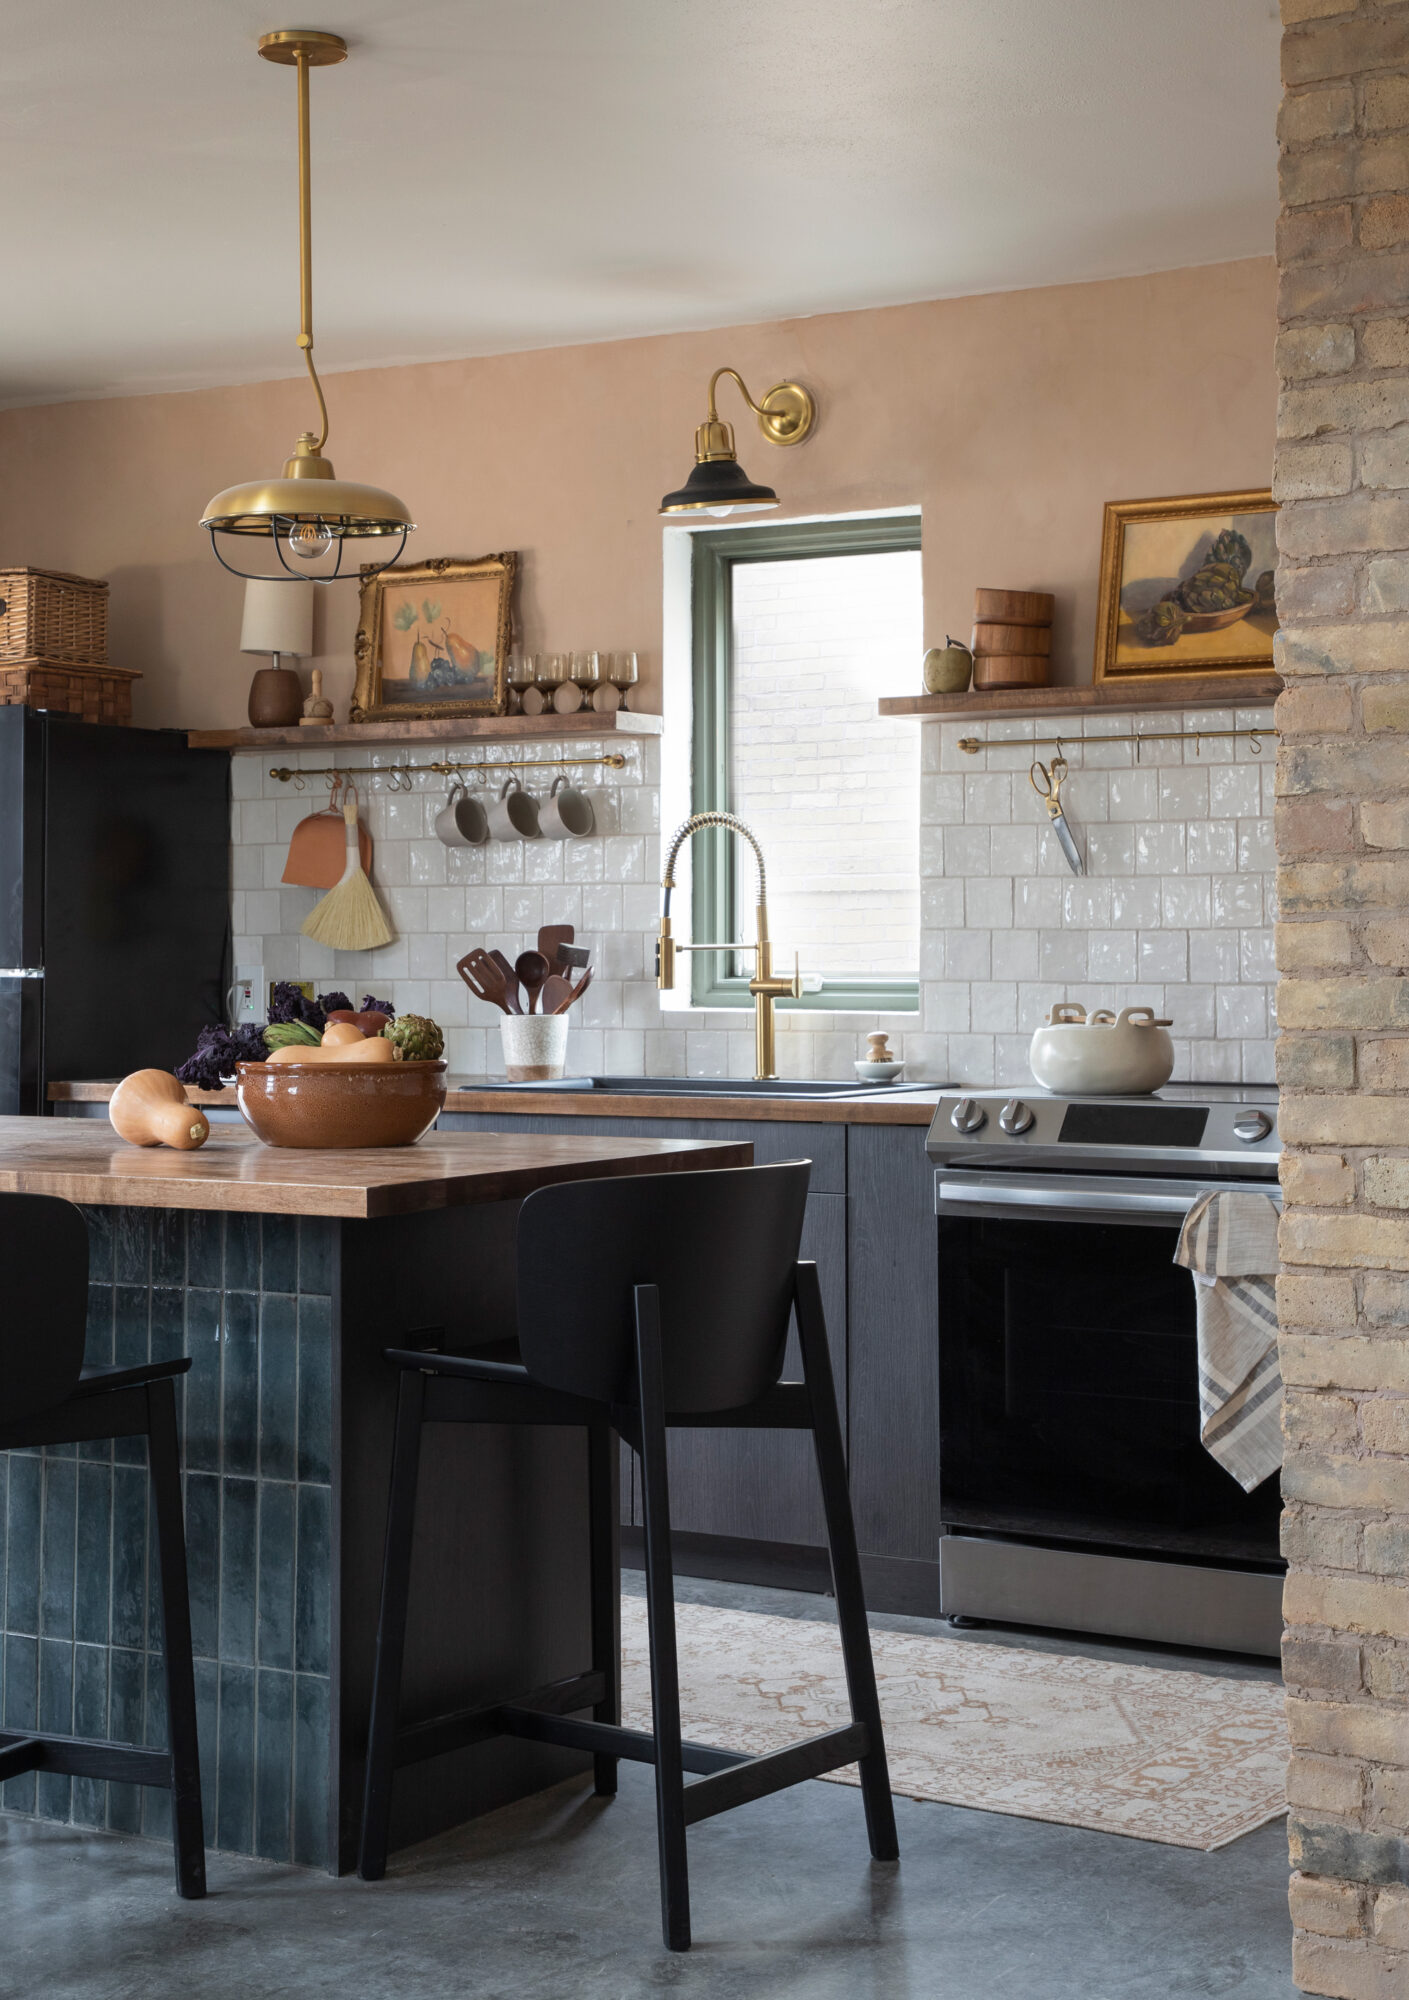
As soon as we walked into the Loft, I saw potential in the kitchen space. We had to start completely from scratch, which gave me the chance to have some fun with the space in this quirky house. If you have been following along from the beginning, you know the first design was much darker, with a green tile on the back wall. After trying to make that work for a long time, I decided to go light on the back wall. It was absolutely the right call, I am so happy with how bright the kitchen is, and how the playful colors work together. There are still a few finishing touches, plus the styling may evolve as the rest of the Loft is finished, but I wanted to answer some of the most asked questions and share links to products.


The Tile
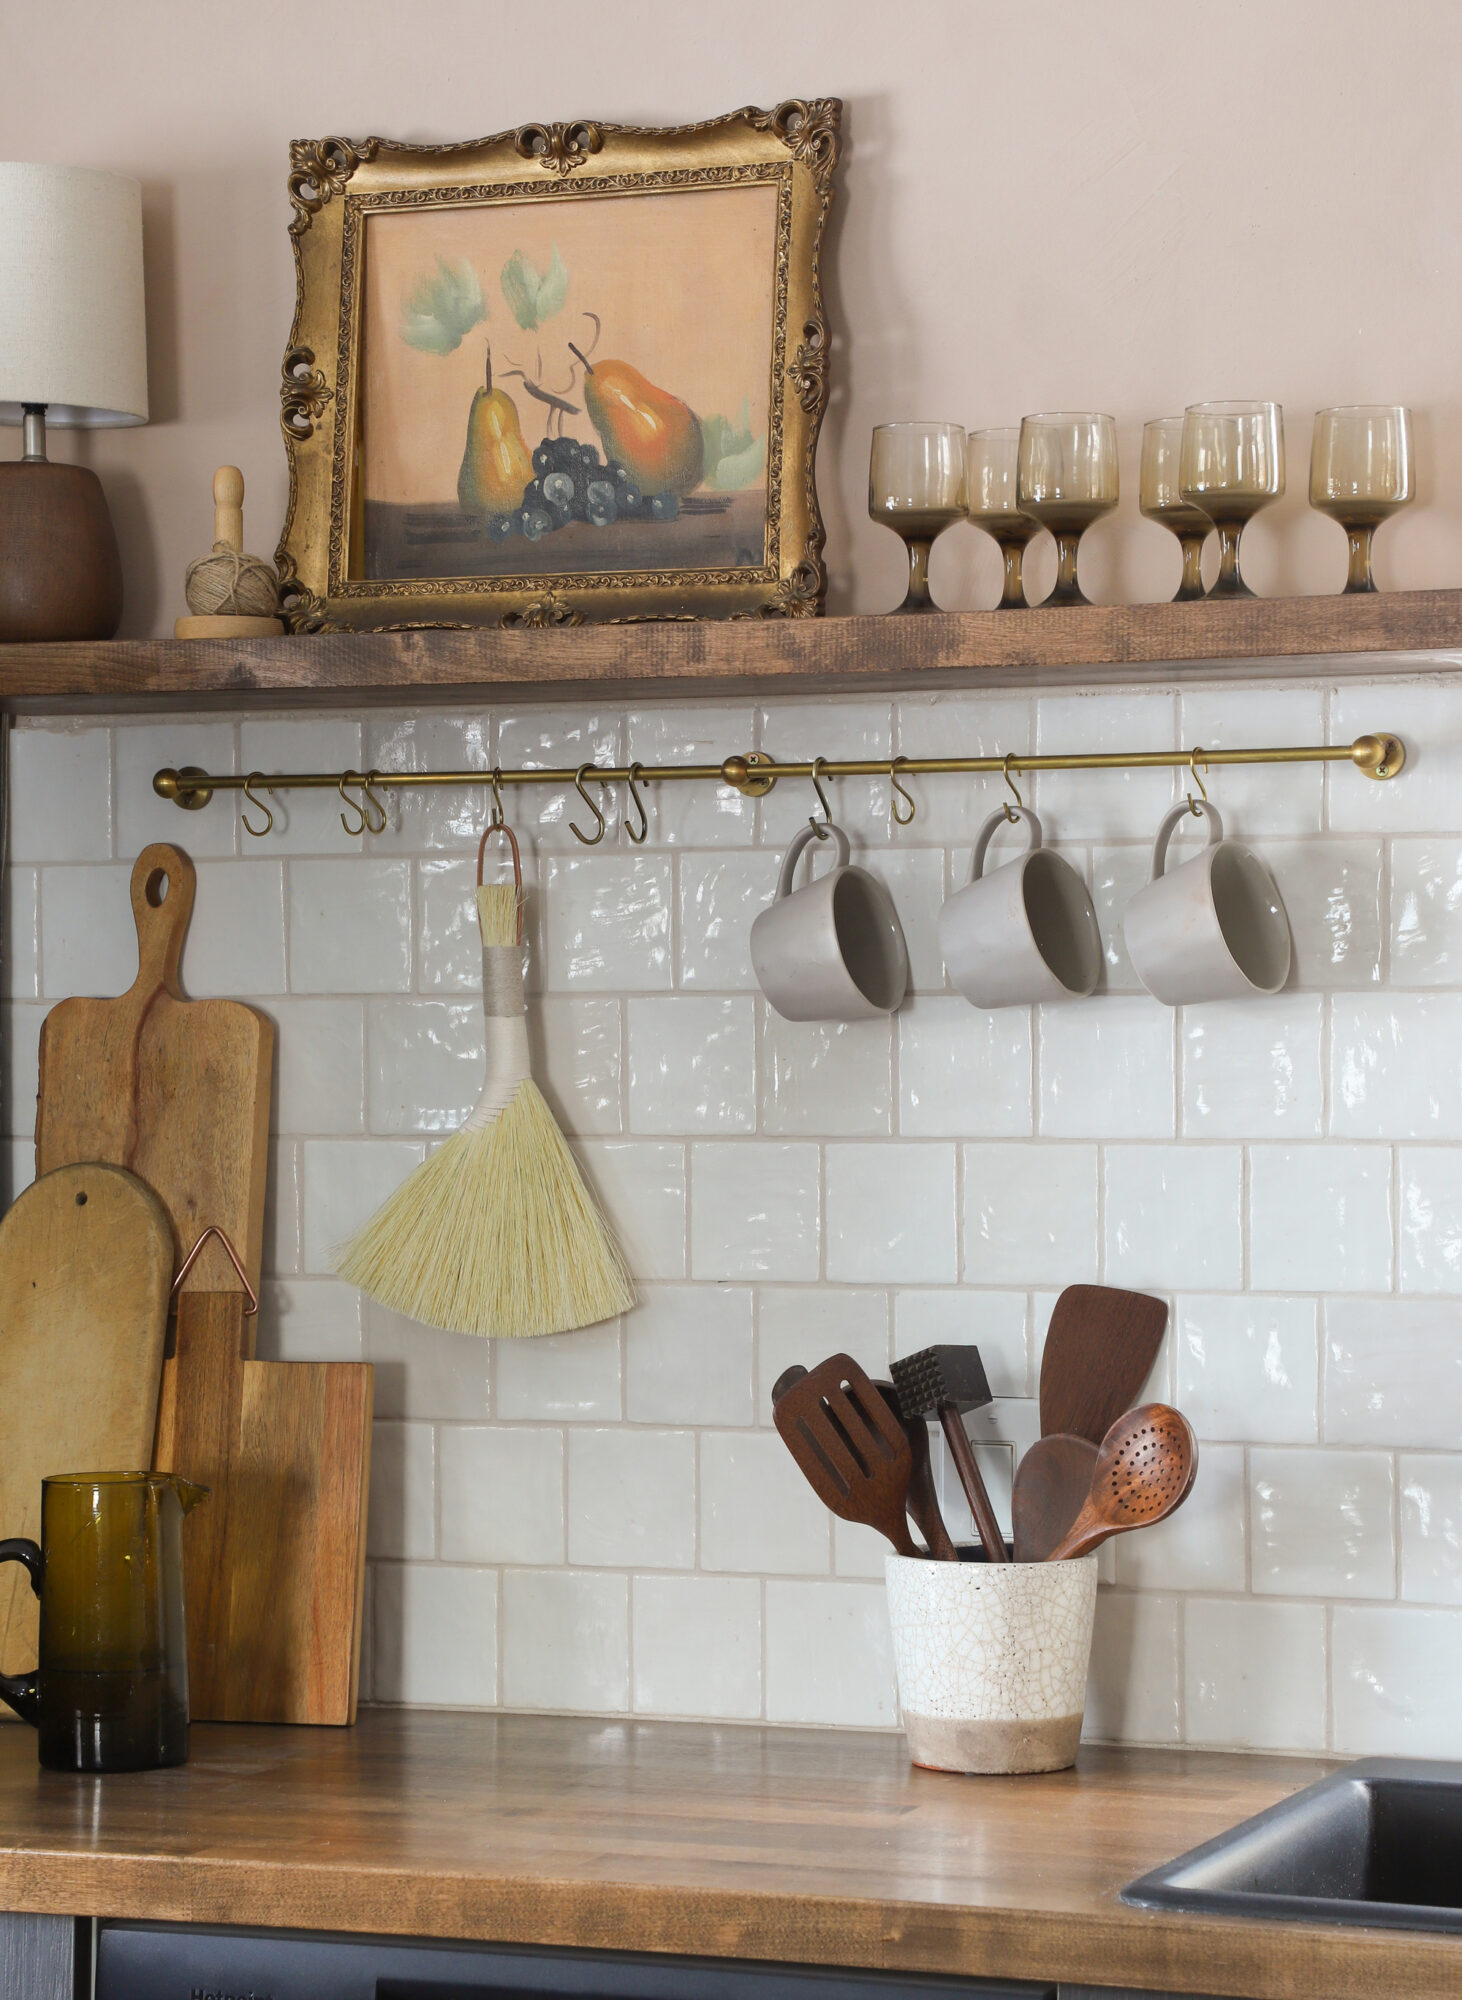
The most asked about item in the kitchen is the tile, and I get it, they are both beautiful!! I played around with them a lot, and tried so hard to avoid my traditional white backsplash. But all the dark tile made the space look SO cave-like, because of the low ceilings in the kitchen. As soon as I saw this Raid square, handmade-looking tile I knew it was the right choice. And going with the white allowed me to play with color above the backsplash and on the island. A frequently asked question about the tile: Did I mix colors? Nope! I used the white version of the tile, and there is some variation in the shades which gives the backsplash more visual interest and dimension.
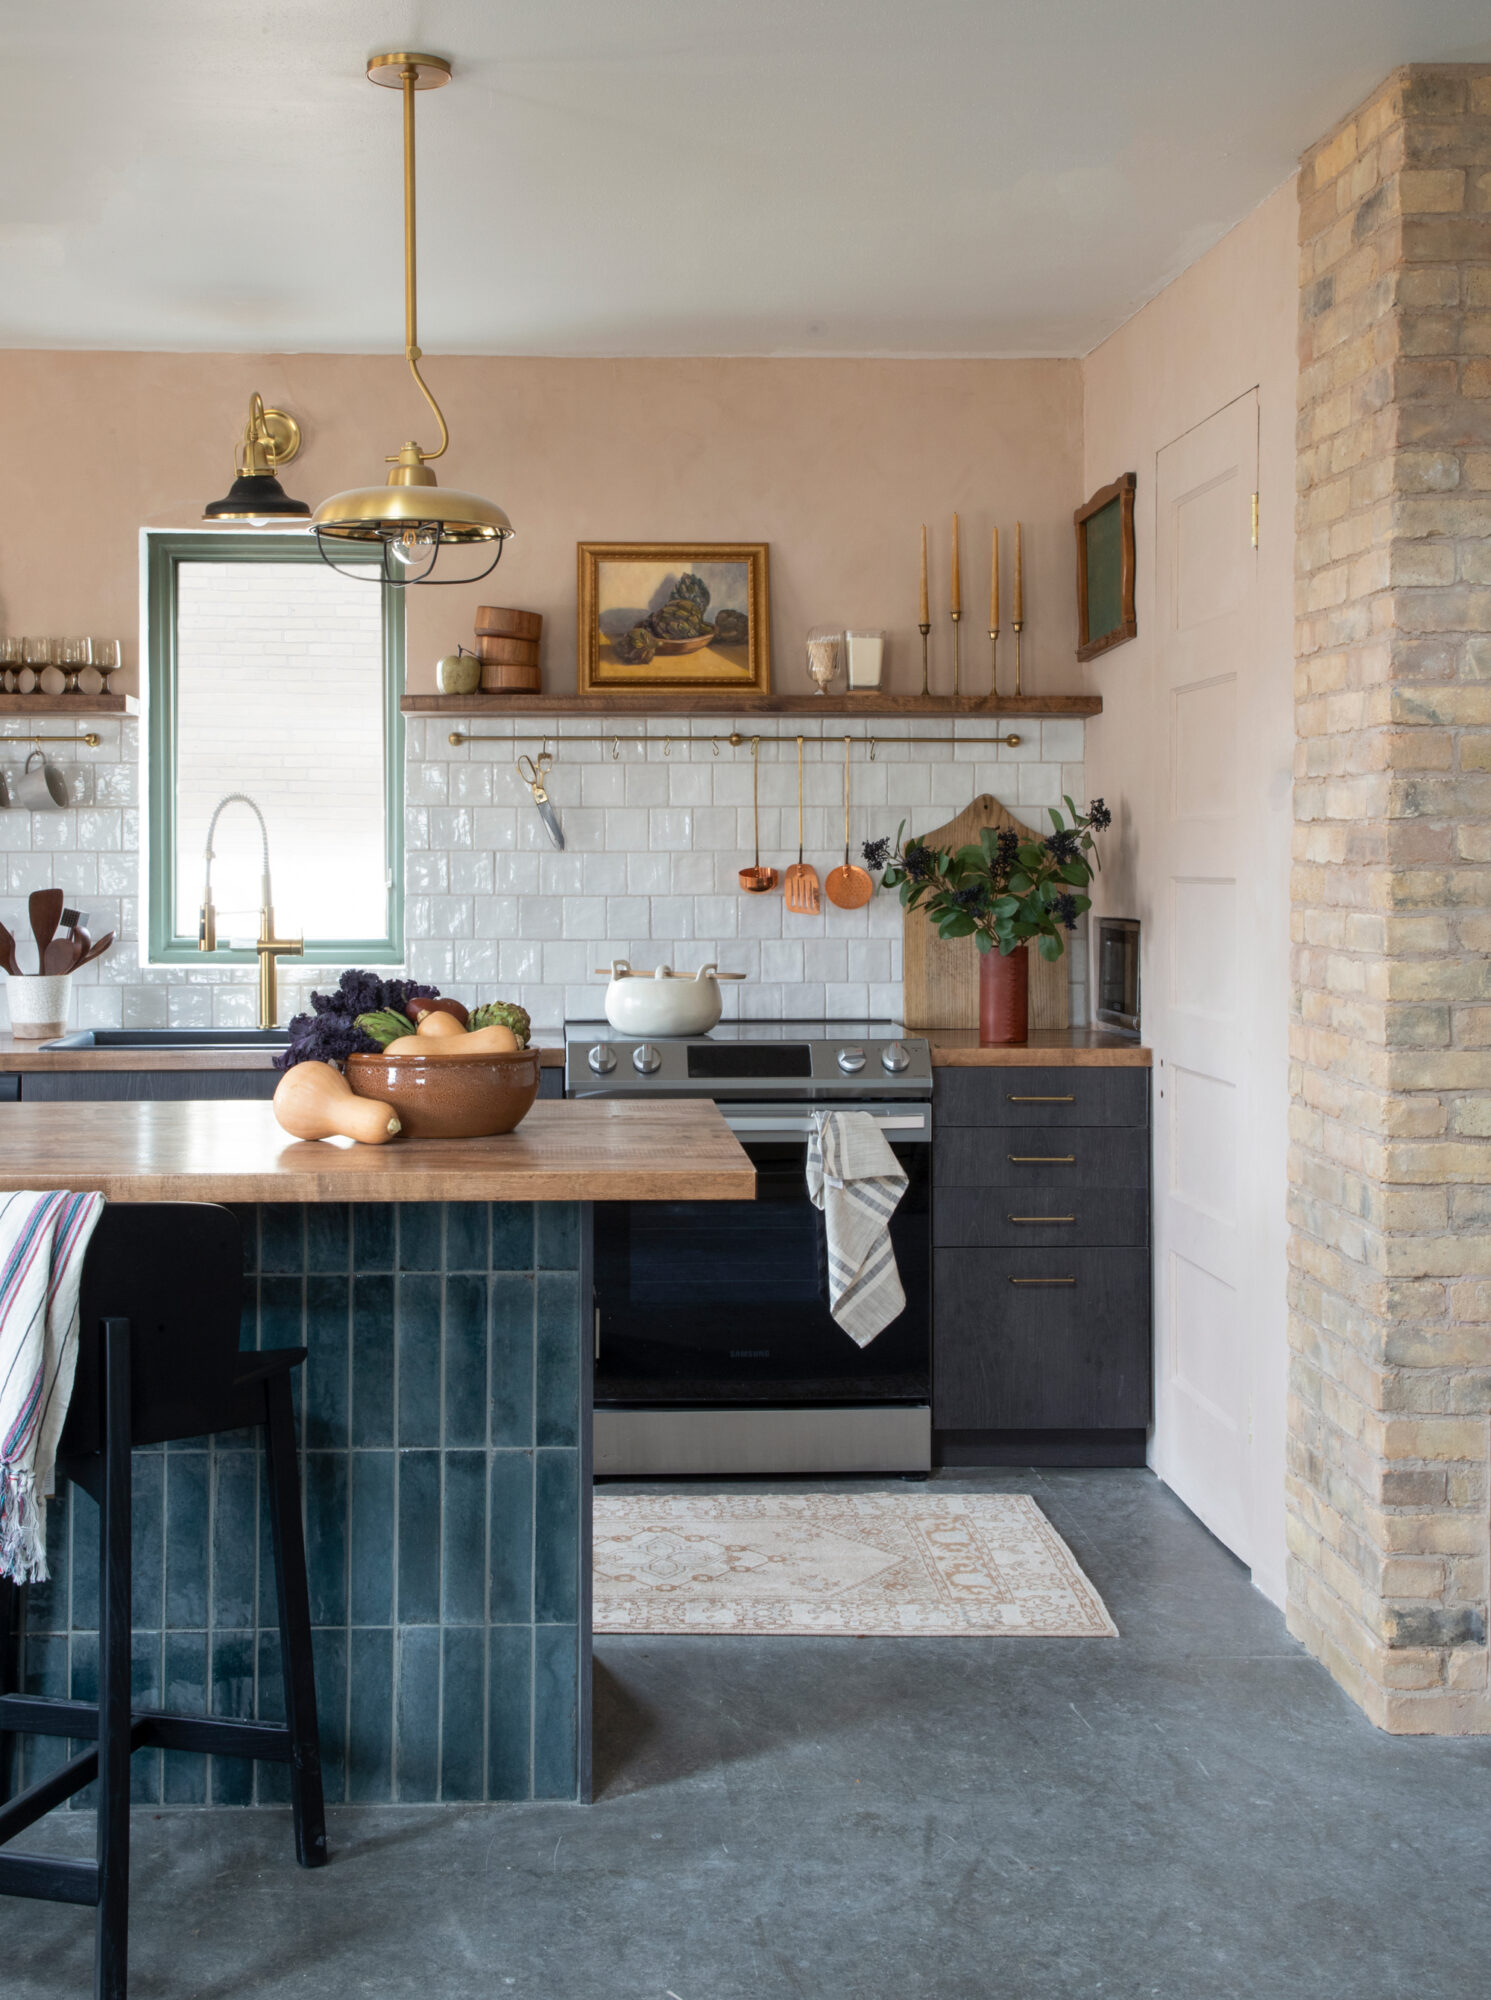
I still wanted the dark tile somewhere, and the Look Avio Tile was so pretty on the front of the island. The light from the large window really shows off the blue color.
Grout & tile dye: I picked out Desert Sand grout color, and Mr. Yolo grouted both the backsplash and the island with it. I loved it on the backsplash, but felt that it was way too bright on the island. The look was too graphic for the space. I decided to use some grout dye for the first time and thankfully it was so easy. The results were exactly what I was looking for. I got Gray grout dye from Home Depot, wiped it on, then removed the excess off the tile and ta-da!
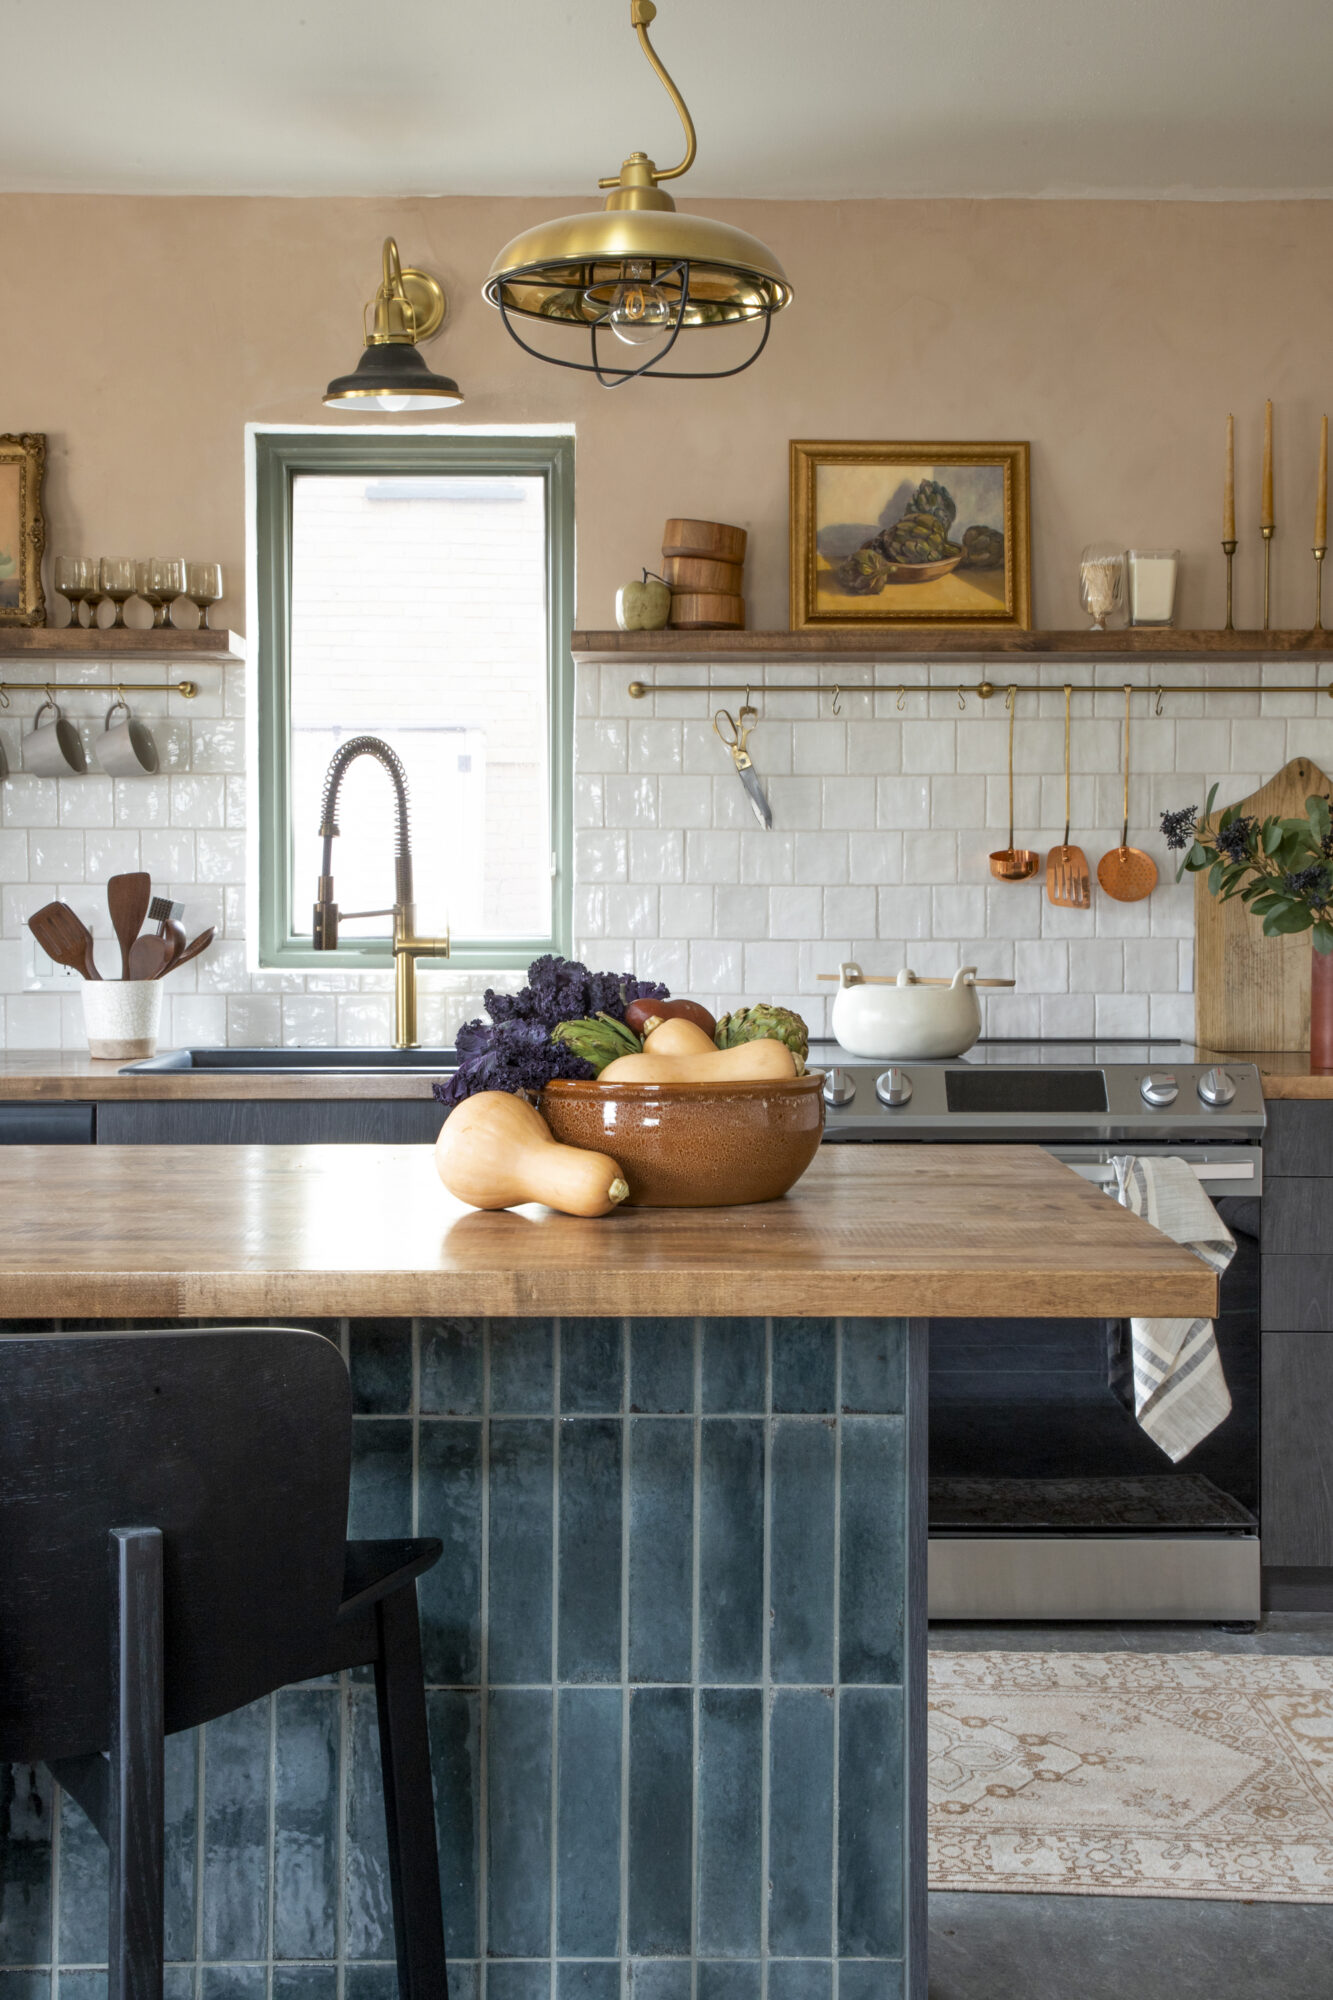
Butcher Block Countertop
Butcher Block is our go-to for our rental properties, because it is relatively inexpensive and we can install it ourselves. Plus, the way that we finish the countertops has made the wood super durable and it really stands up to guest usage. Head to this Butcherblock post to see how we cut it. This install was super easy because we did a drop-in sink, which means you don’t actually see the exposed edge on the sink cut out (great for DIY beginners).
After we installed the countertop, we stained it with my favorite Early American stain, then applied a top coat with Semi-Gloss Wacto Lacquer. We have had a ton of success with this finish. I do always suggest using a cutting board and not actually cutting directly on your countertop. If you are looking for a food-safe option, this oil & finish is great, but requires more upkeep.
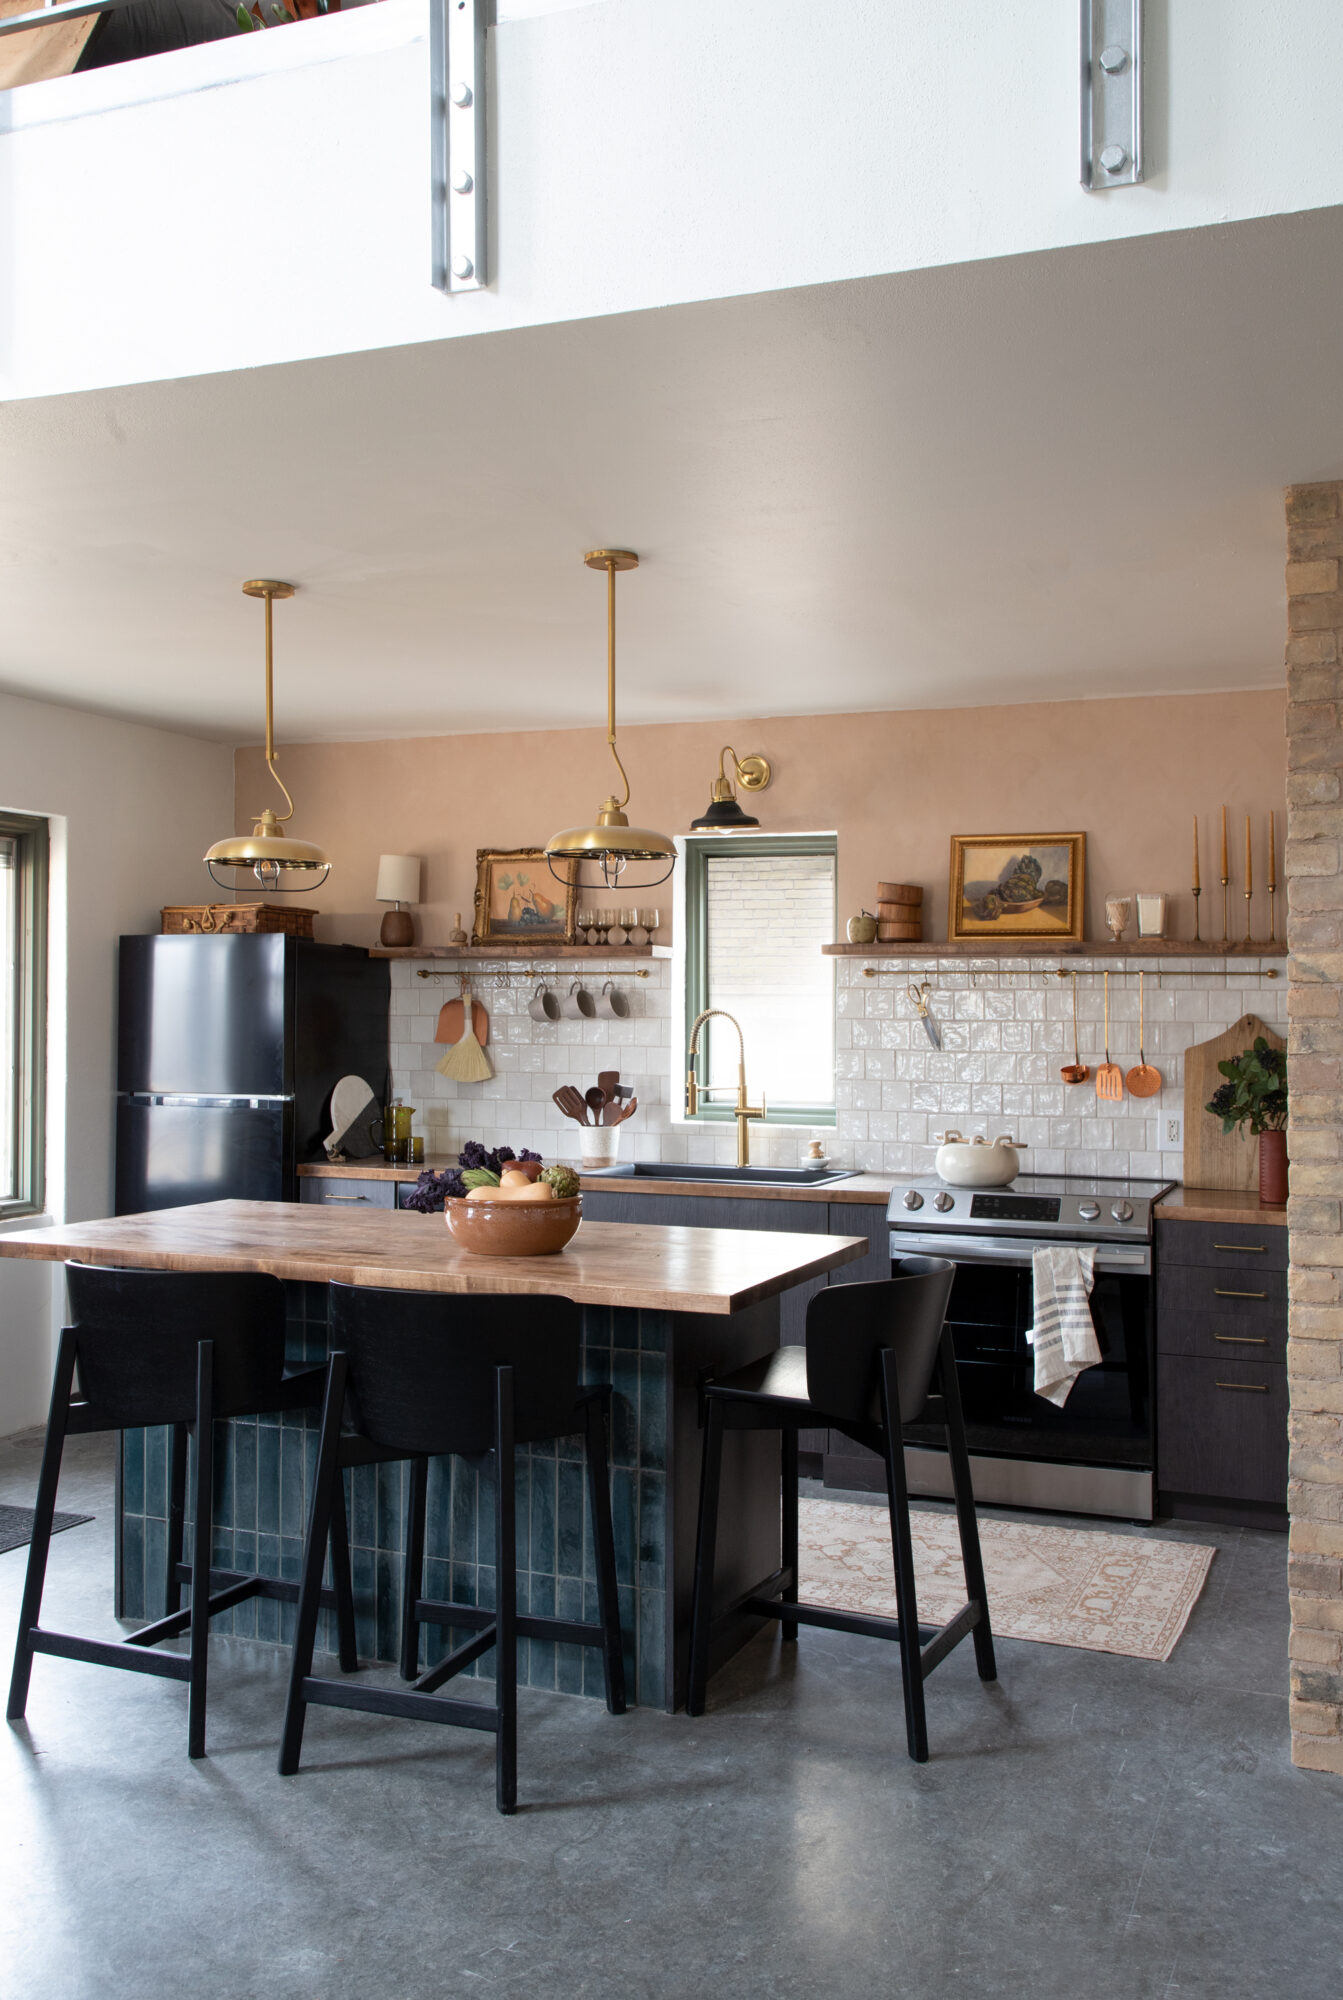
The Cabinets & Hardware
We are always working on a budget with the goal of a quick turnaround, so we used our go-to cabinets from Menards. The total cost for cabinets on the back wall and island was $1,400. The best part? Menards delivered them a week after ordering, and the bases were already assembled. Done and done! The modern flat front works perfectly in this house. I tried a couple different handles, and these more industrial Brass Drawer Handle gave the exact vibe I was looking for.
The Limewash
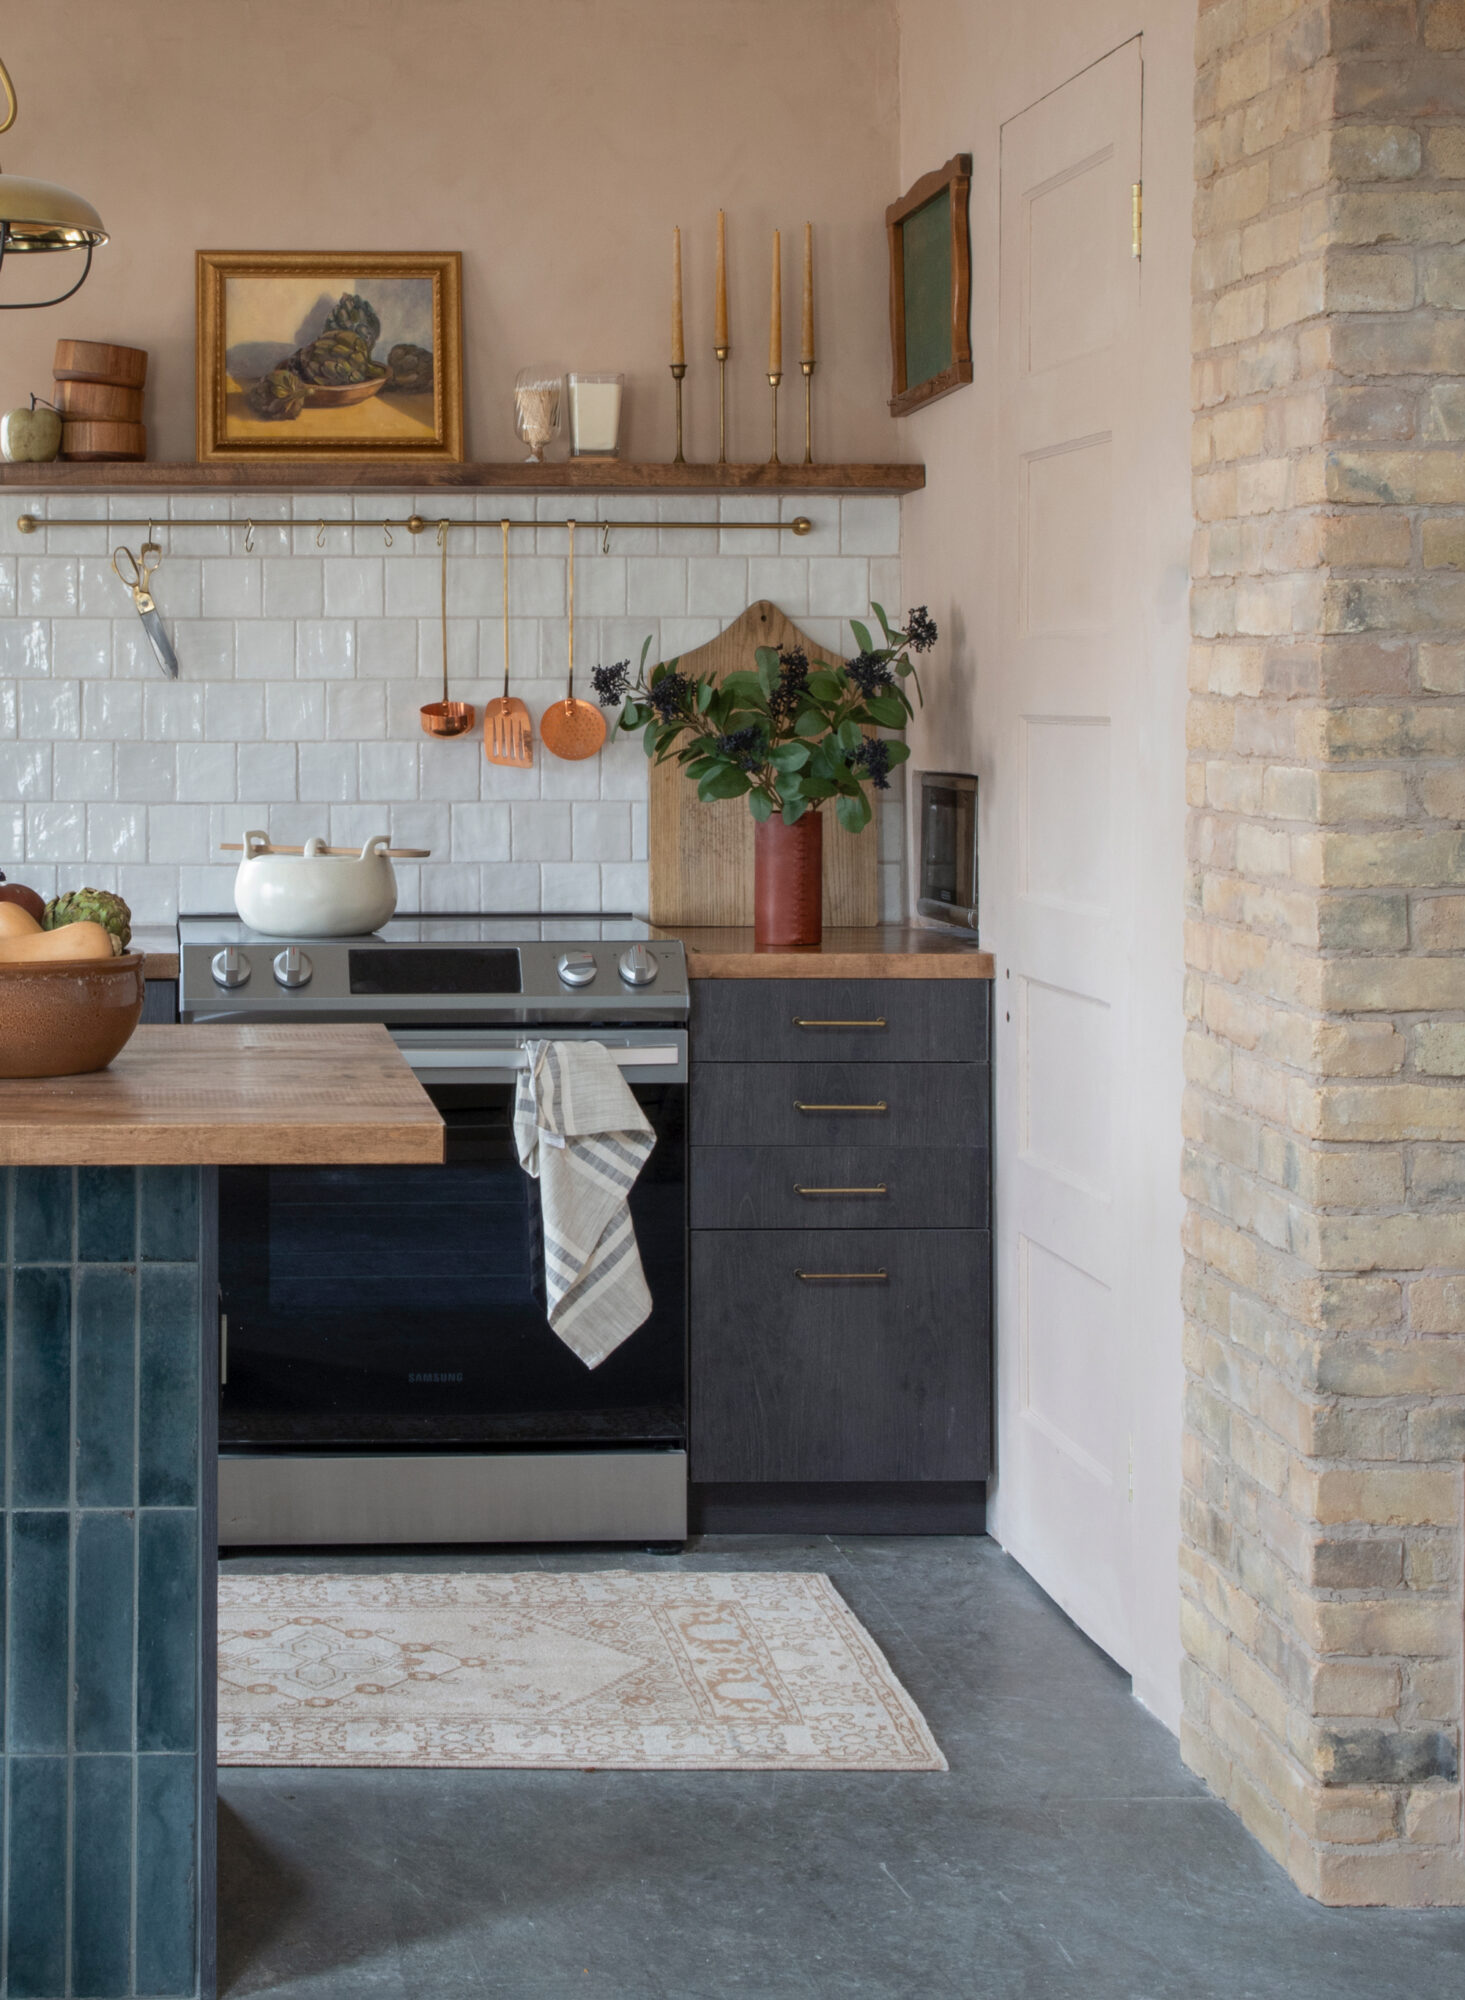
If you have seen my workshop on the Magnolia app, you’ll have seen I’m interested in playing with wall treatments and limewash. I’ve played around with a few Limewash colors from Portola Paints (like in the Duplex), and I ended up falling in love with a muted pink. I tried some samples (see them in the Loft Kitchen Highlight). I ended up actually mixing two colors: 1 part Antler to 3 parts Duet. Portola actually created a custom mix for me, and the result really brings a warmth to the space. I did not put a sealer on it, but might end up adding one so it’s easier to wipe clean, especially around the microwave. BTW we built a little cubby for the microwave, and also hid the internet modem behind the chalkboard!
The Faux Cream City Brick Wall
I will do a tutorial on the brick wall separately, but if you are looking to see the process ASAP, head to the Brick Wall Highlight on I SPY DIY Instagram. We used brick veneers to cover this random bump out and gave formerly sterile looking space some character. The Cream City bricks are native to Milwaukee, and I got them from The Brickyard in Bayview.
The Brass Rail
The custom Brass Rail from Pepe & Carol was the finishing touch this kitchen needed! The look and functionality is A+.
I know I am missing more details, so be sure to leave a question in the comments below!
Shopping
Raid White Ceramic Backsplash Tile
Look Avio Peninsula Tile
Brass Drawer Handles
Match holder
Wood bowl
Leather vase
Towel
Pepe & Carol Brass Rail
Buddy Counter stools
Loom & Dwell Vintage Rug
Kohler Brass Pendant lights
Kohler Brass Trim Scone
Kohler Matte Black Single hole sink
Kohler Crew Faucet
EXPLORE MORE: Before & After, DIY PROJECT


Hi!! What is the grey grout called from Home Depot. ? Thanks