Bedroom Reveal & Tips for applying Limewash to a Textured Wall
Before & After, DIY PROJECT, Room Makeovers
The Limewash room is done!! This was a new process, with some trial and error, but the end result was totally worth it! After I finished painting, Mr. Yolo and I pulled the space together in a couple hours, and it’s just the coziest room. I partnered with Amazon Home to decorate, so let me show ya around.

Decor
The goal in this space (and most spaces!) was to mix new and vintage seamlessly. I try to be thoughtful of the details and like everything to feel inviting to guests, all while sticking to a budget! I have been a fan of Amazon’s Stone & Beam and Rivet collections for a while now. The quality & price point is really good. You’ve seen a bunch of their pillows and lighting in our short-term rentals (more in my Amazon shop!). I mixed the new items with a bunch of my thrifted finds, and now this room really feels like a retreat when you walk through the door.

Art
I actually found this Vintage 1872 Milwaukee Map on Amazon, and it became my inspiration for the color palette in the room. I planned for the map to go above the bed. But we ended up not switching the bed to a queen bed, so it was a little too small over the King. Sidenote: After polling my IG readers, I was surprised at how many people look for Airbnbs specifically with a King bed! The art found a home in this little corner and I pulled a vintage piece from the living room for above the bed.

Bedding
Pulling the colors from the map, I got the olive sheets and tan duvet from Amazon Basics, this rust/ivory throw pillow from Rivet, a European Surplus Style Wool Blanket, and I mixed in a vintage lumbar for a layered look.

Lighting
We use Amazon lighting a lot. The price point and quality are stellar. Since I only had room for an end table and table lamp on one side of the bed, I mounted an accordion sconce on the other side, grouped with my DIY butterfly art. The concrete exposed bulb lamp on the fireplace worked perfectly against the lime wash background. And my schoolhouse semi-flush light was already installed in the room!

Limewash
I have been wanting to limewash a room for a while now, and since the texture on the wall in the room drives my CRAZY, I thought it might help disguise it.
What is Limewash? “It’s a traditional lime-based finish. This natural brush-applied coating dries to create a beautiful weathered patina with subtle movement and natural color variation.” via Portola Paints
It’s definitely way more of a process than painting, but in the end I LOVED IT so much. I used North Woods by Portolo Paints. While it does not necessarily hide the textured wall, the movement of the limewash makes it seem more intentional, like it’s an old plaster wall. I learned a ton my first time limewashing a textured wall, so hopefully these troubleshooting tips will help you:

Limewashing on a Textured Wall Tips
You will use way more product on a textured wall. I’ll admit, I skimped out on Limewash, because I am… well… thrifty (I think that’s the nice word for cheap). I only got one gallon, which was enough for the first coat, but you need to do two coats for the best results. Since the limewash gets caught up on the texture, you will need more than you think, I believe they said 20% more. I ended up trying to save a buck by getting one primer gallon (we only used half the primer) and 1 limewash gallon, and then payed double to have another gallon rush shipped when I ran out #lessonlearned.
Portola Paints answers more FAQs on their page here (scroll down).

Prep! I usually paint without a dropcloth, but the limewash is thinner than paint, and the texture causes it to splatter a lot. I was happy Mr. Yolo was so diligent about putting paper on the floor and taping off all the baseboards.
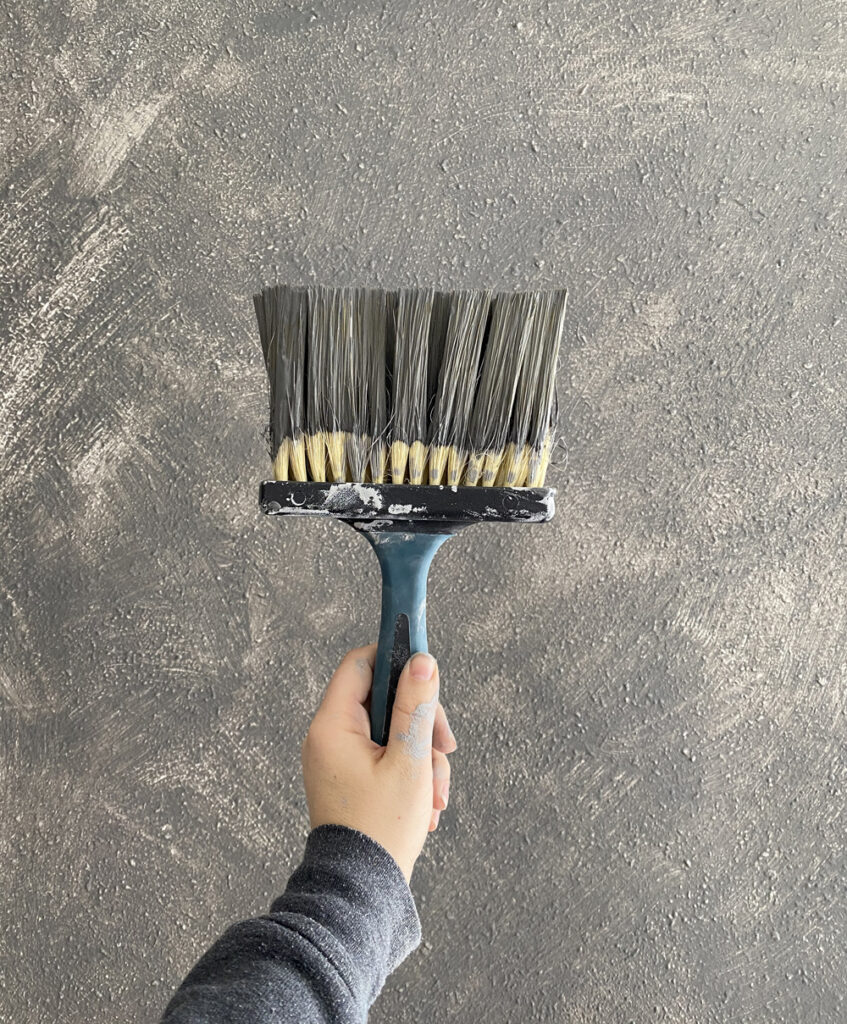
Use a quality brush We ended up just buying the cheap masonry brushes at the hardware store, and I was losing bristles non-stop. When you get into a painting groove, it is quite annoying to stop to pick bristles off the wall and repaint the area.

Don’t let the color scare you This is not specific to textured walls, but the limewash goes on WAY darker. You can see above that while it’s drying the color difference is quite drastic. I definitely had a “what did I do” moment when I first started applying it. Sidenote: before applying we did use the recommended primer to help with adhesion on painted surfaces.
Get the drips right away The the limewash gets caught on the texture a lot. And then it would drip. Brush out the drips right away, before it dries, because you can’t brush over them later. I used the recommended wide masonry brush to paint it on, but also had a second normal 2” paint brush to brush out any drips. I also used this paint brush to do the edging. I watched this video before I started! If you have a drip after it dries try sanding it out, don’t spot touch-up…which leads to my next point.
Don’t do spot touch-ups! My most frustrating moment was when I was done, but decided to go back and brush over drips that had dried. And then I had patch marks that were SUPER obvious. And I did touch ups on every wall, ugh. I kept watching hoping they would blend in, but there was a white limewash ring around the patched area no matter how hard I tried to feather it in. I ended up redoing a big chunk which you can see on the left side of the bed, but embraced the “character” and moved on.
Pace Yourself Not sure if it’s easier on smooth walls, but I did a lot of brushing to work the limewash into the texture and fill in all the divots in the walls. My arm felt like it was going to fall off after the second coat. If you need to take a break, stop in a corner. Don’t pause in the middle of the wall or you will see the seam!


Painting the Brick fireplace
This was one of those projects that you think will take an hour tops…wrong. I brushed on the first coat in that time. But then I went back for the second coat and blotted on the paint with the brush to get it in all crevices. And then I went back and painted between each brick. AND THEN I used a little artist brush to get in the little divots the first two coats missed. Time consuming, but WORTH IT. Don’t ya think?
Color: PPG NeverGreen in Flat


Shopping
Limewash: North Woods by Portolo Paints
Paint Color: PPG NeverGreen in Flat
Rivet Geometric Modern Glass and Metal Side End Table Stand
European Surplus Style Wool Blanket
Stone & Beam Modern Bedroom Table Desk Lamp
Stone & Beam Deco Black Accordion Arm Wall Mount Sconce
Vintage 1872 Milwaukee Map
Garden Stool, Elyse Natural Round
Rivet Modern Textured Throw Pillow
18×24 Metal Wall Mount Frame
Rivet Modern Exposed Bulb Table Lamp
Amazon Basics Light-Weight Microfiber Duvet
Amazon Basics Microfiber Sheet Set, King, Olive
Schoolhouse Semi-Flush Mount Ceiling Light,
Thrifted Mirror with Rub ‘n Buff Wax Metallic Finish, Antique Gold
Stone & Beam Casual Plaid Area Rug
DIY butterfly art
Bed – Hand-me-down from my Sister
This post was made in partnership with AmazonHome, thank you for supporting my amazing sponsors!
EXPLORE MORE: Before & After, DIY PROJECT, Room Makeovers


This redo is insanely amazing! I love the daring color of the fireplace! I actually like painting, but I’ve never considered lime washing walls. How well do you think lime washing would work on regular, non-textured walls like a dining? Your redo has definitely inspired me!
Did you purchase or build the bench at the end of the bed? If purchased, from where? If. Built can you share your plan?