How To Paint Kitchen Cabinets | As Seen on Makeover by Monday
As Seen In, Before & After, DIY PROJECT, Home DIY, Makeover by Monday, Room Makeovers, SHOP, Shopping
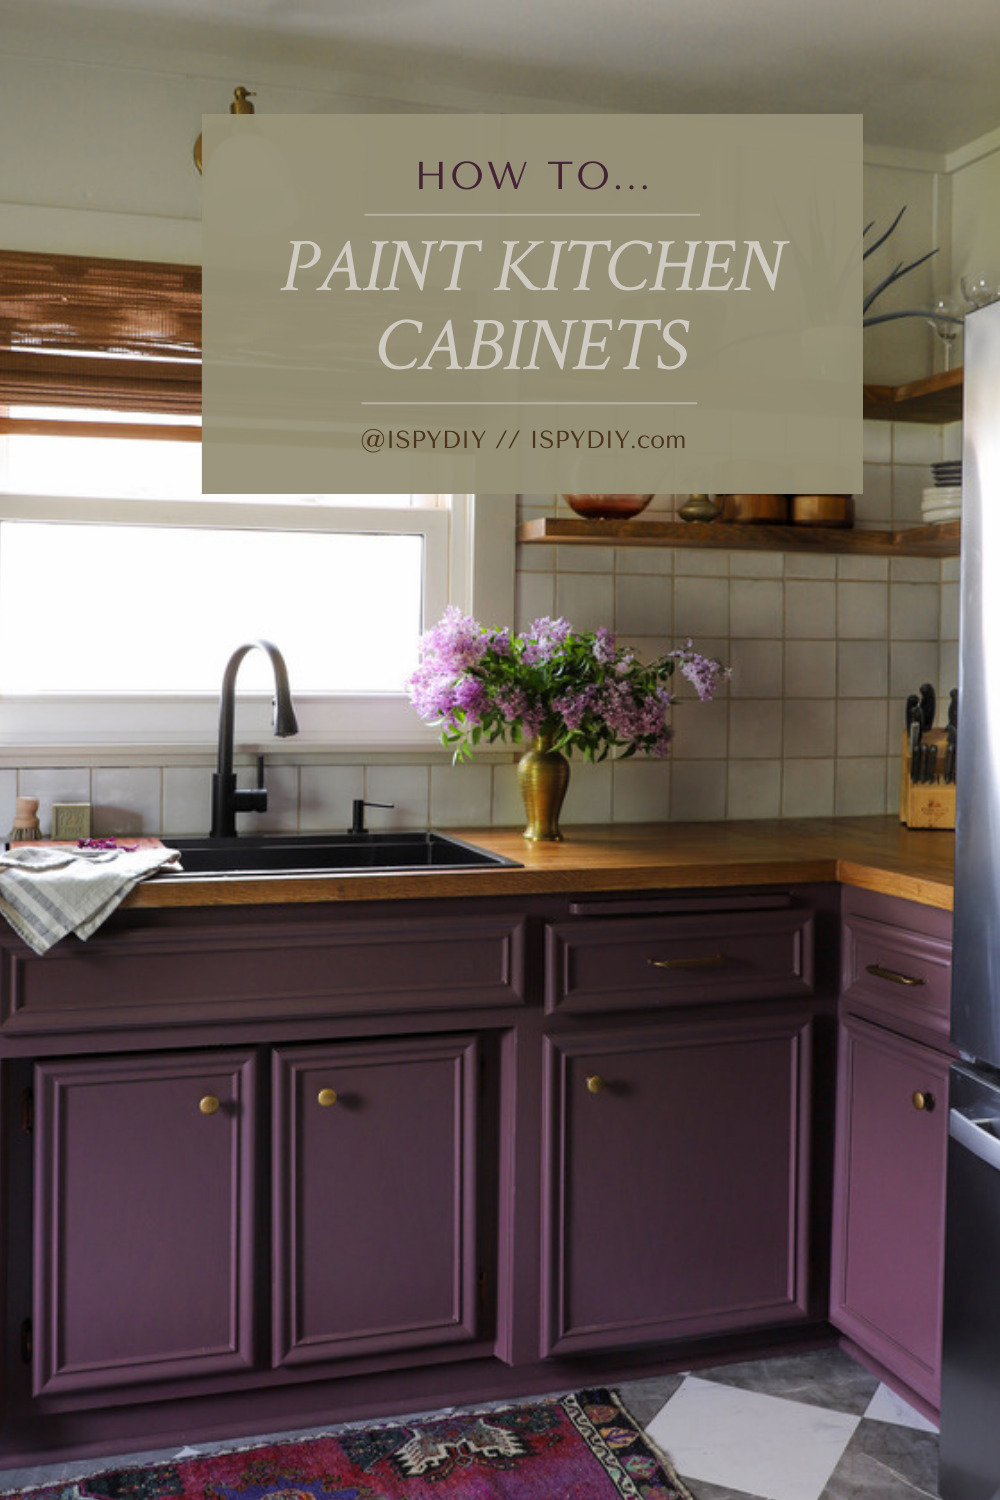
It’s been fun to hear how excited you are about the plum cabinets (Dark Walnut by Benjamin Moore)! Aren’t they SO fun? Katie’s wood cabinets were in great condition, so we painted them. It’s definitely the most cost-efficient way to TOTALLY transform a kitchen. We have painted cabinets before here, but we used a different paint this time and loved it. So, I am breaking down what we did over the 3 days to give these cabinets a new life!

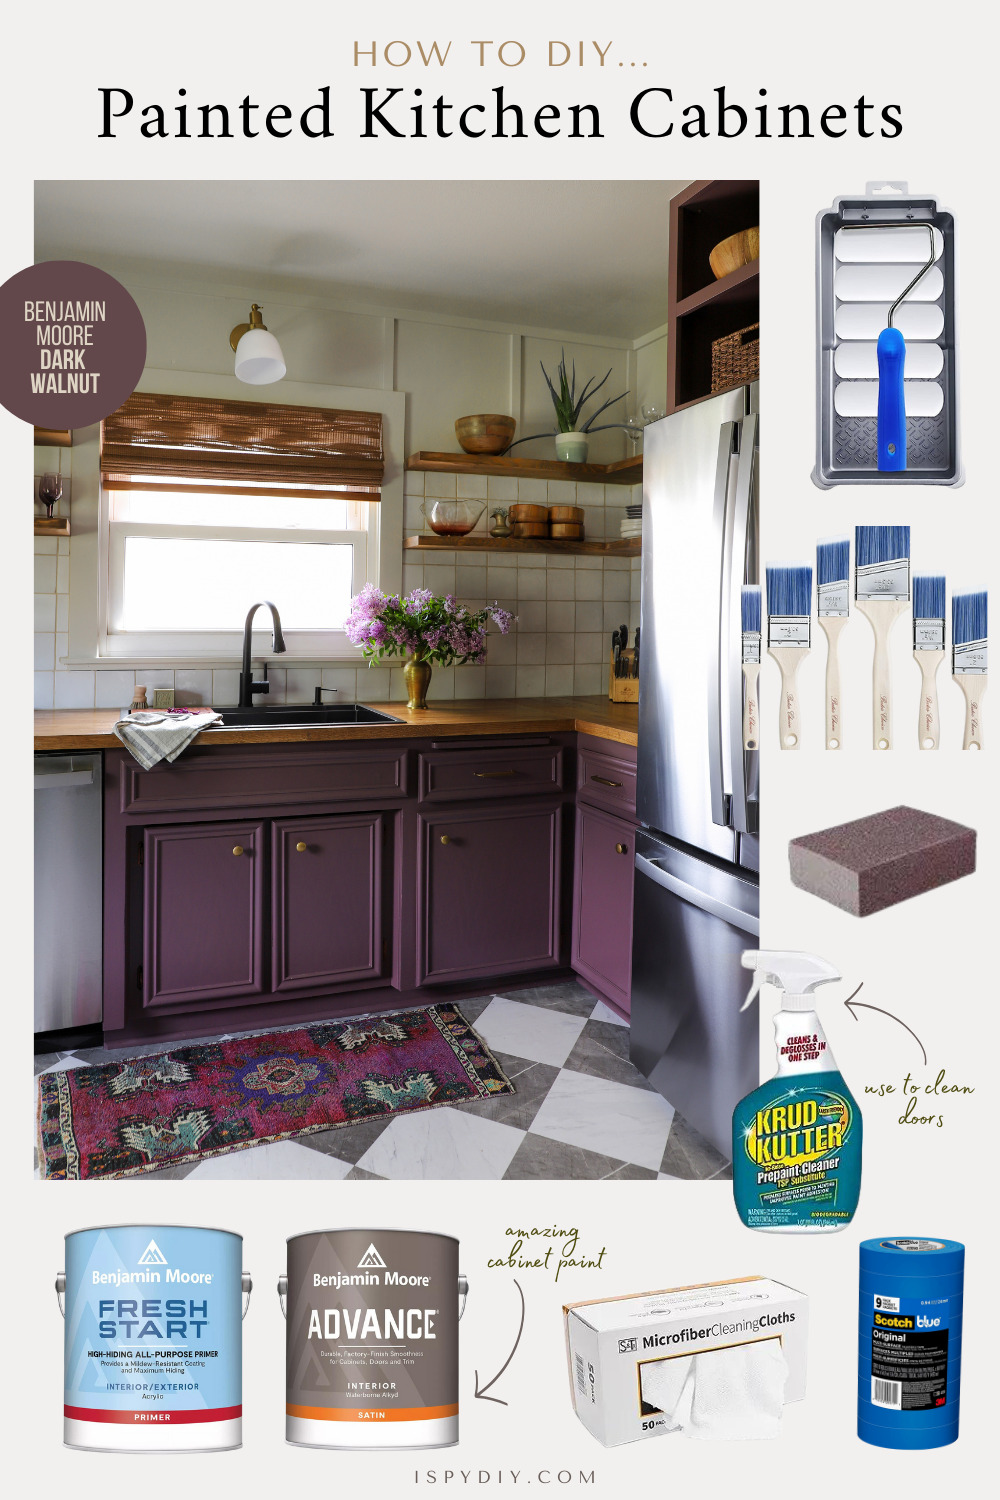
Supplies
- Benjamin Moore Primer
- Benjamin Moore Advance Paint (Color: Dark Walnut)
- Krud Kutter
- Sanding Blocks (220 Grit)
- Microfiber Cleaning Cloths
- Paint Brushes
- Foam Rollers
- Small Paint Trays
- Drop Cloth
- Painters Tape
Step-by-Step
1. First, Remove all the cabinet doors and hardware. Lay the doors out flat on clean drop cloths. For the cabinets in place, use painters tape to protect walls.
2. Next, clean them really good. You’d be amazed at the gunk which can accumulate on cabinets over time. I recommend using a good quality degreaser to get rid of any built-up grease and grime. A TSP (trisodium phosphate) solution is an excellent choice; I used Krud Kutter. Scrub those cabinets down, rinse thoroughly, and allow them to dry completely. You want to a super clean surface before starting to paint.
3. And then sand each cabinet door. Use a fine-grit sandpaper or sanding block (around 220-grit) to lightly sand the cabinet surfaces. This helps to scuff up the existing finish and creates a slightly rough surface for the primer and paint to adhere to. Wipe off any dust created during sanding with a damp cloth.
4. Choose a high-quality primer specifically designed for cabinets. I have been SUPER happy with Benjamin Moore Primer, it goes on so smooth and is really durable. I got it tinted gray because we were painting the cabinets such a dark color. Apply a thin, even coat using a high-quality paint brush (the cheap ones loose bristles that get stuck in the paint) and/or foam roller. The primer self levels, so all the brush marks will disappear as it dry. Make sure to get into all the nooks and crannies. Primer is so important for good paint adhesion and a durable finish. Allow it to dry as per the manufacturer’s instructions.
5. Now it is time to paint! We have used Benjamin Moore Advanced paint on all the kitchen makeovers, and are super happy with how it goes on, and the smooth finish when it dries. We rolled on two thin, even coats, following the wood grain. And again, use a high-quality paint brush and/or foam roller to avoid streaks or brush marks. Multiple thin coats are better than one thick one. Allow each coat to dry thoroughly, before doing the next one.
6. Once all your paints is one, let it cure! We had to install ours right away, but the longer you let them sit, the better. The instructions will give specific on how long to let them dry, and then how long before they are totally cured.
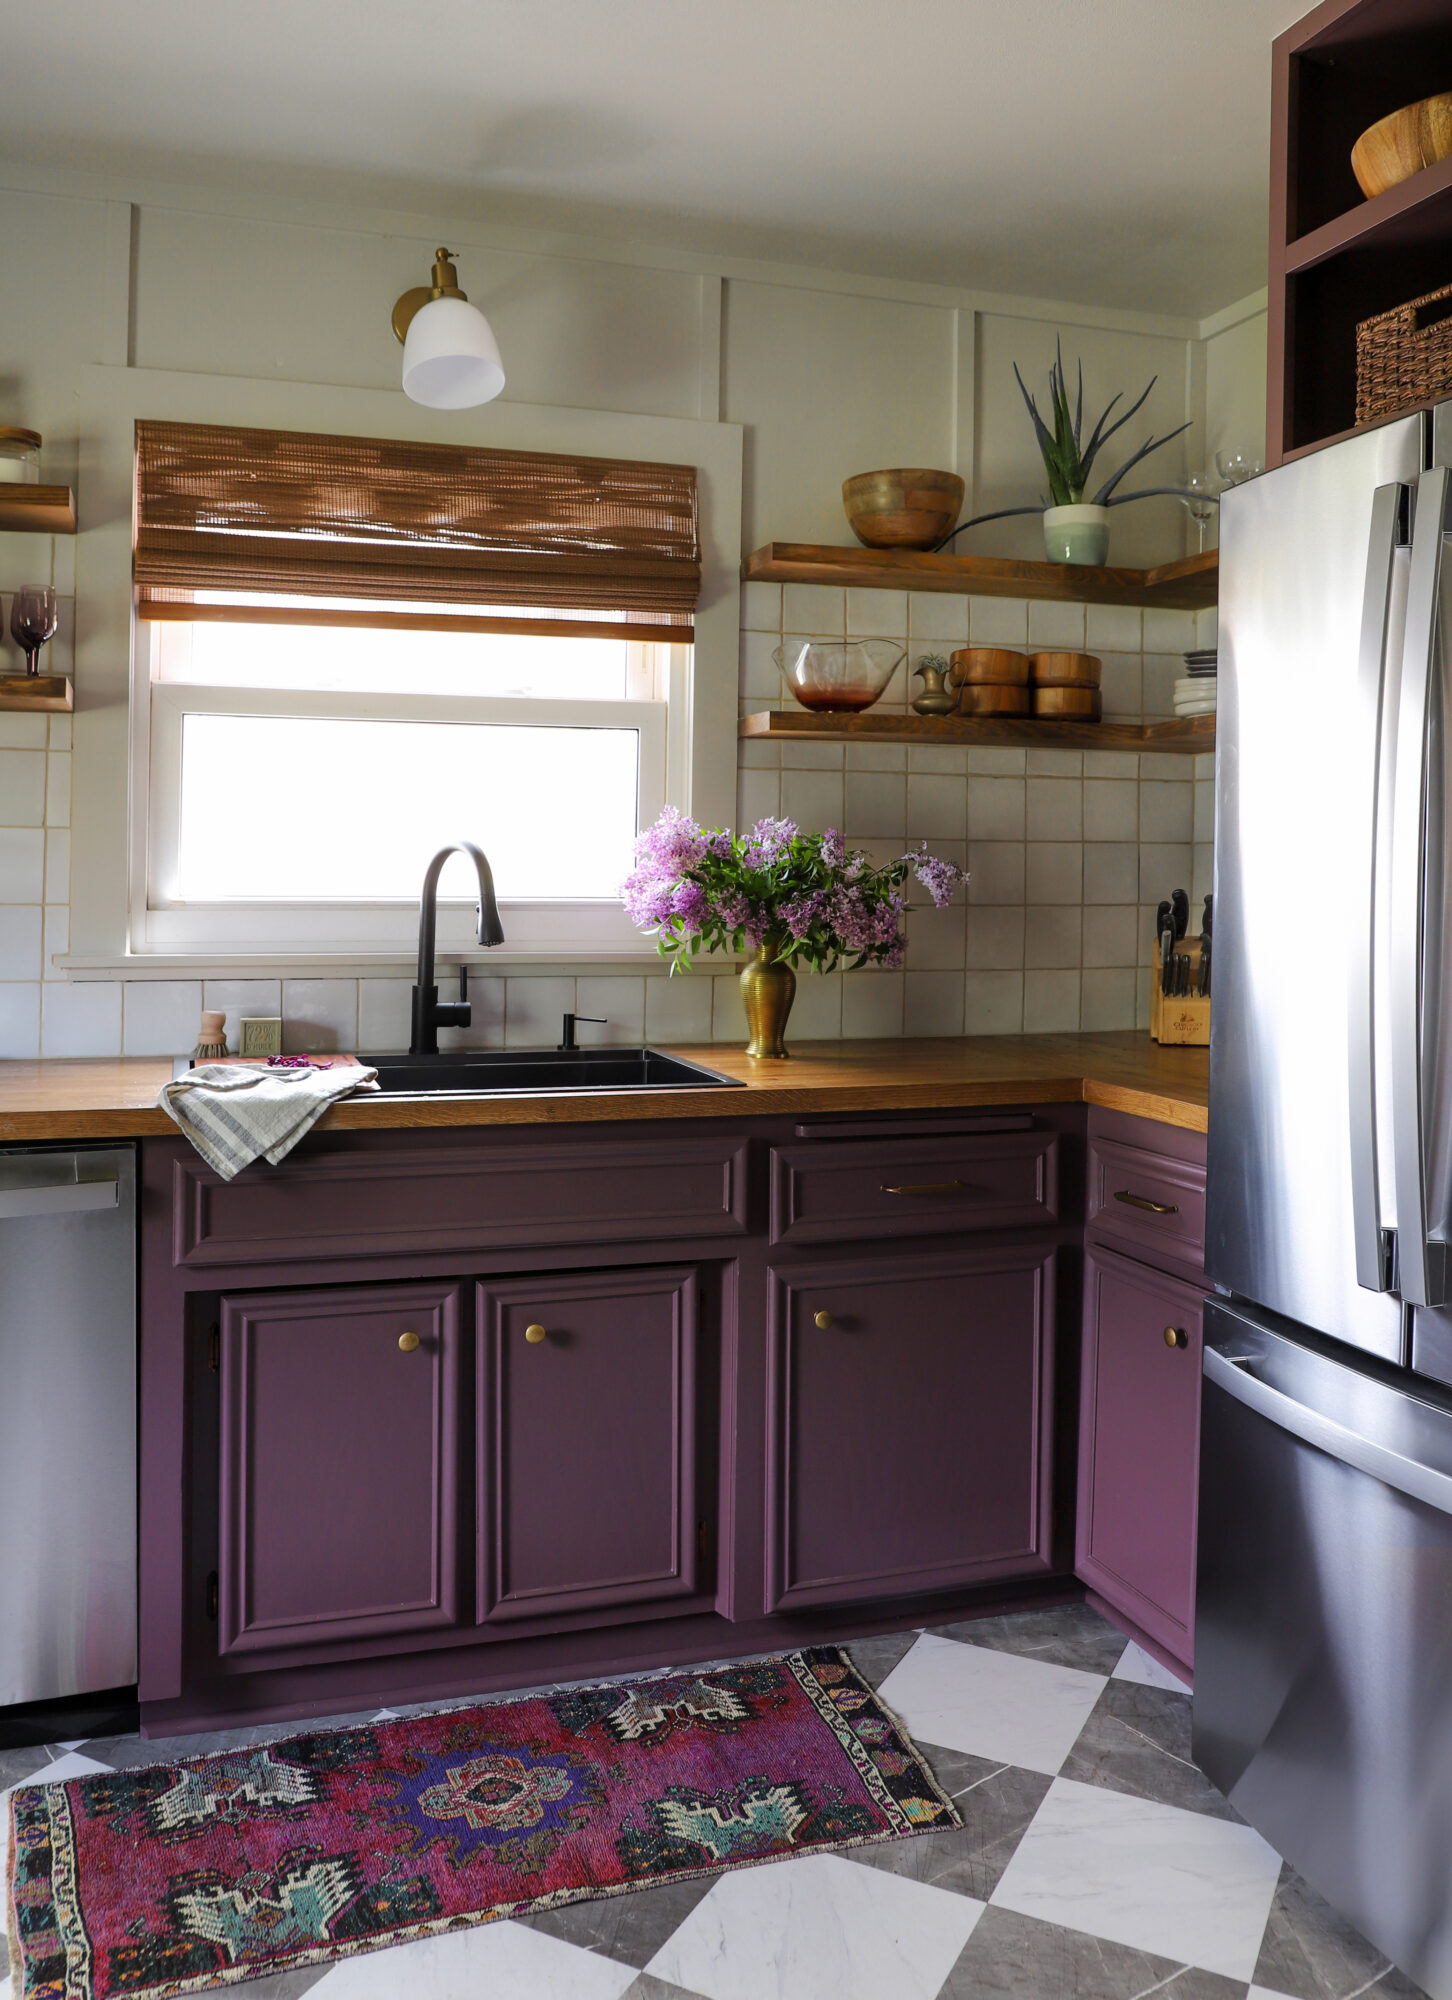
The cabinets SO pretty!! I am really happy the couple trusted us to go bold. This plum color (Dark Walnut by Benjamin Moore) is even more beautiful in person, and I love that it changes throughout the day with the lighting. A can of primer and a can of paint totally gave this kitchen a new life!

For more DIY ideas, watch Season 2 of ‘Makeover By Monday’ Saturdays at 1p/12p c on the Magnolia Network on TV! Or stream anytime on Max and Discovery+!
EXPLORE MORE: As Seen In, Before & After, DIY PROJECT, Home DIY, Makeover by Monday, Room Makeovers, SHOP, Shopping


We have used BM Advance paint on several projects. I can not believe how durable it is. Highly recommend.
Thanks for the information! Will be painting my bathroom cabinets. What finish do you recommend for the paint? Satin, Eggshell, Matte??
Also, do you add an additional finish on top of the paint?
Love your show!
I use the satin! And no topcoat needed