Charcoal Bungalow | The Ship Room & DIY Faux Plaster Walls
DIY PROJECT, Room Makeovers
Thank goodness the Ship Room is done! If you’re following me on Instagram @ispydiy then you know I’ve been trying to tackle this puzzle for a loooong time. It’s amazing how a room so small could totally stump me (and take so darn long to finish!) I will say, there were a few factors that really played into making this room challenging:
-That little window. Oh That little random window, how you taunted me.
-The textured walls. You all know how much I dislike textured walls, but there were 3-5 different textures on the wall from closing up window/doors and it looked like a bit of a hot mess.
-The size. Small rooms are not necessarily easier, you really have to find a way to make the space you have function in the best way possible, and do some tricks (like hanging the curtain rod high) to make it feel more spacious.

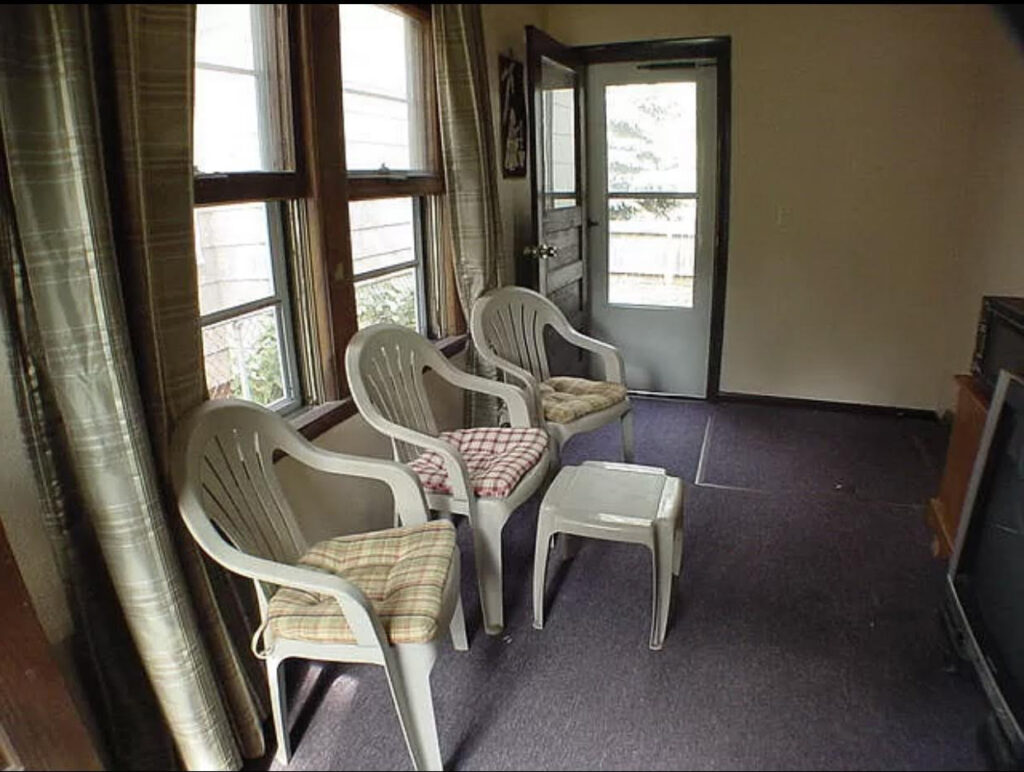
Lets look WAY BACK at when Mr. Yolo purchased this house 5 years ago. This room was used as a TV room, I think? Mr. Yolo closed up the door to make it a bedroom, and when doing so he decided to add this tiny, random window (let’s be clear I did not co-sign that decision.)
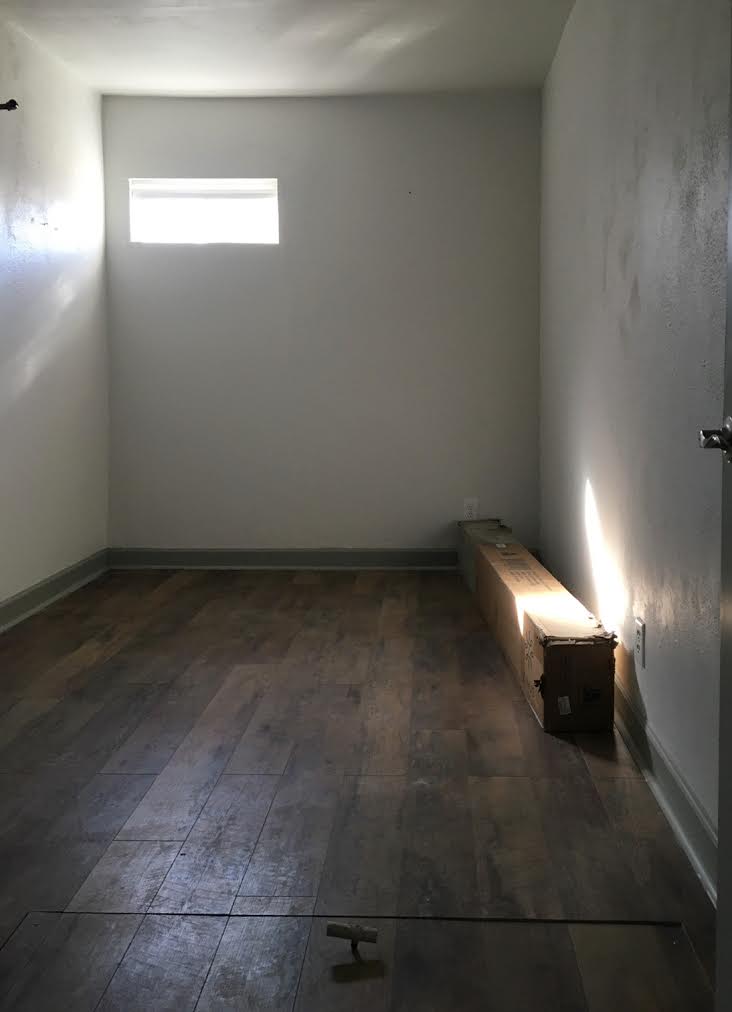
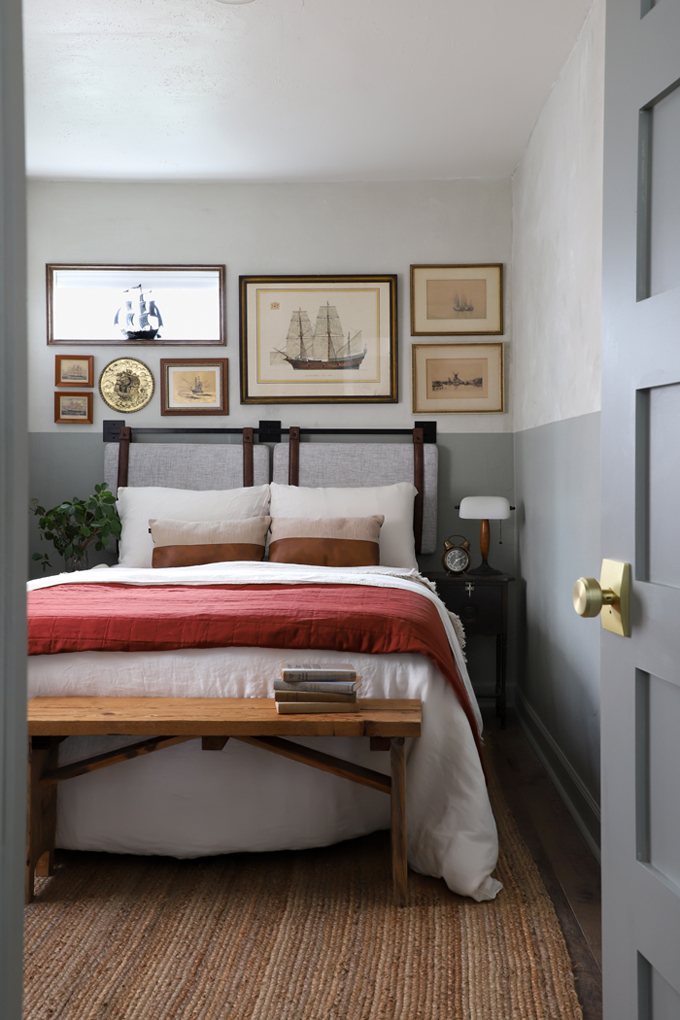
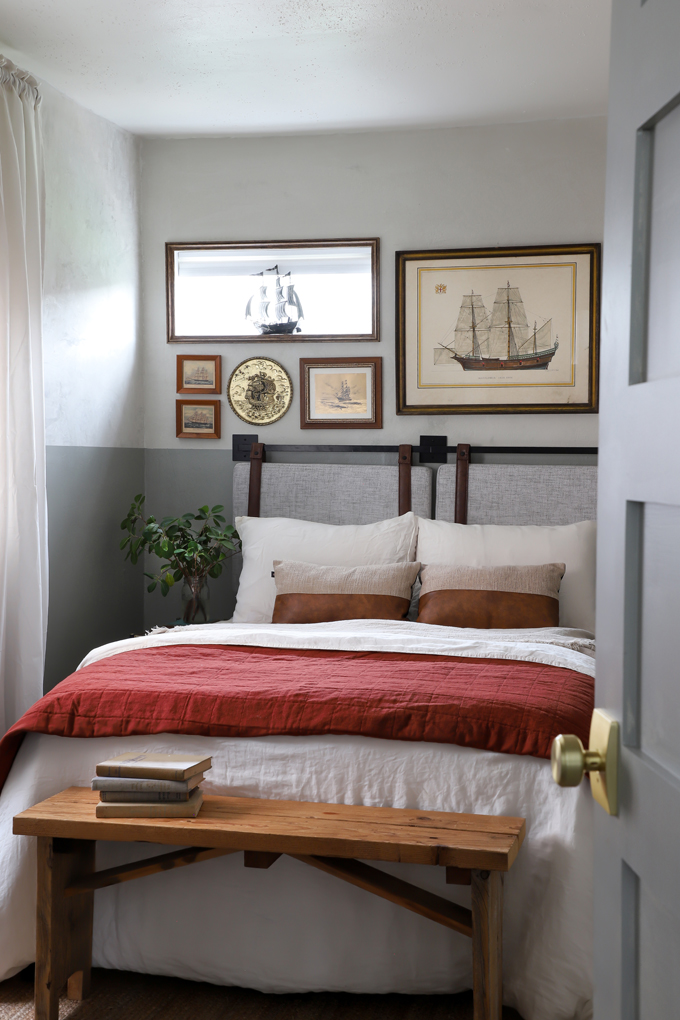
So, this is where I started. I had been thrifting and sourcing some incredible ship art for a while, so my first instinct was to cover the little window with a big show stopping piece. Unfortunately, that idea was not well received, so the next idea was to frame it out like a piece of art and create the gallery wall around it.

The Perfect Retreat
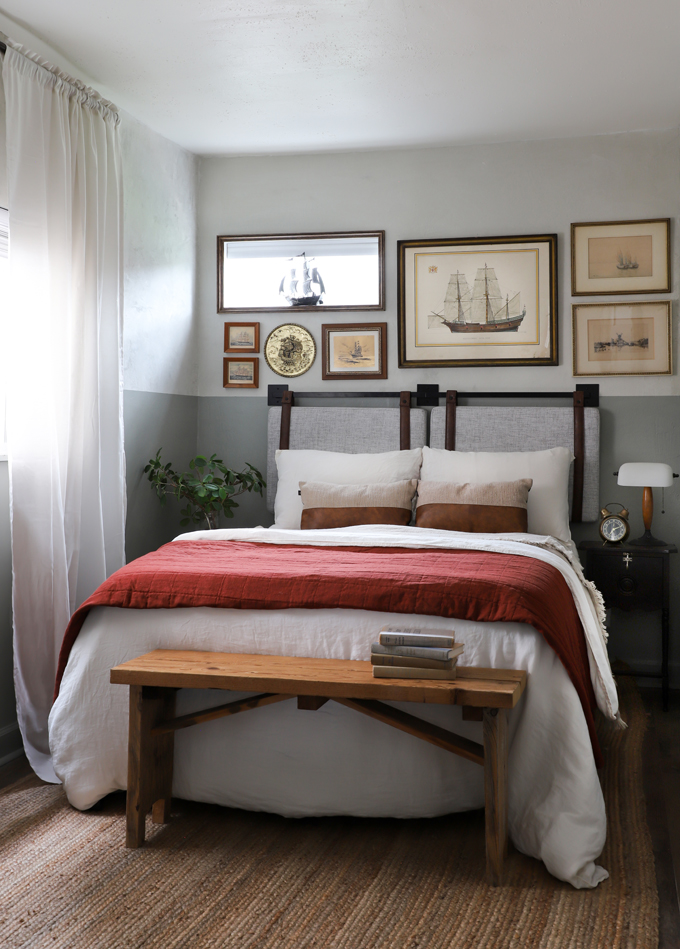
I’m so excited to share with you how it all came together. Before I share all the details, I have to tell you that this room honestly had me doubting my skills. I could not figure it out. So I walked away from it for a bit, and that is totally ok. Sometimes you need to move to another project, clear your head and then return with fresh eyes. I am so pleased with this sweet little room (even though it took a little longer than usual.) I am so happy I saw it through to the end!
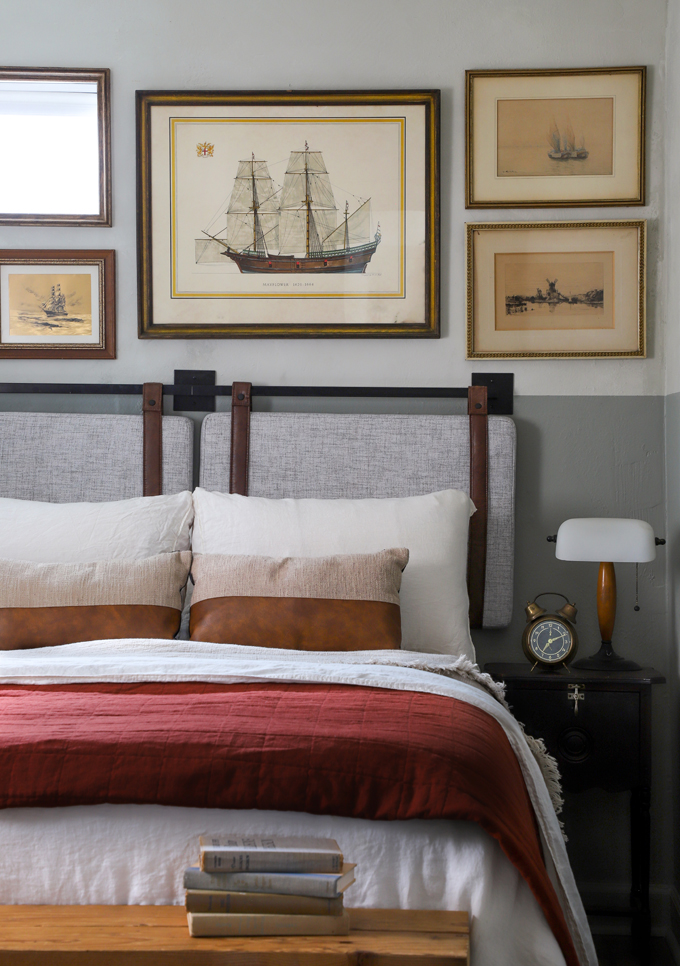
The Ship Gallery Wall
It you were following along with the whole ship art collecting process, you might notice that the ship painting that started this all is no where to be seen. And some of the other paintings I found at antique stores did not make the cut either…well that was an oversight on my part. And a lack of measuring, yikes. After the headboard was up, there was no way all the art I thrifted would fit. I had to pick one, and then find some smaller art (anyone in the market for some oversized ship art?!?) In the end I really love the more neutral color palette of the art, and I will save the other paintings for a room three times this size.
Art Group Effort
The art I ended up with came about through a real group effort:
The Medallion: One of my readers DMed me this find from my favorite Goodwill, I just happened to be on my way so I scooped it up!
The Two on the Far Right: My friend Emily from Penny & Ivy had the bottom one in her basement and was kind enough to pass it on to me, she also tipped me off to an antique store in her area with some ship art, Legacies, where I scored the top watercolor. They are technically boats, not ships, but they fit the color story!
The Little Ones on the Left: My friends at Millhouse Goods contributed to the cause by dropping off these two. They were the perfect fit tucked under the window!
The Big One and the Ship in the Window: Both came from one of my favorite antique stores, Antiques on Pierce. I knew I wanted a ship in the window, but of course forgot to measure the window. Lucky for me it was the perfect fit!
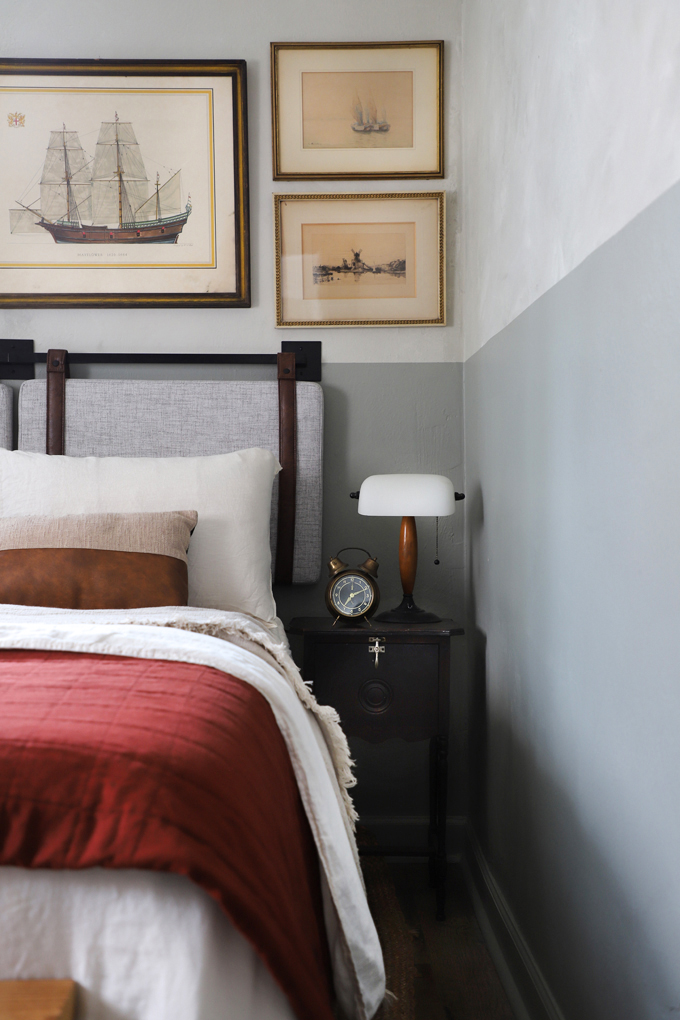
DIY Plaster Walls
This was a fun experiment! Essentially we skimmed coated the walls to cover up the irregular texture, but intentionally left it streaky to look like an old plaster wall. Here, in a nutshell, are the steps we took to achieve this:
Supplies
Joint Compound
Paint – Behr Old Celadon
Trowel
Squeegee
Steps
– We scooped a bunch of joint compound in a gallon bucket, and poured in some Silver Celadon paint and thoroughly mixed it to create base color.
– Next, we poured in some more paint and then just lightly mix, so they paint is a bit streaky.
– We used a towel and smeared on the joint compound.
– Then went over it with a squeegee to knock down any ridges
– Note: the joint compound goes on much darker and then dries, so took some trial to get the right color
– It’s not meant to be perfect, we did this on the whole wall, and them went back and taped off the bottom half and painted it Old Celadon.
Final Thoughts
The top has a lot of movement, which I love, similar to our Limewash Room! And the best thing is that a gallon of joint compound is $15, and we had the paint on hand so it was very affordable. The walls still have some texture, but it looks much more like old plaster walls then current day bad texture. We both love how it turned out, and would definitely try it in a future textured room!
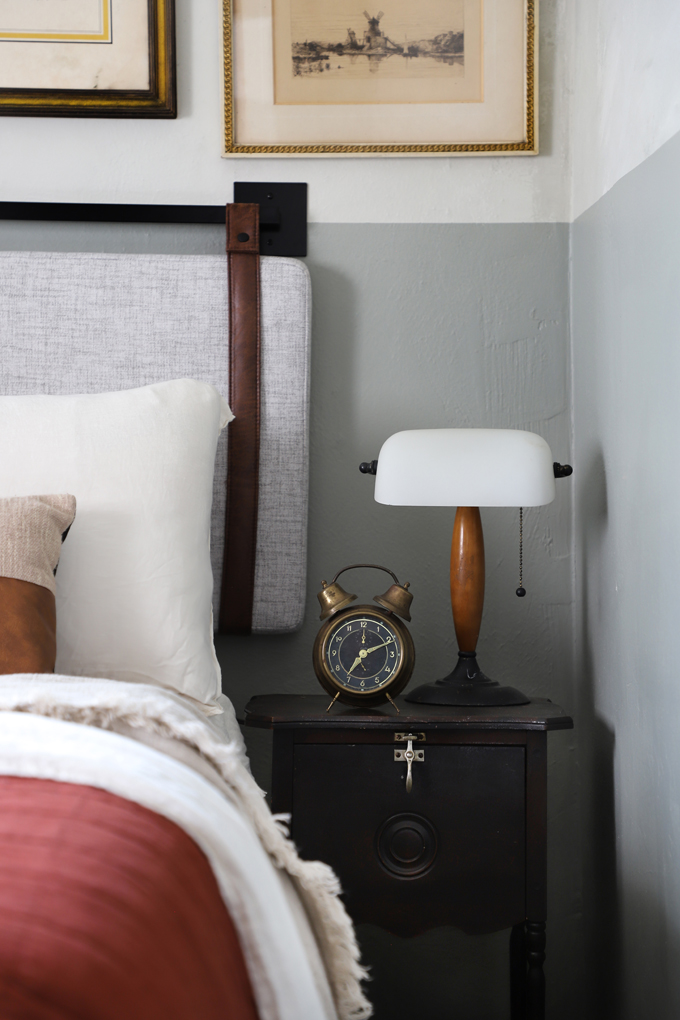
The Side Table
I love when my collecting (aka hoarding) pays off! I bought this little cigar table from Goodland Antiques months ago, and it fit absolutely perfectly beside the bed, and the dark wood mimicked the frames. I don’t worry too much about matching side tables, so the other side just has a slim magic rack/side table I got a Goodwill for $3. The alarm clock and lamp were also thrifted finds! Oh, and the headboard was left over from another project, I am so happy with how well it worked in here. The headboard is meant for a queen bed, but because of the size of the room, we just have a full bed and frame in here and it looks very hotel-esque.
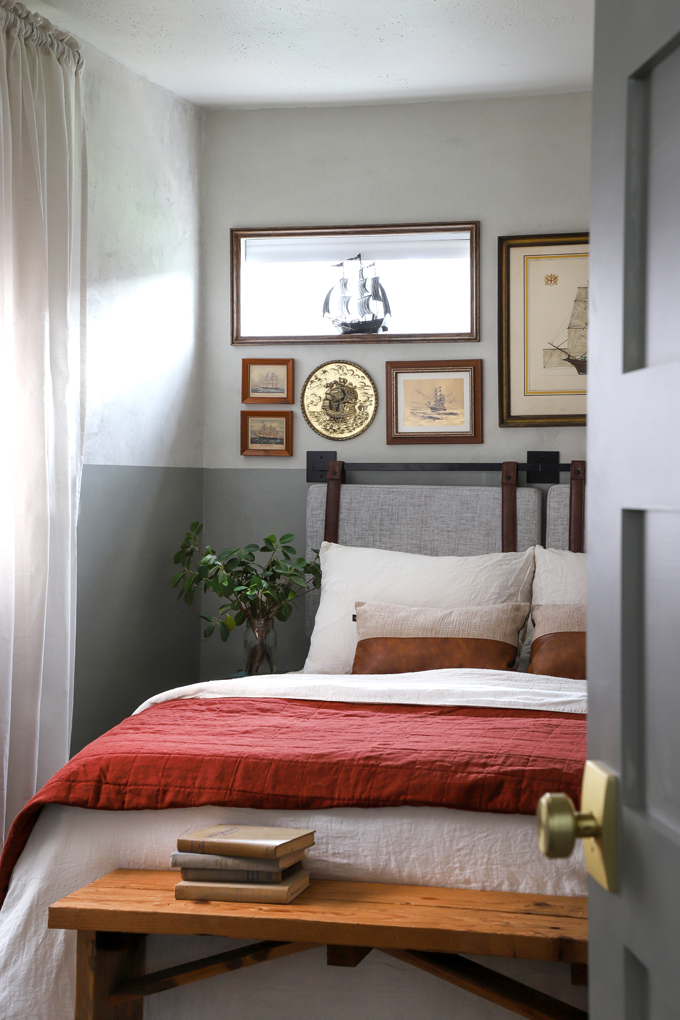
Hanging Curtains High & Wide
My favorite trick to making a room look bigger: Hang your curtains high & wide! This window is on the smaller side and is pretty low. We took the curtain rod higher, just a few inches below the 8 ft ceiling, and wider than the window (about 20″ outside the edge). This makes the ceiling look taller, the window look wider, and the room bigger! The curtains are from Ikea, and the pipe-looking rod is old Target.
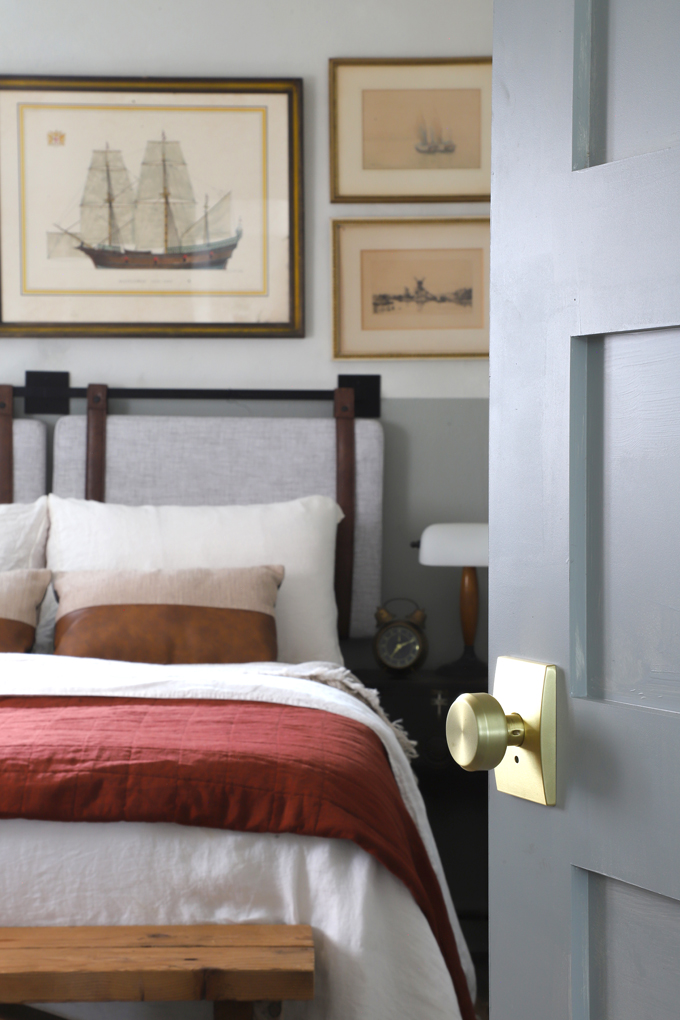
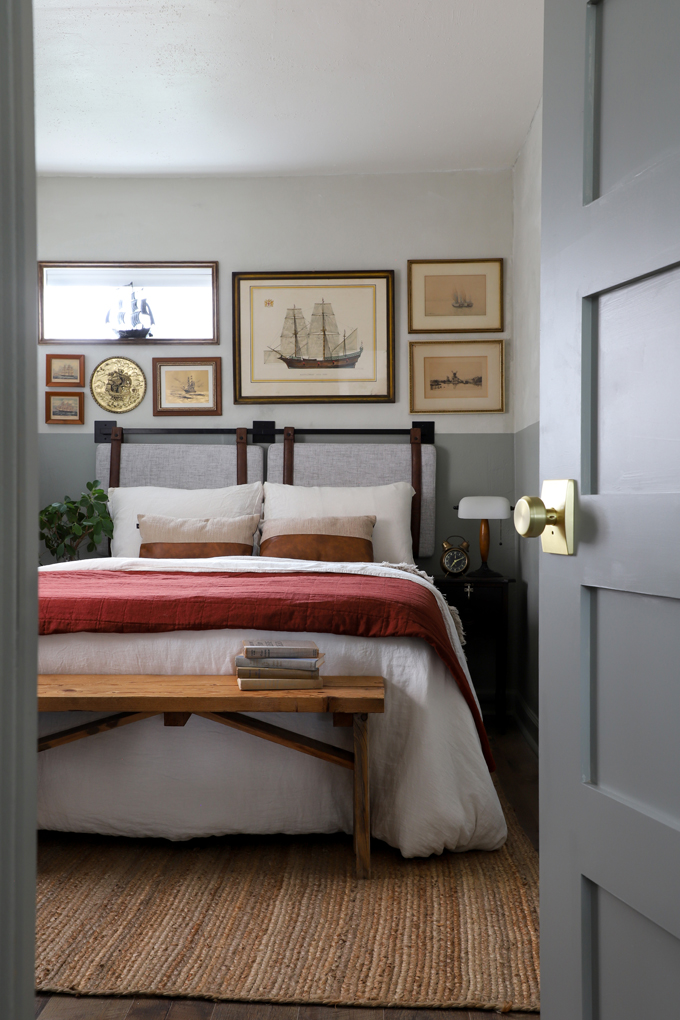
New Door & Hardware
If you were following along on IG, you saw that we upgraded all the doors and the hardware in the Bungalow. I am going to have a big post on the whole process (coming soon), but in the meantime, I’ll answer your FAQs: The 5 Panel Doors are from Menards, the hardware is Schlage Bowery Knob/Century Trim, and they are painted Behr Old Celadon
Shopping Links
Fabric Upholstered Mounted Headboard
Ikea Curtains
Jute Rug
Leather Lumbar Pillows
BrookLinen linen Cream Sheets/Duvet
5 Panel Doors
Bowery Knob/Century Trim
Paint – Behr Old Celadon
Antique Finds: Side table, alarm clock, lamp, bench, books, art
EXPLORE MORE: DIY PROJECT, Room Makeovers


Love this restful looking room. It just has a very peaceful vibe! Great job!