MY DIY | Geometric Wood Headboard
DIY PROJECT, Home DIY
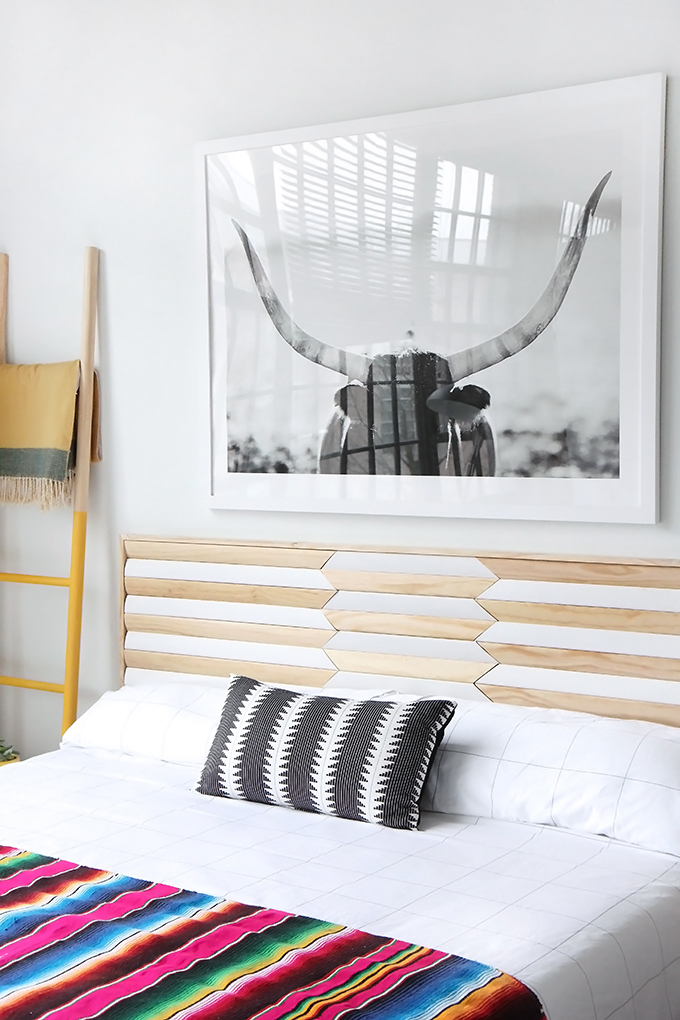
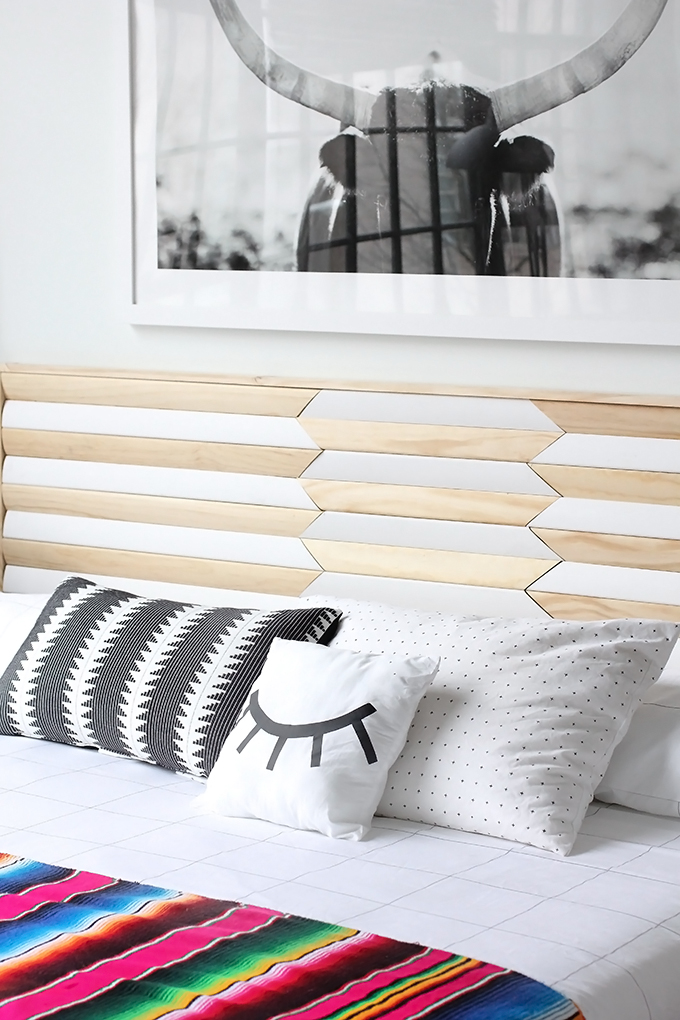

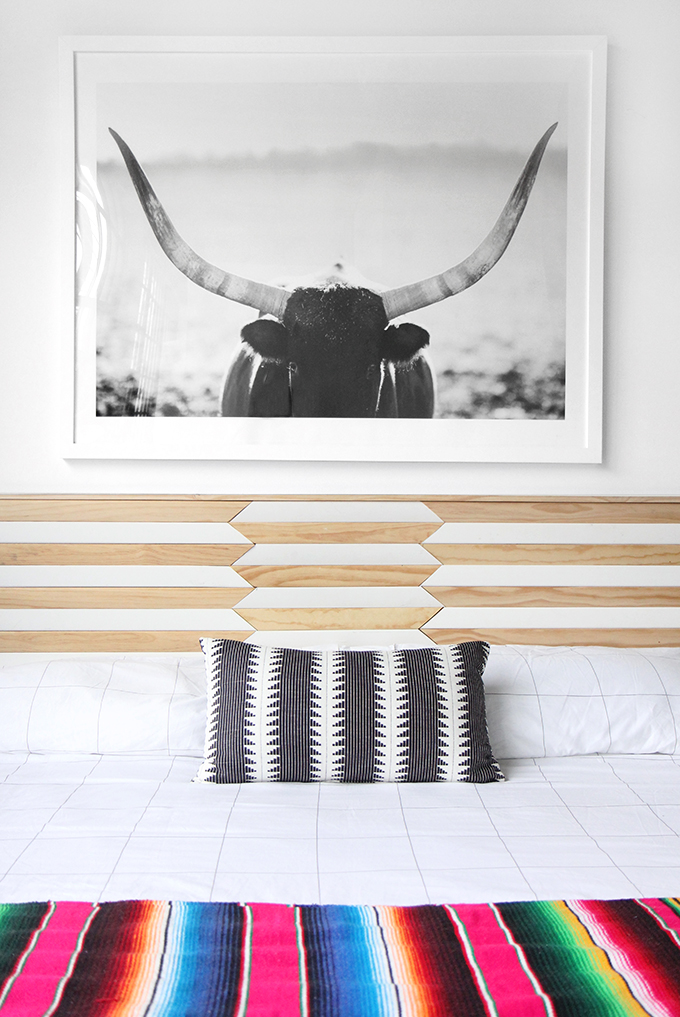
My headboard is finally up, and I LOVE it! I originally saw this pattern on a coffee table, and knew it would be the prefect backdrop for my bed. I went out and bought a miter saw for this project (because I have a dream of having a bunch of power tools in the garage at my reno house, where I can make all sorts of cool projects) soooo you will have to either invest or find a carpenter buddy for this project. But the good news is that once you make all the cuts, the assembly takes no time, and the outcome is pretty phenomenal! With my headboard being complete, my bedroom is officially a happy oasis, now time for a nap! Step and supplies after the break…
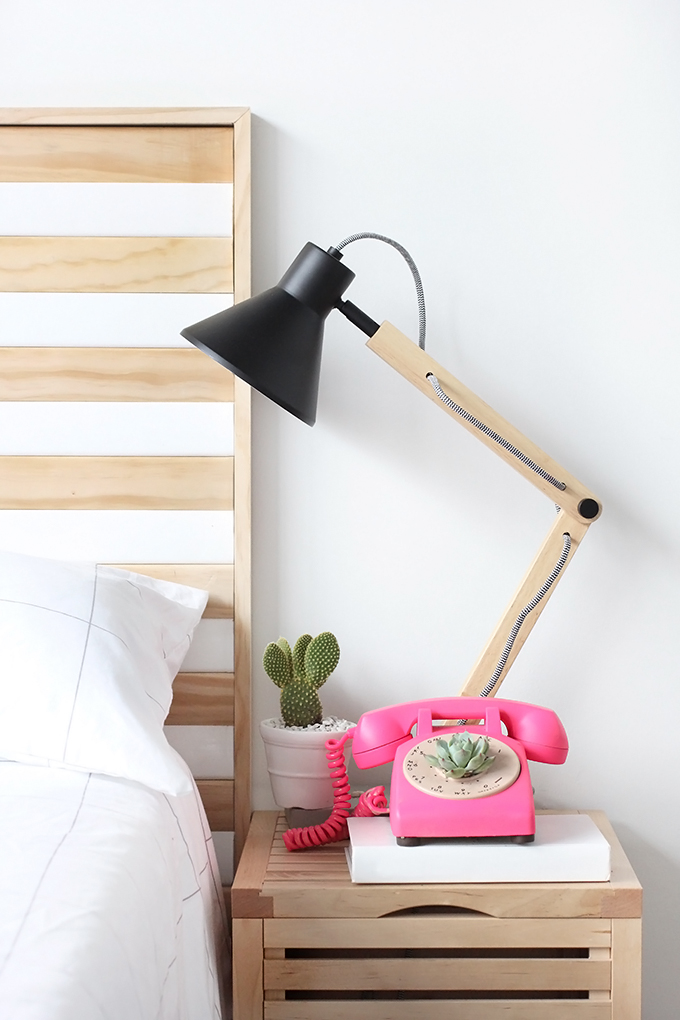
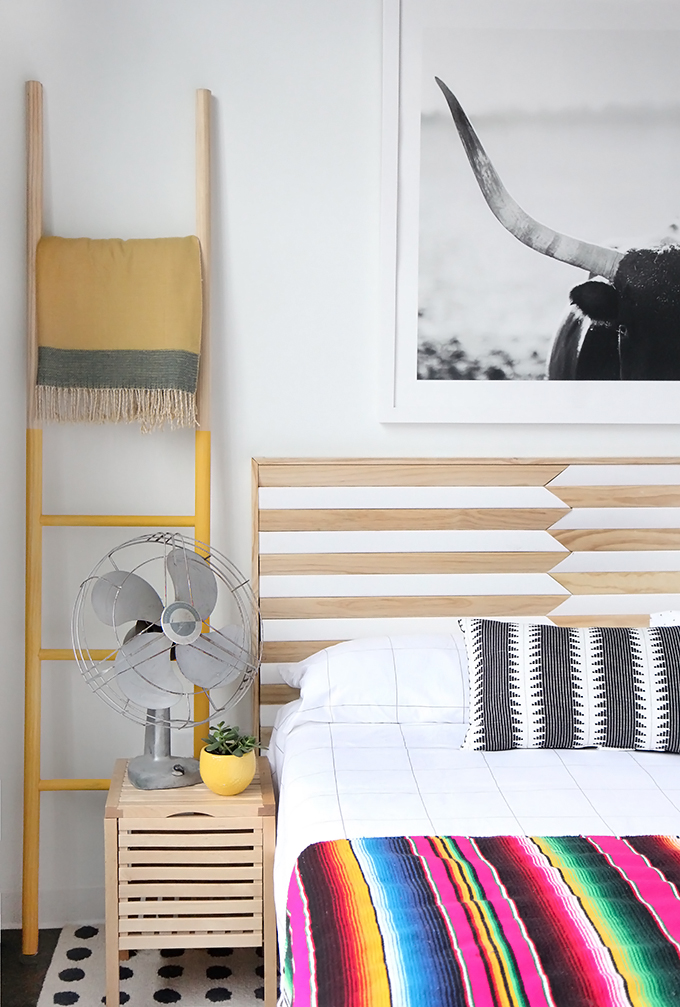
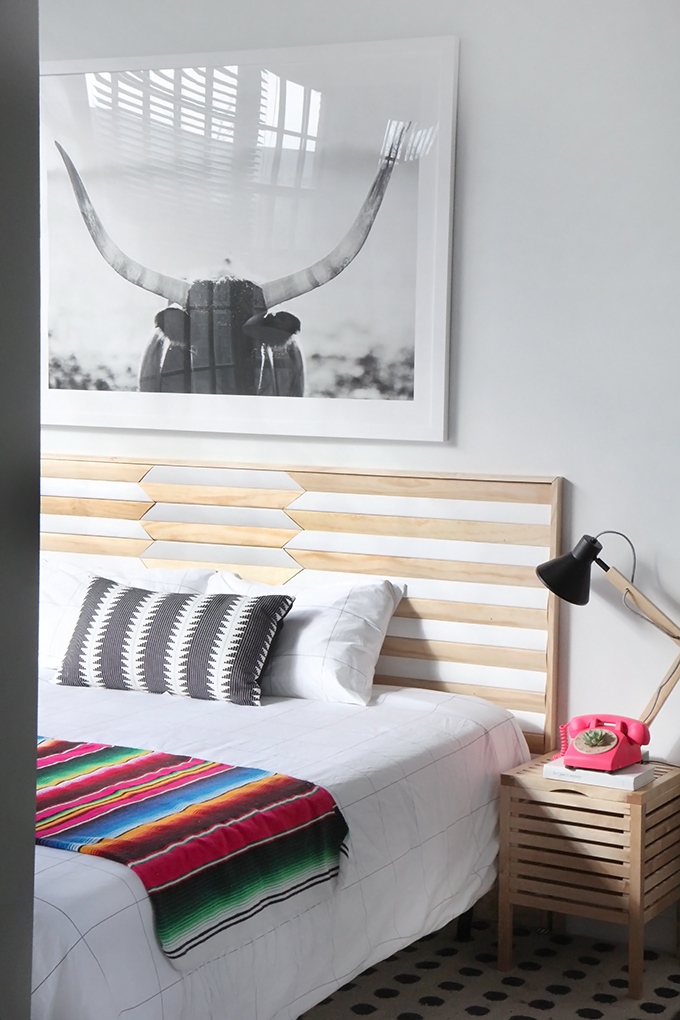
ROOM DETAILS | DIY Colorblock Ladder, DIY Succulent Rotary phone, Target Lamp and pillow, Ikea side table, Brooklinen Window Pane Luxe sheets, Minted Staredown Art, Thrifted fan and blanket.
What you need:
Plywood
Wood glue
Miter saw (this is the one I bought!)
Spring clamp
11/16 x 2-1/4 casing (10 white and 10 unfinished wood pieces)
What to do:
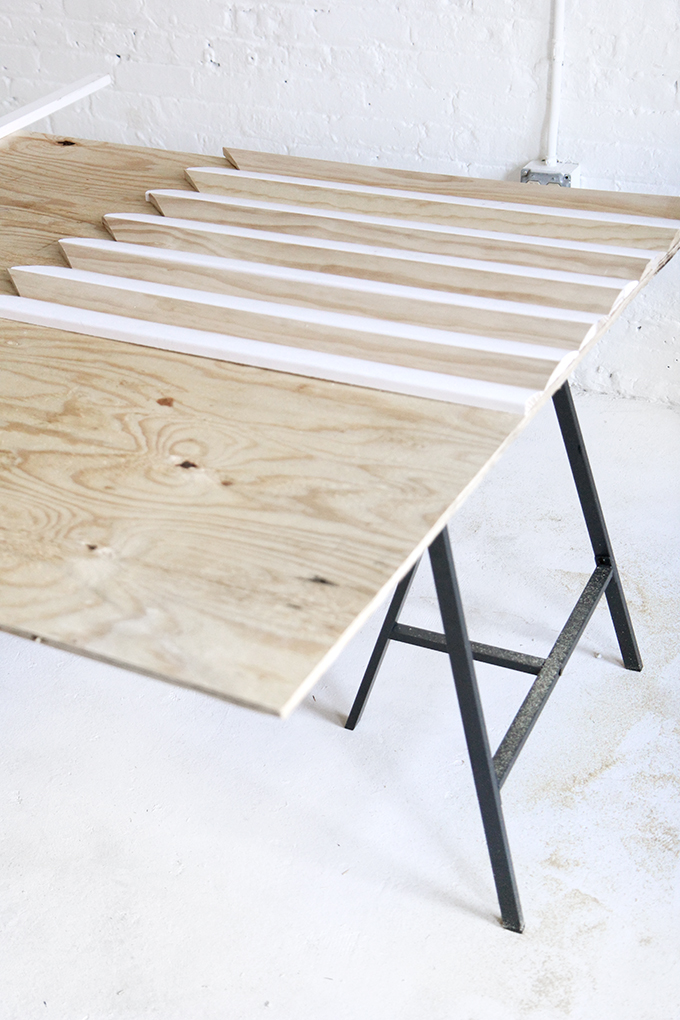
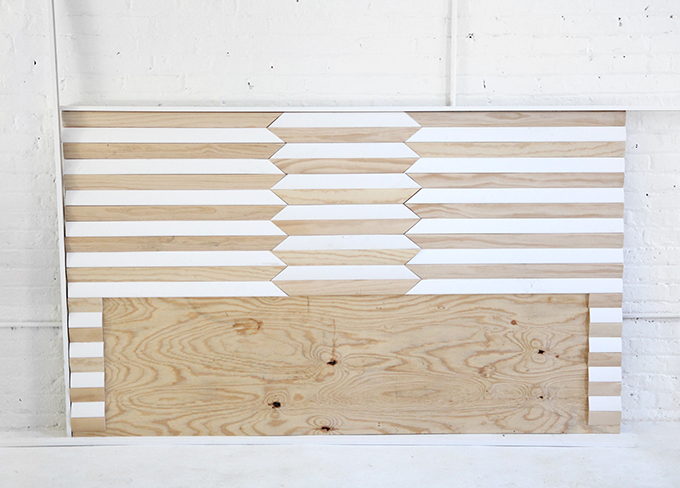
My bed is a king size, so I cut the piece of plywood 84in wide by 48in tall (adjust to fit the width and height of your mattress)
Then I laid out all my pieces of casing on top of the plywood, alternating between the white and unfinished wood so the short ends touched and the tall ends touched, creating little peaks and valleys.
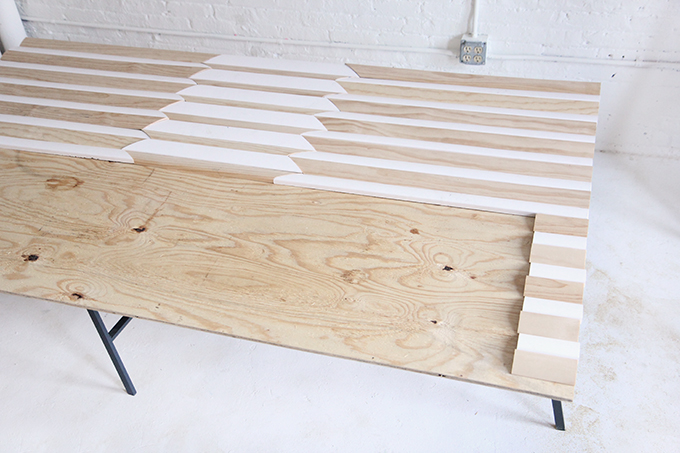
Next, I decided where the inverse design would be, and marked at the same spot on each piece, and then use the miter saw to cut 45 degree angles (there was some trial and error to get this right, that’s why I bought extra wood)
After all the wood was cut, I inverted the pieces to create the pattern.
With the excess wood, I cut 4in pieces to line the edges of the plywood.
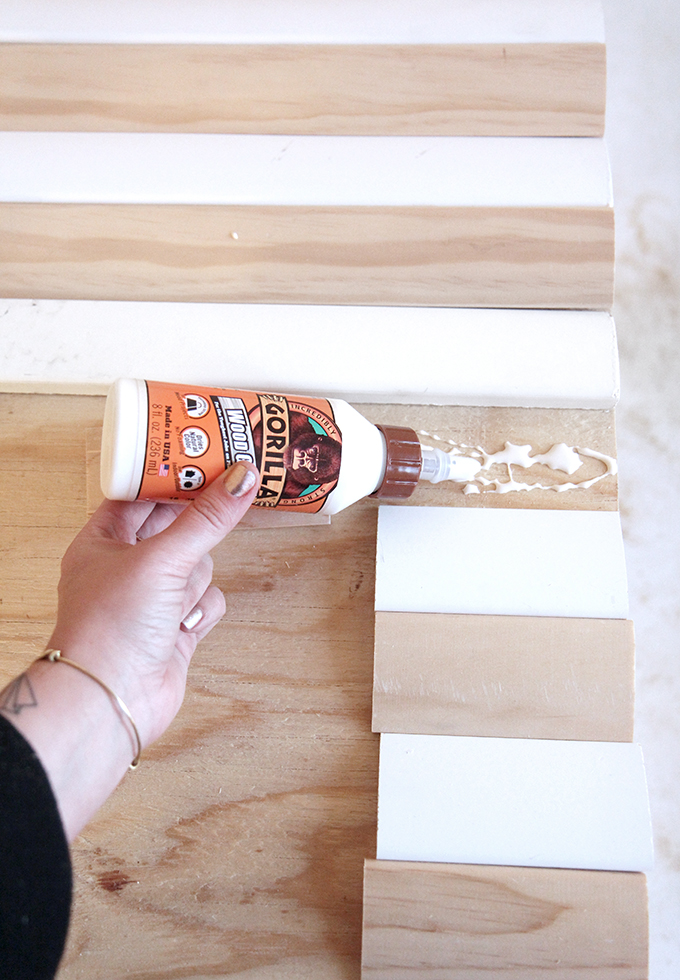
After I had everything in place, I used wood glue to adhere the casing pieces to the plywood and clamped them in place, then let dry for 24 hours.
If you have any jagged ends, you can sand them down after the wood glue drys.
I finished of the headboard by adding trim around the edges. Measure your perimeter and then cut pieces at a 45 degree angle at the ends to create a miter corner joint. I used the wood glue and clamps to adhere the trim.
Install by screwing headboard into the wall behind your bed. Done!
EXPLORE MORE: DIY PROJECT, Home DIY


I love this DIY! X
http://www.thoughtsinstyle.com/
jadłospis przy dnie moczanowej http://epodagra.pl/ – http://epodagra.pl/ dieta przy
This looks so wonderful, I love it!
https://www.makeandmess.com/
Always wanted something nice behind the pillows not to see the wall 🙂 Very good idea!!!
Eugenia
http://www.diamondsandspikes.com/
fashion / lifestyle / beauty / moscow-budapest
amazing!
xx
http://www.cherry-mag.com
Love this DIY! Looks so polished yet so easy to make. Thanks for sharing!
Vivi / http://www.cottonandcoffee.com
Great DIY project! Also love the photo above the bed!!!
That headboard is gorgeous! I can’t believe you DIYed it!
Paige
http://thehappyflammily.com
This is gorgeous!!
Xx Taylor
http://lightscameracatwalk.com
This looks amazing! I love the overall look with the print and throw blanket.
-Libby
http://www.libbylivingcolorfully.com
This is super pretty and I think because of the relatively small width of the wood pieces it could even be done with a mitre box and a hand saw!
You knocked it outta the park with this one! So so good!
Aww thanks, that make my day!
Love the headboard! I love your eclectic mix of items. I favor serape blankets as I spent some of my childhood in AZ and we frequented the Mexican markets (no passport needed or danger then). My mother would always pick up a serape to bring home and fortunately I now have several of them. They are all wool and the colors aren’t as vibrant as yours, but are great for accent colors in many places.
Amazing! I got mine in Mexico too, I filled up my suitcase!
Yes, yes, YES! So good…I love an original DIY and this is so good.
WOW! It looks so so great! Now I want to make my own, but don’t have space for it 🙂
http://redbarberry.com
That looks really great!
You make it look so easy, when I know that it was not! I love how this looks! Thanks for the idea!
I really like your take on the headboard. I’ve been waiting for this pot since I saw you DIYing it on snapchat. I also, kind of, DIYed my own headboard. It’s actually a desk table top from IKEA, but doubles as a headboard. Here you can see how mine looks. http://annamarialarsson.se/blogg/2015/02/monthly-makers-februari-aterbruk/
This looks awesome! It gives me so many ideas to make something for my house.
https://www.etsy.com/ca/shop/ MommyCanSewCanada
https://www.facebook.com/MommyCanSew
This is a stunning headboard! I’ve been looking for a DIY headboard solution for a while now, since buying one is so expensive! Will definitely be pinning this for future reference/inspo! Thanks!
Xo
Alex
http://www.sincerely-alex.com
This is so cool! omg 🙂 Thank you for sharing this awesome DIY>