Laundry Room Makeover with DIY Painted Tile & Cabinets
Before & After, DIY PROJECT
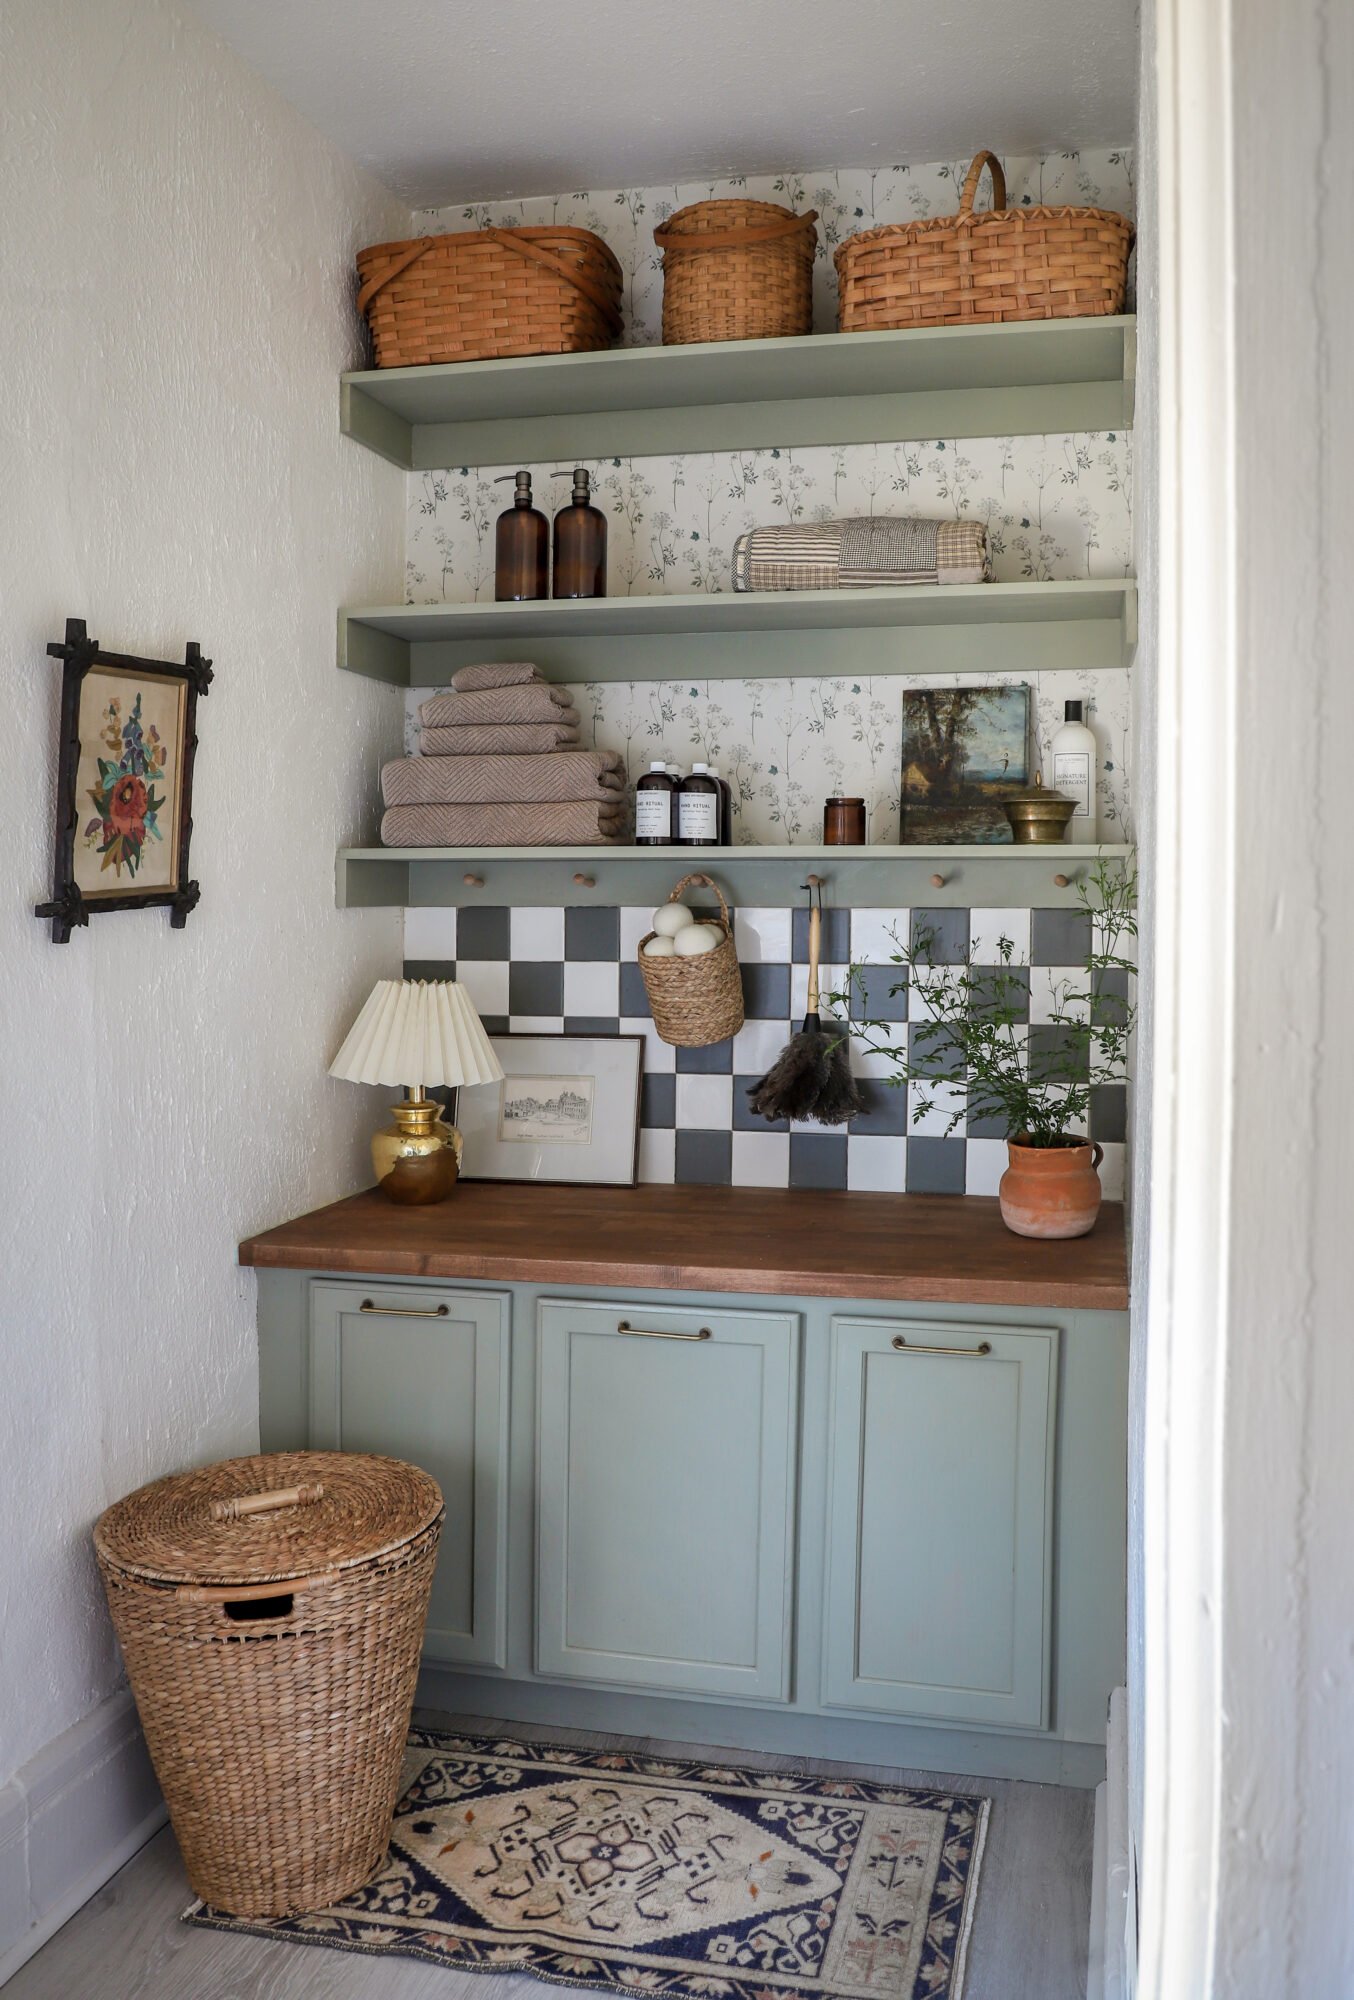
This was such a fun project in the Laundry Room at the Duplex! This wall is opposite of the washer and dryer and was asking for a little something. And now it’s the sweetest area for folding laundry and storage. I did this makeover on a budget; painting a $50 second-hand bathroom vanity and a $20 box of square tile! Read on for the details.

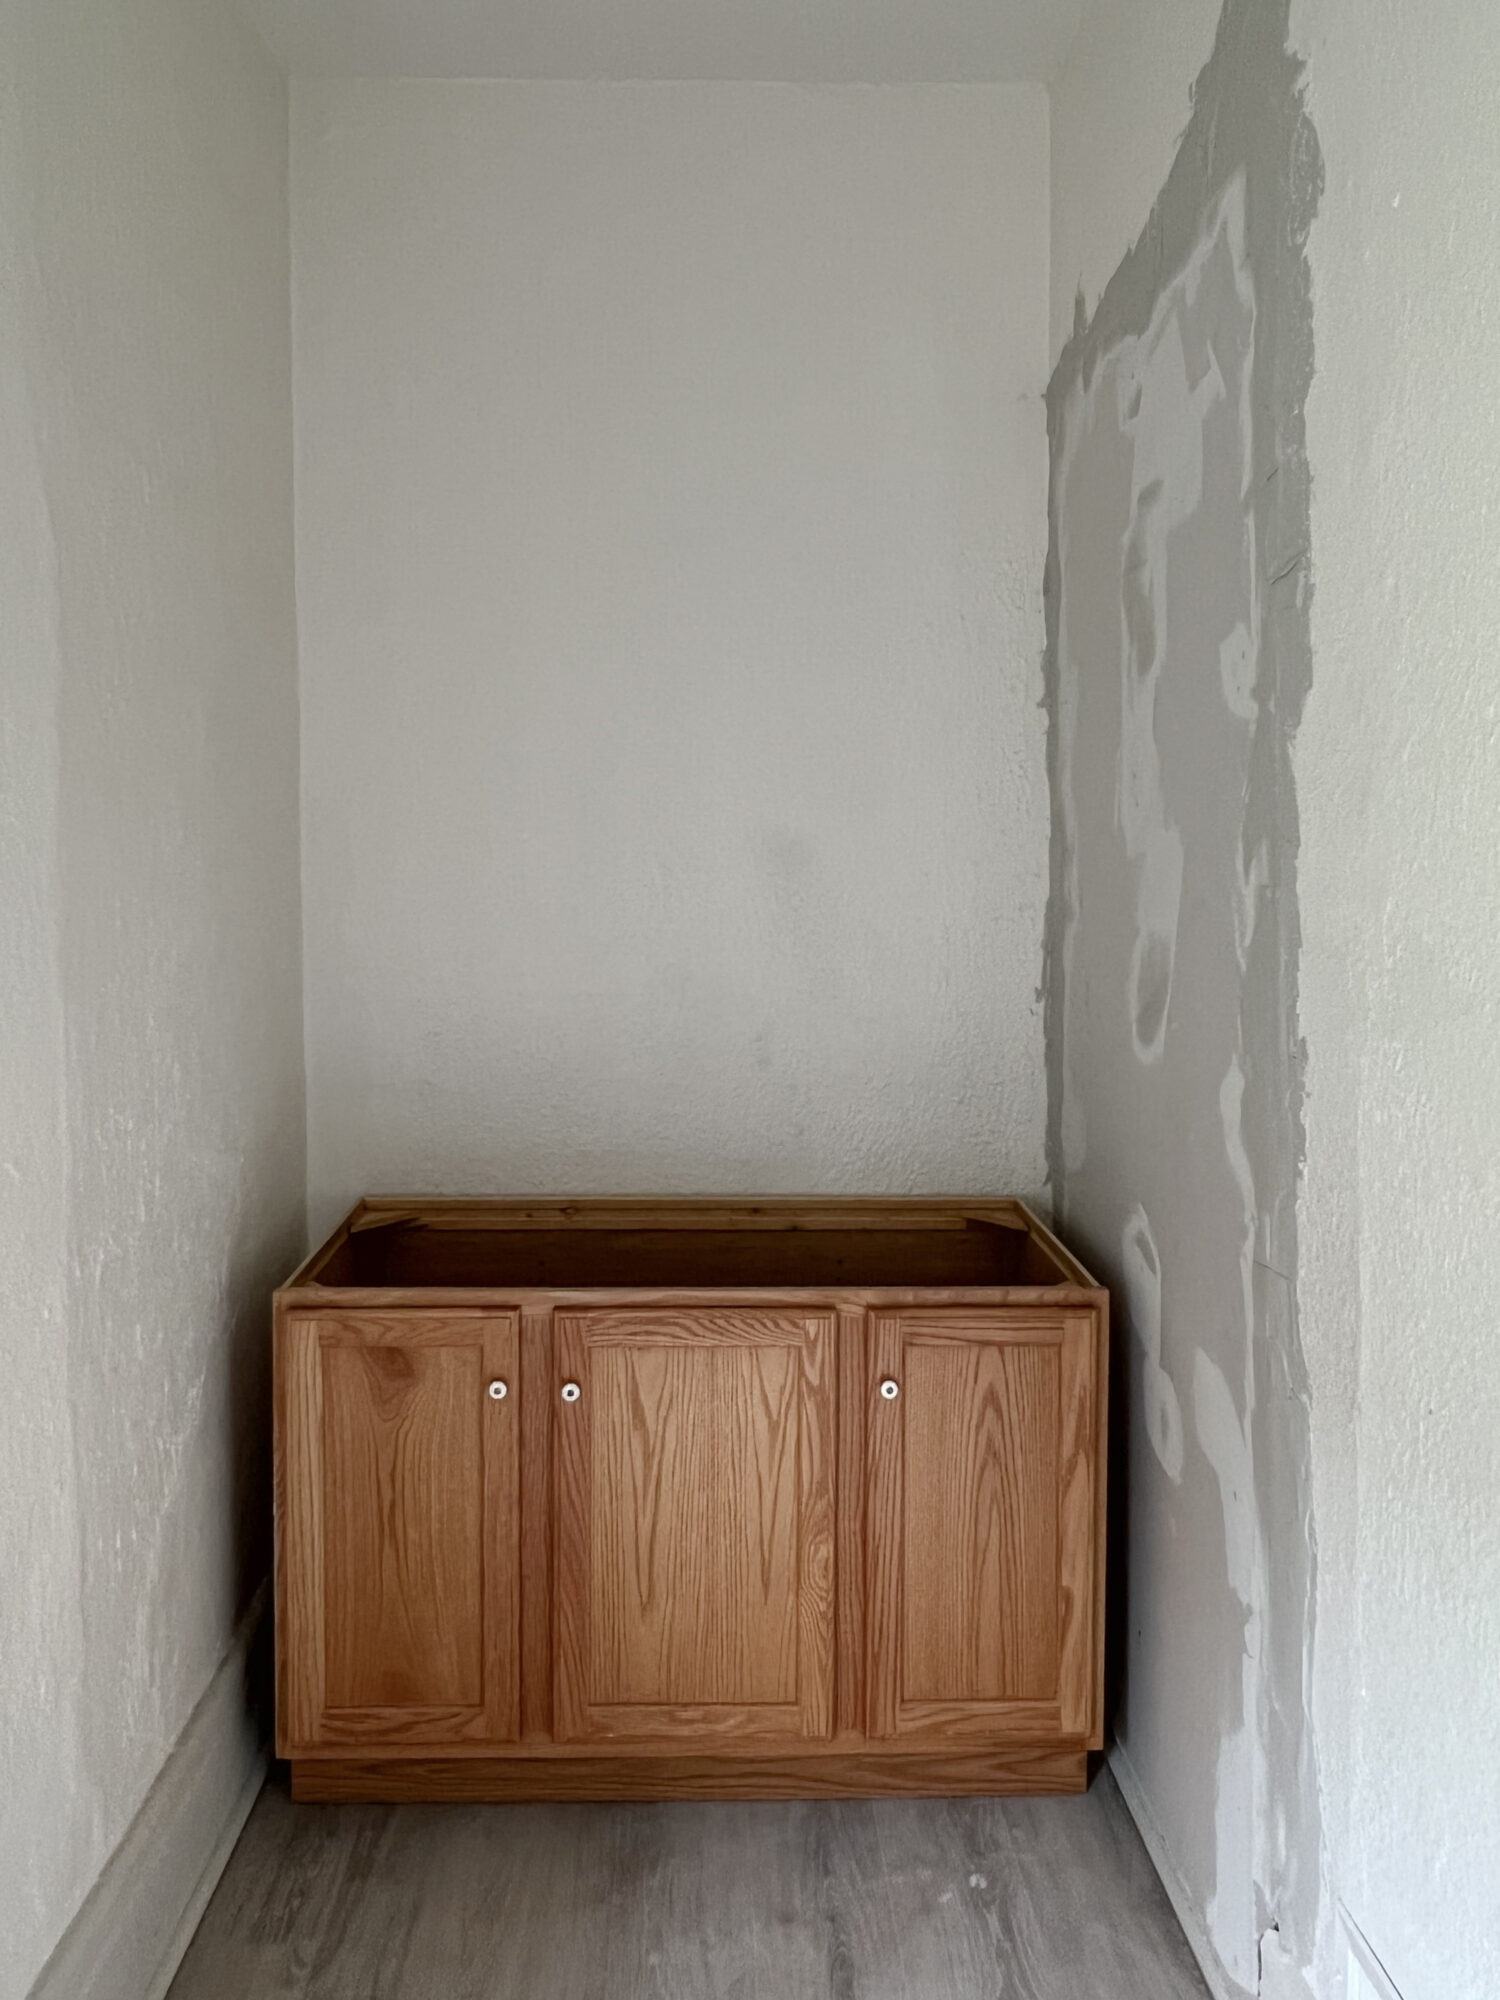
This is the 54″ wide space opposite the washer and dryer. First, we had to patch up an old doorway (that lead to nowhere), and retexture the wall (ugh, I am not a texture fan, but it was not in the cards to skim-coat them all). The vanity fit with a little wiggle room. I wanted to have fun with the little room, but also wanted to do it on a budget because it’s not a focal point in the home.

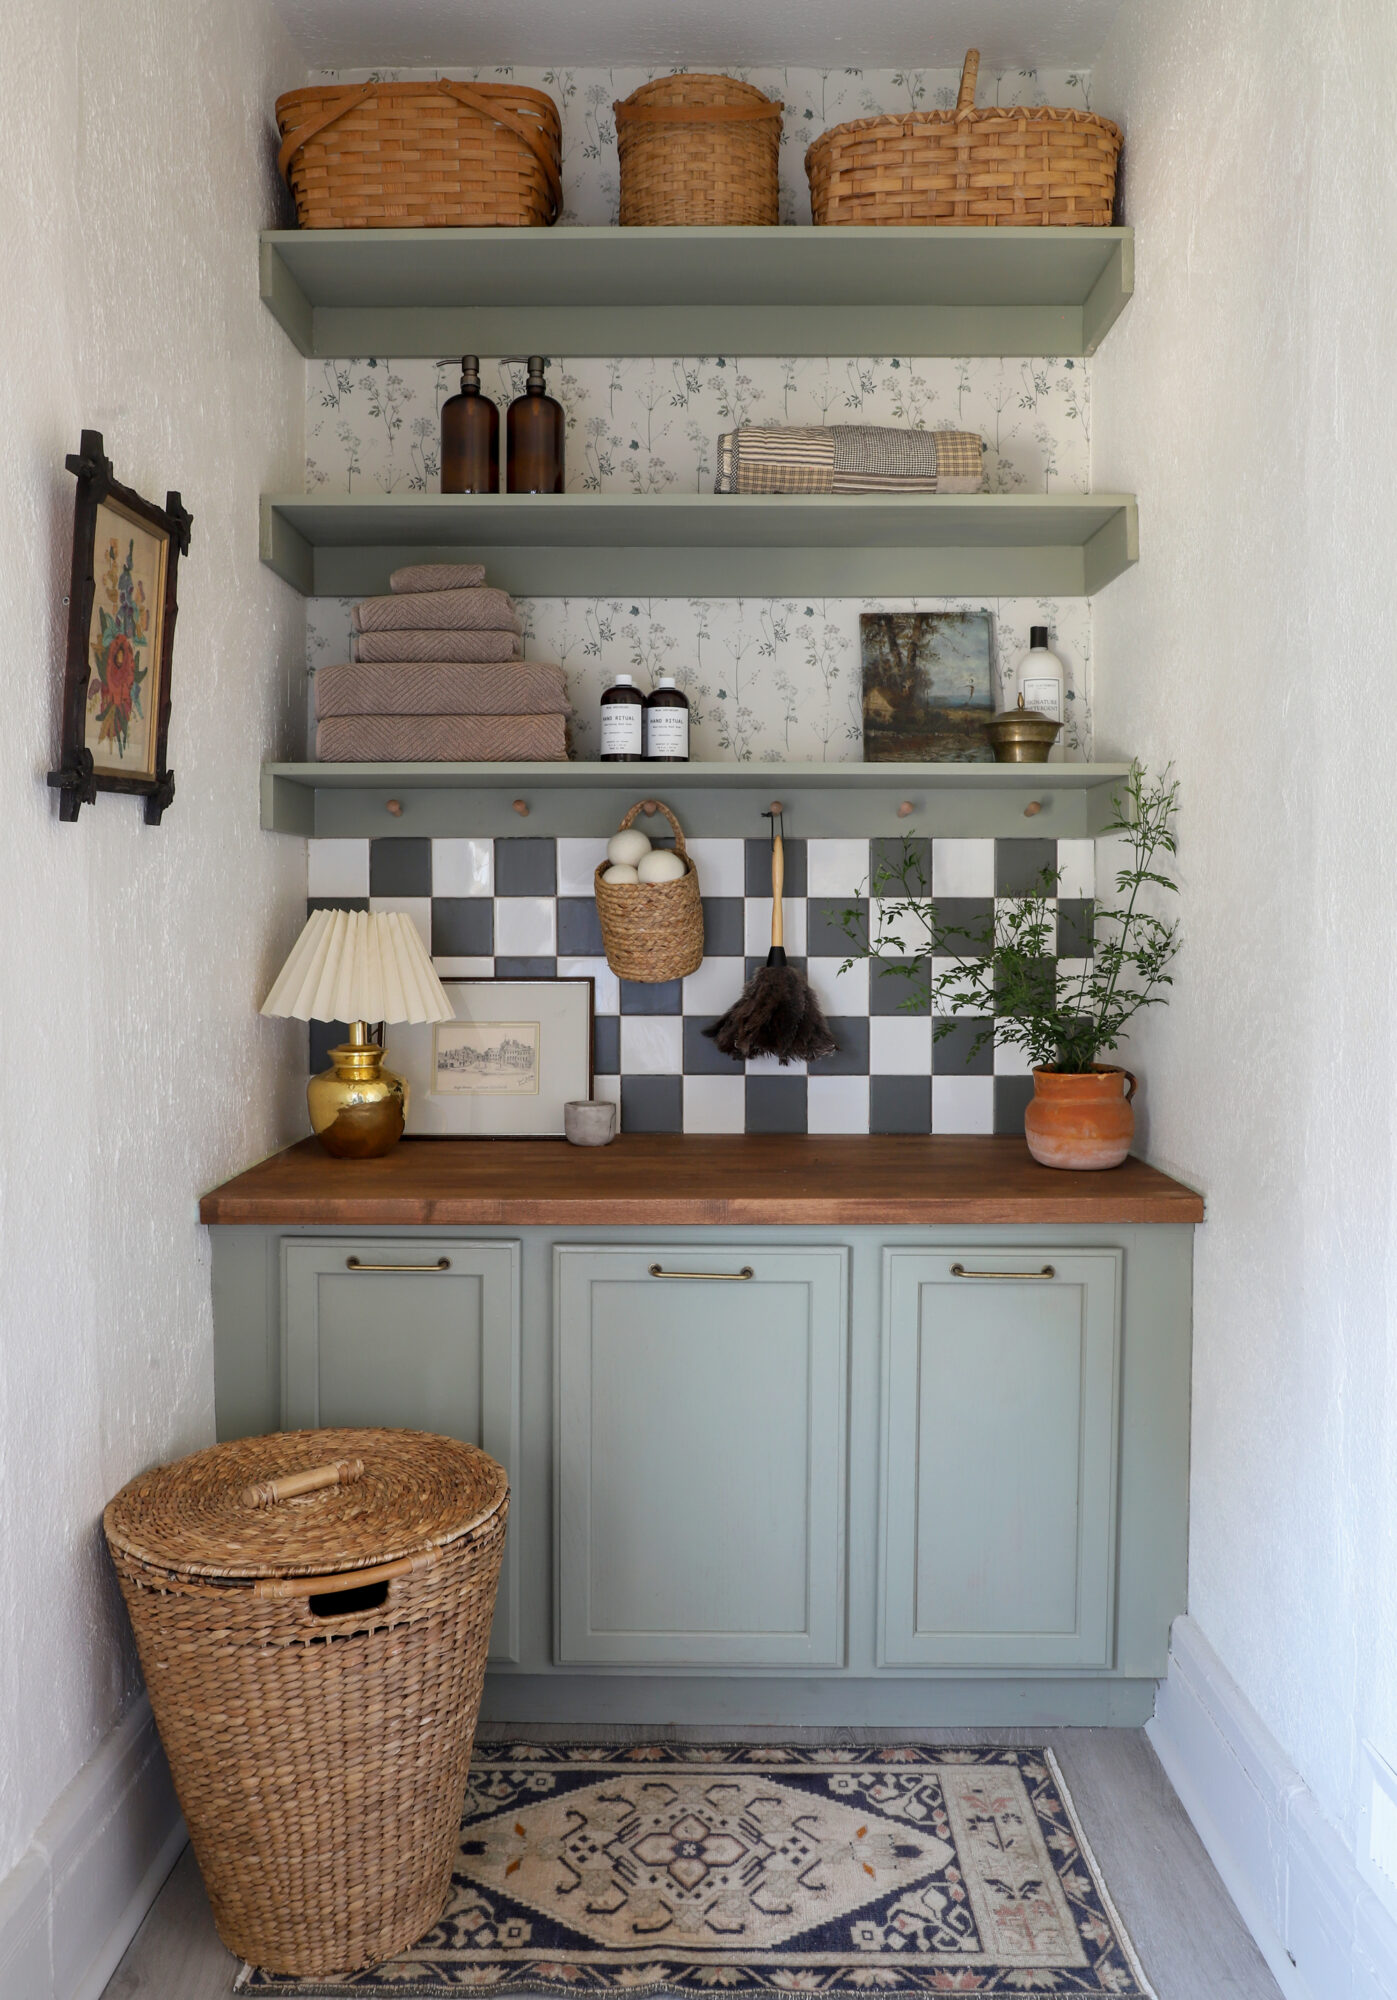
Isn’t it CUTE?!?! I painted the cabinets with Rustoluem’s Cabinet Transformations Kit in Tate Green. We used this system before in my Sister’s kitchen (step-by-step here!). The big perk is that you don’t need to sand the cabinets. You just clean/degloss, paint two coats of the color, and then apply the topcoat. Done! Do you have a cute laundry area? Maybe it’s time to create one!
Shopping
Tate Green Cabinet Transformations Kit
Olive Green Floor Coating Paint (for tile)
Lace Wallpaper
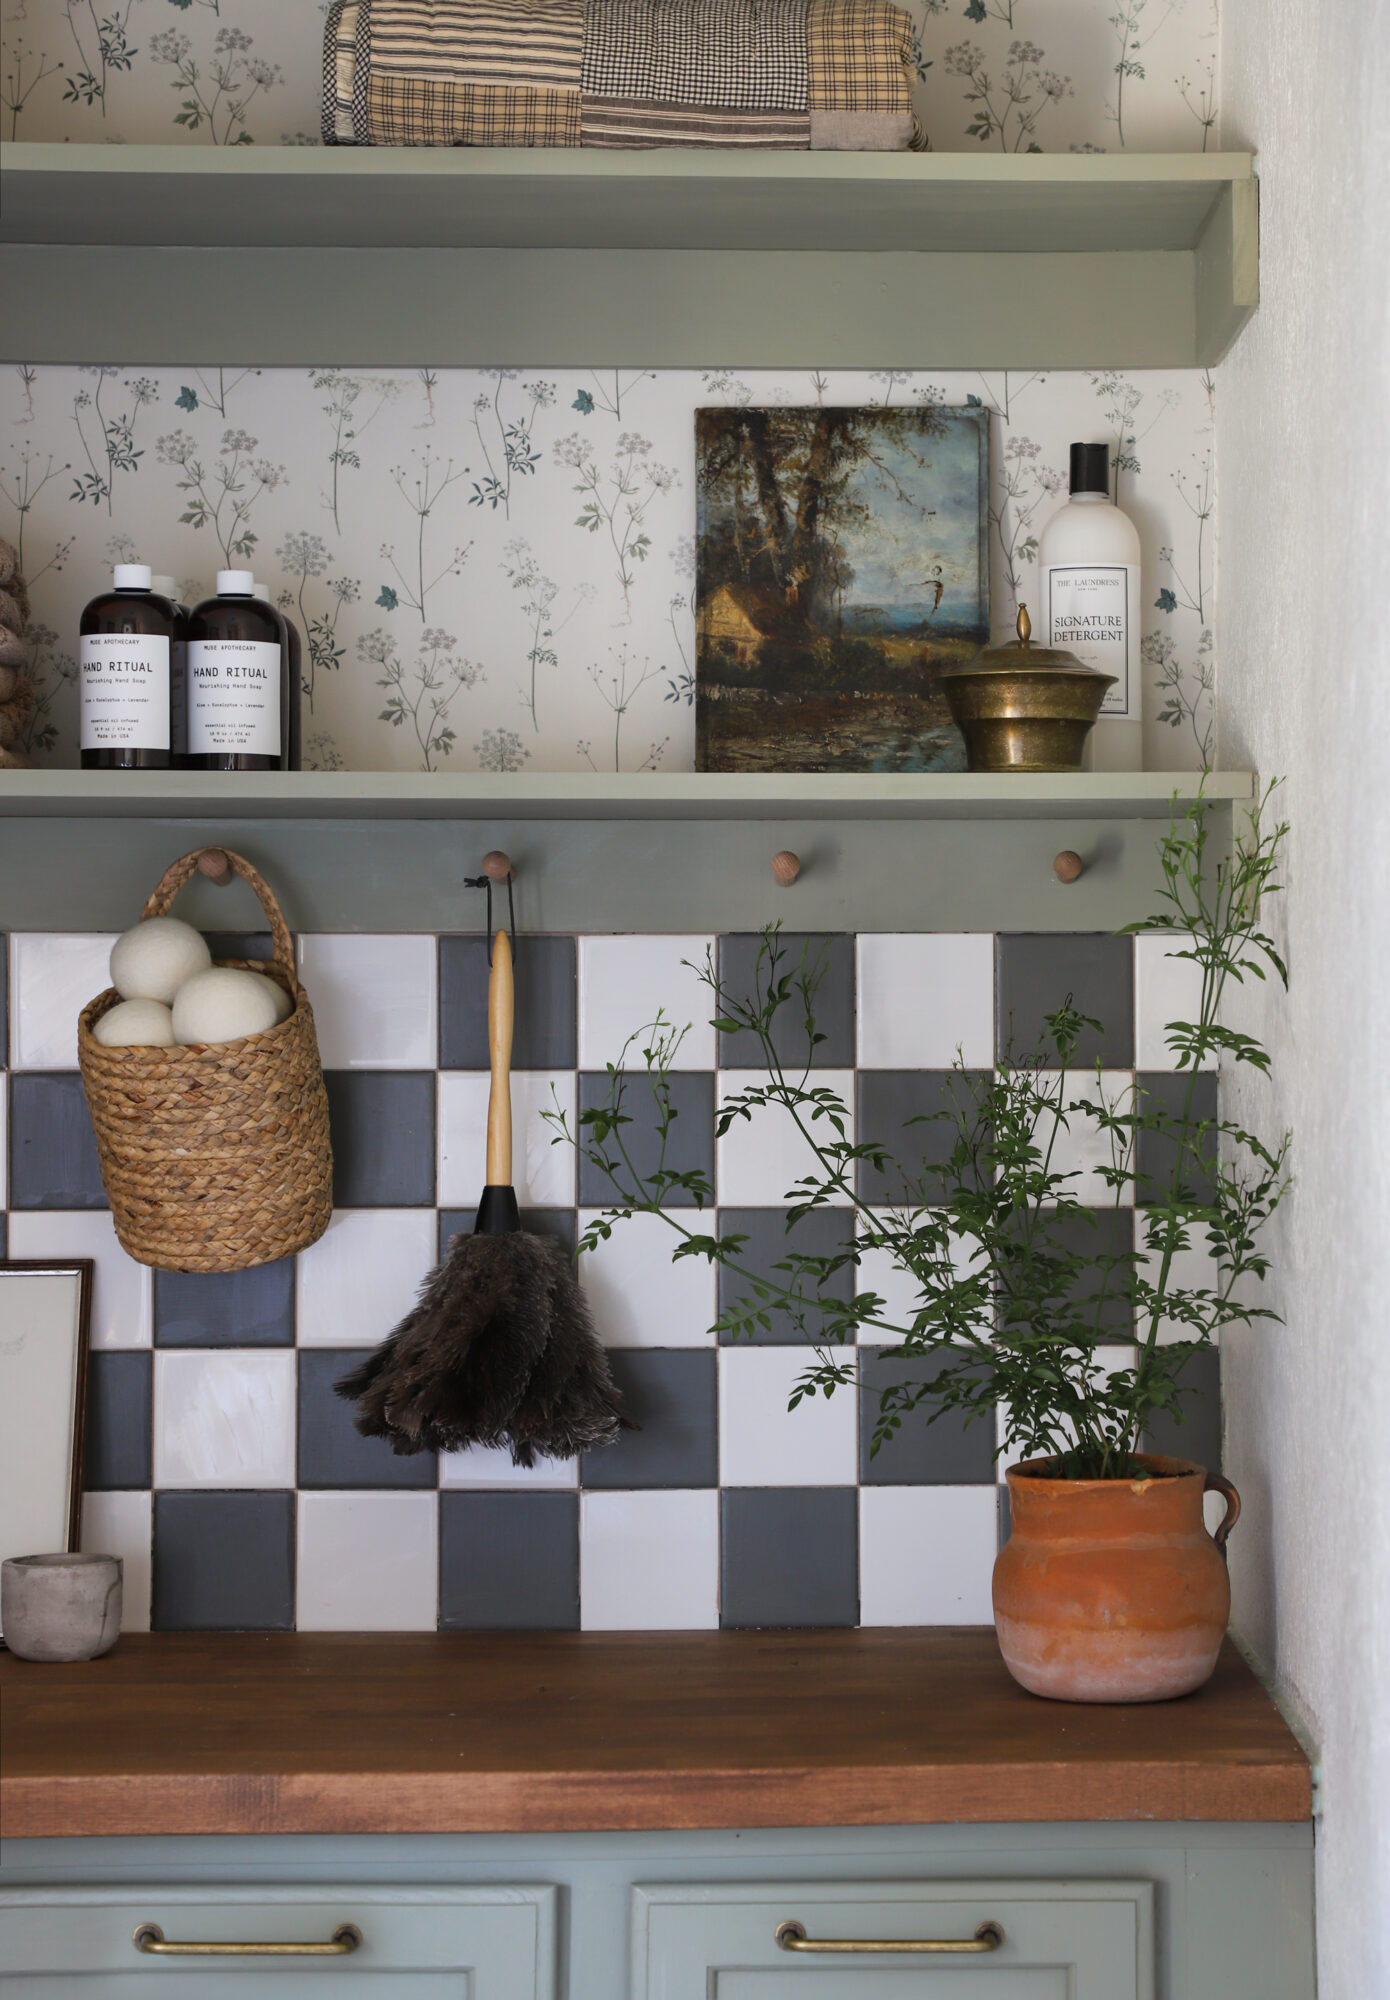
Hanging basket
Screw-in peg
Amber jars
Draw Pulls
Vintage: Art, Rug, baskets, lamp
DIY Painted Checkerboard Tile
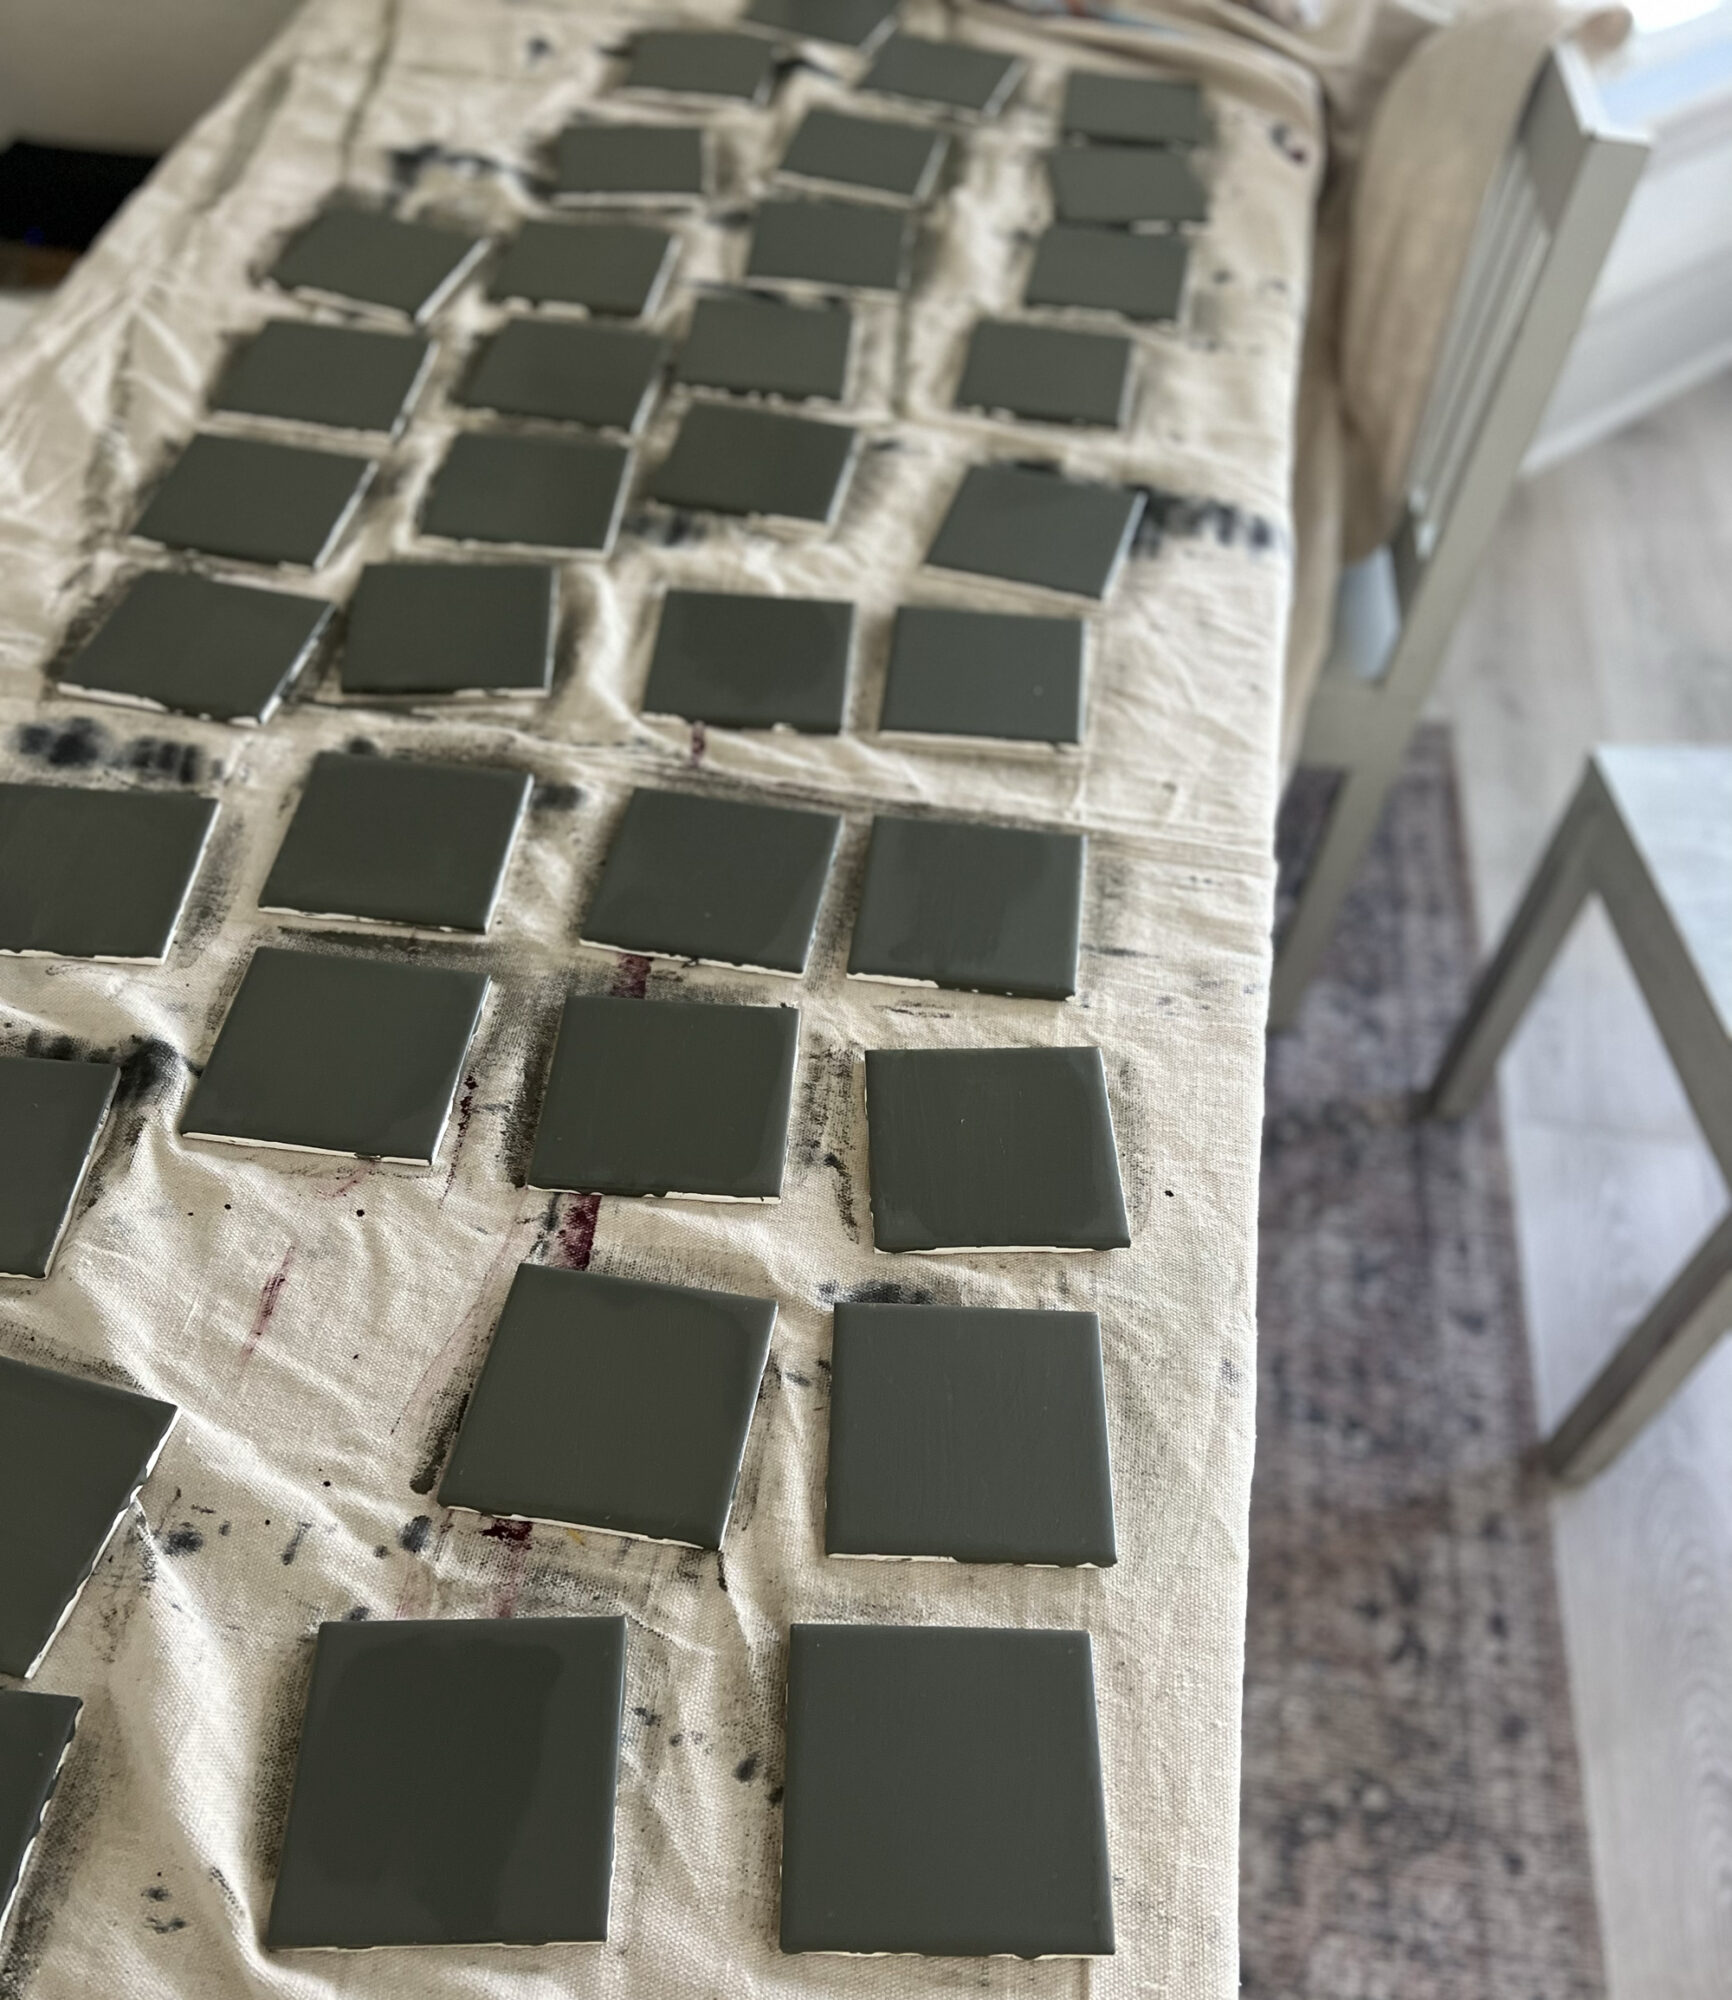
I have wanted to try this painted tile idea for a while. We started with a $20 box of white, square tile from Menards and painted half with Rustoluem’s Floor Coating Paint in Olive Green. I did two coats of paint, and then this is where I should have painted on the topcoat, but I waited until they were installed. Once I installed the tile in a checkerboard pattern, I should have sealed them and waited a couple days to grout….but ran out of time. As I expected, grouting the unsealed tiles pulled paint off of a few of them. Good news: it was easy to touch up the painted tile and seal everything at the end. Next time I know! And thats the fun of DIY; figuring it out. I AM SO happy with the final look, and it definitely got the wheels spinning for future projects!
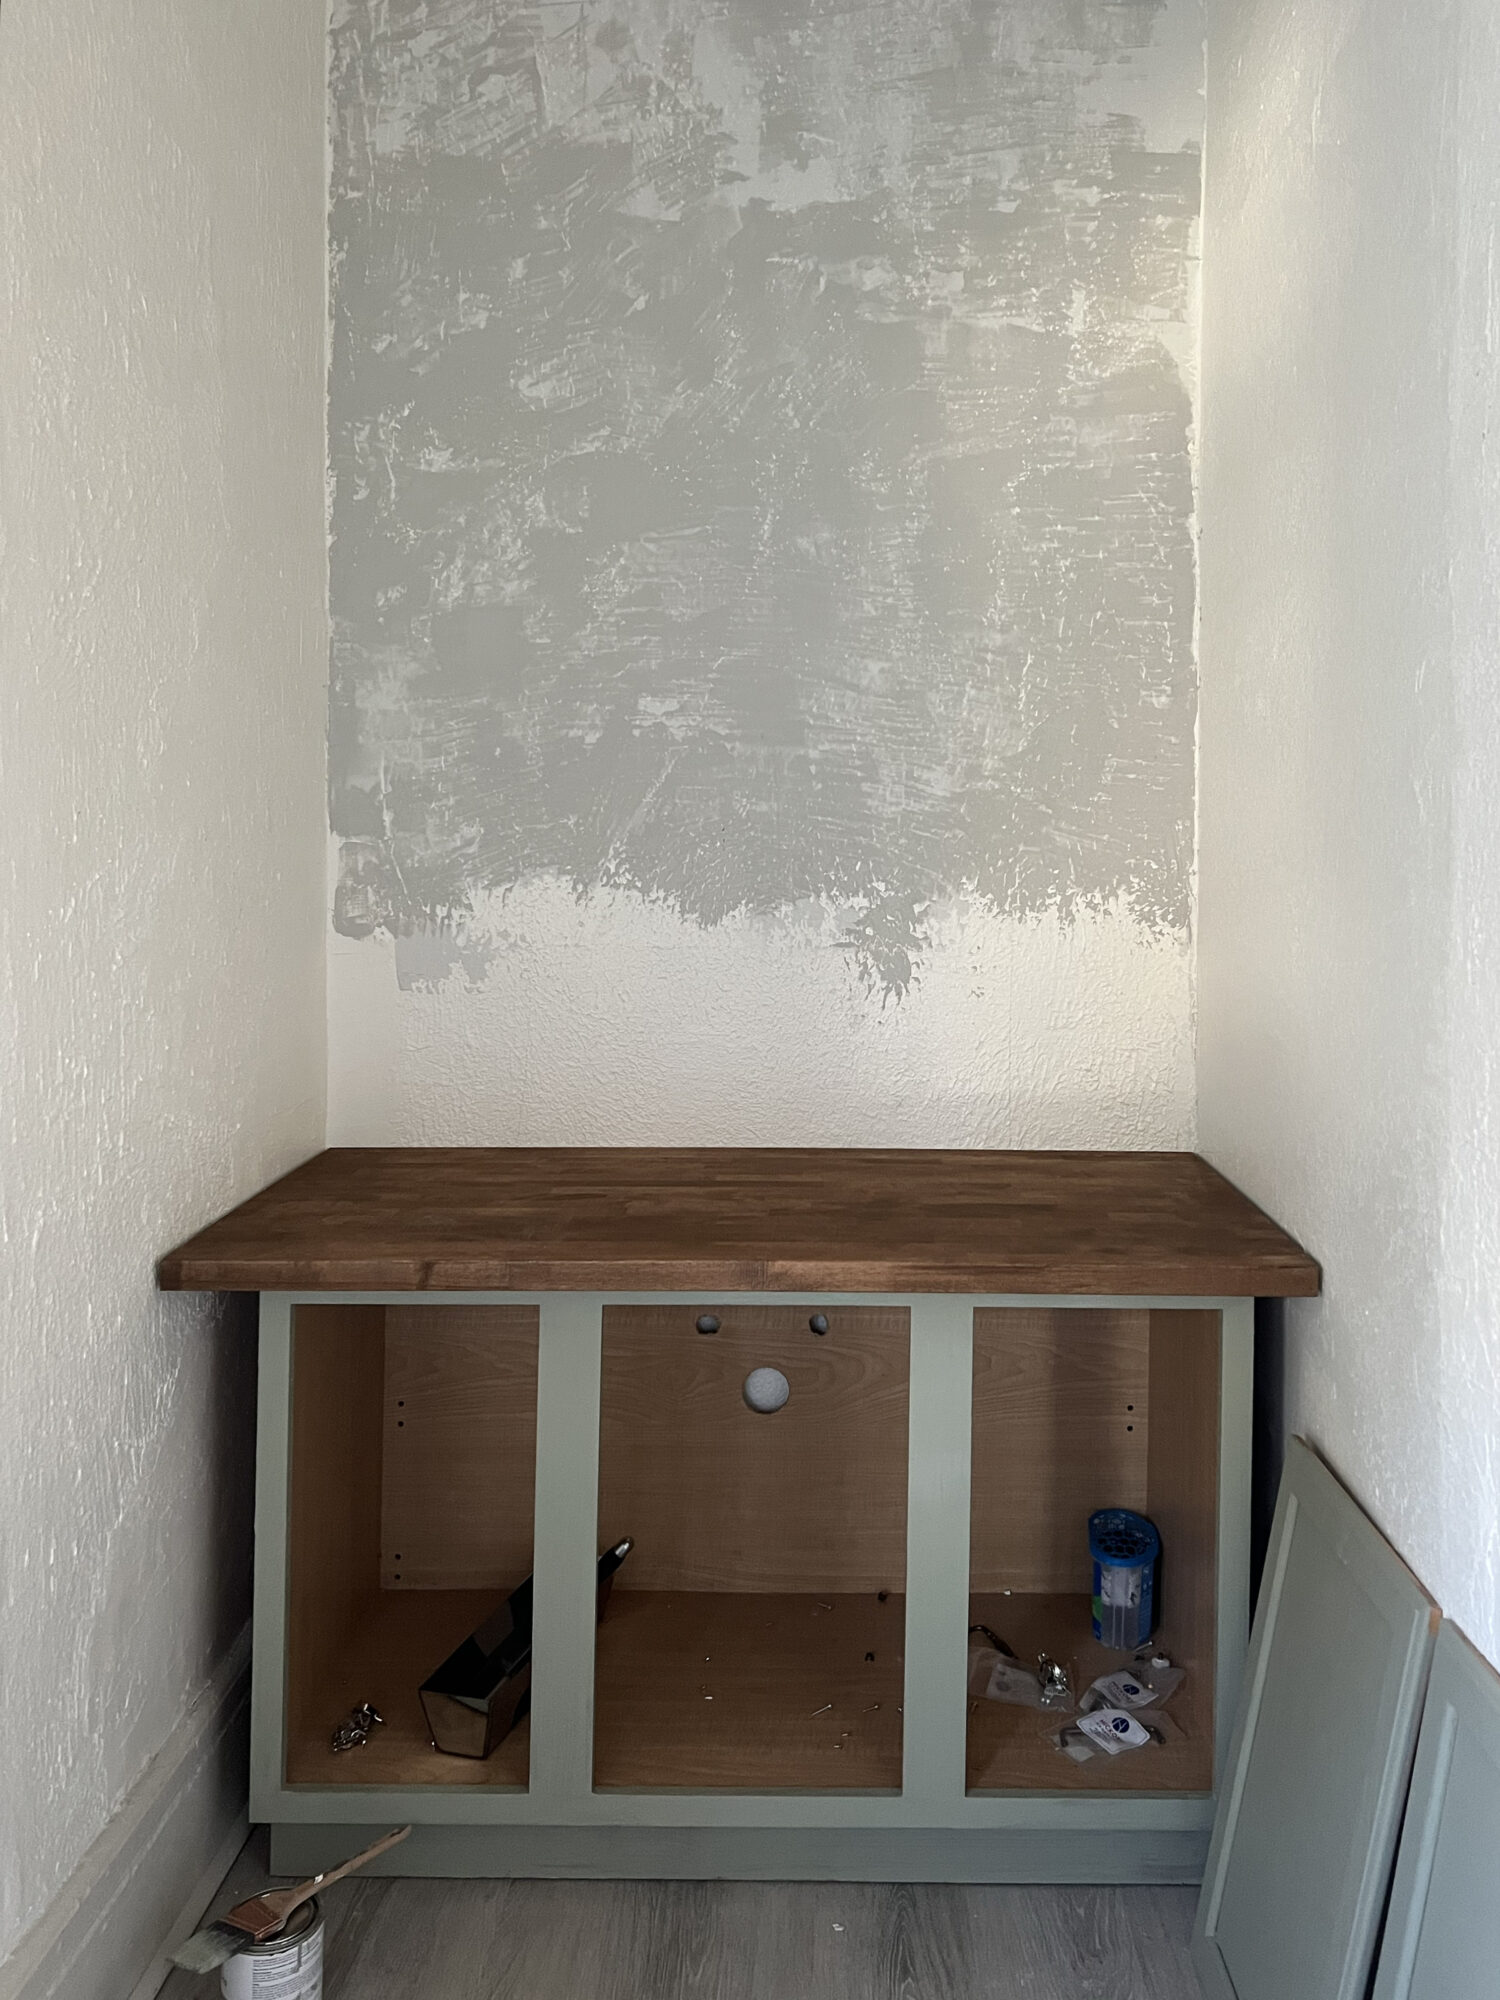
Skim coating for Wallpaper
The walls in this room have HEAVY texture, so I skim coated the back wall to apply wallpaper. Skim coating is covering your wall with a thin layer of joint compound to fill in the texture and smooth it out. These old plaster walls have layers of texture, so I needed two coats of joint compound to get it somewhat flat enough to hang traditional wallpaper with paste. Peel and Stick would not have worked because there still was some texture and it will not stick to the joint compound. I had leftover Lace Wallpaper from the show so used it to cover the wall above the vanity.
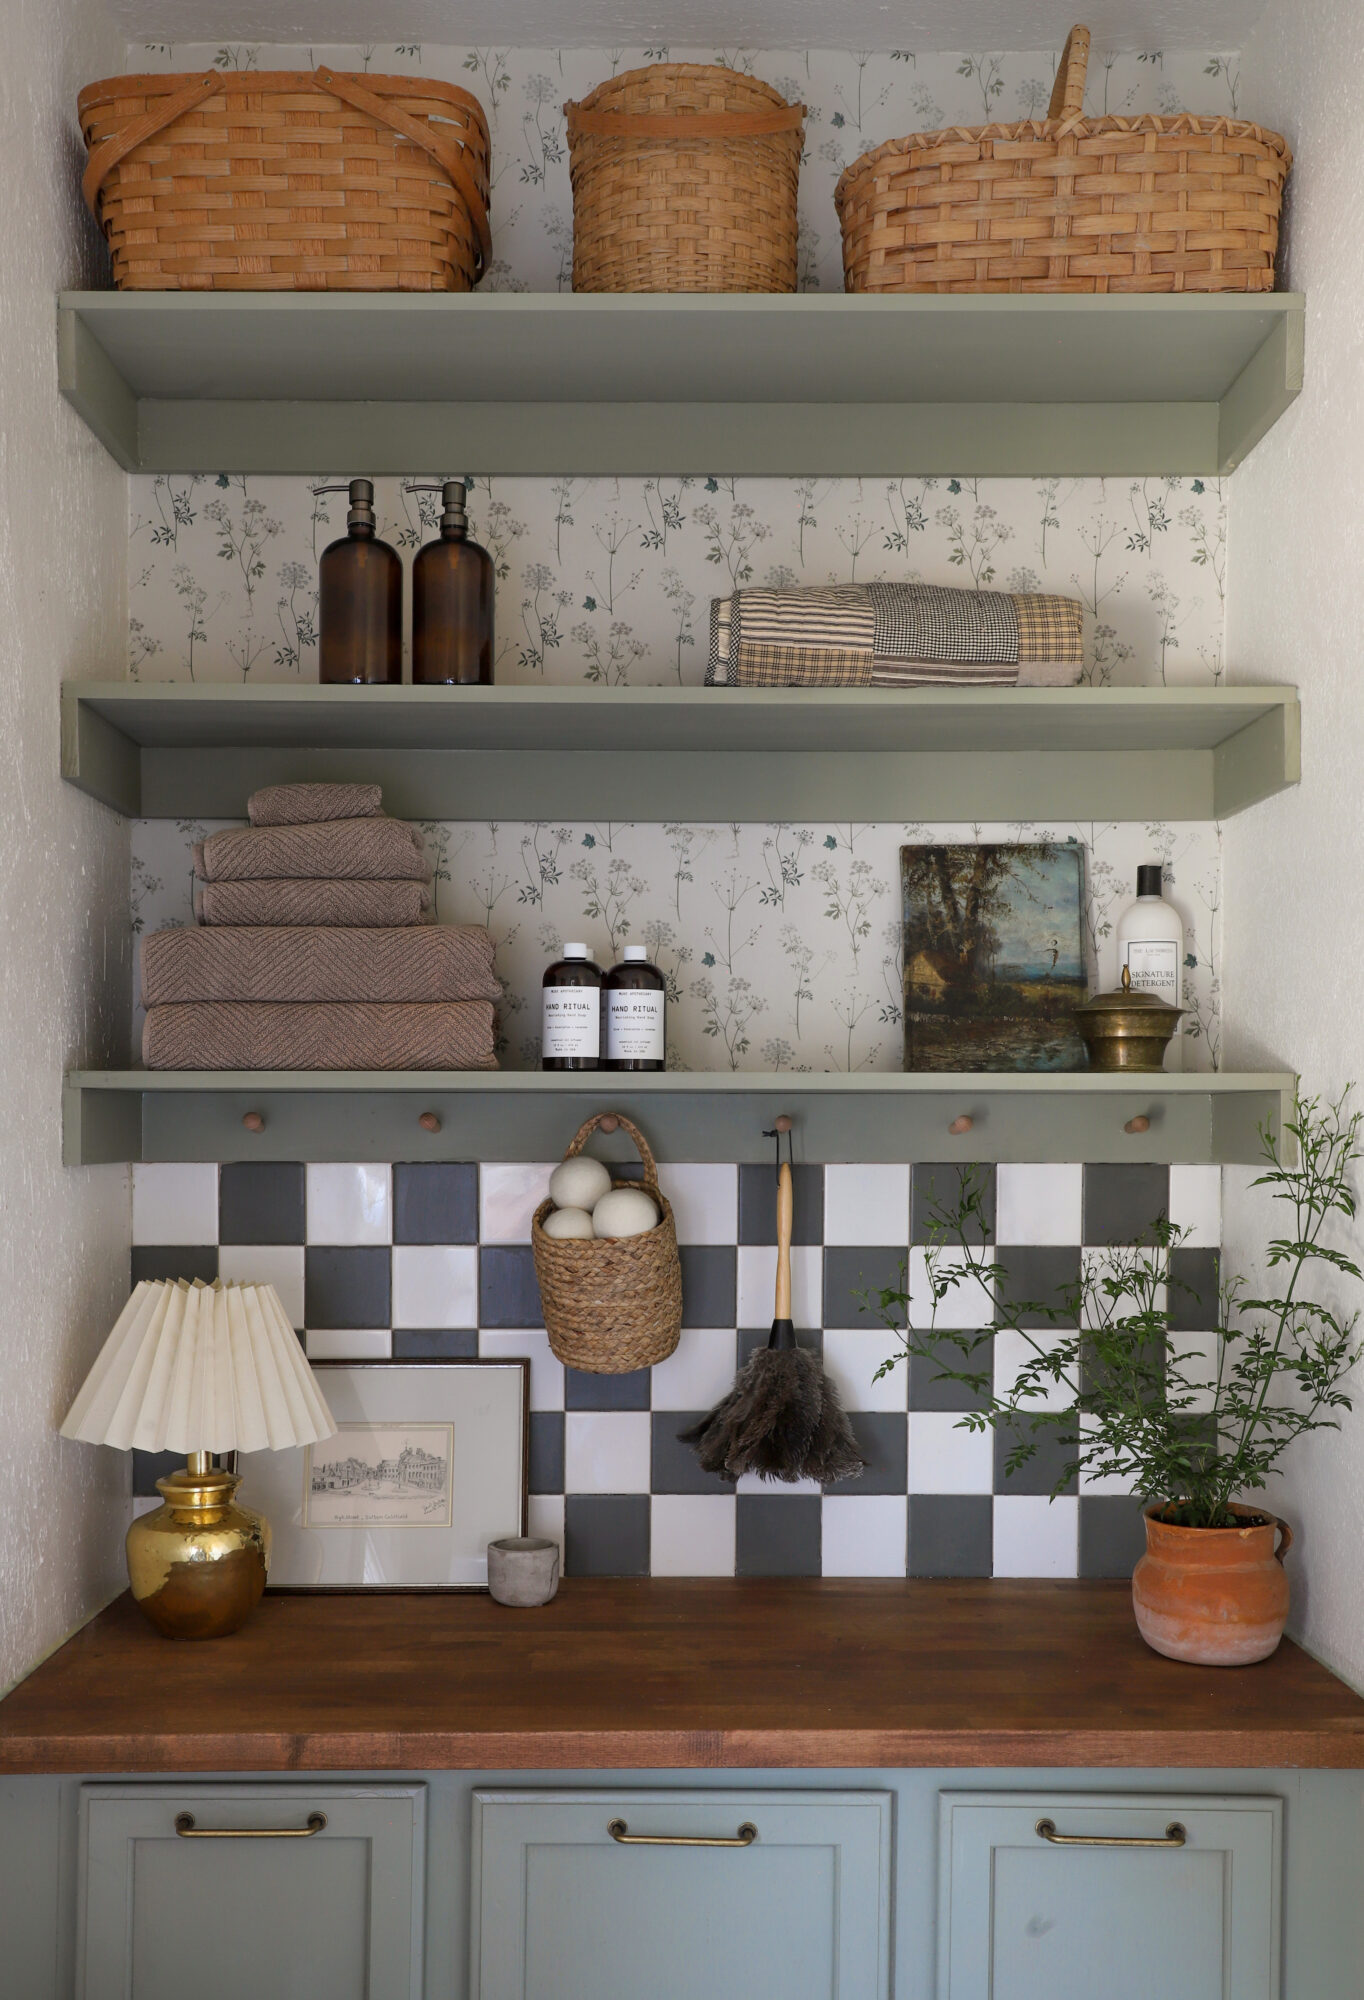
We used a birch butcherblock top stained with Early American, and the shelves are common boards (1×3 screwed into the studs to create brackets and 1×12 shelves). And we used scrap wood to fill in the gap between the wall and the vanity.
I filled in the the old cabinet knob holes and put new handles at the top to look more like bin pulls.
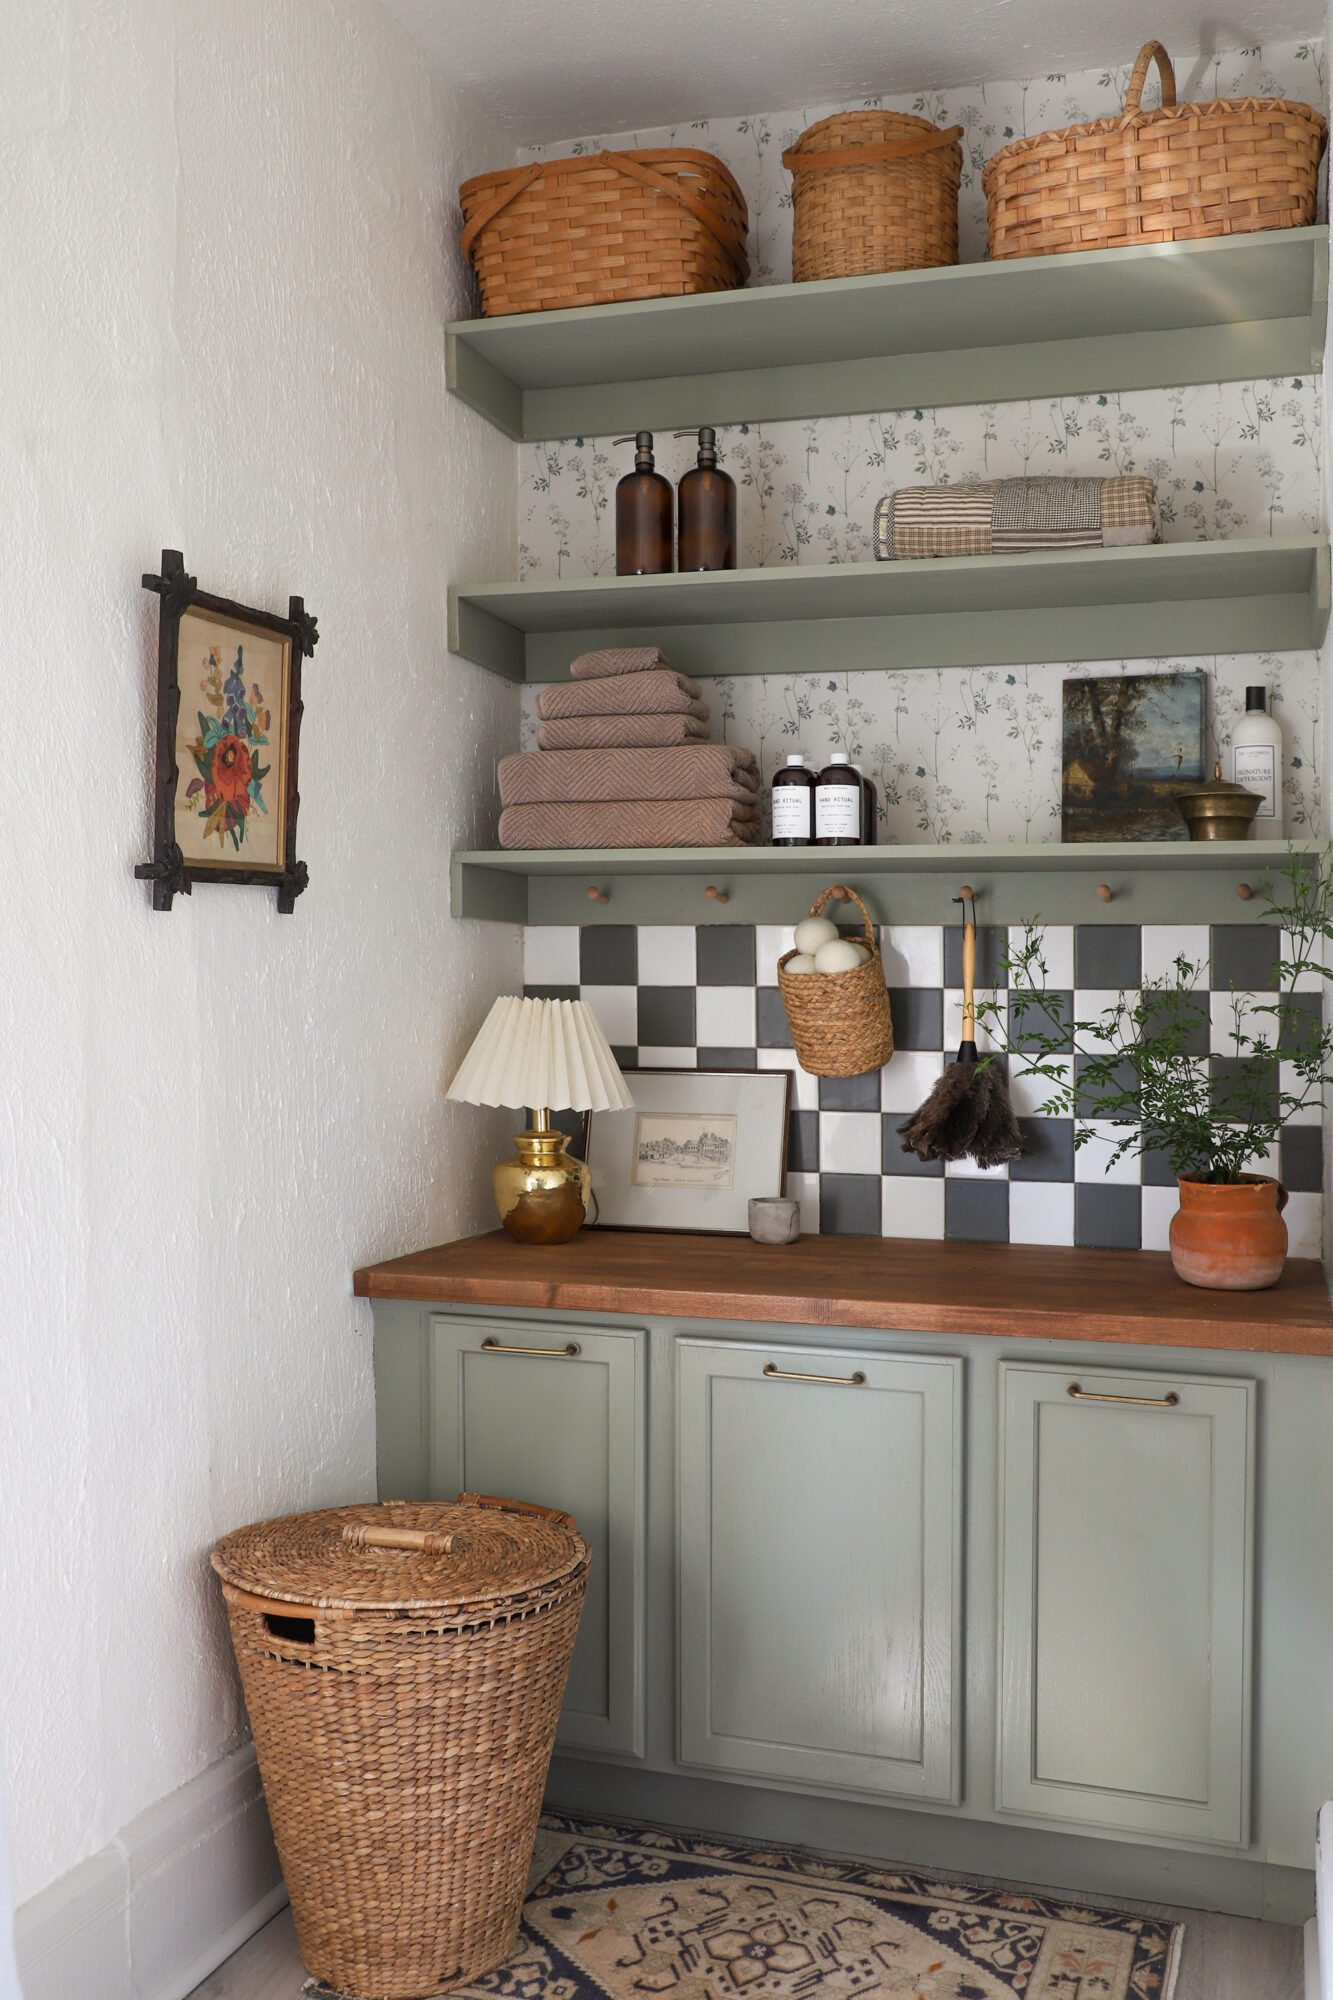
Styled up up with some vintage finds, and done!
EXPLORE MORE: Before & After, DIY PROJECT


