Duplex Kitchen Makeover | Bold Backsplash & Wood Planked Ceiling
Before & After, Home Inspiration, Room Makeovers

A Bold Makeover for the Duplex Kitchen
The duplex kitchen finally feels complete! I went bold, oh so bold. Mr. Yolo and I started the Duplex renovation four years ago when I was pregnant with our first daughter, and by the time we got to the kitchen renovation I was nine months pregnant, and I was SO fatigued mentally and physically, so I had a hard time really piecing together a cohesive design for this kitchen. At the time it was good enough, and we’ve lived with the “good enough” for four years. It has served us well as a short-term rental, and we get so many kind comments on the home, however, it has seen some wear and tear, and we decided it was time for a MAJOR refresh!

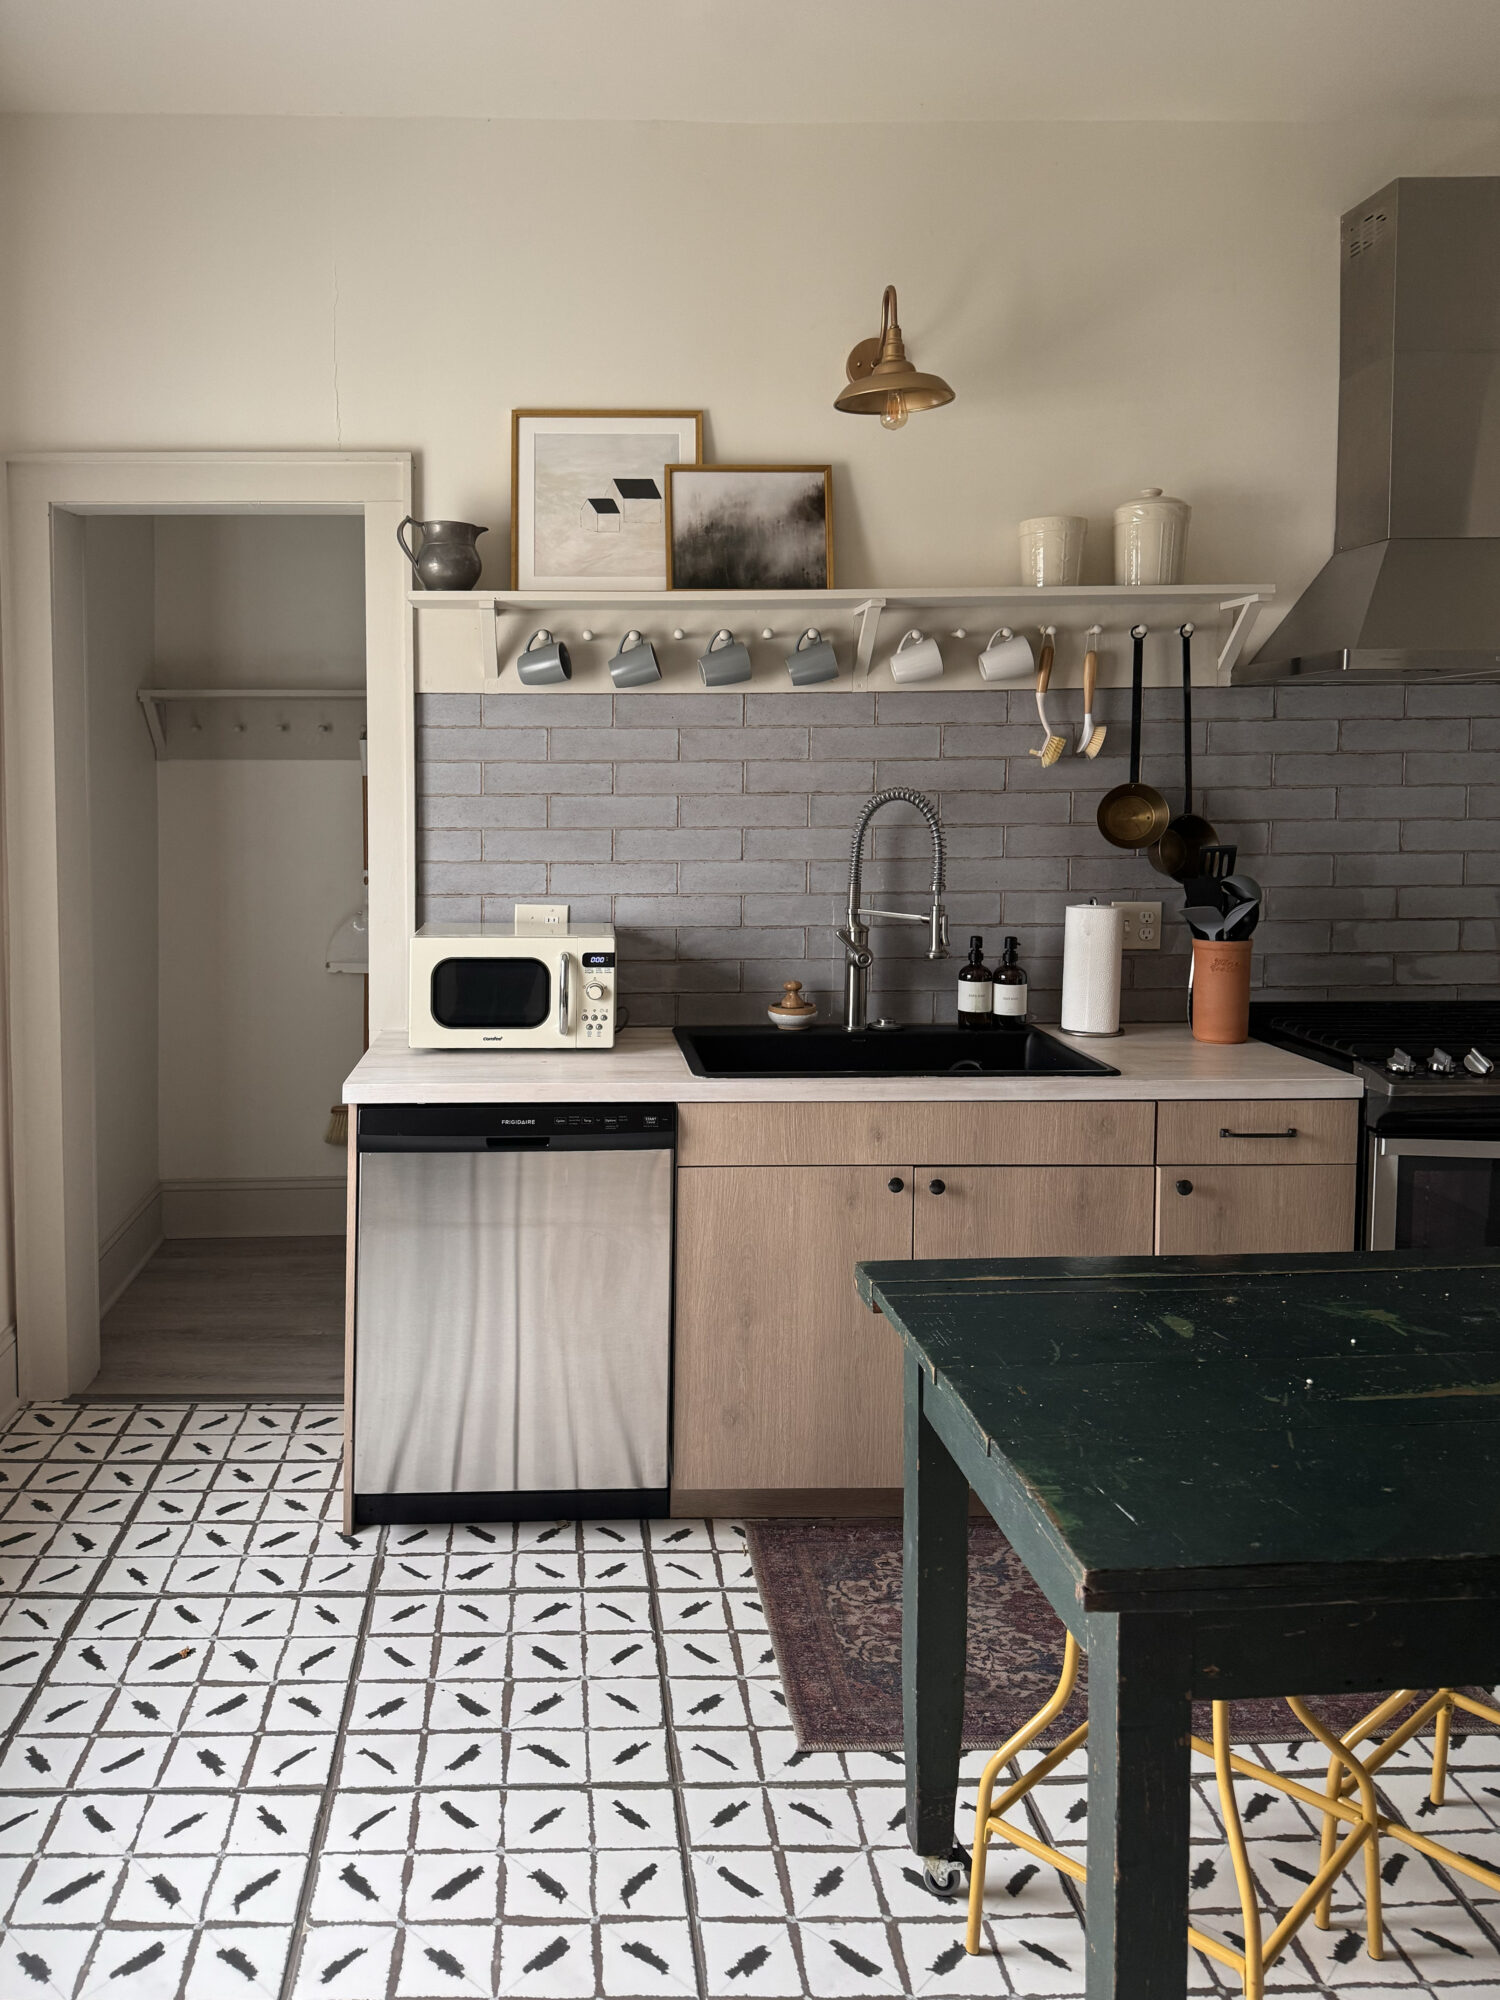


One thing that always bothered me about the kitchen was that the tiles did not really work together. I love the previous backsplash tile (Annie Selke Artisanal Pearl Grey Ceramic Wall Tile), I actually have it at our Barnhouse, but the color I picked for the Duplex didn’t quite work with the beautiful Annie Selke tile (Annie Selke Ikat Black Porcelain Wall and Floor Tile) on the floor. The floor tile is such an amazing statement, and I wanted something that worked with that, so I got the idea of changing out the backsplash. I got Mr. Yolo on board with ripping out the backsplash, which would be quite an undertaking, because there were some other updates that needed to happen… I had whitewashed the butcher block countertops during the initial renovation, and as you may have guessed, that did not hold up great against wear and tear. They were stained by coffee and wine over the years, so we needed to take out the countertop and re-stain them. I figured while we were doing that, it was a great time to rip out the backsplash and put in a new one! AND while we were doing that… why not completely design this kitchen to feel more cohesive, and how I always envisioned it to look!

We called in our favorite crew (you may recognize them from Makeover by Monday ;)), because we needed to complete this entire renovation in just one week, in-between guests. Mr. Yolo and I had a couple prep days, then planned for the bulk of the work to happen in one day with the whole crew. We had Alan, Michael, my father-in-law, Roger, David, our project manager, Cassie, all working to get this done as quickly as possible. And while we were all stepping over each other, we GOT IT DONE! And she’s a bueat. What’s better than seeing a vision come together in just a couple of days? I’m so thankful they helped me with it! I always love working with the crew. If you want to watch the five-part series over on Instagram, you can see tutorials and behind-the-scenes on the one-week renovation in Part One, Part Two,Part Three, and Part Four!

The Tile
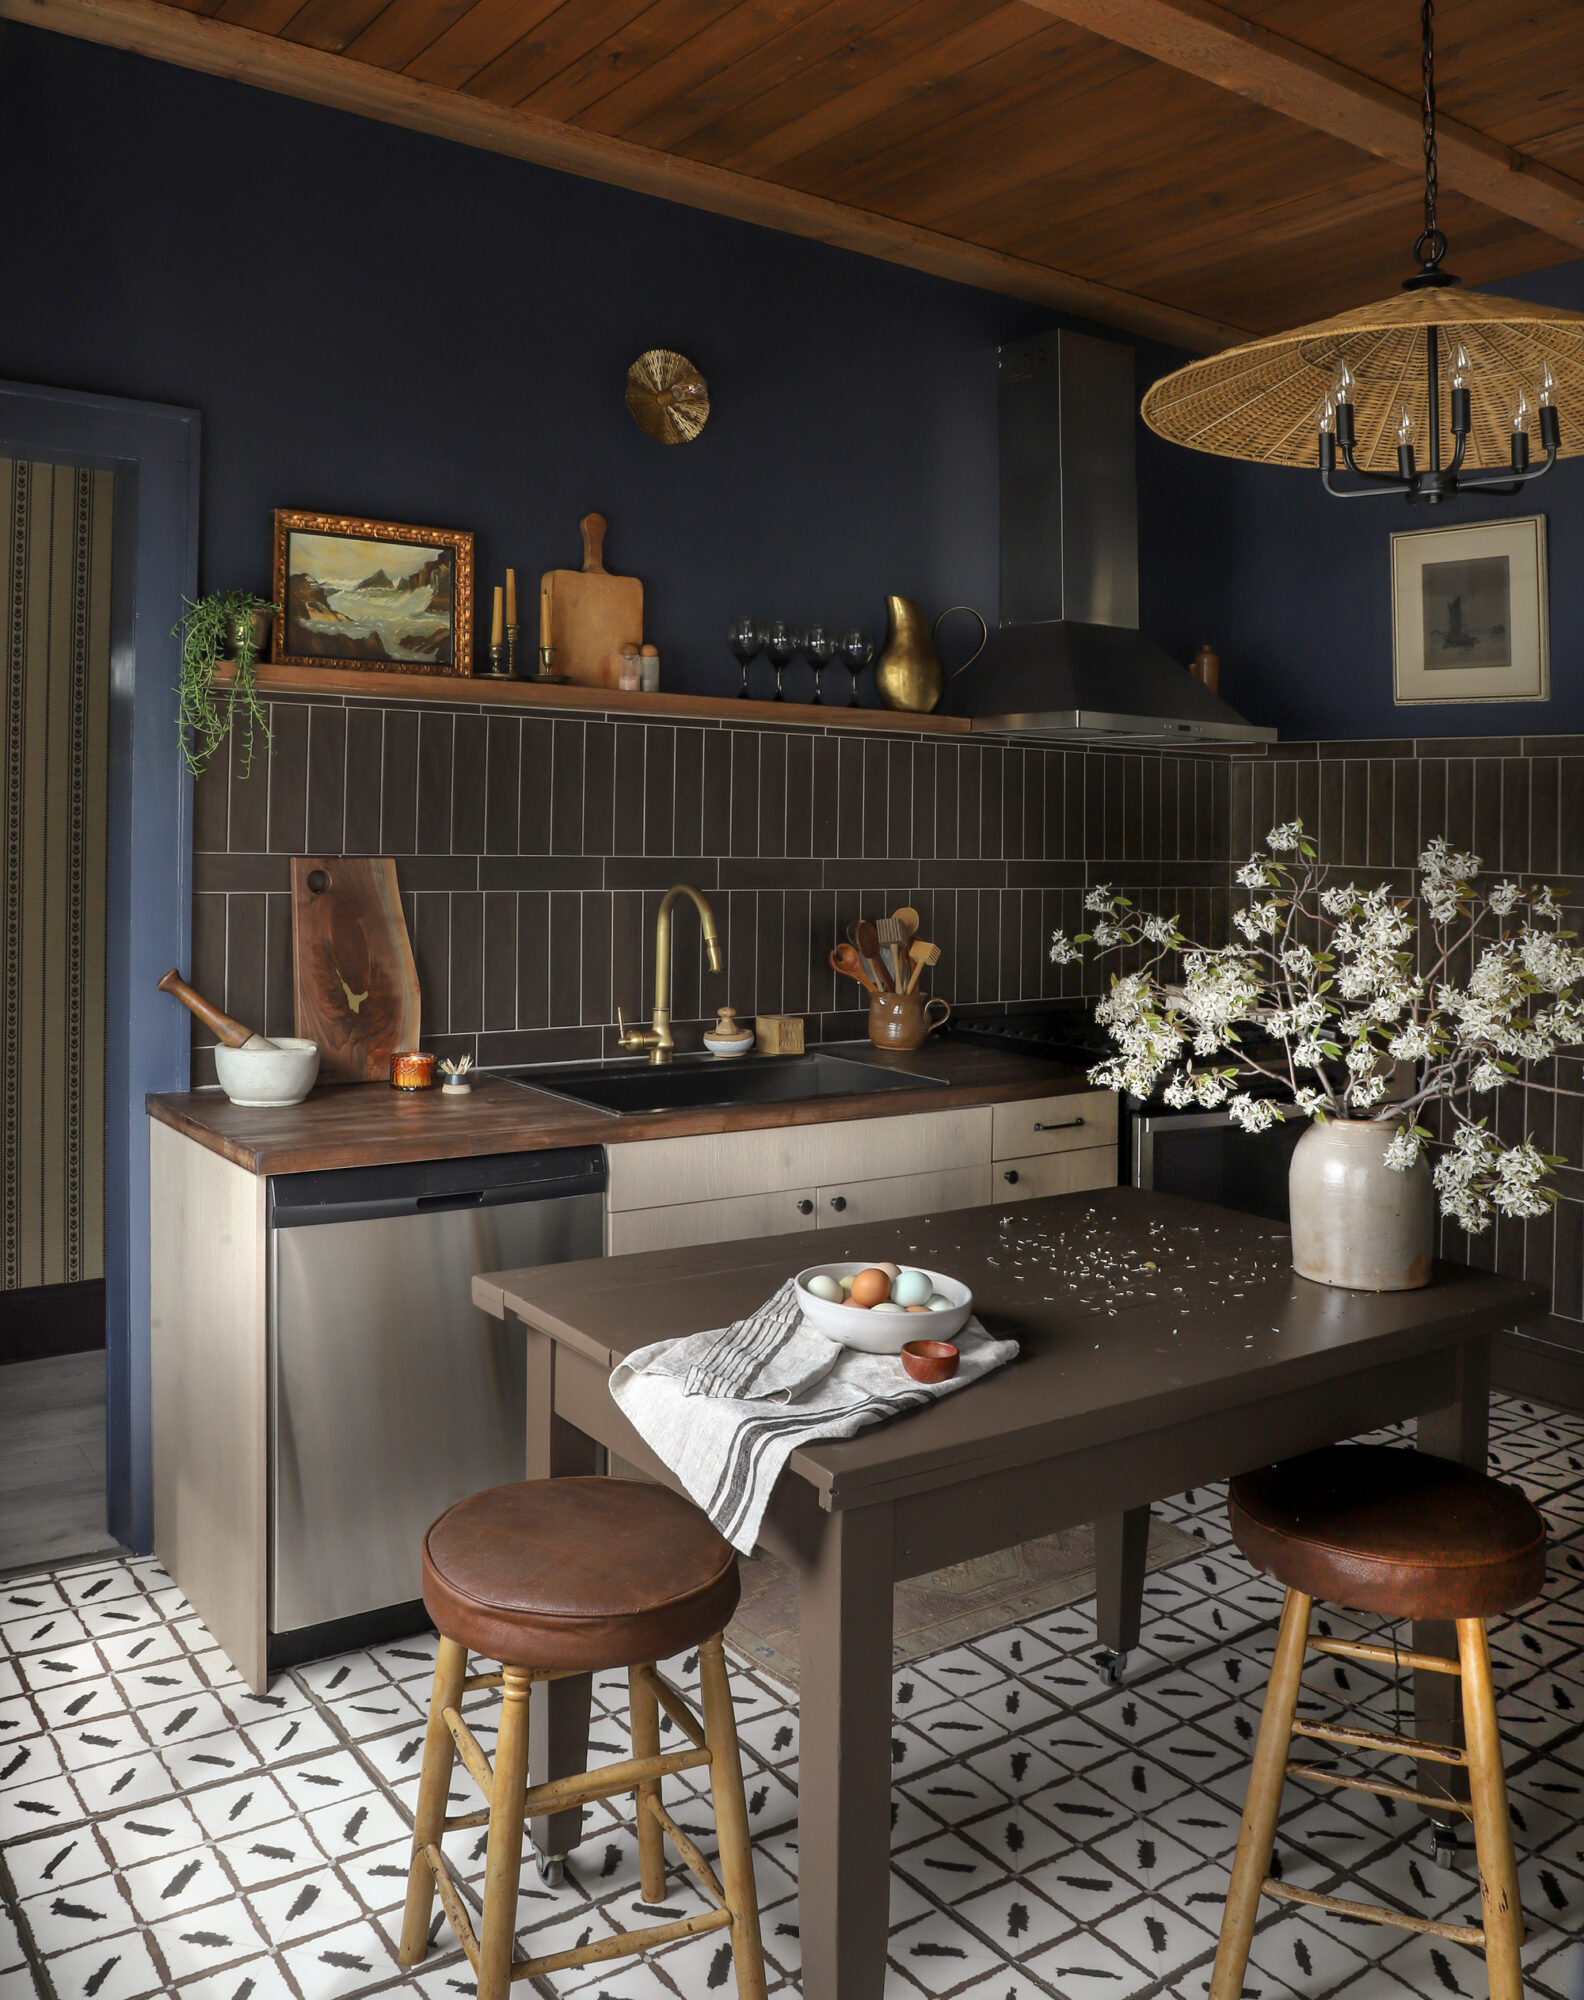
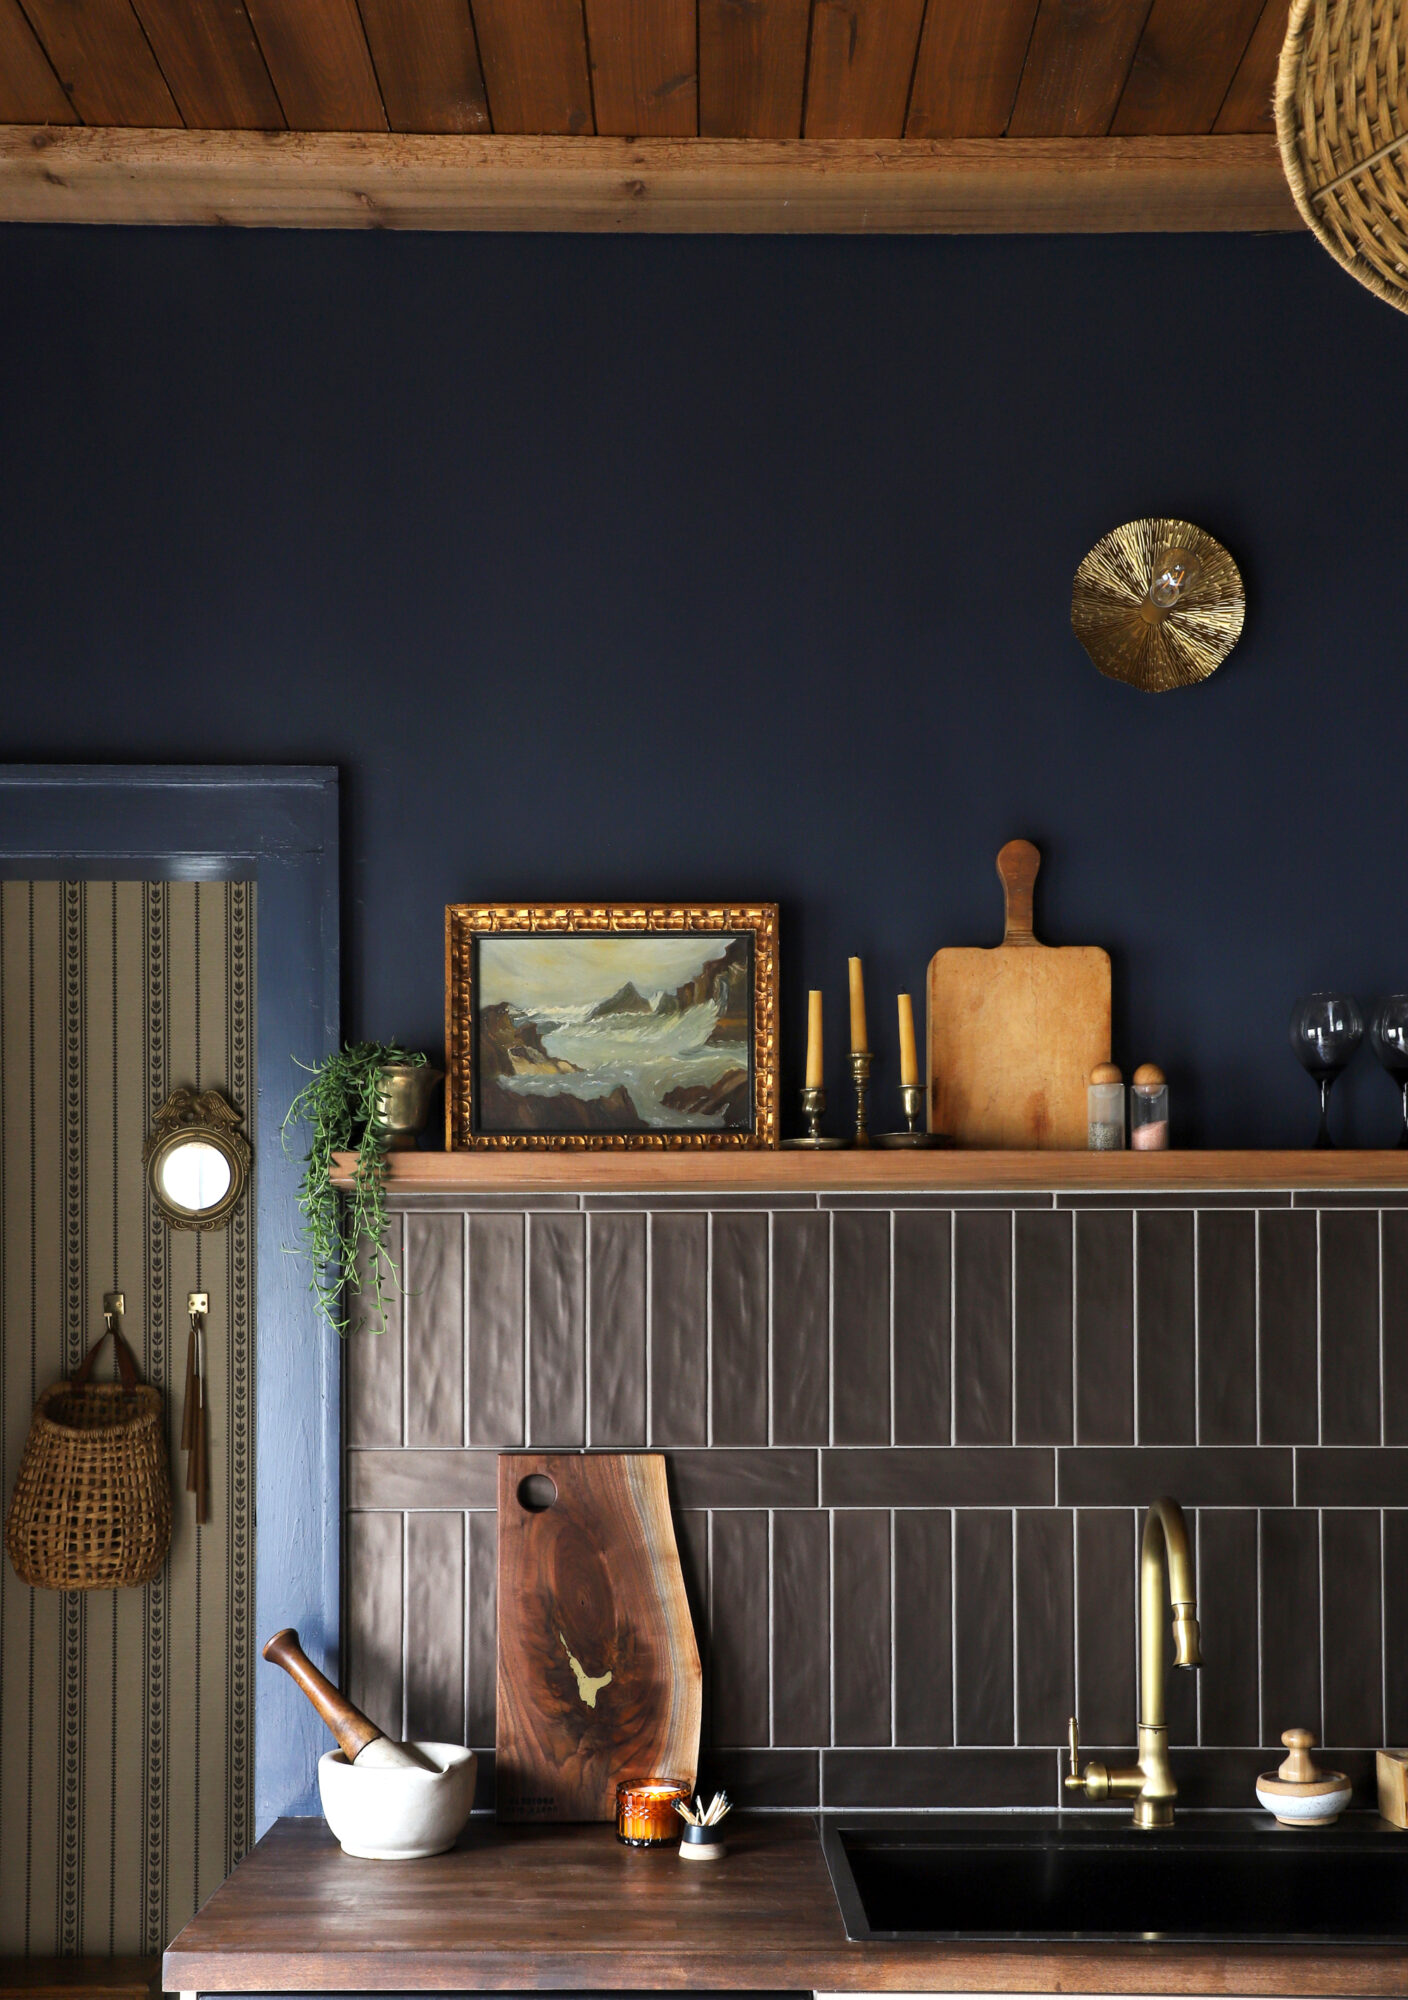
I love the floor tile so much! And I loved old wall tile too, but they just weren’t working together, so I brought the floor tile into The Tile Shop, and played around with a couple different options (link Reel 1 here).. I was debating if I wanted to go dark, or do something that kind of picked up the whiter lighter tones in the tile. I’m in a bold phase right now, so I decided to pull out some of the brownish copper tones of the floor tile and go in that direction. I found this beautiful tile called Aurea Bronze Ceramic Subway Tile, and I love that it had a shimmer to it because when you’re working with a dark tile, I love something that reflects light so it doesn’t suck all the color out of the room. Instead, it bounces light around and feels bright even though it’s a dark color. I love this tile and it’s a great price point! We spent under $500 for all the backsplash tile, including the tile that went all the way down the wall. I wanted to add that just because I felt like it created a more cohesive look in the kitchen.

Choosing a Tile Layout and Pattern
One thing I like to do when working with subway tile is come up with an interesting pattern to really elevate the look. I decided to change it up and do a different pattern than I’ve ever done before: Vertical standing tile with horizontal on the top and on the bottom. I just love the visual interest this gives, and since the tile does have a bit of that handmade movement, the tile catches light differently when in laid in different directions. That really just makes it shine! I couldn’t be happier with how the tile works together now in this kitchen. It’s such a statement. It’s so beautiful. You all know I love working with The Tile Shop; I’ve worked with them for the last seven years on all of my kitchens and bathrooms, and each time I take on a project, I go a little bolder! I’m so happy I got to take a chance with a really interesting floor tile complemented by a really beautiful wall tile. Now, the room finally feels complete.

The Paint
It might seem counterintuitive to have a dark tile and then do a dark paint, but I wanted this room to be really dramatic. I had a vision of a really dark inky blue to go with the brownish copper tile. I felt those would complement each other so beautifully. There’s also a bunch of wood tones in the kitchen, and I thought by having this dark backdrop, there would be so many elements that could pop off it.
When I’m looking to paint a room dark, there’s a few things I look at.
1. I want there to be some light elements in the room, like the cabinetry in the light wood, to provide some lightness against the dark background.
2. I also want to make sure there’s a really great light source. There’s a big picture window on the wall that lets a lot of light into the space, so I knew the room could handle a dark color. Eventually, we’re going to replace the current back door with one that has some window panes. That would just provide a little bit more lightness in the corner. But right now, even as is, I just love how this room feels. It’s like a warm hug.

The Ceiling
We didn’t need to do a whole ceiling treatment in this kitchen too, but I had to do it, the room was calling for it! Ever since we did a wood ceiling like this on Season One in an English inspired kitchen, I told Mr. Yolo I wanted to try one in one of our houses. And this kitchen was perfect for that! Four years ago, when we renovated this Duplex, we removed multiple drop ceilings and now the ceilings are now 10 feet tall. The wood treatment makes the room feel bigger, because your eyes are drawn up Really tall ceilings can make rooms feel kind of sterile, and adding the wood just creates a really warm and inviting environment. I am SO HAPPY with how it turned out! You can check my Instagram reel for step-by-step on how to do the ceiling.
There you have it! The kitchen is complete, and one more room in the Duplex is done (errr, redone, ha!) I can’t wait to hear what you all think?! Too bold, or just the right amount!?

Shop the Room
- Backsplash Tile: Aurea Bronze Ceramic Subway Tile (3x12in) from the Tile Shop
- Flooring Tile: Annie Selke Ikat Black Porcelain Wall and Floor Tile (20 x 20 in) from the Tile Shop
- Grout Color: London Fog
- Paint Color: Find this kitchen’s paint in my Digital Paint Guidebook!
- Laundry Room Wallpaper: Ticking Tulip Stripe from Chasing Paper (Charcoal/Dark Tan)
- Ceiling Light Fixture
- Sink
- Faucet
- Sink Wall Sconce
- Brass Lamp (Lamp shade is thrifted)
- Salt & Pepper Shakers
- Linen Tea Towel
- Candle (Jenni Yolo DIY Candle Making Kit with Makesy: Use code ISPYDIY10)
- Floating Shelf Wall Brackets
Thrifted Items (Links to Similar Finds)

EXPLORE MORE: Before & After, Home Inspiration, Room Makeovers


Love all of the changes!
Wauwwww – just wauwwww!! I.am.blown.away!!
It looks SO, SO gooood – just LOVE the colors and everything About it:-)