DIY SWEETS | Pastel Hexagon Tile Cake
DIY PROJECT, Eats DIY, Holiday DIY, Home DIY
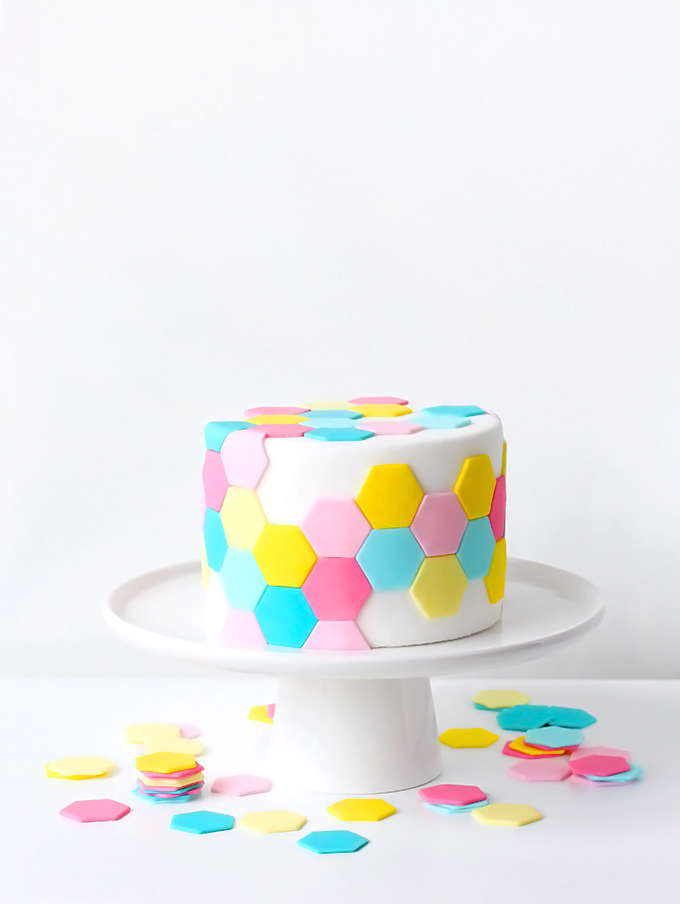
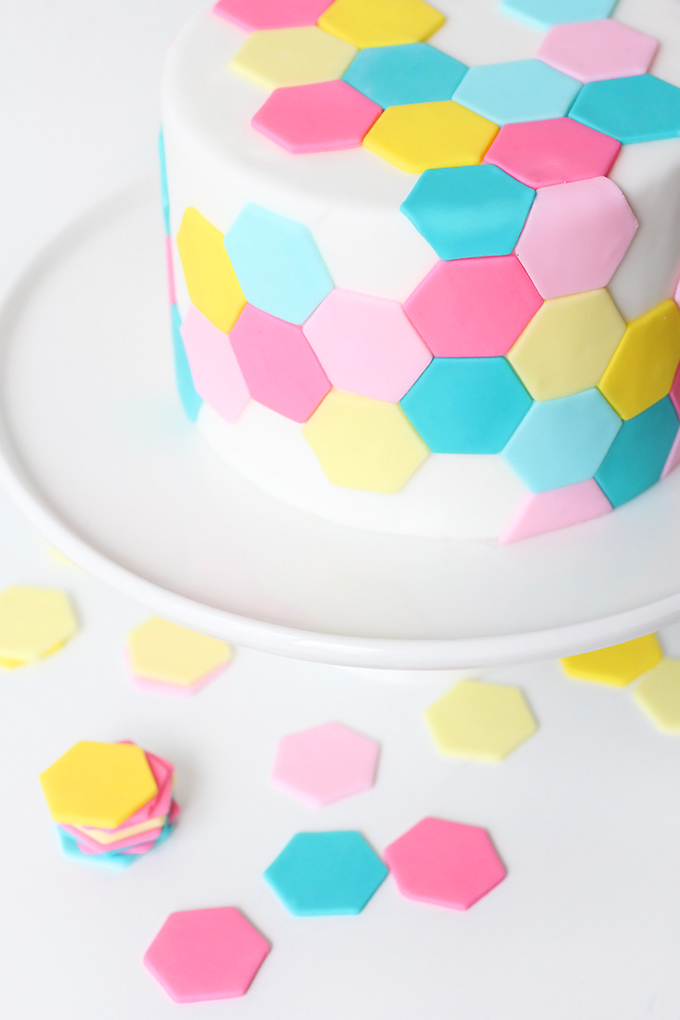

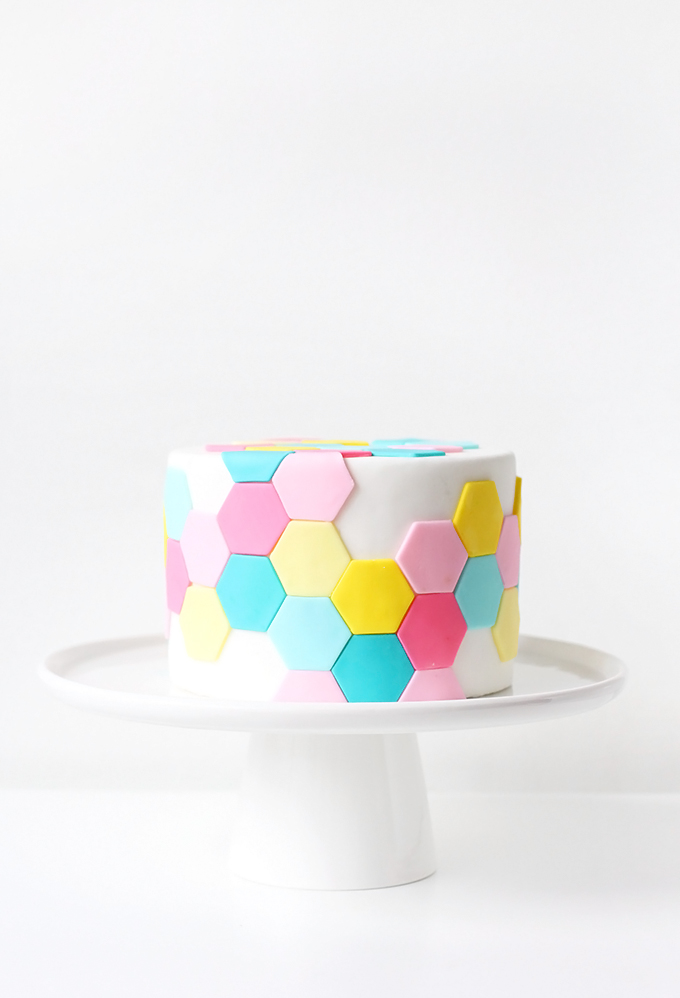
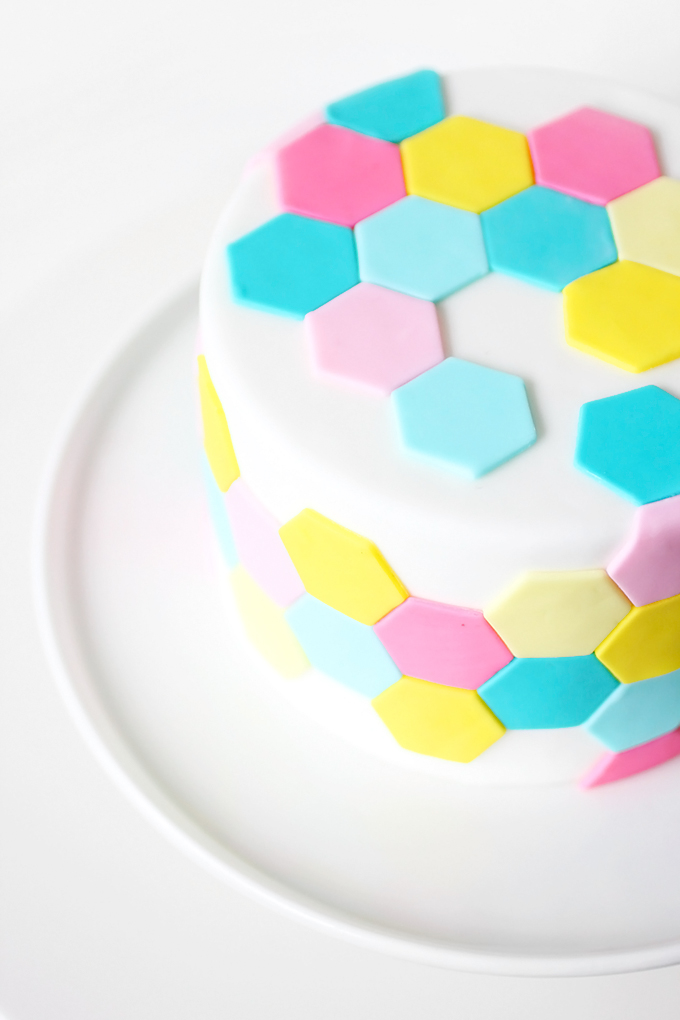
This may just be my new favorite sweets project! After stumbling upon Tortik Annushka’s insanely amazing cakes on Instagram awhile back, I became obsessed with the idea of creating a hexagon tile cake in Spring colors, so I asked my friend Alexis, from Yield Bakehouse, to come on over and teach me how. She created a million hexagons from fondant for me…and then came the fun part, arranging each one on the cake. I can honestly say, this was one of the most enjoyable projects I have ever done. And results are just so darn pretty! Imagine if you showed up to a party with this cake, I have a feeling people would be too busy ogling over it to eat it! Steps after the break…
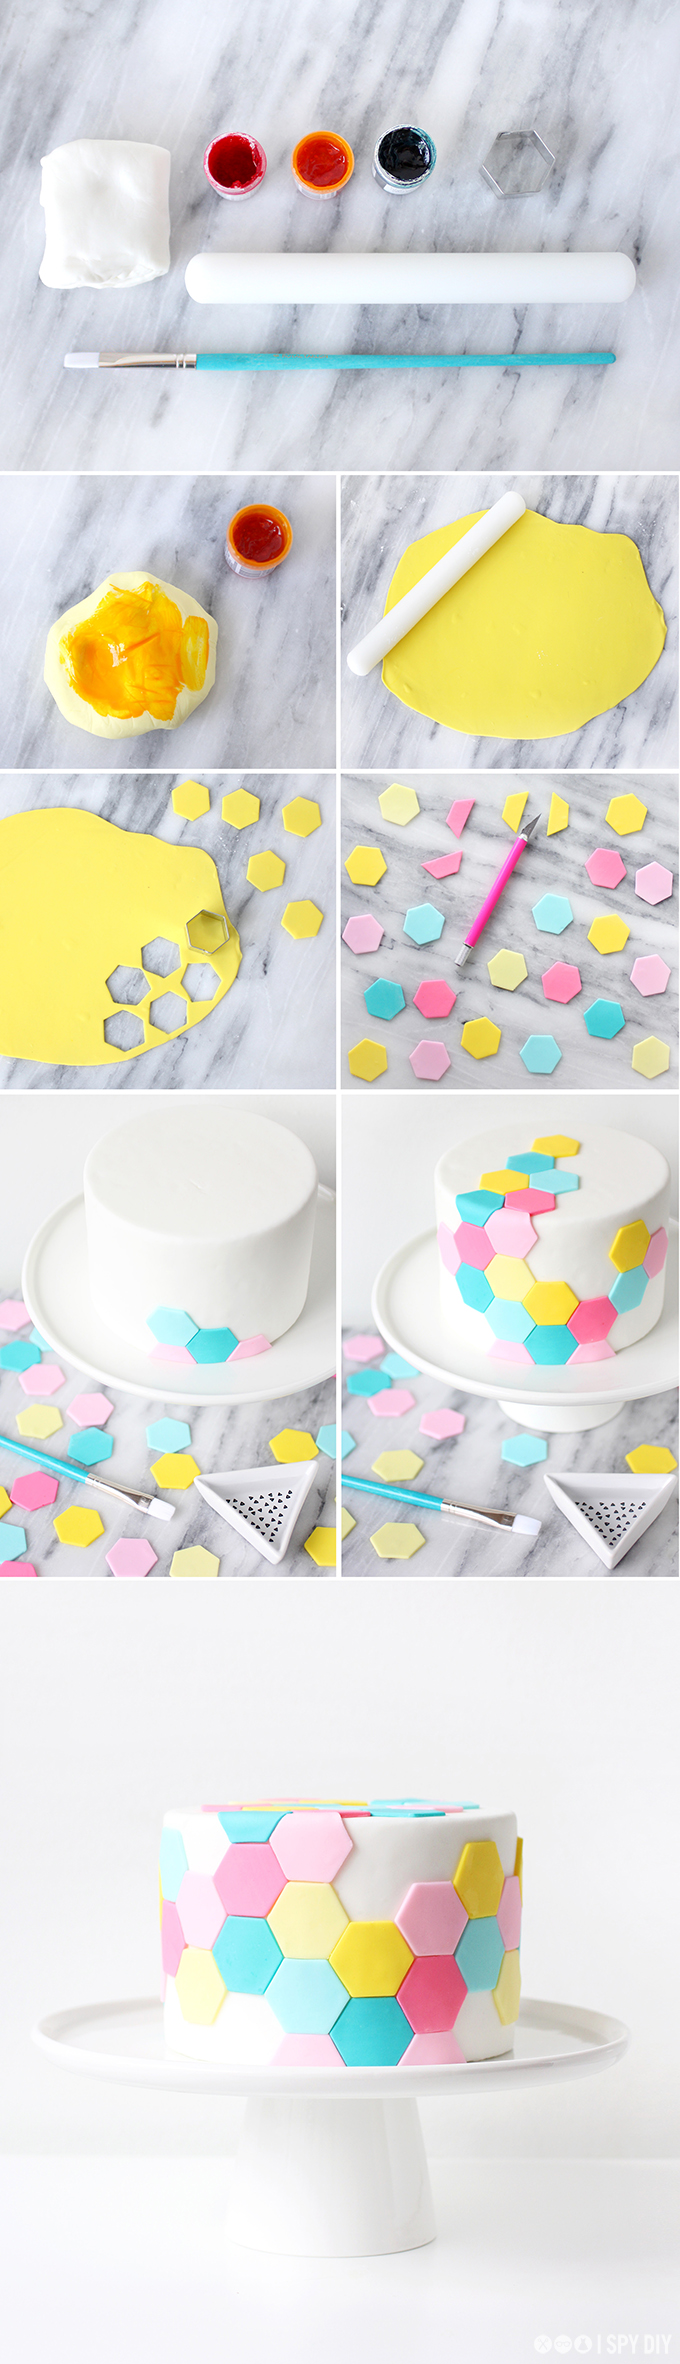
What You’ll Need:
• 1 fondant covered cake (we used a 6inch round)
• 1 box of white fondant (24oz)
• gel food coloring
• hexagon cookie cutter
• rolling pin
• powdered sugar for dusting
• small flat paint brush (that has not been used)
• latex gloves
What to do:
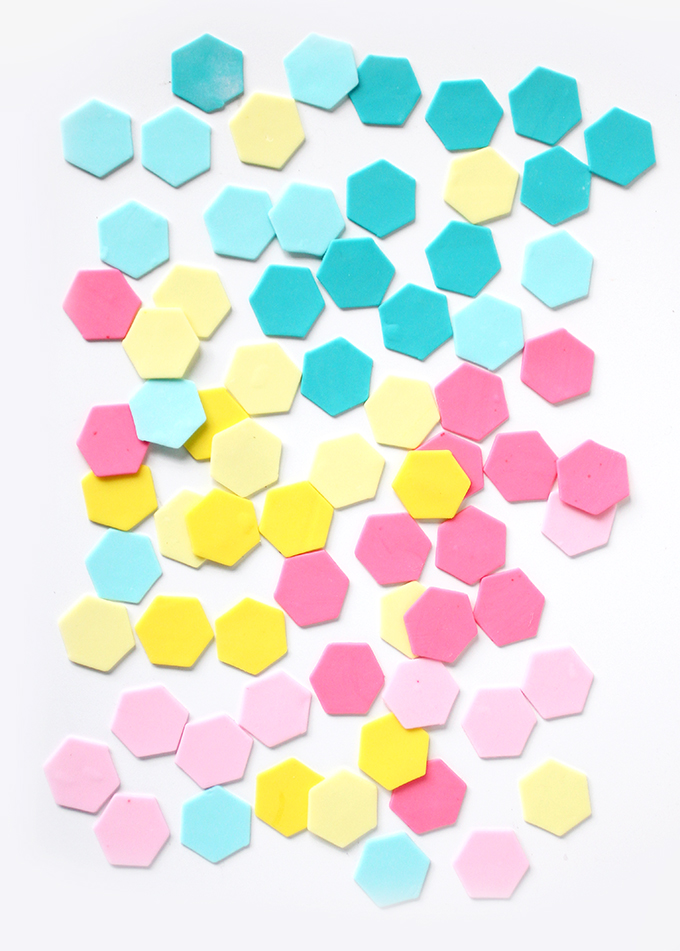
1. Start by dividing the white fondant evenly according to how many colors you’ll be using. We went with pink, teal, and yellow, so we divided it into thirds.
2. Before you begin to dye the fondant, you’ll want to put on latex gloves, things are about to get messy. With your first color choice, use a toothpick, and add a small amount of gel coloring. This will make the lighter of the two tone colors. Knead the fondant between your hands, pulling and twisting, so the color blends evenly.
3. Once the color is blended, lightly dust your work surface with powdered sugar and begin rolling out the fondant to your desired thickness. Then you can begin cutting the hexagon shapes.
(Note: how many you’ll need will depend on the size cake you choose, and if you’re covering the entire cake. For the 6 inch cake we used, we made roughly 15-20 of each shade.)
4. Once you have your desired amount of the light shade, roll the fondant back up and add more of the same color to darken. Knead, roll out, and cut more hexagons.
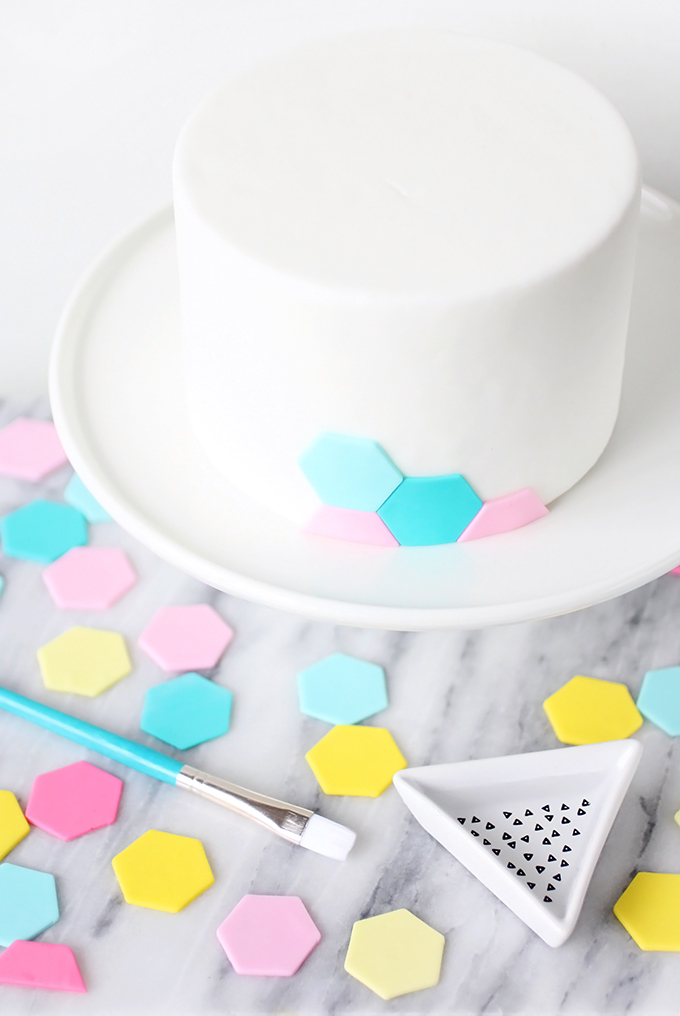
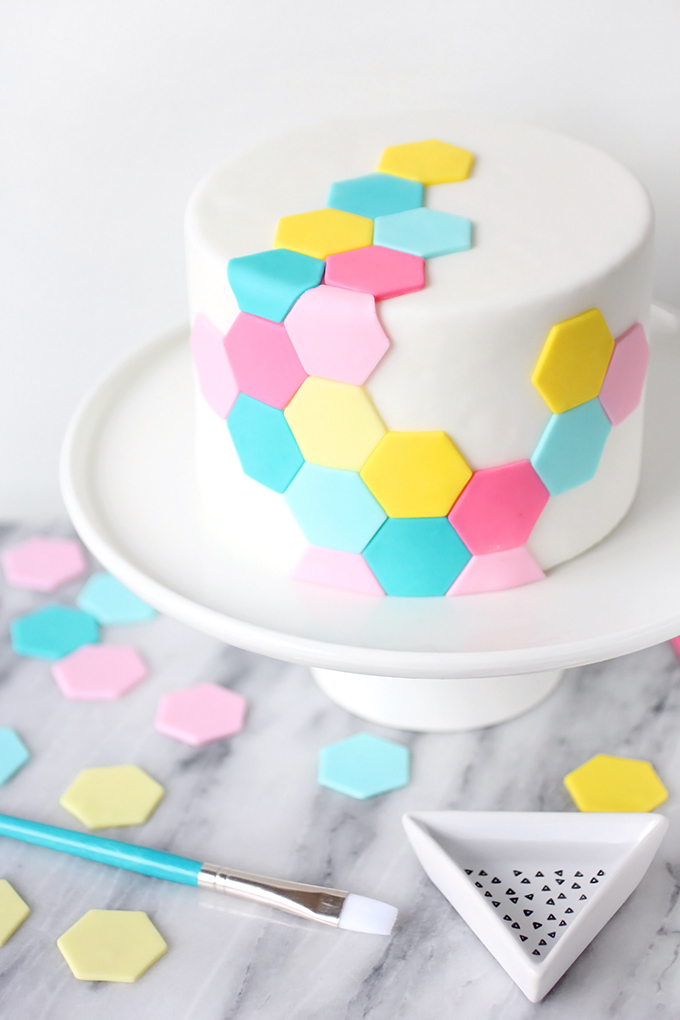
5. Repeat steps 2-4 with each of the remaining colors. Once you have all of your colors cut out, you can start attaching them to the cake!
6. Fill a small bowl or glass half way with water, and using the small paint brush, lightly wet the back of the hexagon you’d like to place on first. We started at the bottom by cutting a few hexagons in half. But this is your cake, so arrange them however you’d like!!
(Note: you don’t want to over do it with the water here. Fondant becomes very sticky once moistened, but if you add too much it will just start to slide down the cake, not actually stick in one spot.)
7. Done, admire, eat!
EXPLORE MORE: DIY PROJECT, Eats DIY, Holiday DIY, Home DIY


I totally love this geometrical design, and the pastel colours are perfect!
https://www.makeandmess.com/
So cool!
Looks great but it’s too much work for me.
This is awesome! Love it!
countryclassdiy.blogspot.com