DIY Live Edge Breakfast Bar Floating Shelf
DIY PROJECT
Over the years I’ve found that similar elements make their way into every home project I do, and floating shelves is one of those. We actually have them in all our homes! I used to be a bit intimidated by hanging floating shelves, because I wanted all of my thrift finds and trinkets to be secure. But I installed floating shelves in the kitchen at my Sage Home and absolutely loved the results. I was actually surprised that it wasn’t as challenging as I had thought. Now National Hardware has made the process even easier with their Floating Shelf Kit. It has all the essentials for this project, including brackets and the hardware you need to hang them.
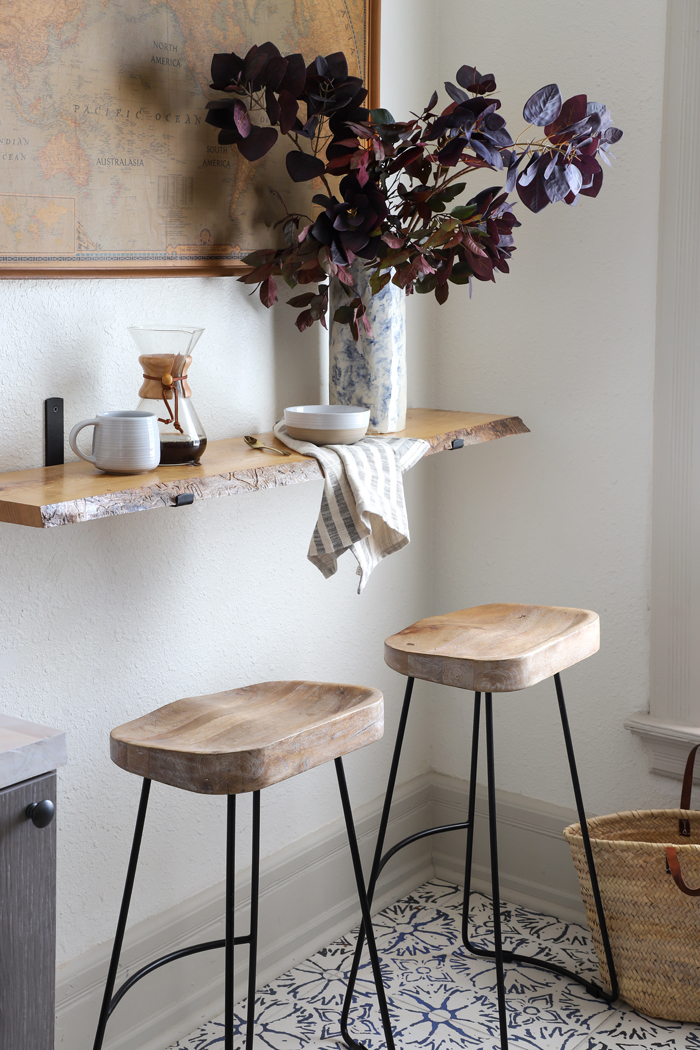
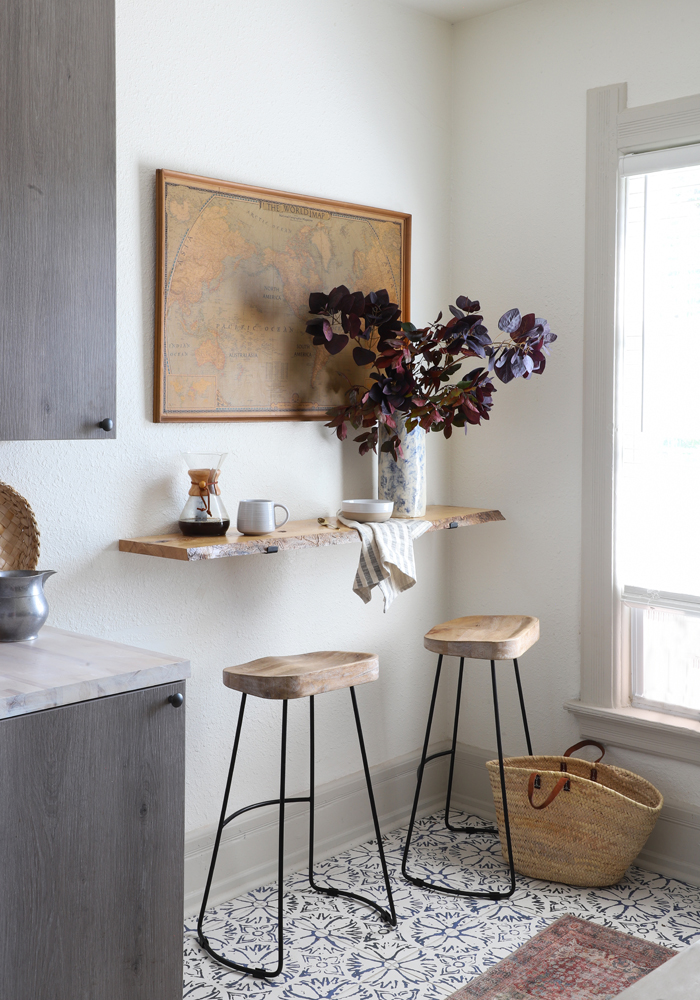
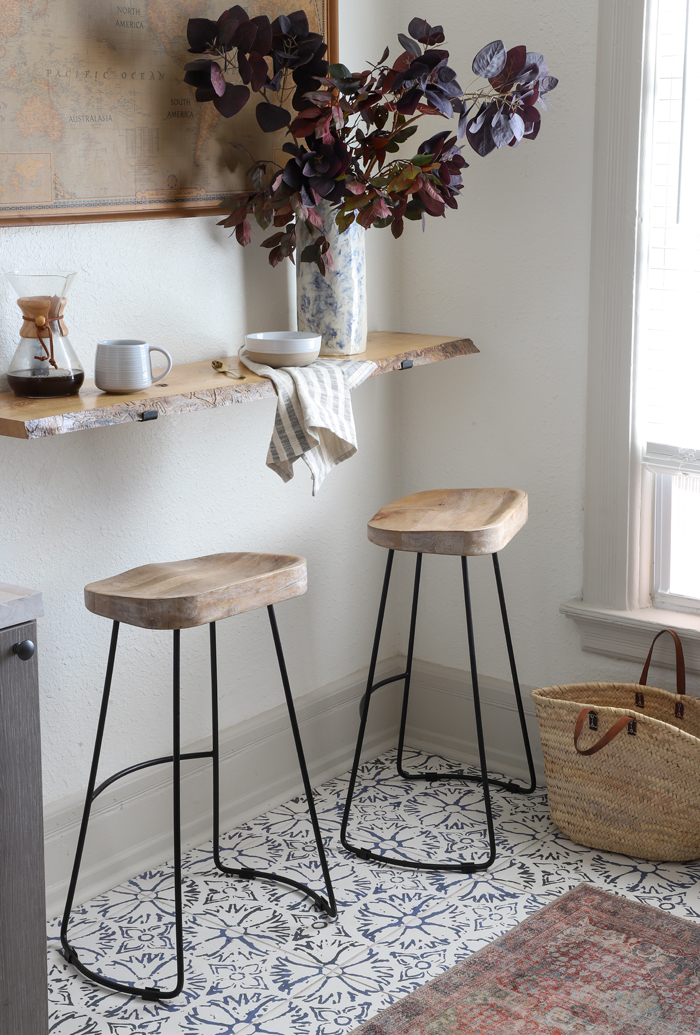
Today, I’ll be walking you through the steps and tricks for hanging a floating shelf as a breakfast bar in our Duplex kitchen, using the National Hardware kit. Since the brackets included can hold a 12in board, I decided to hang it a bit lower and use it as a breakfast bar/extra counter space in the upstairs kitchen at our Duplex. We used a piece of live-edge wood. All that was needed was to notch out a bit to fit in the brackets.

The original plan was to use three of the four brackets that come with the kit, but when I read that each bracket holds up to 50 pounds, we decided to go with two. I love the matte black finish on the brackets, and the security of the industry-grade steel means I don’t have to worry about this going anywhere. And because life is sometimes crazy around here I’m so glad National Hardware has a great Lifespan™ Limited Lifetime Warranty. We chose to hang them directly to the studs, but the kit comes with anchors as an option as well.
SUPPLIES NEEDED:
National Hardware Floating Shelf Kit Includes: 4 Shelf Brackets, 8 Wall Anchors, 16 Flat Head Screws
Live Edge Wood (Wood not included in the kit)
Drill
Level
Stud finder
Pencil
Tape measure

STEPS:
First, find your studs using a stud finder and mark location on the wall using your pencil. If you want to skip this step or don’t have studs where you’d like them, use the anchors. National Hardware has a great instruction guide on their website, along with other design ideas and projects.

Next, measure how high you want your ledge from the floor. If you’re hanging this in a living room to display family momentos, maybe you’d hang it higher out of reach of little hands. For extra work space or a coffee bar, go with what feels comfortable for each person in your household to use. If you were hanging this in a bathroom, split the difference so things are easily accessible. We set up the stools and found a height that worked for us. The best thing about a floating shelf is that you can find a use for it in any room of the house, and this kit makes it so flexible.

Mark the bottom bracket hole with pencil, then use your level and make sure the bracket is straight up and down. Then mark the top hole.


Drill pilot holes into the wall where you marked on top and bottom. Screw the brackets in the wall using the longer screws in the kit.

A 12″ board (standard size 11 ⅜”) will fit perfectly! We had a live edge board and used a multi-tool to create a notch for the brackets to fit.
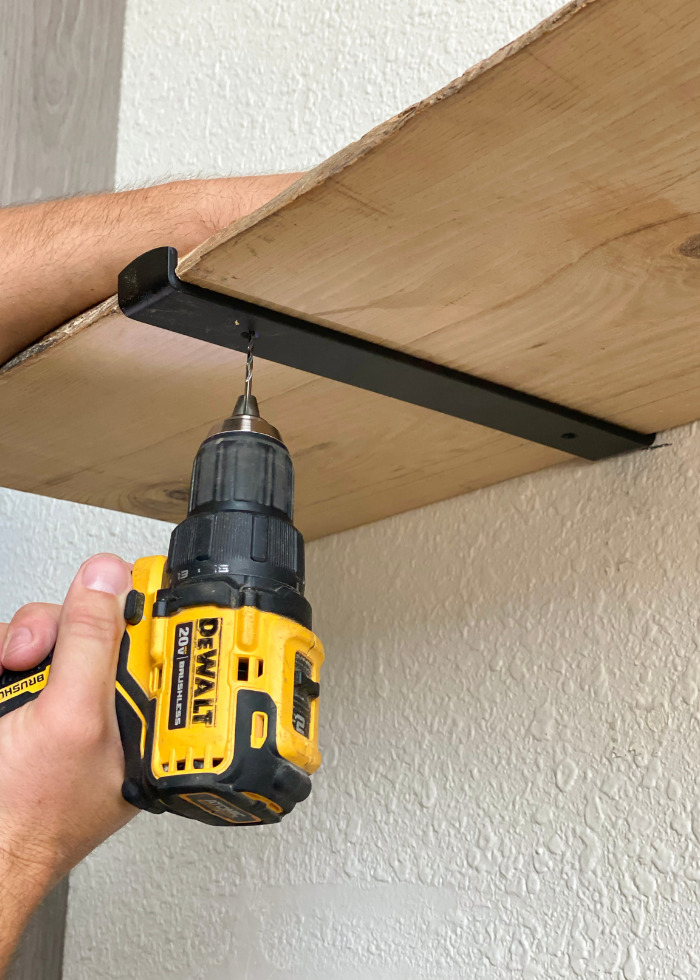
To secure the board to the brackets, first drill pilot holes from underneath the board, then secure with the short screws.

Ta-Da! You’ve got yourself an amazing floating shelf and saved yourself several trips to the hardware store. I can’t wait to see pictures of the floating shelves you all create. Be sure to share them with me and we’ll style them up for fall together. This is the perfect project for a rainy Saturday and if you have questions be sure to leave a comment.
Thanks again to our sponsor National Hardware.
EXPLORE MORE: DIY PROJECT


I love ,love,everything you have designed and re designed ,very good ideas and beautiful flow w paint color choices. Where did you purchased the stools ,I love it’s made w natural wood and simple but perfect for the decor of room….