DIY Limewash Walls | As Seen on Makeover By Monday
As Seen In, Before & After, DIY PROJECT, Home DIY, Makeover by Monday, Room Makeovers, SHOP
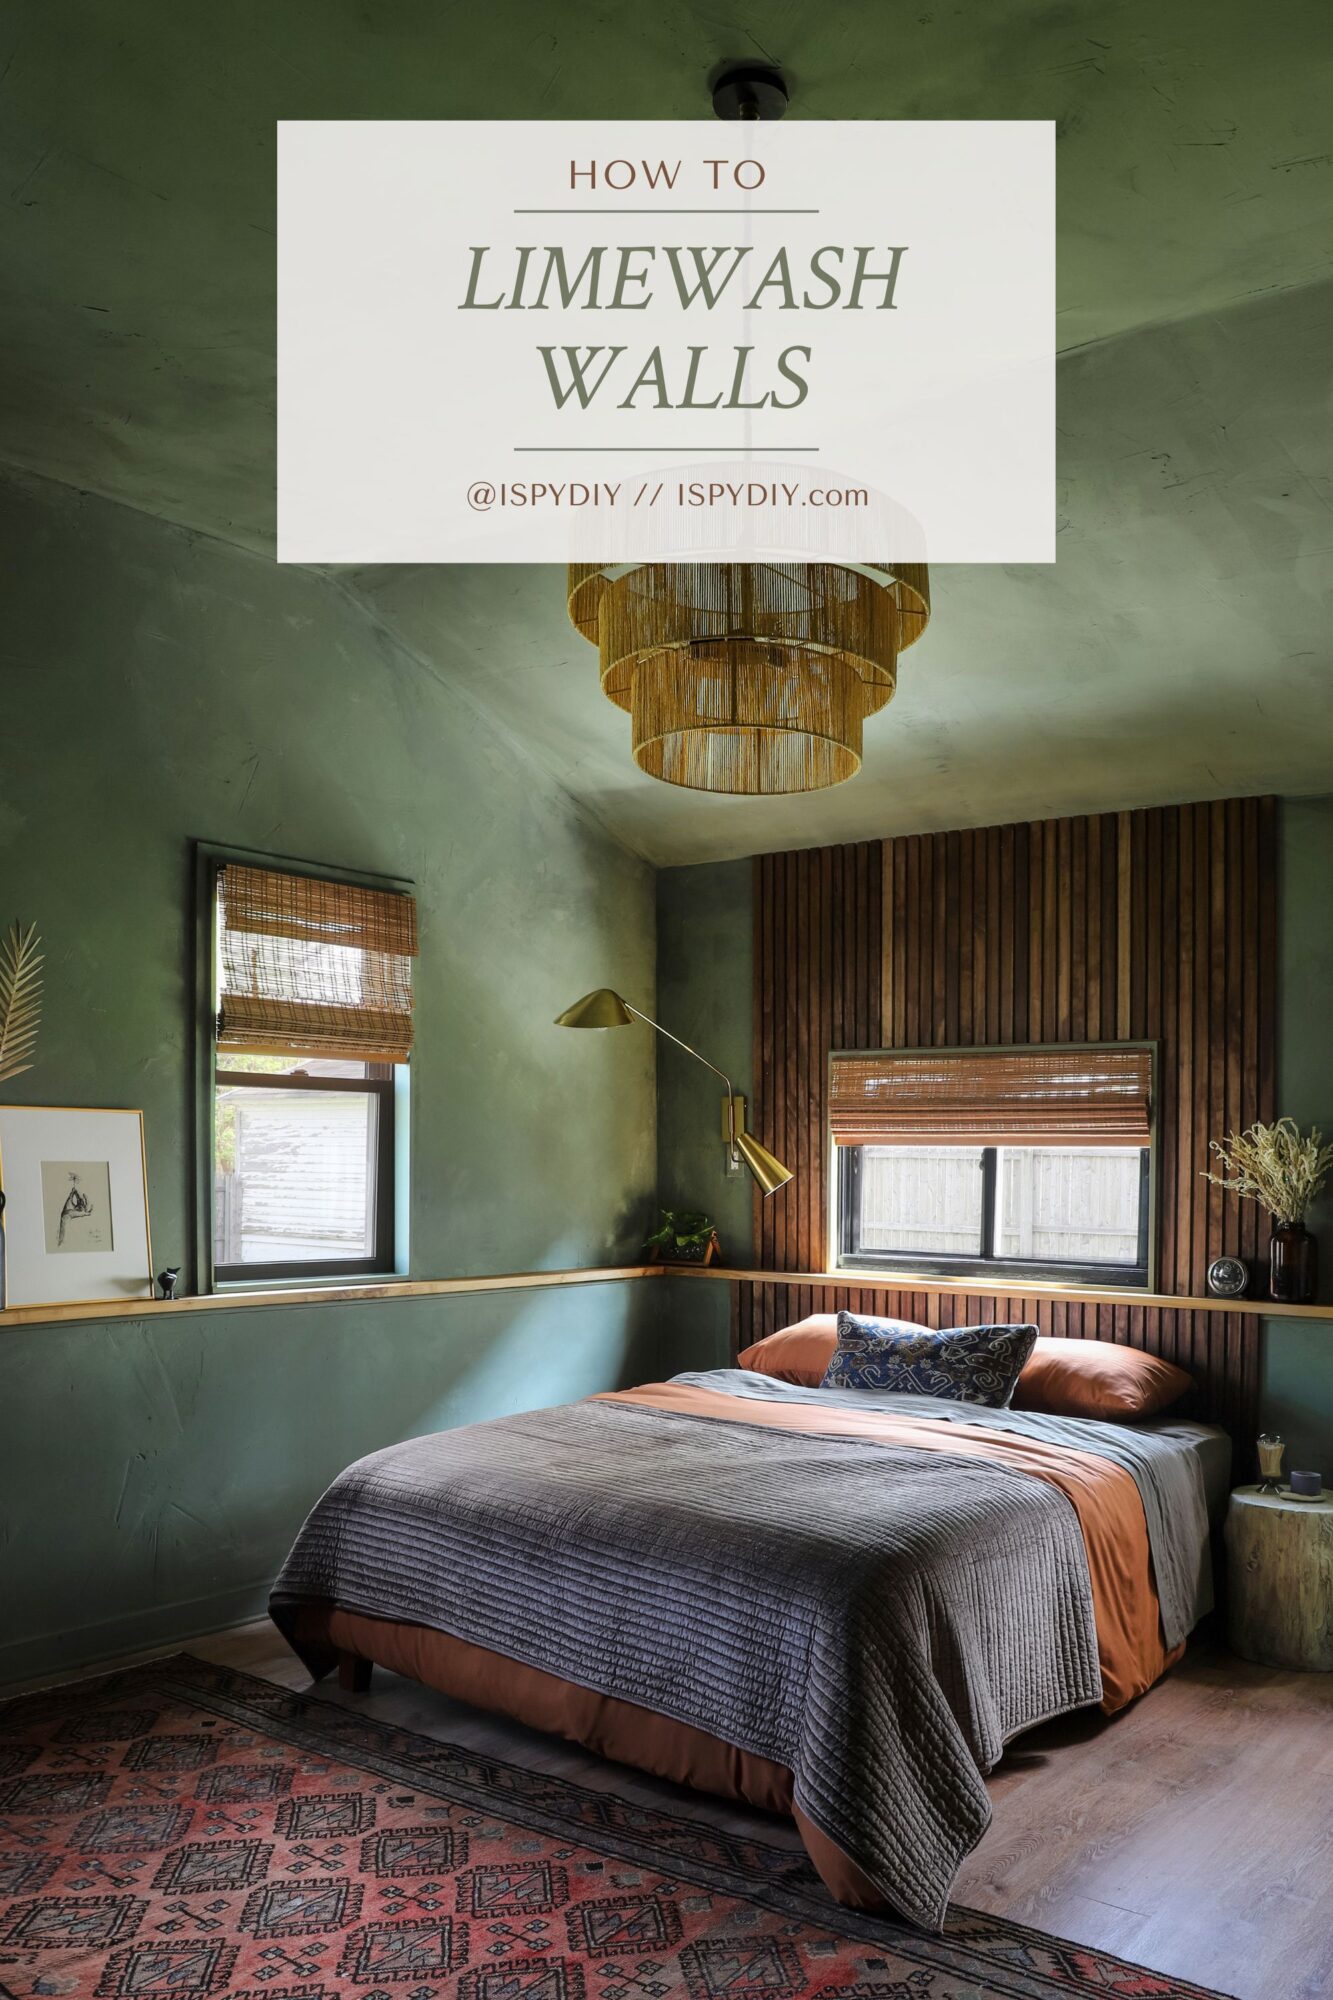
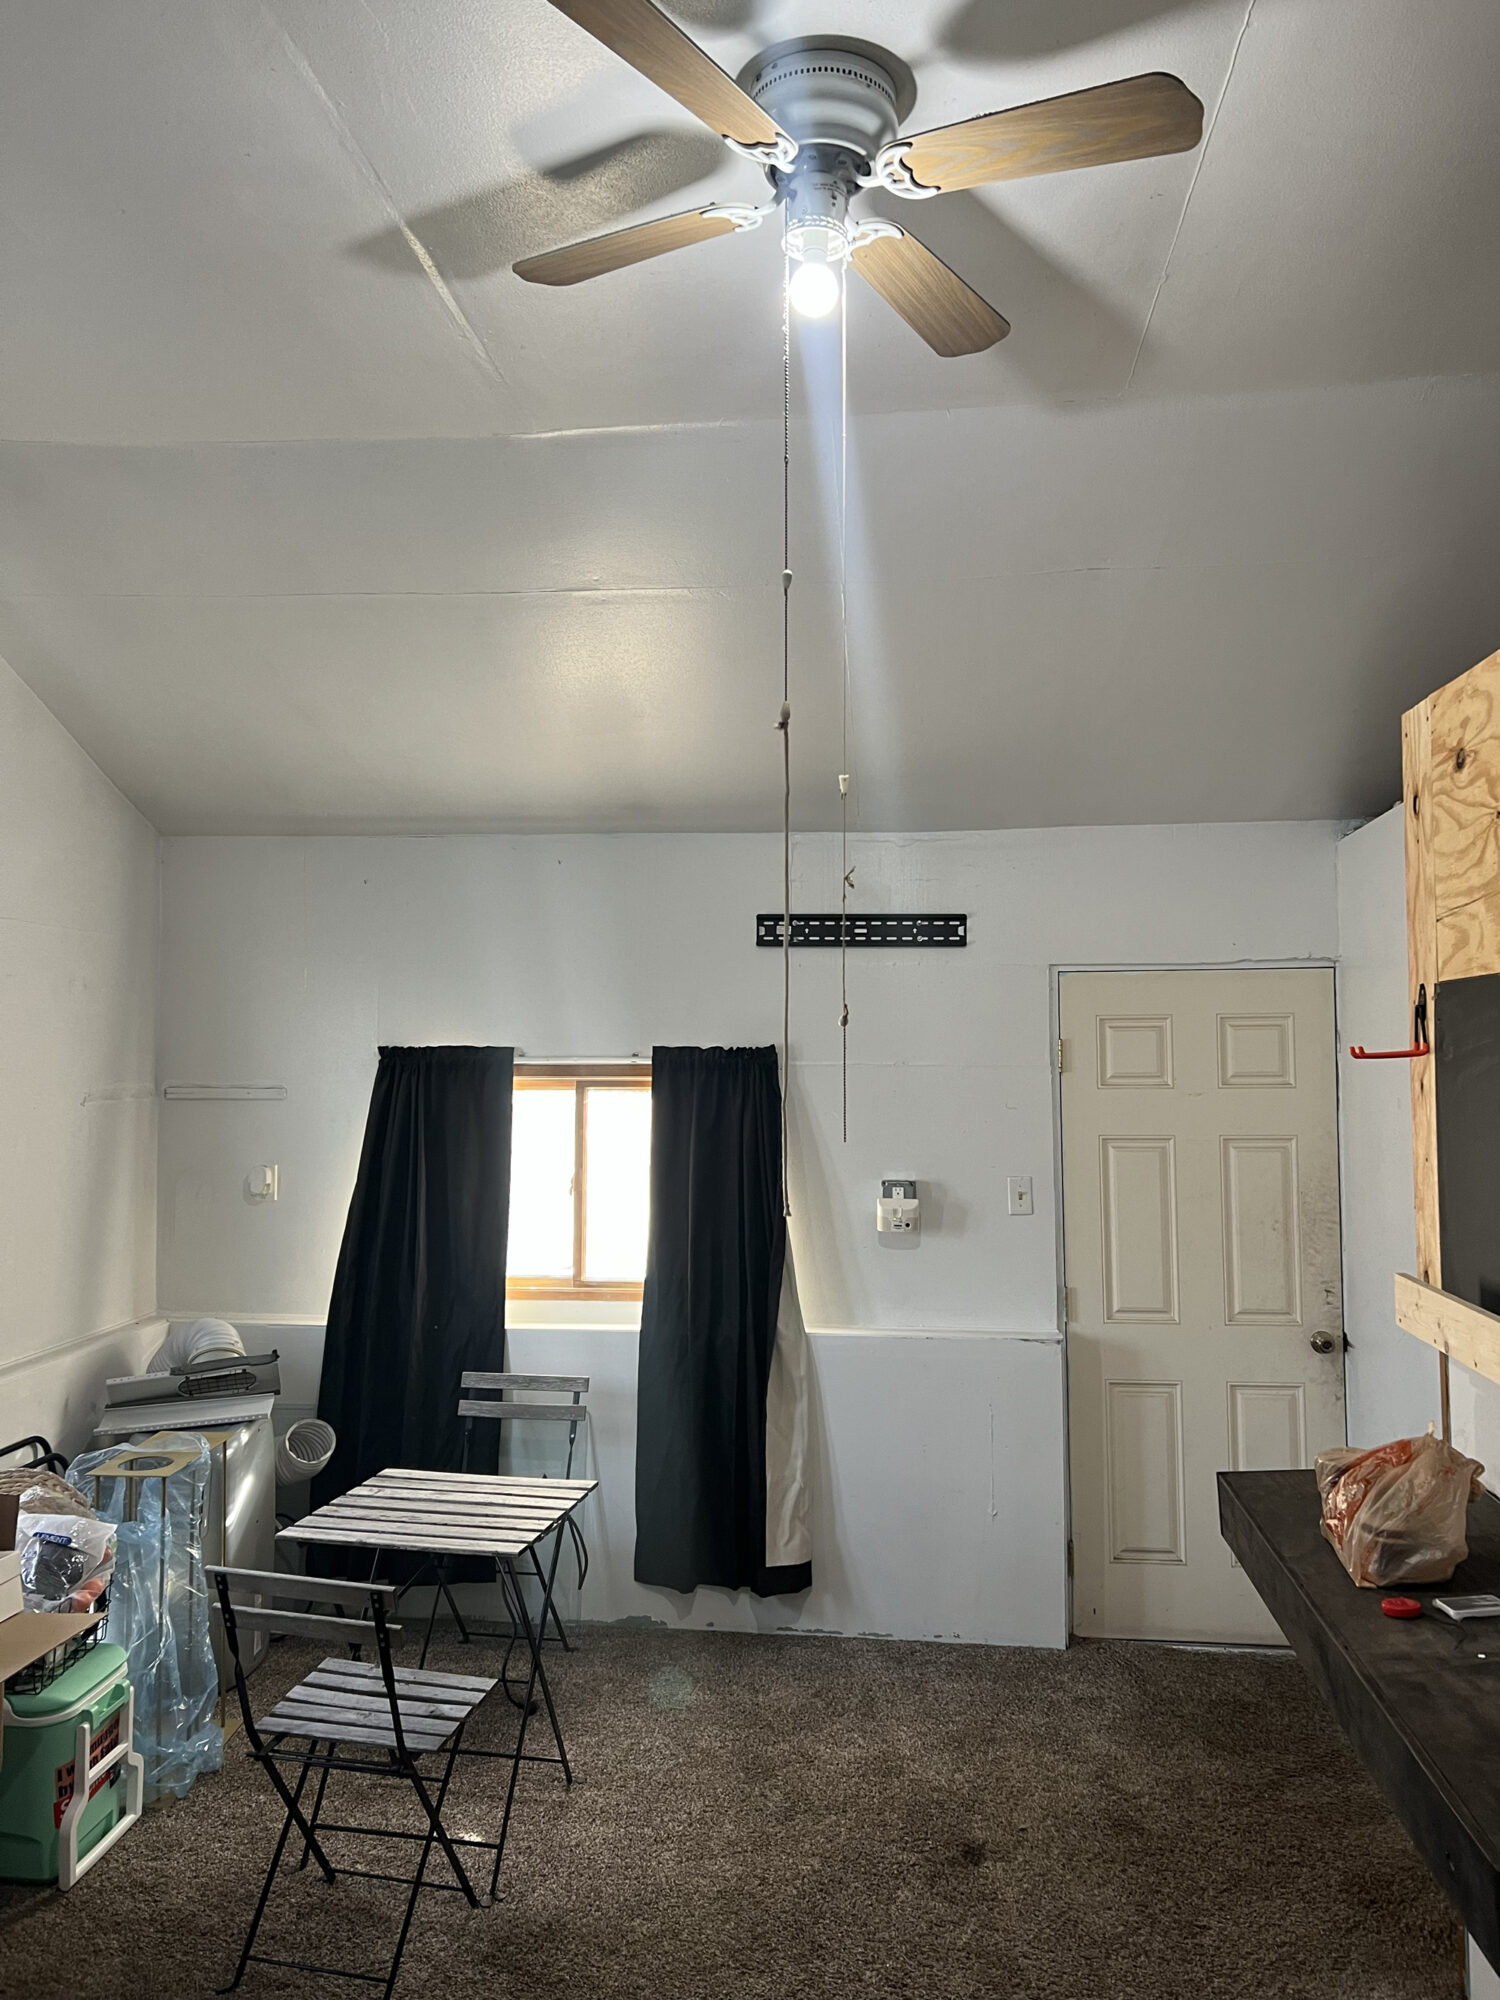
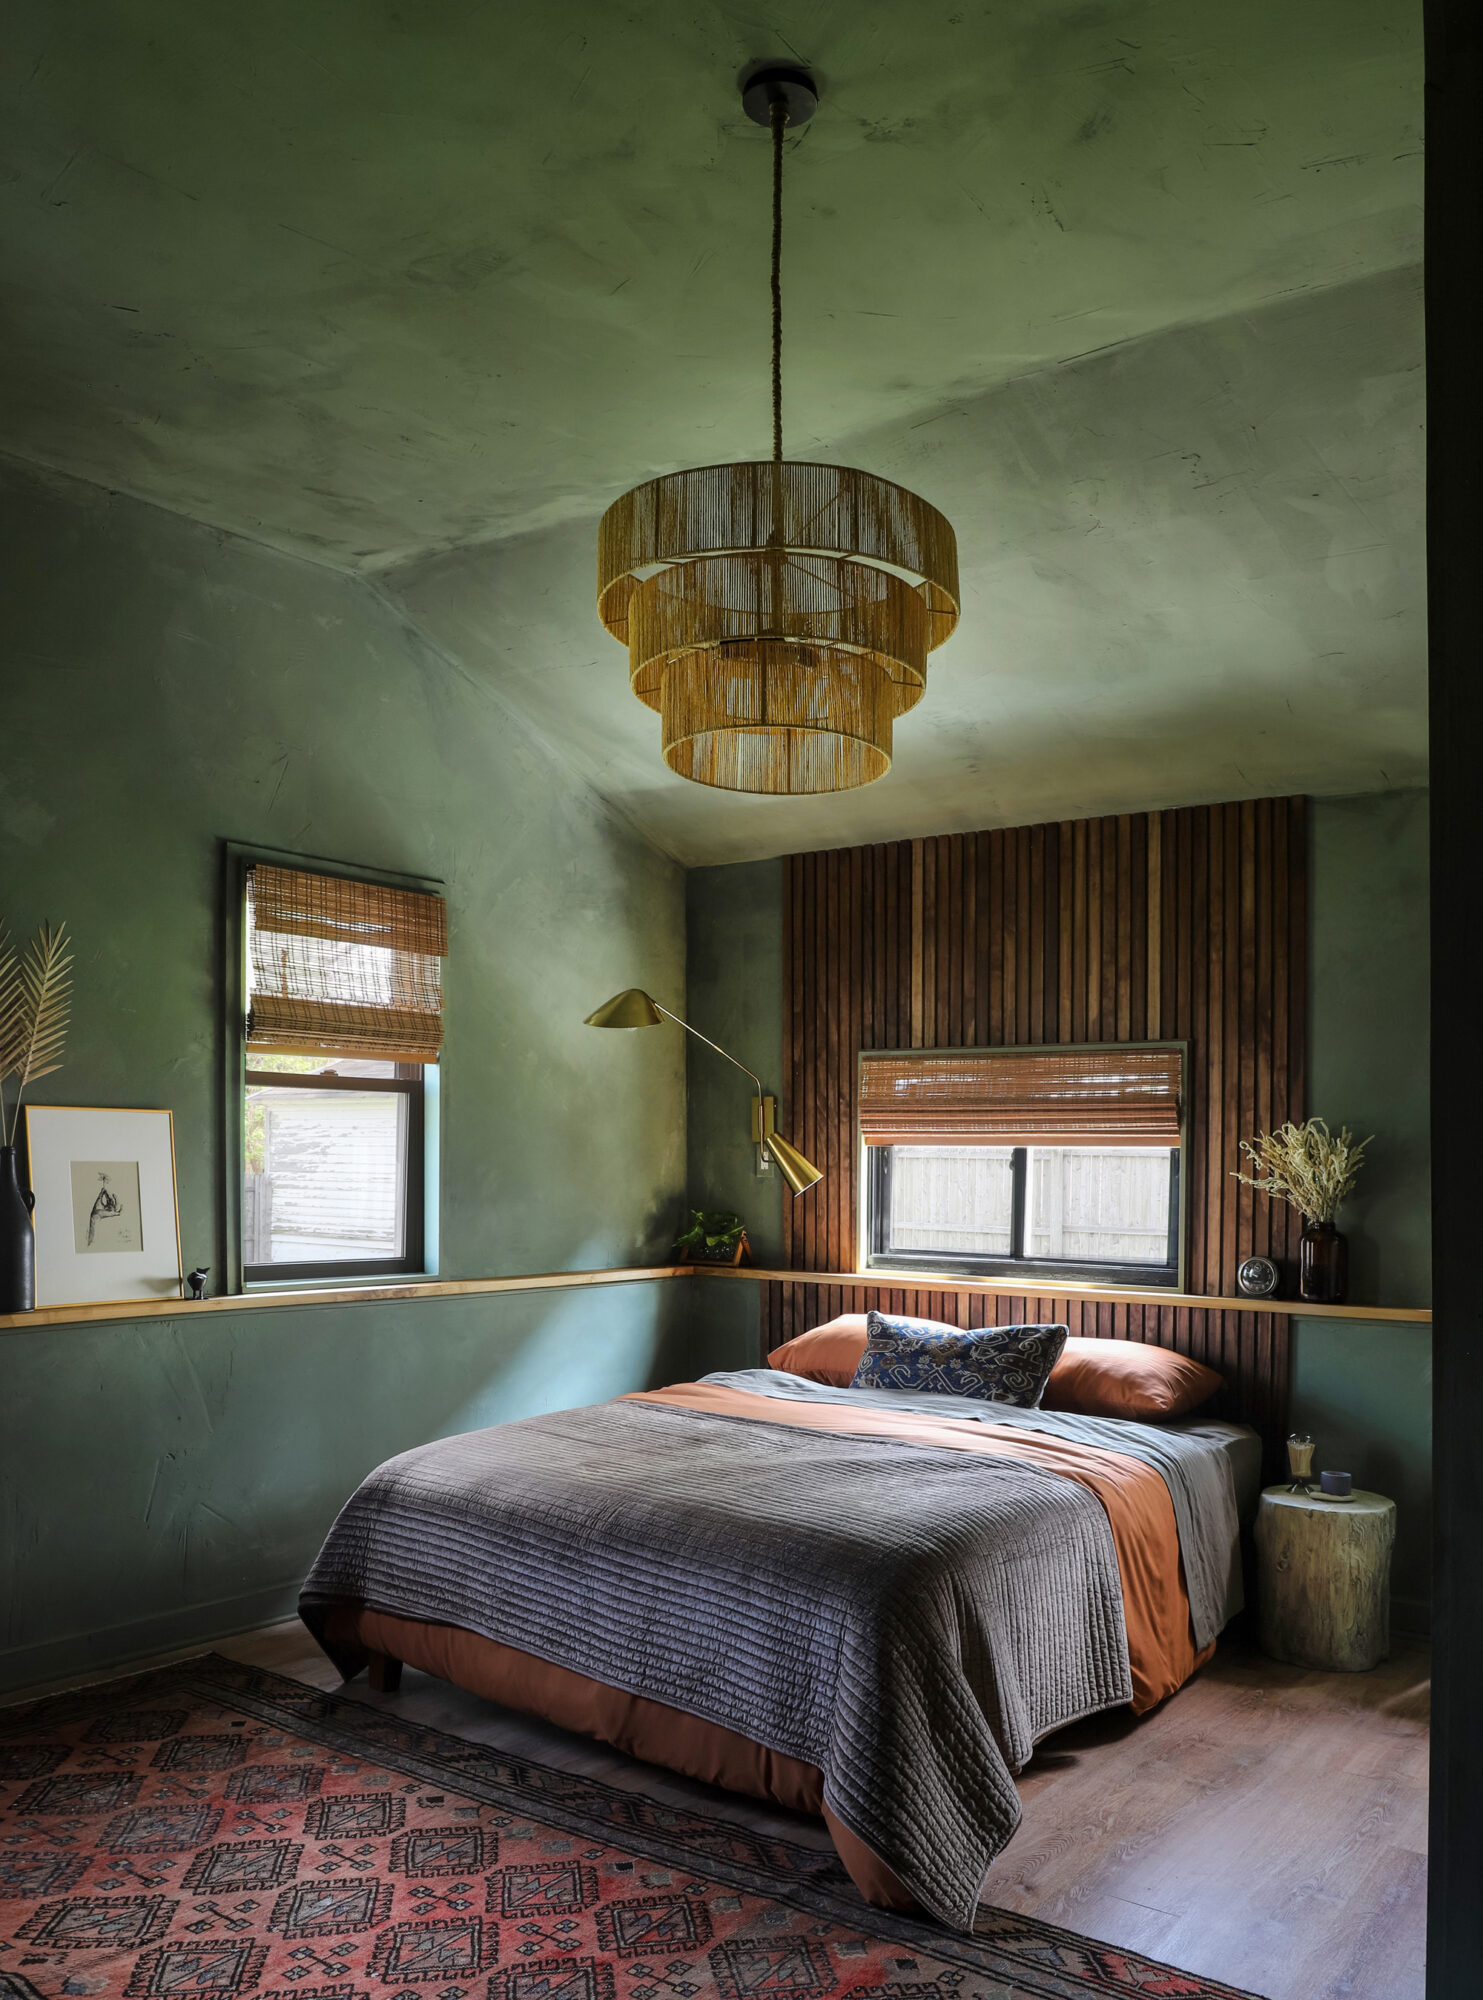
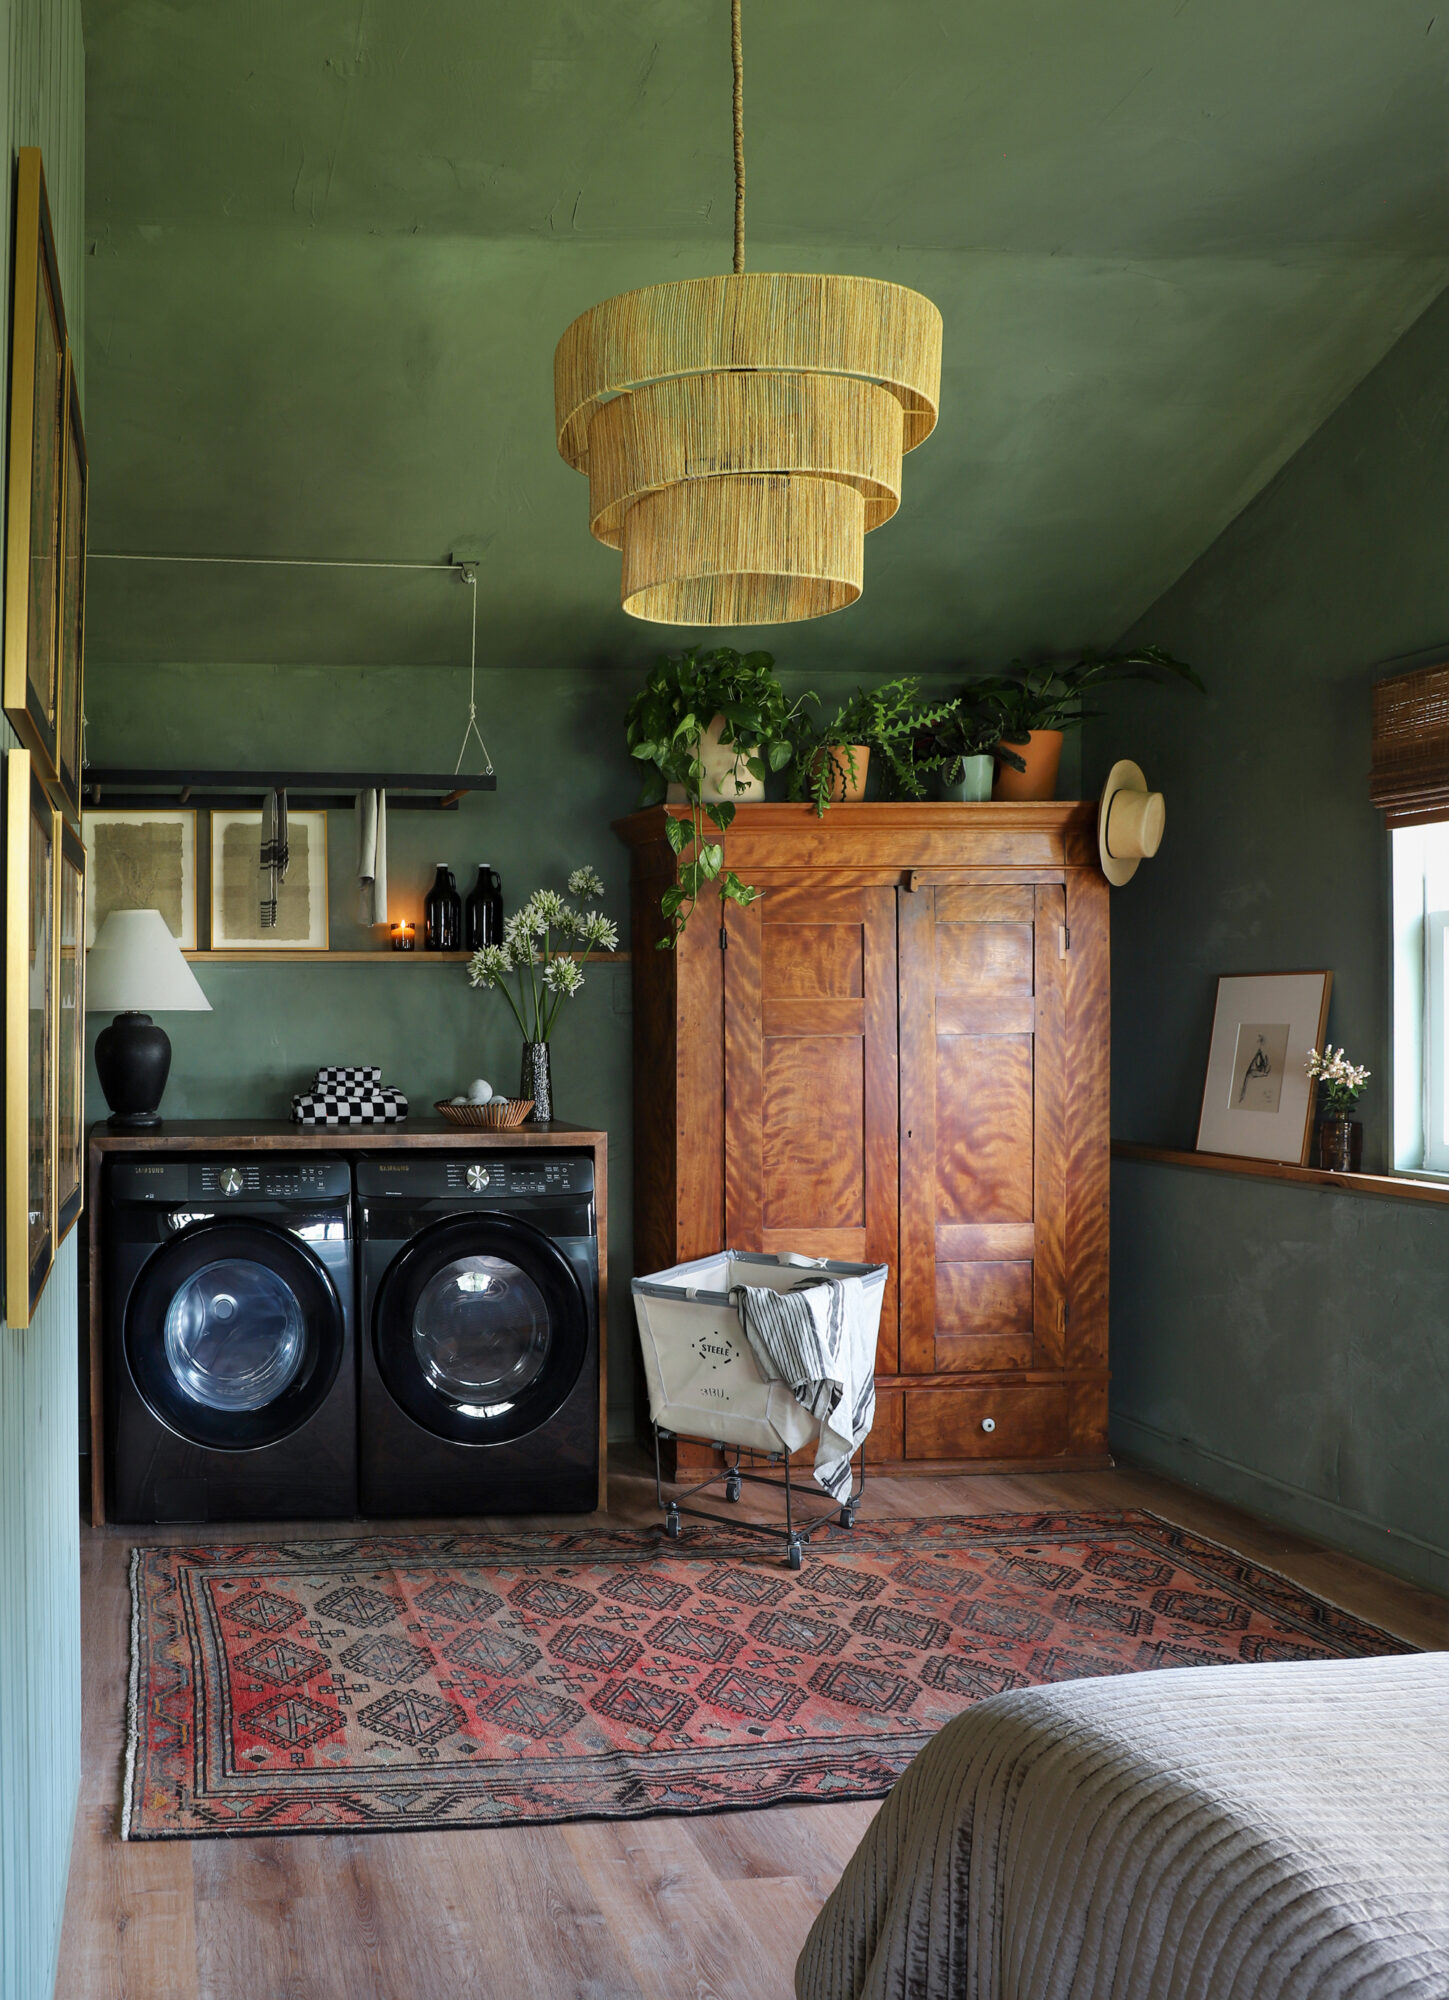
I got so many questions about limewashing after the first episode of Makeover by Monday aired, I wanted to dedicate a post to the supplies and process. I am so happy with how it turned out! You can see how rough the walls were in the before of this space. By skimcoating and limewashing them, we totally transformed the walls, and made a cold feeling room a SUPER cozy guest/laundry room! Read about the full room makeover here.


What is Limewash?
Limewashing is a centuries-old painting technique which involves applying a mixture of lime, water, and color pigment to the surface of walls, creating a beautiful, aged, and subtly textured appearance. The technique of Limewash has gained popularity for its ability to add character and charm to interiors, plus it can help blend imperfections on the walls, making it a perfect for transforming the guest bedroom in this makeover!
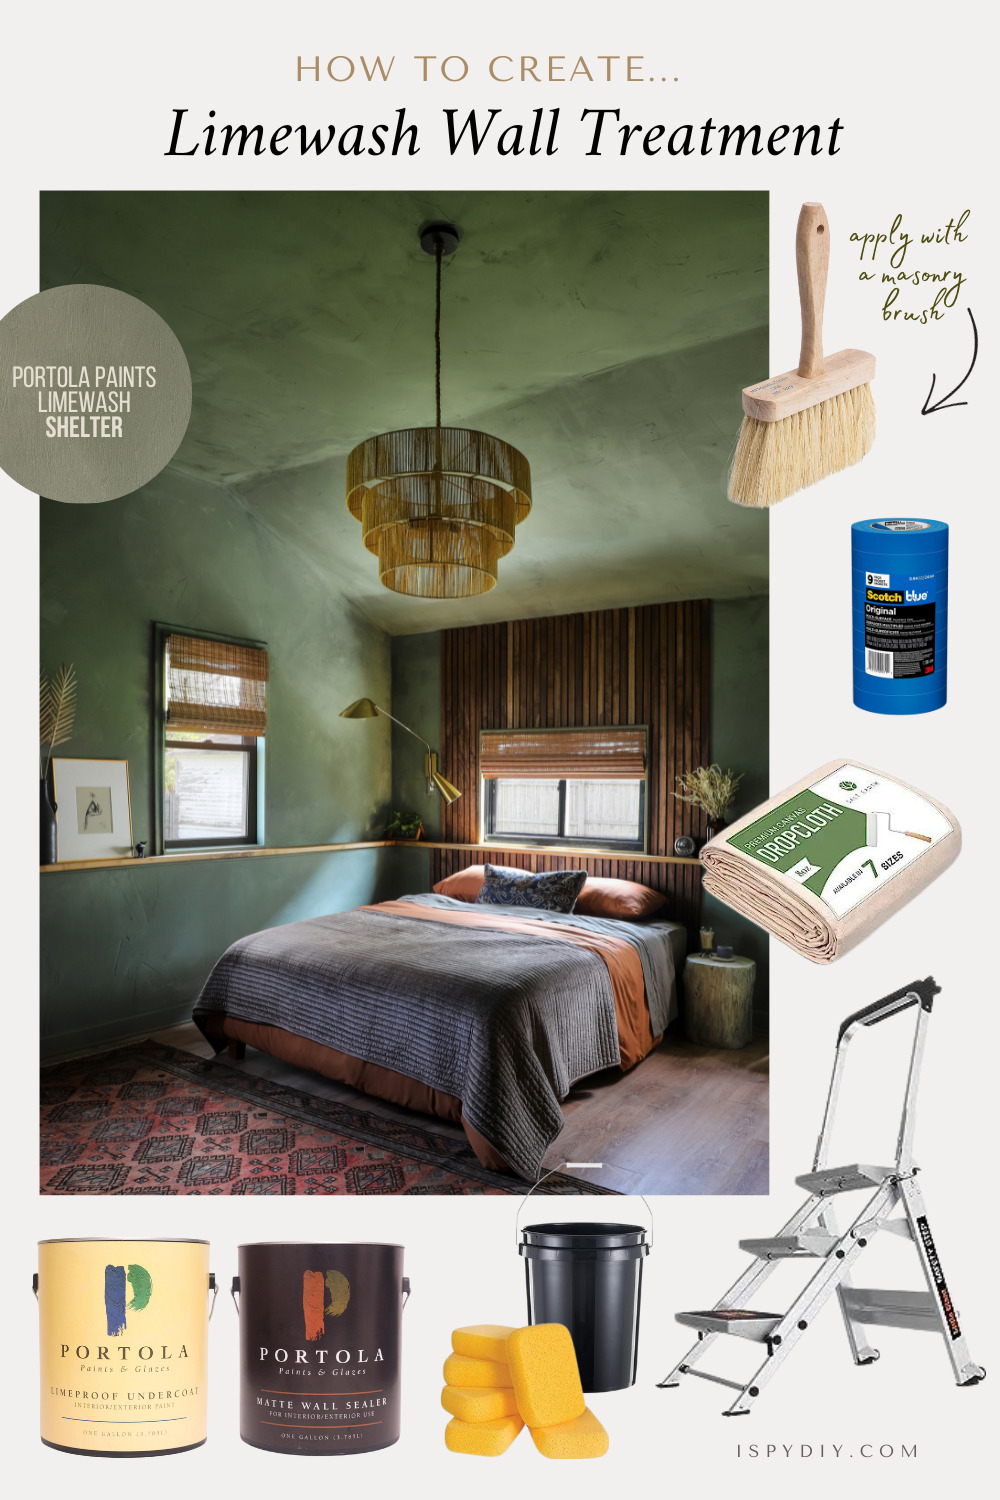
Supplies
- Limewash Paint – Color: Shelter
- Drop Cloth
- Painter’s Tape
- Water
- Buckets
- Sponges
- Paint Brushes
- Masonry Brush
- Contractors Step Ladder
- Sealer (Optional)
Step-By-Step
1. You may not need this step if your wall have no/light texture. The walls we were working with had a bad drywall job and texture, so we started by skim coating the entire room. Skim coating means applying a thin coat of joint compound on the wall with a putty knife to cover any inconsistencies on the walls. Normally you would want the joint compound completely flat, but this is more a forgiving application because the imperfection add to the textured look of the limewash finish. However, we did sand down larger ridges after the joint compound dried.
2. Limewash is thinner than paint, and the consistency causes it to splatter a lot, so it’s super important to start by prepping the space. Remove furniture or cover it with drop cloths to protect it from paint spatter. Use painters tape to mask off areas like baseboards, trim and outlets. Cover the floor with a drop cloth.
3. Mix the limewash paint with water in a bucket, using the instructions on the can. Mixing the limewash lets you customize the level of opacity.
4. Next, lightly dampen the walls using clean water and a sponge, which helps the limewash adhere better to the walls.
5. Then you’re going to start applying the limewash to the walls. First of all, don’t let the color scare you. It will start much darker than how it dries. To paint on the limewash, instead of applying in one consistent direction, as you would with traditional paint, start applying in a criss cross pattern. I like to start in one corner of the space with a paint brush to fill in the corner, and then switch to a masonry brush to cover the rest of the wall. Applying the limewash in a criss-cross or crosshatch pattern on the wall adds to the textured look. (Read more tips for limewashing below.)
6. Make sure to let the first coat dry completely before adding additional coats. The more coats you apply, the more opaque and textured the finish will become. Patch marks are super obvious so be careful as you layer the limewash. For a more natural and aged effect, apply each coat with varying pressure to create depth and dimension.
7. Finally, if you are limewashing in a kitchen or bathroom (or anywhere that will get wet), make sure to use a clear sealer. This will protect the finish and give the paint longevity.
Limewashing Tips
Don’t let the color scare you The limewash goes on WAY darker. The difference between the color that goes on and the final color is QUITE drastic. I definitely had a OMG moment when I first started applying the green, but it drys quickly so you can see the actual color. Sidenote: before applying we did use the recommended primer to help with adhesion on painted surfaces.
Get the drips right away Limewash is thinner than paint and gets caught on any irregularites on the wall. And then it drips. Brush out the drips right away, before it dries, because you can’t brush over them later. I used the recommended wide masonry brush to paint it on, but also had a second normal 2” paint brush to brush out any drips. I also used this paint brush to do the edging. I watched this video before I started! If you have a drip after it dries, try sanding it out, don’t spot touch-up…which leads to my next point.
Don’t do spot touch-ups! I learned this the hard way. The first time I limewashed I decided to go back and brush over drips that had dried. I then had patch marks that were SUPER obvious. And I did touch ups on every wall, ugh. I kept watching hoping they would blend in, but there was a white limewash ring around the patched area no matter how hard I tried to feather it in. Repeating what I said above, get the drips right away.
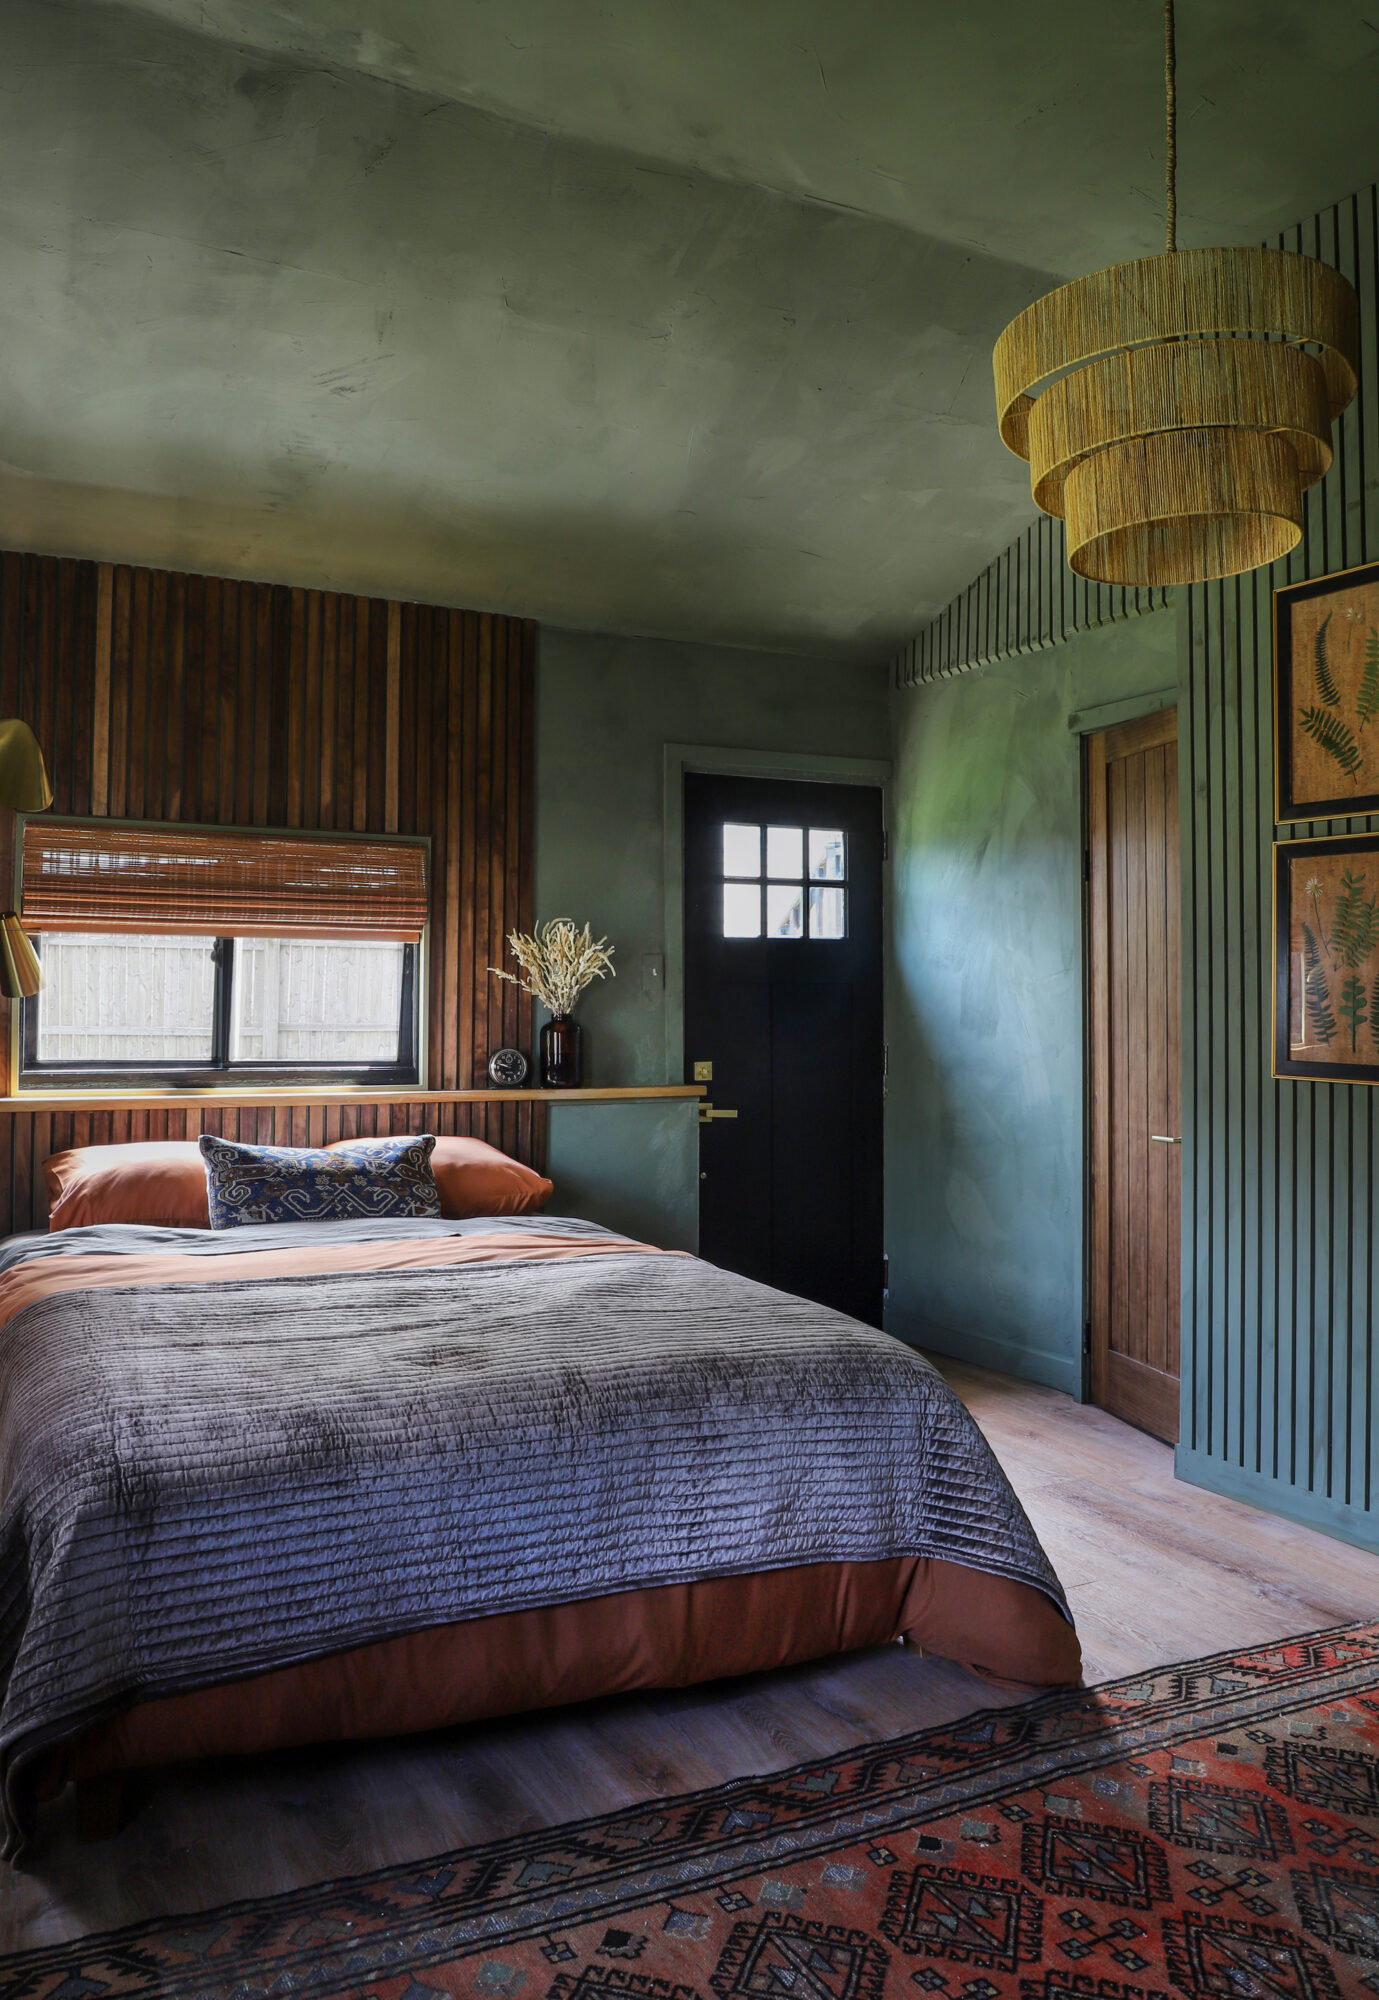
Don’t you just want to touch these walls! The texture is so good, and that green! We basically invited the outdoors in. Knowing Mikel is a florist helped me play into those nature vibes – think lush gardens and total tranquility (plus we covered up that gnarly drywall job). Paired with wooden furniture and some lovely leafy plants, this created a welcoming oasis their guests won’t want to leave! Read about the full room makeover and get all the shopping links here.
Watch Season 2 of ‘Makeover By Monday’ Saturdays at 1p/12p c on the Magnolia Network on TV! Or stream anytime on Max and Discovery plus!
EXPLORE MORE: As Seen In, Before & After, DIY PROJECT, Home DIY, Makeover by Monday, Room Makeovers, SHOP


