DIY HOME | Quick Bathroom Backsplash With Adhesive Tiles
DIY PROJECT, Home DIY
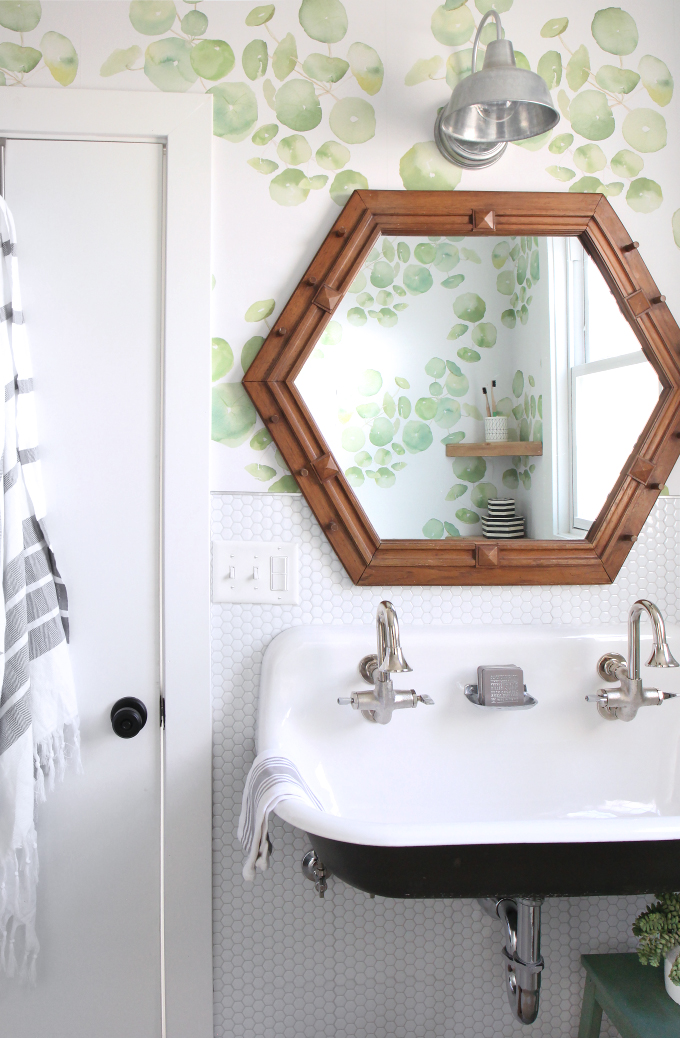
Thank you for all the social media love on my guest bathroom makeover! So many of you were surprised to hear the tile is adhesive! It was perfect for this project because I did not want to take the one million pound iron sink off the wall. And it’s perfect for you all who are renting and need a removable tile option. I was super excited when Smart Tile asked me to try out their product, because when we were originally renovating my bathroom, I wanted to add tile behind the sink, but since we were under a time crunch for the HGTV pilot we had to scrap it. Smart Tile’s hexagon pattern worked so well with the design of the bathroom, I really like the size of the hexagons against the oversized greenery on the wallpaper pattern and the large hexagon tile on the floor. And the best news is that I could install it in less then 2 hours without removing the sink, my kinda weekend project! Stop by Home Depot’s blog for more details!
Tips for installing after the break!
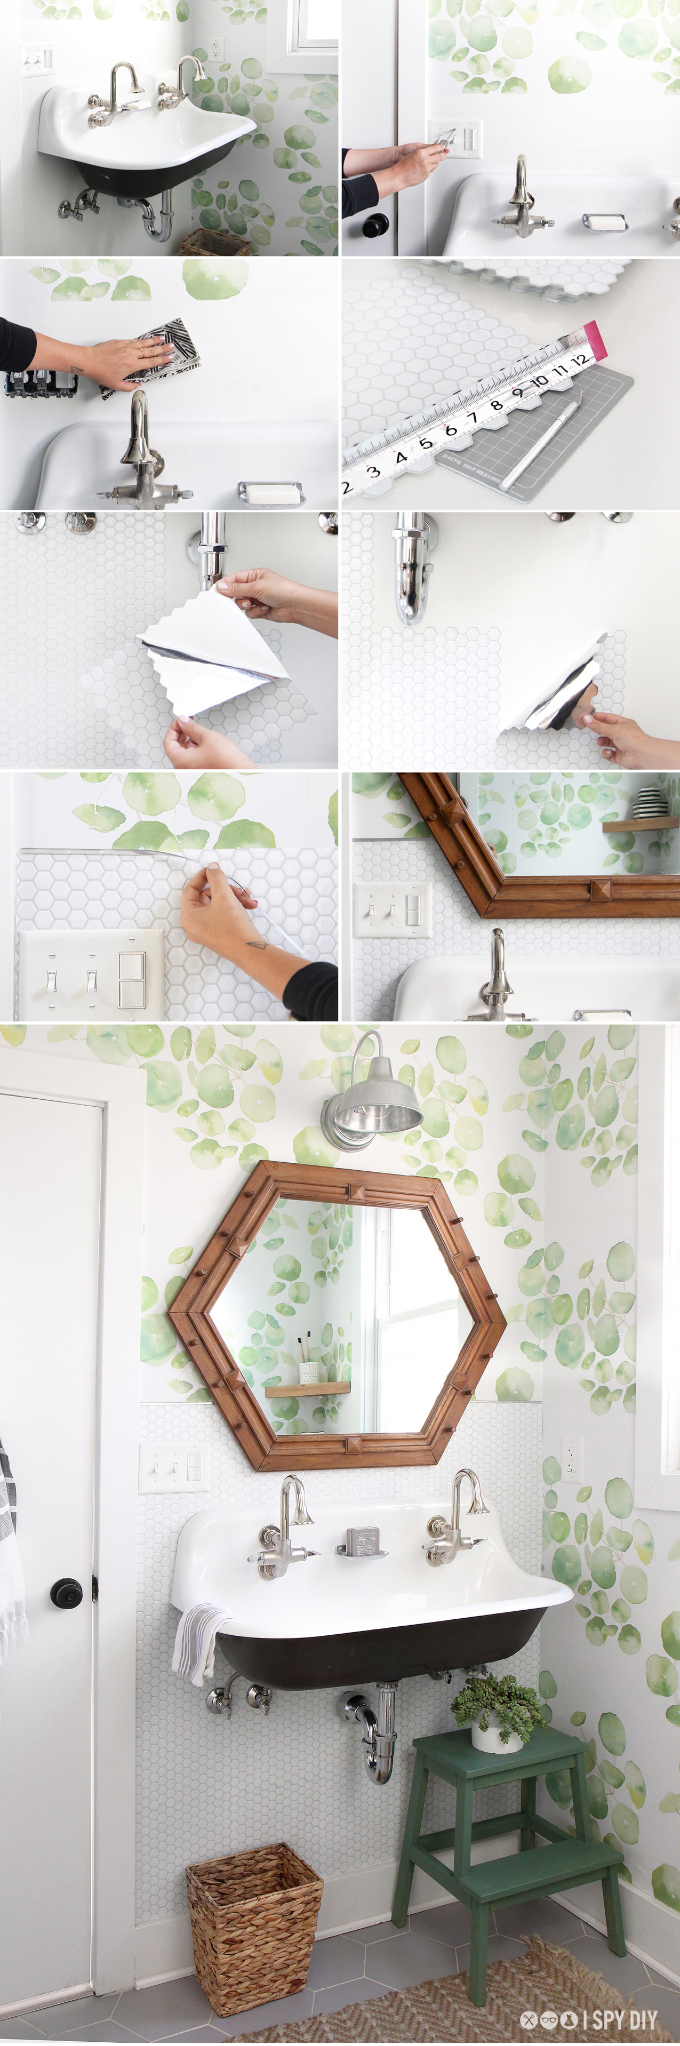
1. We wallpapered first leaving a little extra overhang so the Smart Tile could overlap, and there would be no gaps.
2. Next, unscrew the switch plates.
3. Clean your walls with a wet washcloth.
4. Use a blade, cutting board and straight edge to cut the tile sheets, or a scissors, and trim each one to fit the space. We held the sheet in place then traced around the curved edge of the sink before cutting with a scissors.
5. Peel off the backing and stick into place. Make sure all the touching edges uniformly overlap. Work from one side, and keep the sheets level so all the edges line up.
6. Once stuck on the wall, rub your hand over the sheet to remove any air bubbles or gaps.
7. Cover space, then finish by sticking Smart Edge pieces to any exposed edge.
What do you all think? Pretty slick right!? I am going to use the leftover tile sheets for a backsplash at a rental unit I am helping renovate. I got a couple questions on my Instagram about durability, and it’s holding up great. It’s designed for kitchen and bathroomd, so it’s resistant to heat of stovetops and humidity from the shower. You can follow along on Instagram Stories and I’ll keep you updated on how it looks in a few months!

Thank you for supporting my amazing sponsors! The Home Depot is partnering with me to participate in this Smart Tiles Program. As a part of the Program, I am receiving compensation in the form of products and services, for the purpose of promoting The Home Depot. All expressed opinions and experiences are my own words. My post complies with the Word Of Mouth Marketing Association (WOMMA) Ethics Code and applicable Federal Trade
EXPLORE MORE: DIY PROJECT, Home DIY


Wow! This looks so super easy, what an amazing idea. Unfortunately I have just finished tiling our new bathroom but next time I have a space to do I will definitely be looking to these. Thanks for the inspiration.
Holly from The Art of Being Holly xo
I love post!!!!
New post: http://thepinkpineappleblog.blogspot.com/2017/10/nyfw-day-6.html
Beautiful project
New post:https://thepinkpineappleblog.blogspot.com/2017/10/nyfw-day-6.html
Looks easy, need to try out at my bathroom. Thanksx
I love the wallpaper and kind of think it would’ve looked better just to do the whole are with it instead of adding the tile. Just my opinion!
Where did you get the wallpaper? I love it!
Chasing Paper!
It looks so good, I really love the pattern!
https://www.makeandmess.com/
The bathroom looks great!!!!love the colors.????