DIY HOME | Board & Batten Wall
DIY PROJECT, Home DIY
I gave you a look at my guest room makeover a few posts back and promised I would share all the details on my DIY Map Dresser and DIY Board & Batten. If you missed it, check out my post on the DIY Map Dresser here. And without further delay; here are all the details for my guest room DIY Board & Batten.
Instead of just painting my guest room, I wanted to add texture and character to the space and you know I am always up for trying something new. Originally I started with using stick-on vertical wood planks, but the height and angles of the guest room walls proved very overwhelming for that idea. If you follow me on Instagram stories, you may remember my real talk about this change of plan (trial and error is the name of the game in the DIY world). The walls were damaged from peeling off the wood, so I needed to spend a little more time patching up and re-painting. After peeling off the loose ends, I used Ready Patch from Home Depot over the damaged areas. Then I sanded the patches until smooth before painting. After this little extra elbow-grease, I could move on with a new and improved vision! Bring on the Board and Batten.
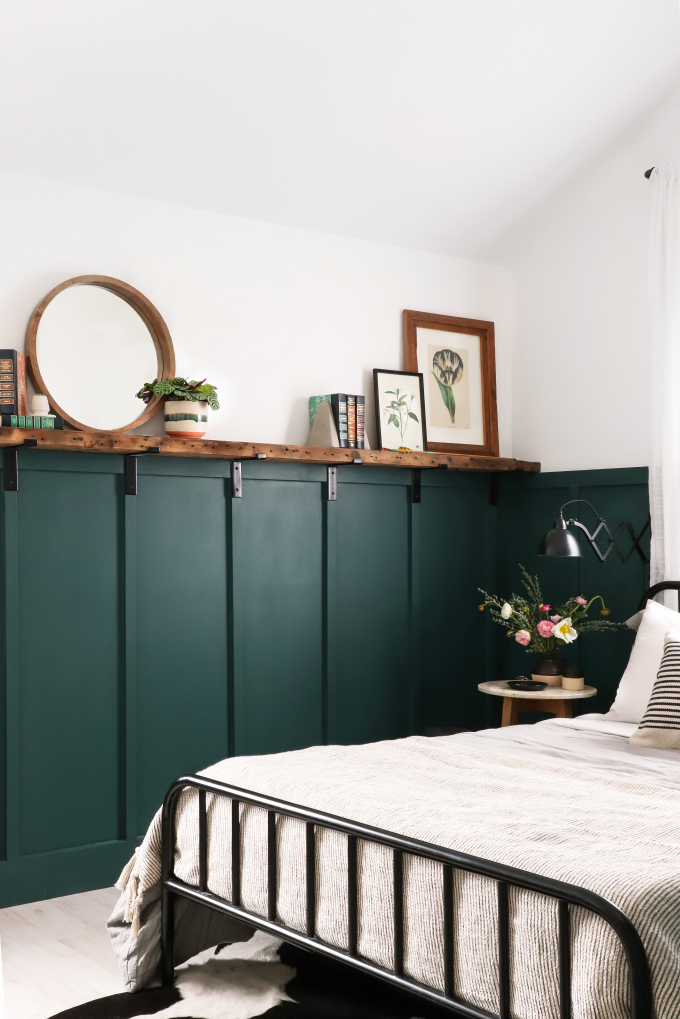
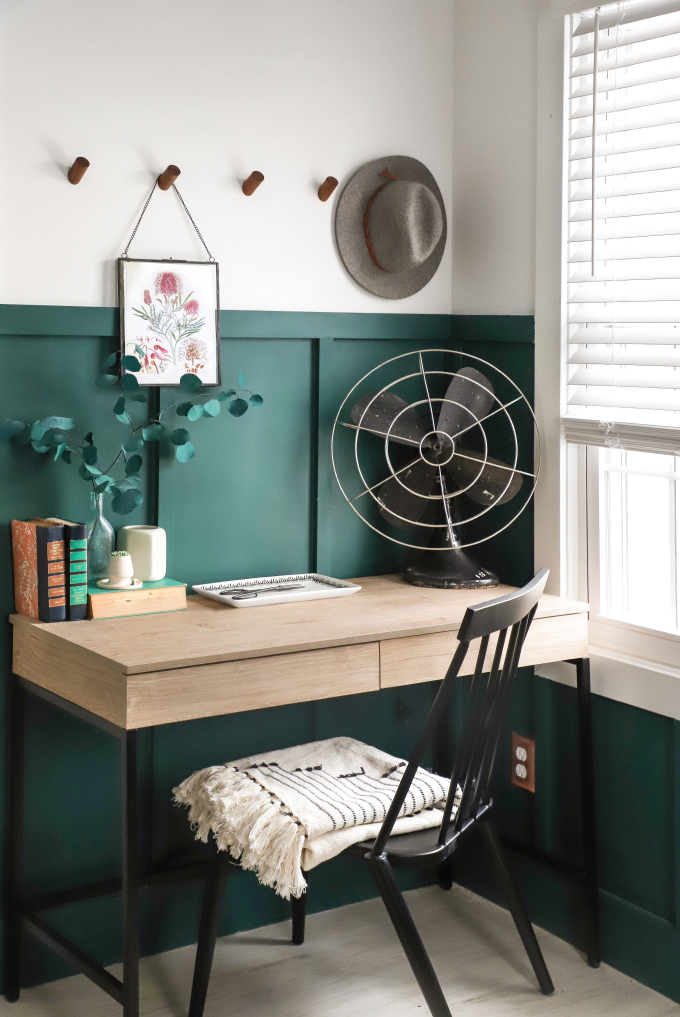
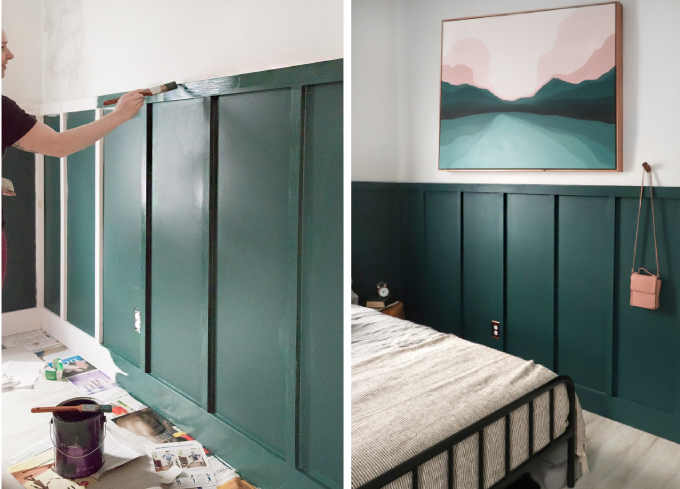
I started by painting the bottom portion of the wall Hostaleaf by Behr. I never thought I would put green on any wall in my home, but I have become super drawn to its warm woodsy vibe. This is the second room I have used a green shade (remember the woodsy boys room post?) and probably won’t be the last. Hostaleaf by Behr is especially rich in tone and provides a great backdrop for the decor in the room which stands out from the dark shade.
After painting the bottom portion of the wall, I nailed the wood boards to the wall along the stud lines. Once the seams and holes were filled and caulked, I painted all the boards green to match the wall. The finished look is very polished and cozy! This was the perfect small space to try this DIY project.
Read on for the full list of supplies and step by step instructions for DIY Board and Batten!
================================
What you need:
Pre-primed MDF trim pieces – 1×2 vertical boards and 1×3 horizontal boards
Miter saw
AirStrike 16-Gauge Cordless Straight Nailer
Behr Paint – Hostaleaf
Stud finder
Tape measure
Caulk
Level
Wood filler
Sanding Block
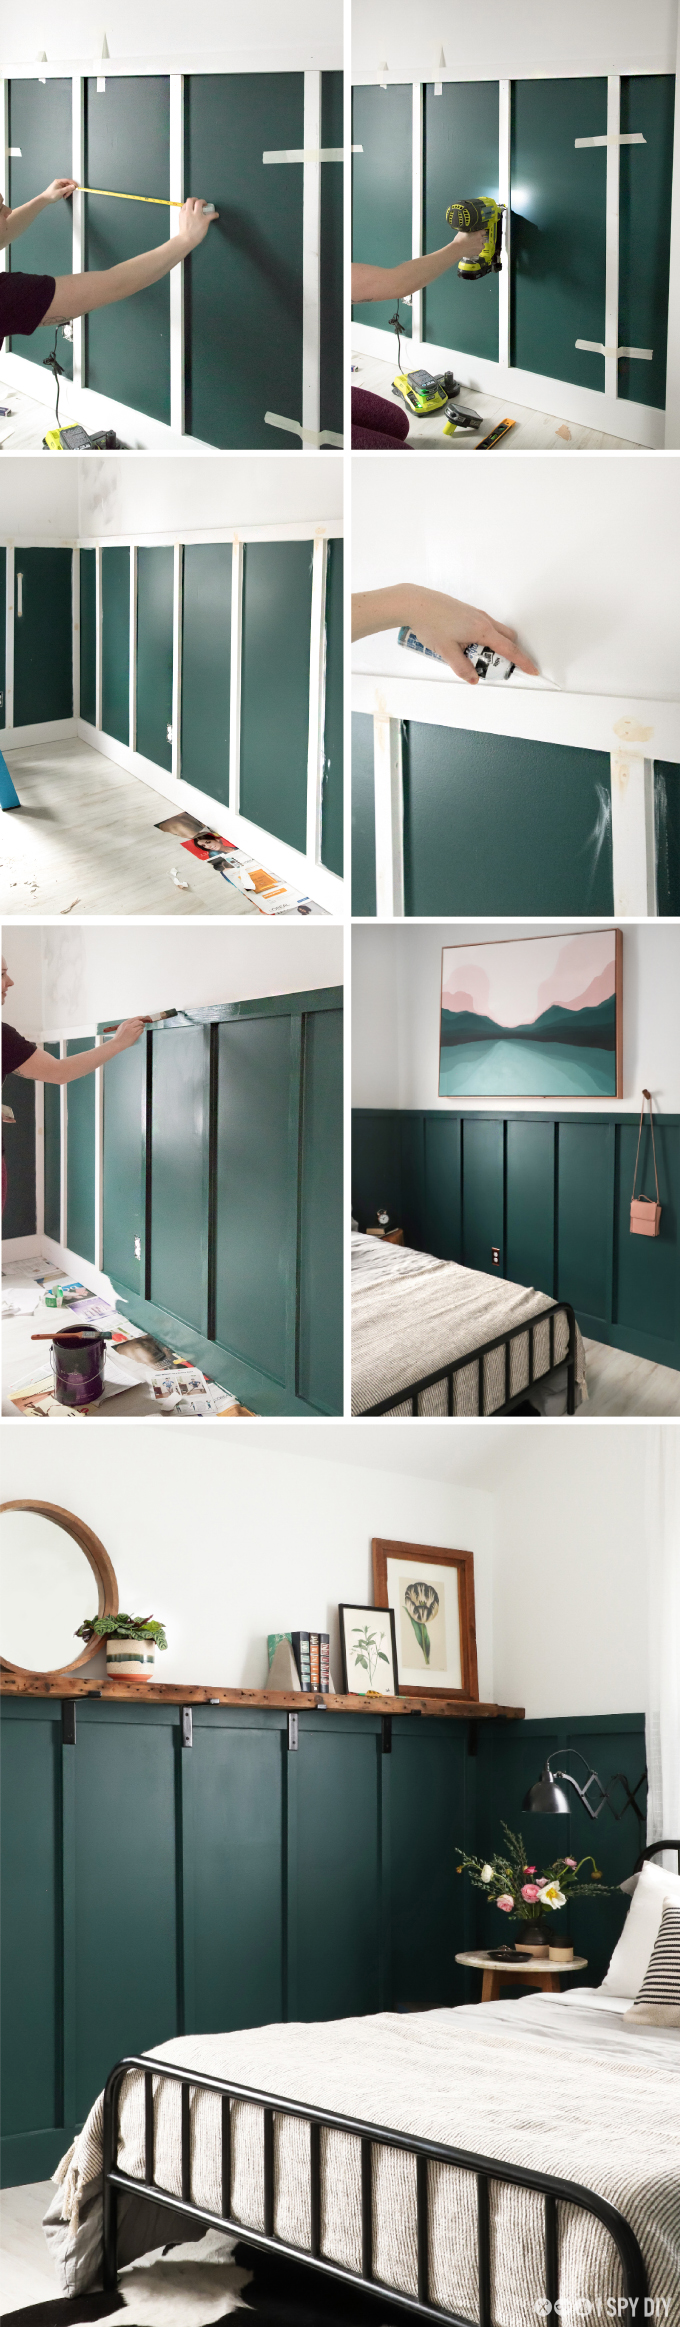
1. First I painted the wall green, 4.5ft up from the floor (my baseboards at 1×6).
2. Then I used the stud finder to mark where the studs were on the wall, mine were 16in apart.
3. Then we started with the top vertical board (1×3) and leveled it 4ft higher than the base board, and nailed it into the studs.
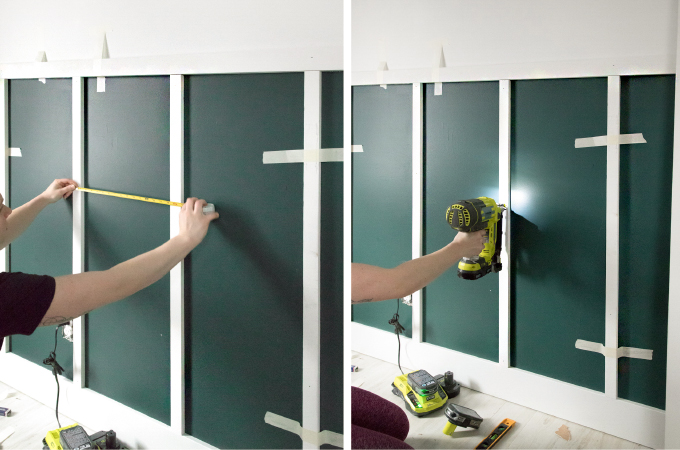
4. Since my walls are not completely straight (100 year old house!) we measured and cut each one of the vertical pieces individually with the miter saw, to fit snug between the baseboard and top board. Then I taped them to the wall where I had marked the studs.
5. After I taped all the vertical boards, we went back to make sure the spacing was even, and the spacing visually looked correct. A couple did not look right in the corners, so I adjusted and used wood glue to glue to the vertical piece to the bottom and top board and the wall. When dried they felt pretty darn secure!
6. After all the vertical boards were evenly spaced, we used a nail gun to nail the boards into the studs. We put 5-6 nails in each, enough that when we pulled on the boards they were securely in the wall.
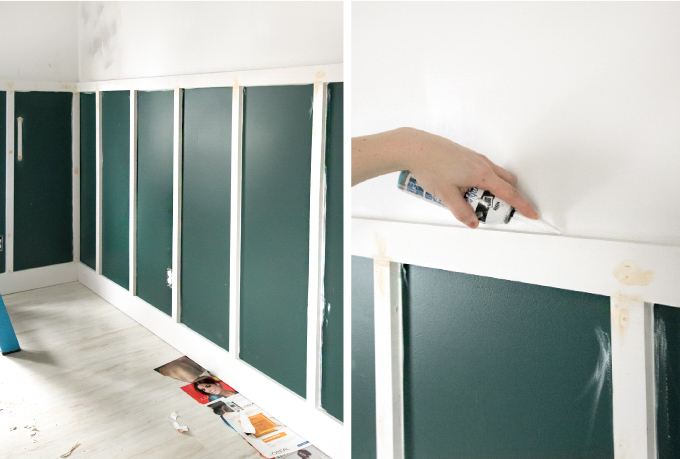
7. Next I filled all the nail holes in with wood filler, and caulked all the joints. I found this bottle of caulk at Home Depot that worked great for getting into all the corners.
8. After the wood filler dried, I sanded it down so the surface of the wood was smooth.
9. After the caulk was dry, we painted the baseboard, top board and vertical boards with 2 coats of the Hostaleaf green. Let dry, and done!!
—————————————-
PIN THE STEP-BY-STEP BELOW
—————————————-
EXPLORE MORE: DIY PROJECT, Home DIY


This is such a creative idea for a spare room, it looks great and really adds character to the room!
Jess | http://www.beautythroughthespecs.co.uk
Great deco,I loved
http://thepinkpineappleblog.blogspot.com/
This is such a lovely idea and it makes the whole room look different. Love it. X
http://www.thoughtsinstyle.com/