DIY ART |Geometric Gradient Color Story
DIY PROJECT, Home DIY
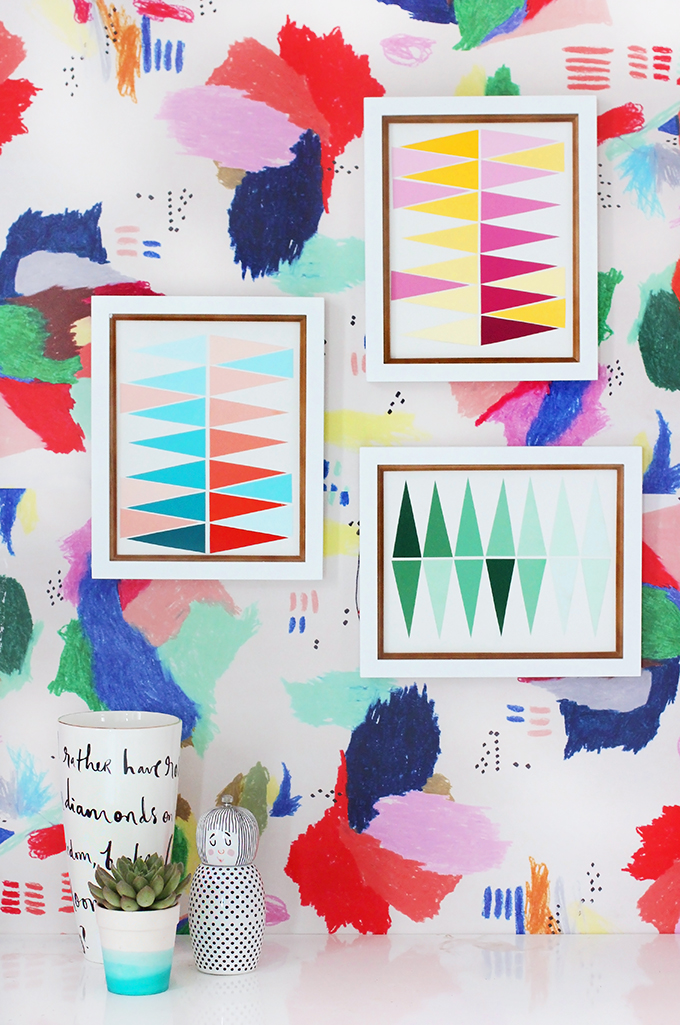
I was having coffee with my friend, Lauren (the amazing interior designer behind LaurInteriors) and she showed me some geometric gradient art pieces she made a while back, and I could not believe how something so simple to make, could add so color and impact to a wall. I invited her over for a craftnoon, to make more for I SPY DIY Studio, and am so stoked with color explosion happening!
Now a bit from Lauren on Choosing & Arranging your colors:
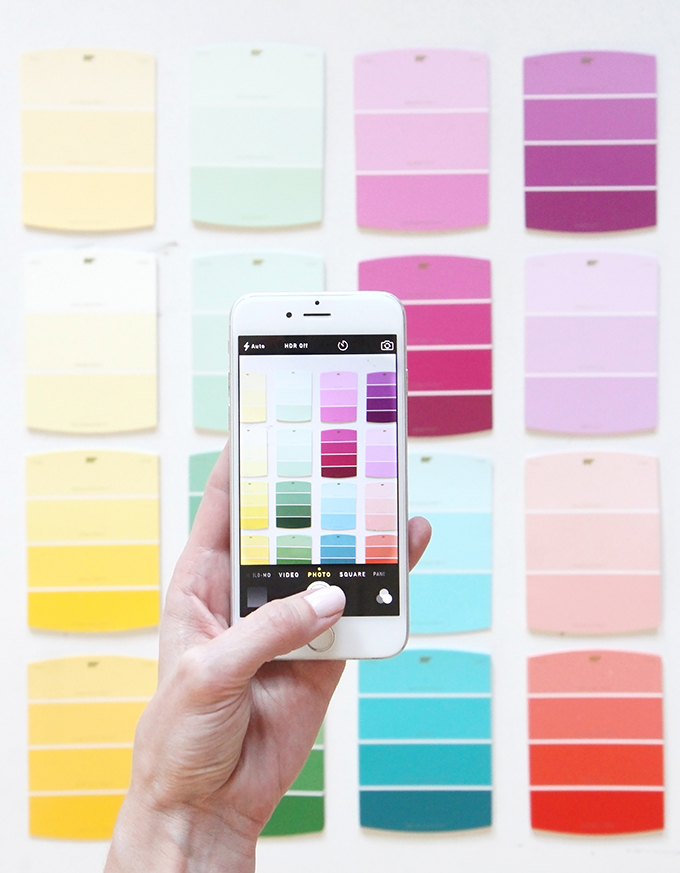
One of my favorite things about this project is that you get to work with bright and bold colors that may not be appropriate for interior walls, but are totally appropriate for interior wall ART! So have fun with it… Get funky and grab those crazy color chips that rarely need restocking anyways! Here are a few tips for choosing and arranging your colors into an awesome art for any space:
1. Grab at least 2-4 of each color chip. Some colors may be used more than once and extras give you room for do-overs!
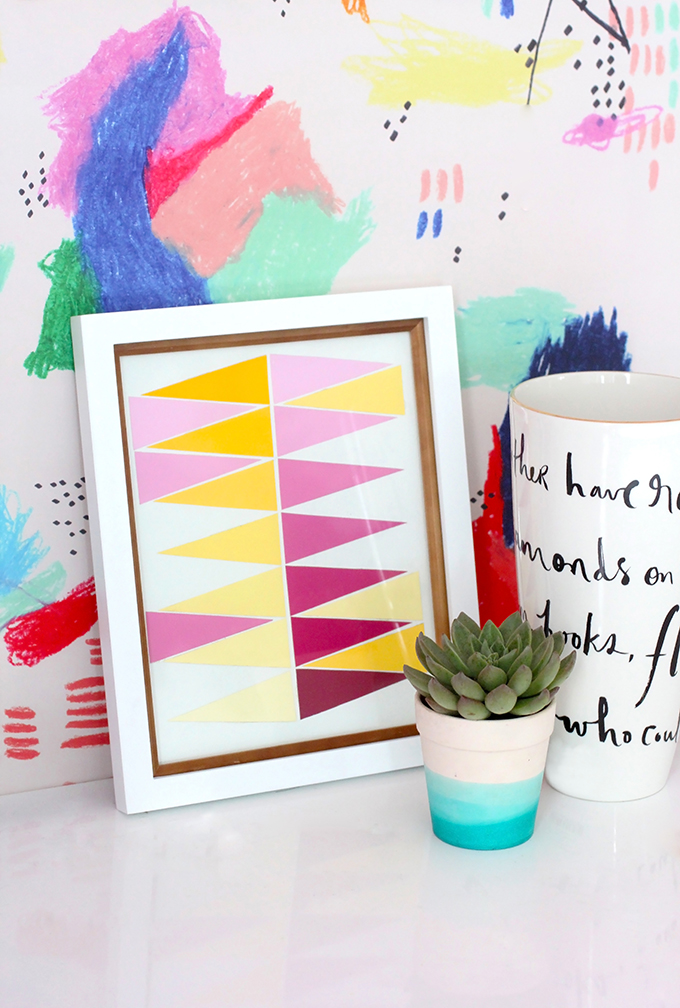
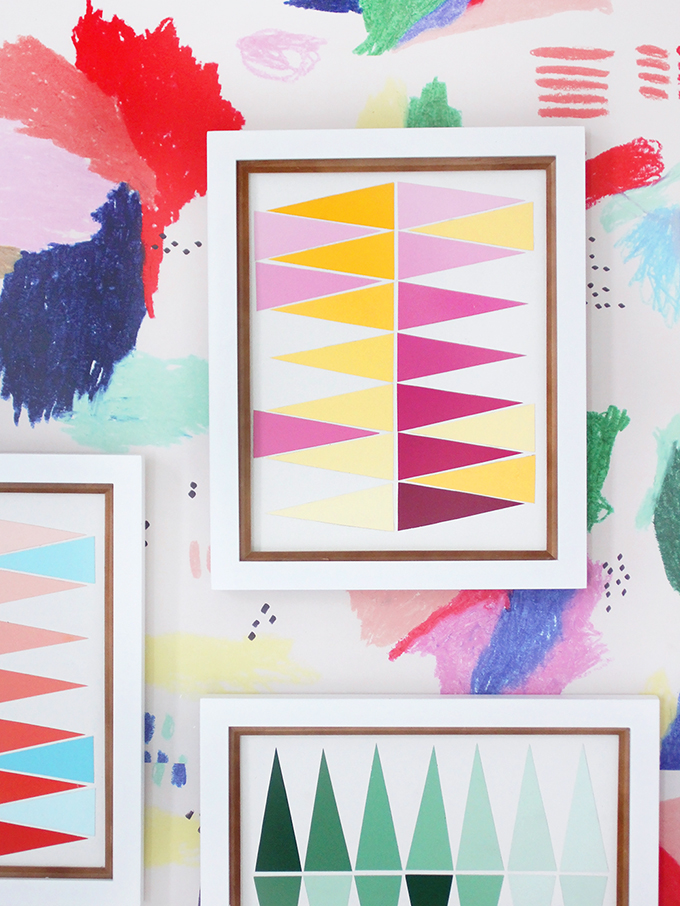
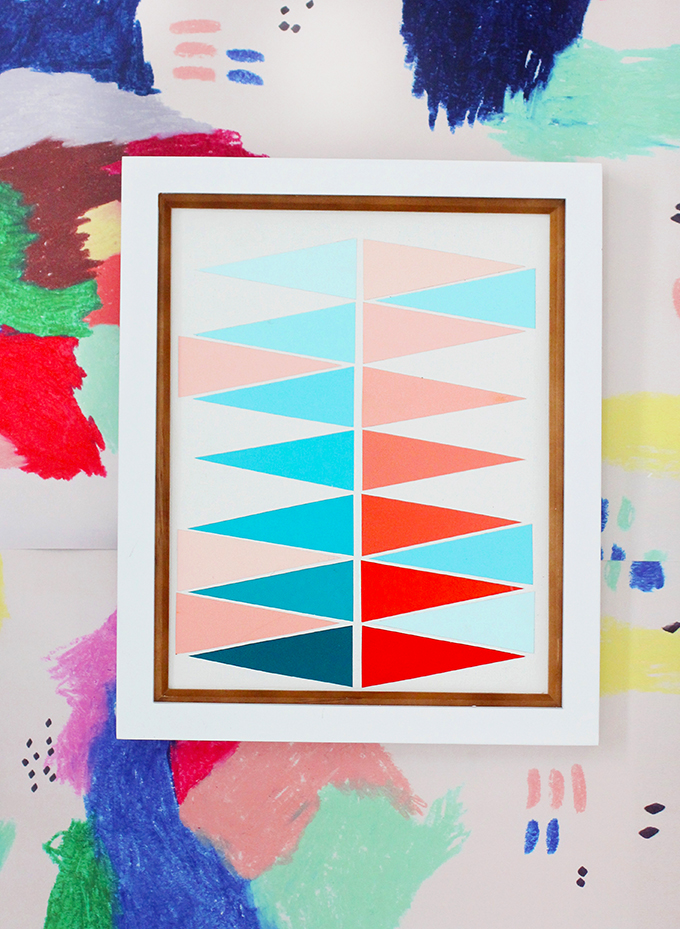
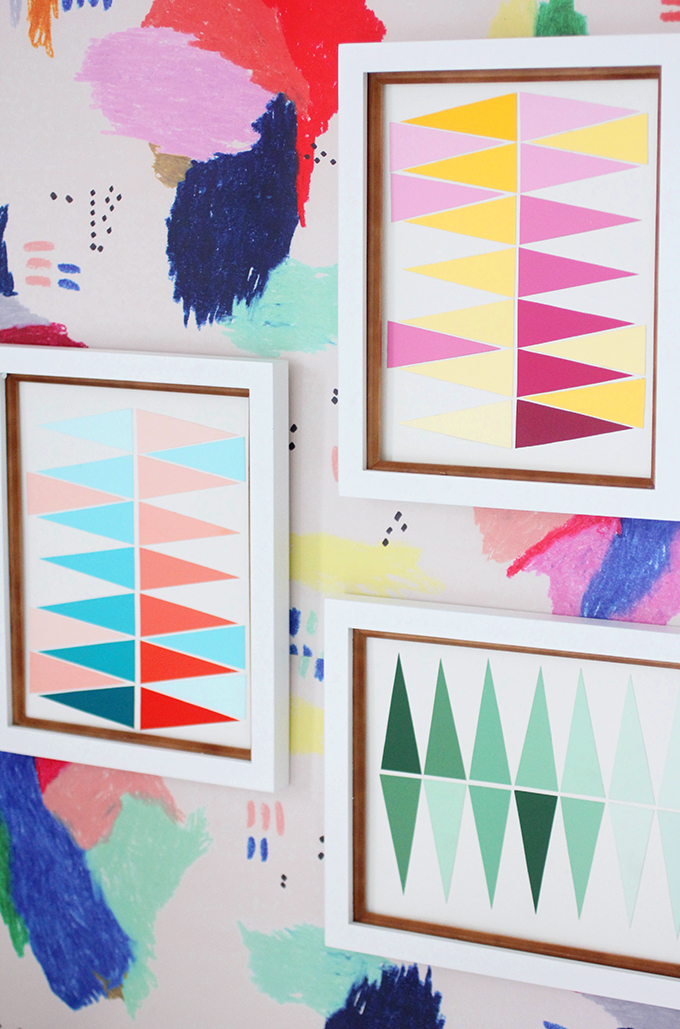
2. For a cool color study, choose one color only, maybe your favorite color. Be sure to grab at least 2-4 color chips of your gradient color, as you will need 2 triangles of each color. Arrange your triangles in gradient order, from darkest to lightest, same order as the color chip. Wide ends of the triangles facing inwards towards each other and pointy sides outwards. You could also try rearranging the colors randomly, on one side only, to add some extra interest. As seen in the green study here/above.
More tips and steps after the break…
3. OR Choose 2 colors, complimentary colors. Such as blues and oranges, greens and pinks, yellows and purples. You can use this color wheel as a guide to which are complimentary. 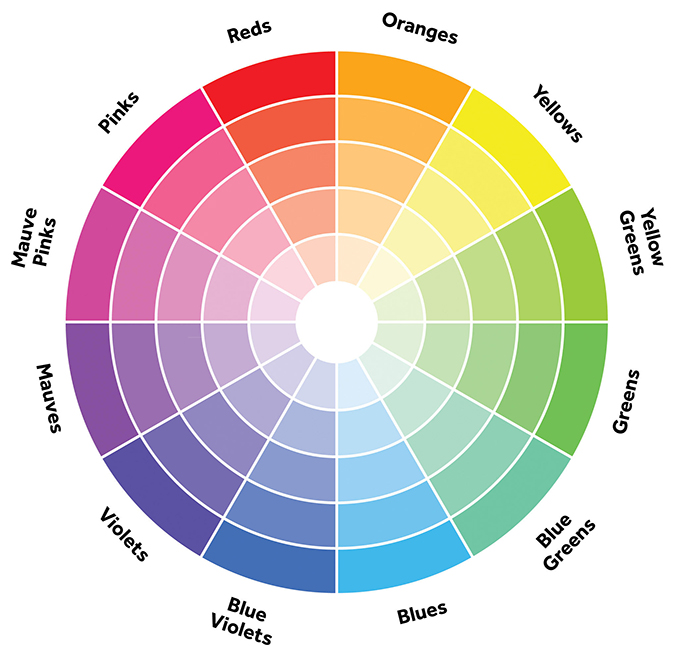
4. Colors that are directly across from one another are considered complimentary, which create the most contrast and visual interest for the eye. Choose 2 colors opposite or near opposite on the color wheel for a no-fail combination. Grab all color chips coordinating with those colors so you have the whole gradient.
5. Arrange with darkest colors on the bottom and work your way up to the lightest colors at the top. Now add 3 more triangles of the lighter to mid-tones of each color, on the OTHER sides, facing inwards. Mix it up and randomly arrange mid-tones down between the dark colors and up between the light colors until you get a cool color contrast that makes you happy!
What you need:
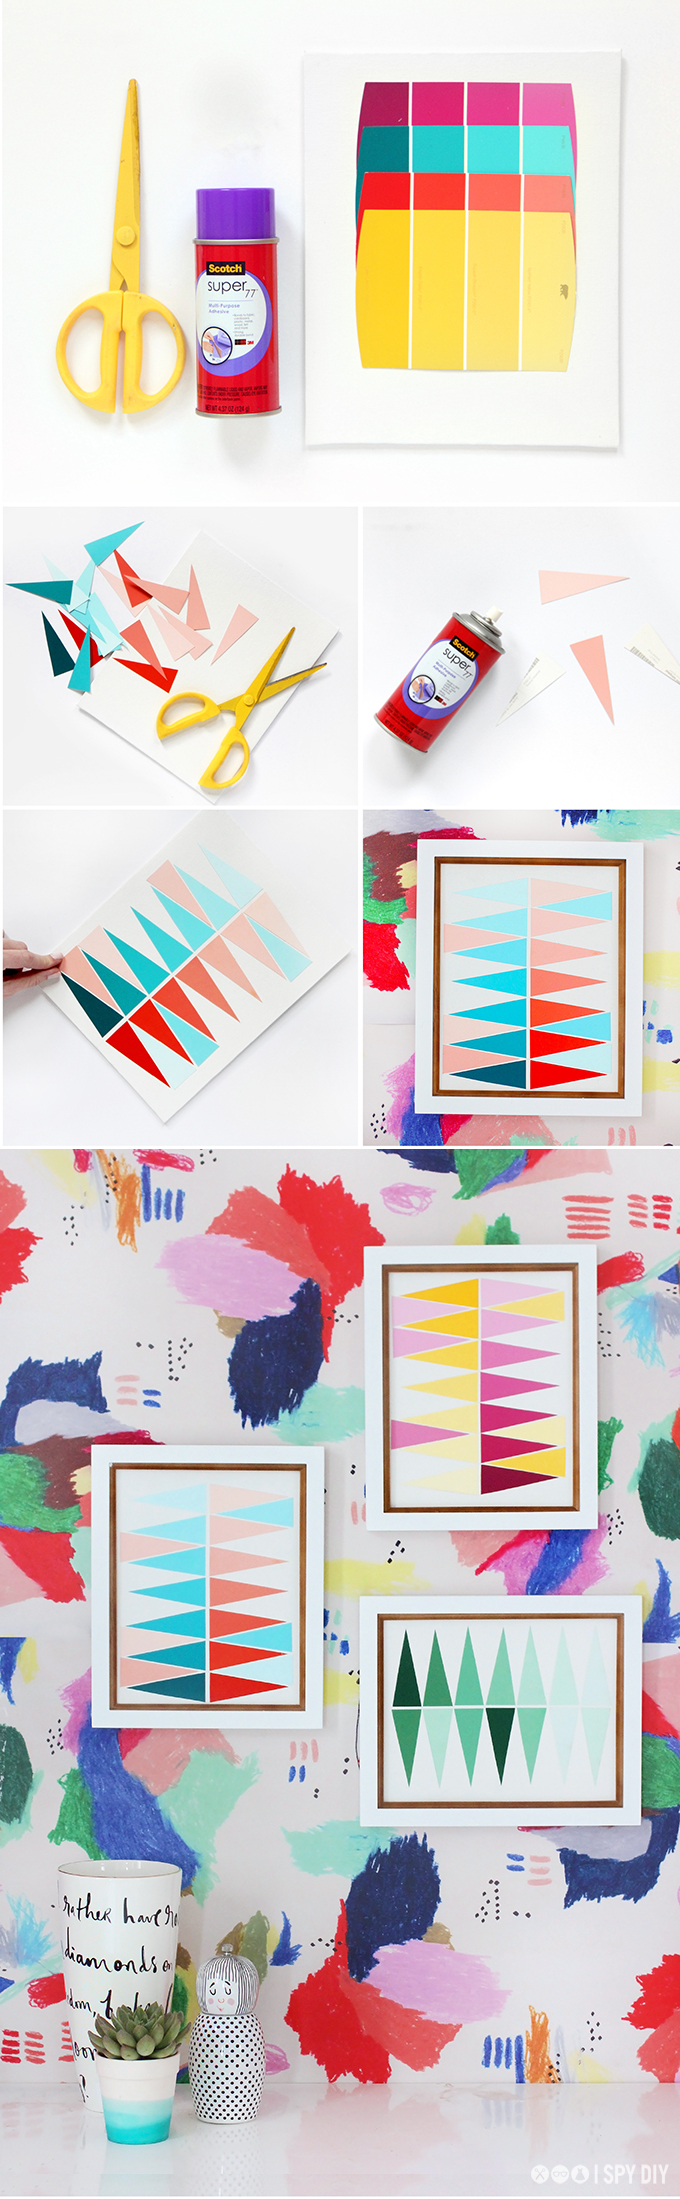
Paint chips (they are free at the hardware store!)
Pencil
Scissors
Spray Adhesive
8×10 Canvas
8×10 Frames
What to do:
1. Create a triangle stencil that fits inside each color of your paintchip
2. Trace equal sized triangles onto each color. Then cut each out.
3. Arrange your triangles (use the tips above)
4. Away from you canvas, spray the back of a triangle with the spray adhesive. Works best to do one at a time.
5. Place the triangle into its spot. You can always mark the where the corner should go with a pencil for precise placement.
6. Let dry, frame and hang. Done!
EXPLORE MORE: DIY PROJECT, Home DIY


I really like the idea, and it’s so cheap to craft! Amazing!
https://www.makeandmess.com/
Very fun deco and nordic style we love. Happy weekend!
http://www.inatrendytown.com
I really love those frames, could you provide a link of where they’re from? Thanks!!
It a bit much for me because I am very conservative. Like the idea.
This is such a clever idea. I love using paint chips for projects, although sometimes I feel a bit guilty taking them… But I do give the hardware/paint stores a lot of business otherwise, so it all works out in the end! http://www.enchantinglyemily.com
Great idea – simple yet very elegant. 🙂
http://www.ieva.studio
LOVE,LOVE,LOVE ❤ THIS IDEA!!! So very pretty & interesting to look at!! It’s very pleasing to the eye. I might just try this!!! Kind of intimidating tho, at least to me!!! But I guess you just have to take time on it.
These prints are so cute! I love how much life they add to the room!
Paige
http://thehappyflammily.com
Seriously, SO pretty!!!!
Que máximo Jenni. Uma ideia simples e super interessante. Bjsss
http://dibobis.blogspot.com.br/
This is lovely x
http://jessicawoods.fr
So trendy!!! Beautiful colors.