Charcoal Bungalow | How-To Upgrade to Solid Doors & Brass Hardware
DIY PROJECT
A few weeks ago we upgraded all of our doors at the Charcoal Bungalow from hollow core to
solid doors with new Schlage brass hardware. It is definitely a bit of work, but totally worth it. We
received a bunch of questions on Instagram during the process, so let’s chat about it!
Picking Doors + Hardware
Since this was a team project, I’ll share how I picked out what we went with and then I’ll hand it
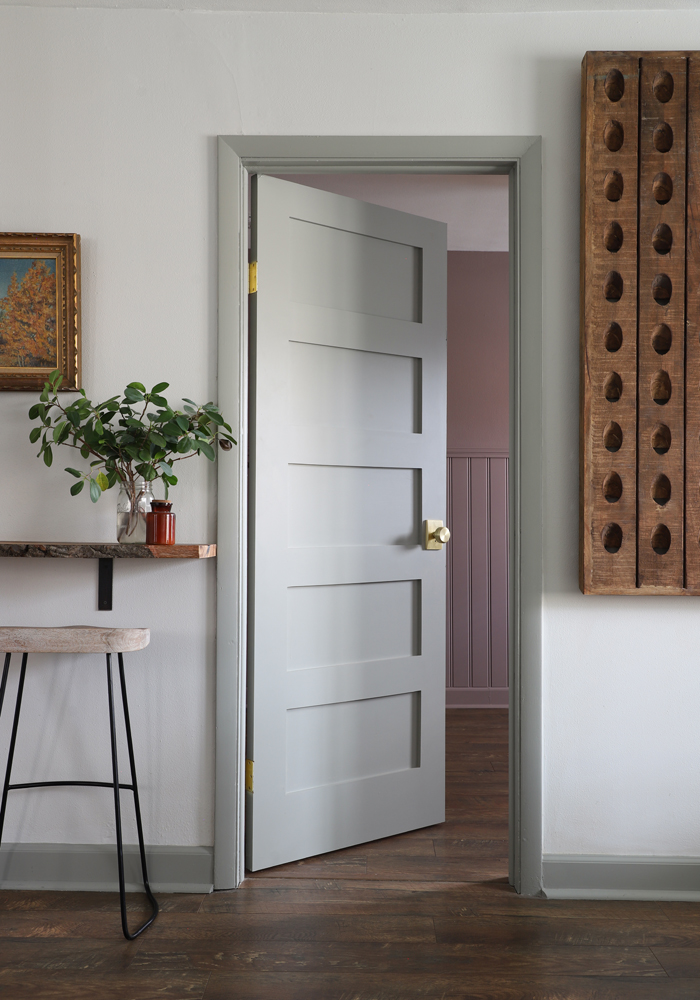
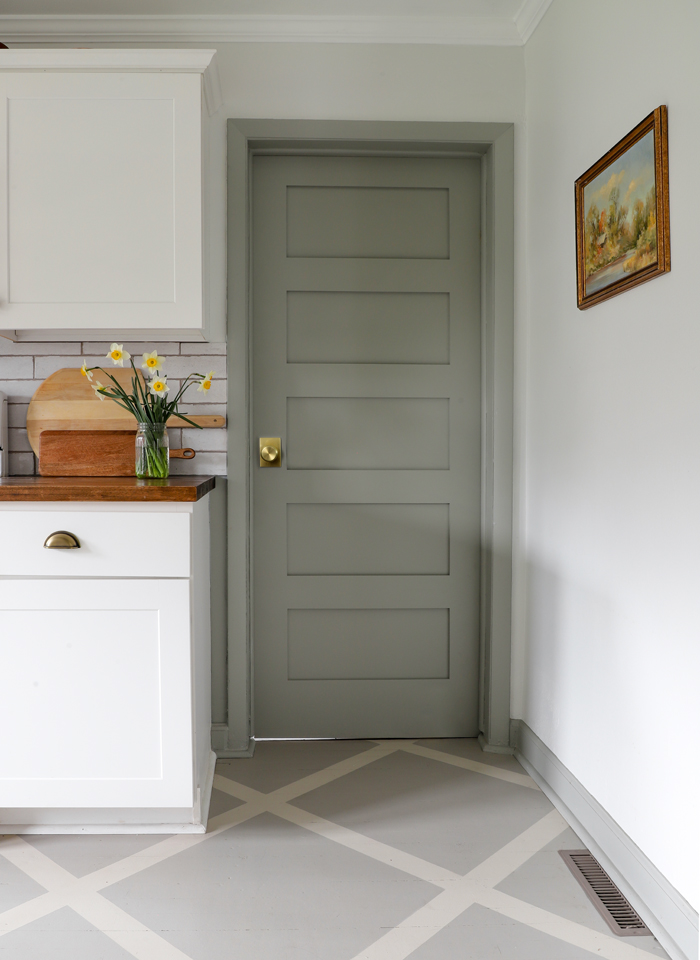
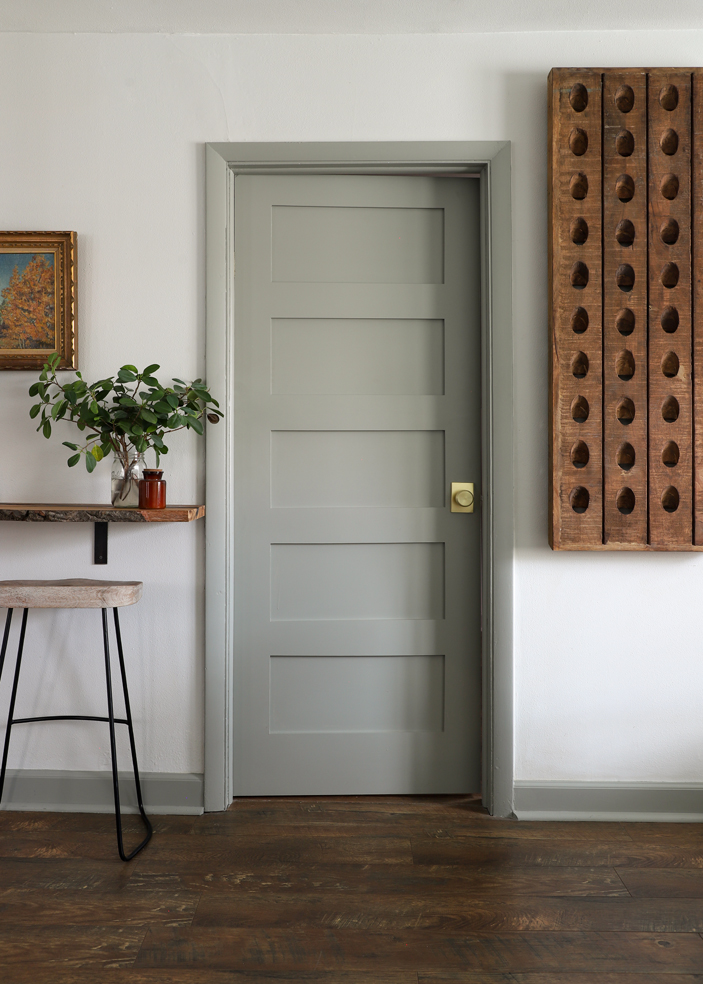
over to Mr. Yolo to talk about the install. I first used these 5 panel doors in our Barnhouse and
fell in love with them. These are solid doors with panels that add so much character. They also
fit well with the time period of the Barnhouse and the Bungalow.
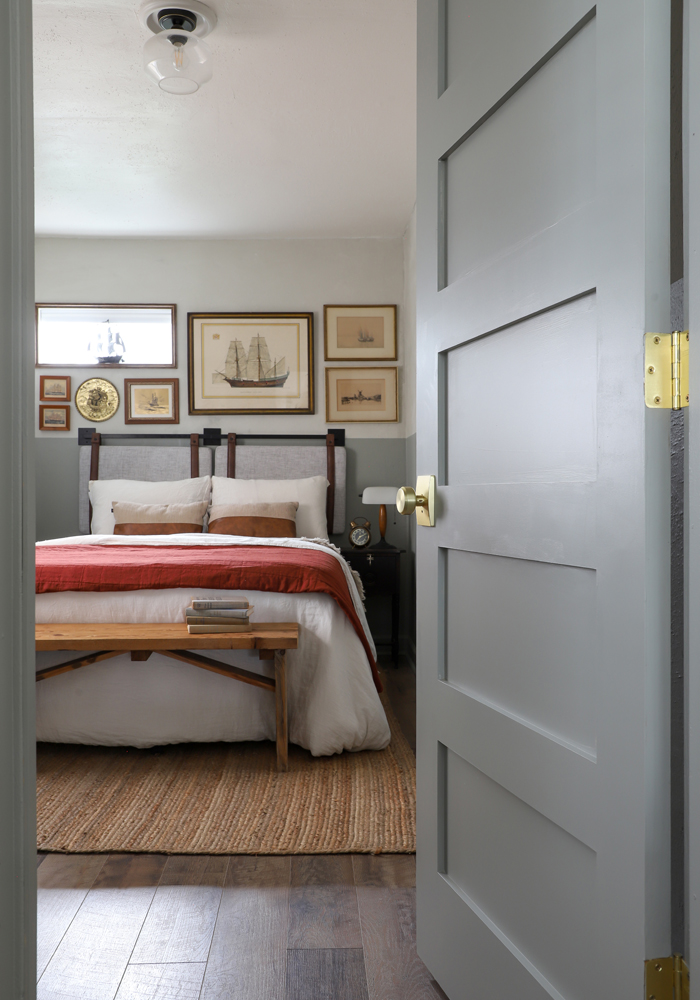
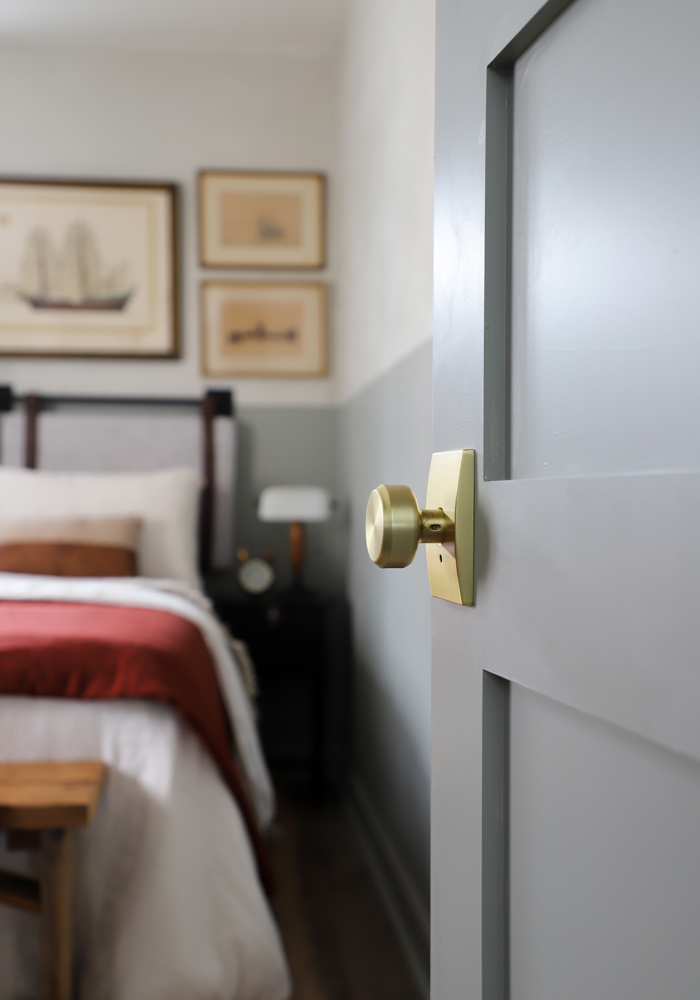
Since we upgraded the doors, it made sense to upgrade the hardware. There are lots of brass
accents in the house and I thought the Schlage Bowery knob with Century Trim in Satin Brass
would be so pretty against the Old Celadon painted doors. The combination looks beautiful on
the new doors, with brass hinges to match. You can mix and match the knob and trim, which I love for really customizing your home! We are planning on doing the Hobson glass knob on the Bathroom door, with the same Century trim.
Time for a Mr. Yolo takeover…
Because our new doors were slabs and didn’t have existing hardware cut-outs, there were a surprising amount of steps to this process. But once you do it once the rest go pretty quickly. Here is a step-by-step guide
for the method I used on this door project.
Measure
Before taking the existing doors off, measure both the door and the opening in multiple spots (a
truly square door opening is not as common as one may think.) Measure high and low width,
and left and right heights to determine what size doors to get and if those new doors will need to
be cut to fit. Also, just because the existing door is a certain height, does not mean it needs to
stay that height. This can change if you have removed or added flooring to the house.
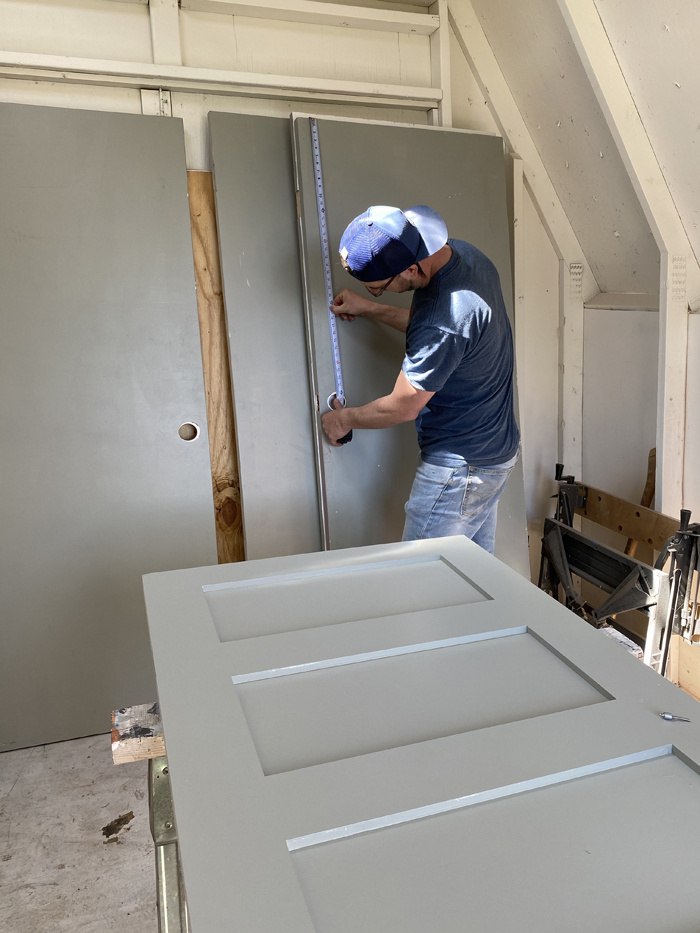
If a new door slab does need to be cut, mark the door and clamp a straight edge (offset from the
cut line) so that the saw can slide on the straight edge for a nice, straight cut. Once you have
determined the size of the door and made any cuts / adjustments, it’s time for paint!
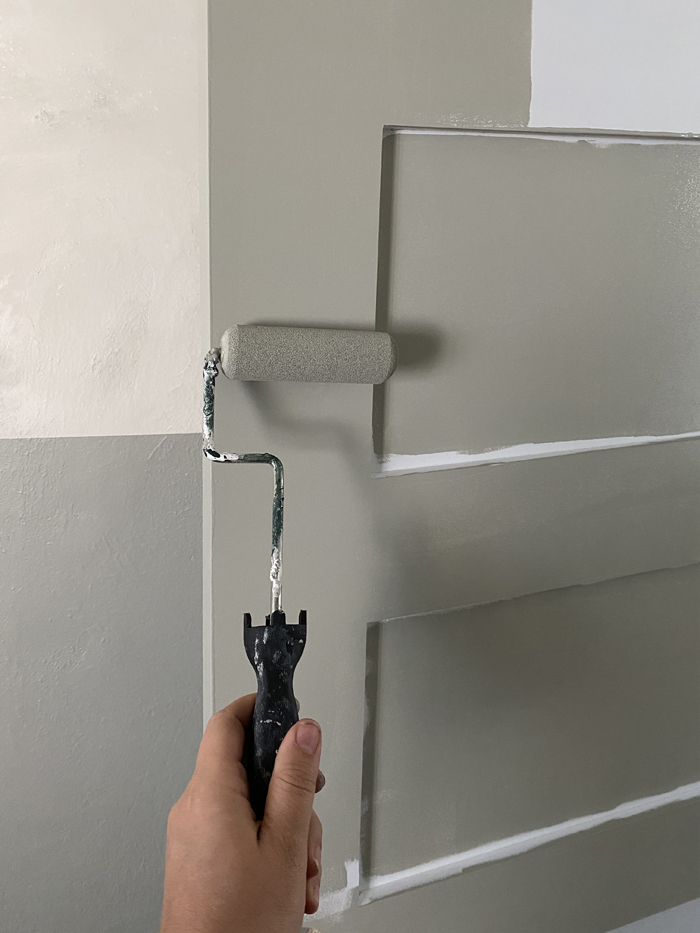
Paint
We used a Weenie Roller (yes, that’s what it’s called) for the large areas and a 1.5” brush to get
the perimeter of the inset panels. I used two coats. Make sure to paint the door prior to hanging
it, and paint with the door laying flat (we did that for one side, but because of rain painted the other side hanging, and it was less successful.) We put them on saw horses. Although we tried hard to avoid drips, some were still visible. With small drips (majority), we used 220 grit sandpaper and buffed it out. For a couple of the larger drips, we used a putty knife to scrape them off. Then repaint. Let dry before cutting in the door knobs.
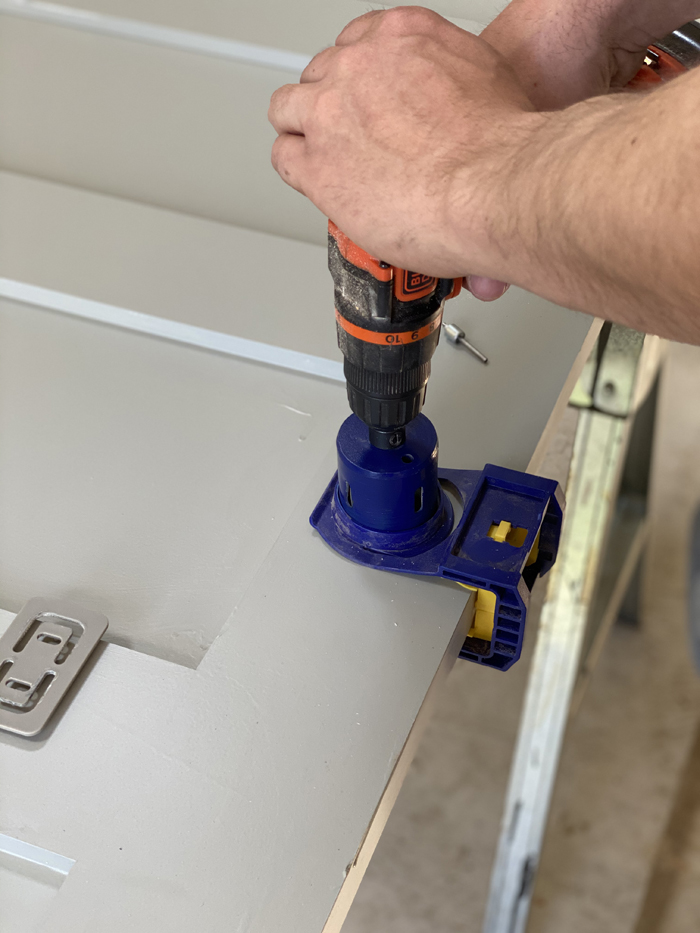
Knob Install
I used the existing door to locate the hardware cut for the new door, by measuring from the top. This door lock installation kit was really helpful. It came with two hole saws (one for the knob opening, and one for the latch opening), a jig for both hole saws, a router bit, and latch plate template.
Steps for cutting the holes were:
1) Attach the jig to the door with screws.
2) Use the large hole saw to core a hole for the door knobs.
3) Use the other hole saw to core the latch.
4) Attach the latch plate template to the side of the door with screws.
5) Use the router bit to carve out the perimeter of the latch plate.
6) Use a chisel to remove wood left inside of the perimeter made by the router bit.

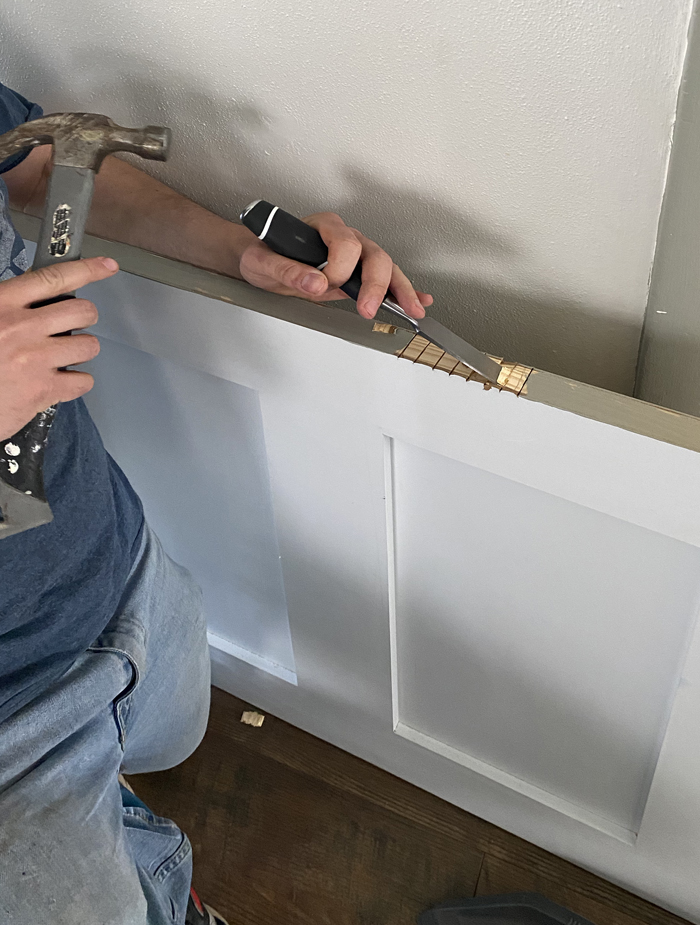
Hinge Install
If the new and existing doors are identical in size and you are reusing hinges, it’s probably safe
to use the existing door as a template for hinge locations on the new door. Since our new doors
were not the same (left them longer to account for floor removed during the initial renovation)
and because our new hinges were larger than the existing hinges, we started fresh.
I assumed an ⅛” gap at the top of the door, and then measured from the door frame to the top of
the top hinge and from the frame to the top of the bottom hinge. Using that dimension, I traced
the new hinge onto the new door and used a chisel to create a recess for the hinge. I did the
same for the door frame (traced and chiseled to accommodate the new hinge).
Door Install
Once I had the hinges in place, I used this Air Shim to get the door set in the opening. This tool
was great and worth picking up. I set the door in the opening, on top of the deflated Air Shim.
Using the hole for the door knob to hold the door steady, I inflated the Air Shim to get the hinges
in line to drop the pin through.
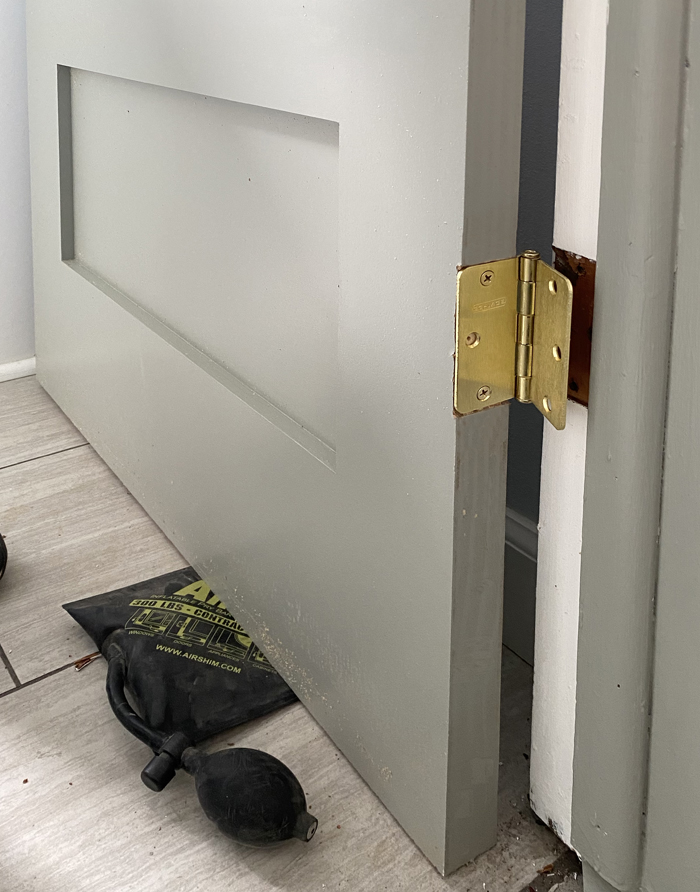
With the door on, I eyeballed the hole I made for the door latch to see if it lined up with the
existing latch hole in the frame. If it doesn’t, don’t panic. You can use a large drill bit to make the
latch hole larger. From there install, the door knobs and latch/strike plates and test the door. If
the door isn’t latching, the easiest thing to fix is adjusting the strike plate on the door frame.
Either in or out, or up or down.
Door Replacement Return On Investment
Return on Investment (ROI) is always tough to calculate. When looking at home listings, I’ve never seen
“new five panel solid core doors” in a description. That being said, the new doors and hardware do bring a
“wow” factor and design unity to this home. It’s the never ending cycle of home improvements.
Upgrade item A, now Item B looks outdated. Upgrade Item B and now Item C needs updated,
etc. We’re really happy that we took the time to go this extra step with the Bungalow. These
timeless doors will be able to transition with this home well into the future.
Project Complete
A huge thanks to Mr. Yolo for doing the heavy lifting and sharing the step by step! Our advice: if
you’re thinking about upgrading doors, start with the most prominent, in-view doors first. All of
your doors don’t necessarily have to match if they are not all in view at the same time. This
project is a great way to spend a weekend. If you have more questions about the
process send us a DM or comment below!
This project was made in partnership with Schlage, thank you for supporting our amazing sponsors!
EXPLORE MORE: DIY PROJECT


I absolutely love these doors. We have been looking around at doors so that we can replace our hollow core ones. I haven’t seen these solid core ones. Where did you purchase them?
Love the color. What paint did you use.
Silver Celadon