BAYVIEW BARNHOUSE | Kitchen Renovation Before & After
DIY PROJECT, Home DIY
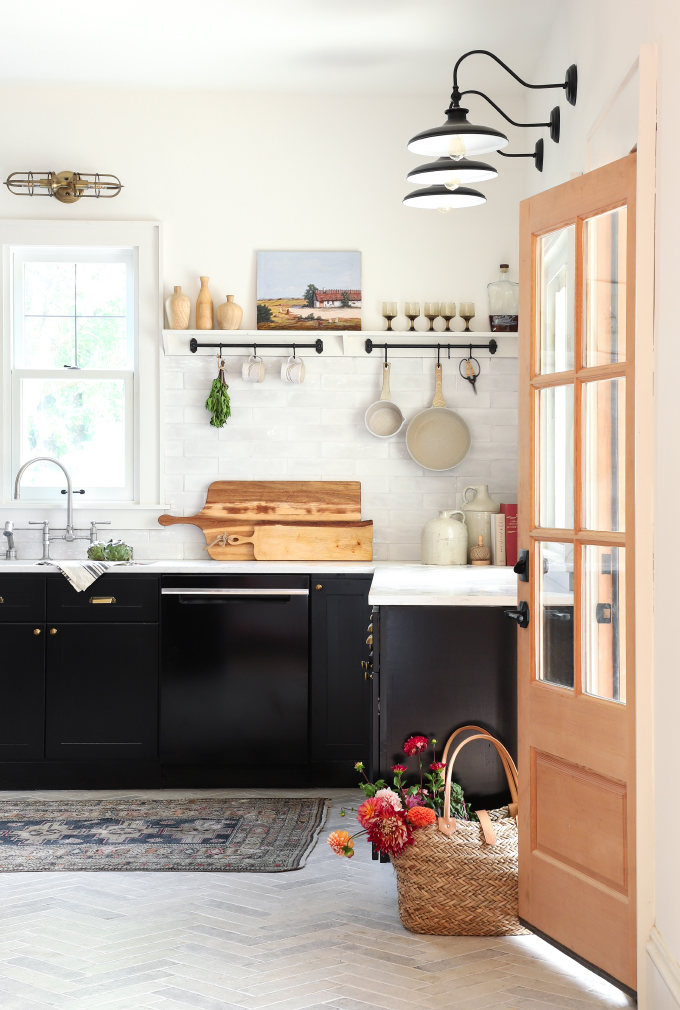
I have been a little quiet over here on the blog because I have been working on my latest renovation The BayView Barnhouse, and I’m SUPER excited to show you the amazing progress we’ve made on the kitchen!! The rest of the house is not done yet, actually if you would pan around, the reverse view is still a construction site, ha! But I wanted to photograph the kitchen so I could start showing you all the DIY projects we’ve been working on (like the hood cover! And the utility rack shelves! The pantry door!) so I sweep up the saw dust, styled it up, and snapped some photos. If you want to see the nitty gritty of the decision making, make sure to head over to the Barnhouse highlights on @ISPYDIY Instagram, where I chronical the entire process! I am sure I will make tweaks as we finish up the house, but I wanted to check in with you all, and give you sources for everything I picked out (at the end of the post) so here we go!

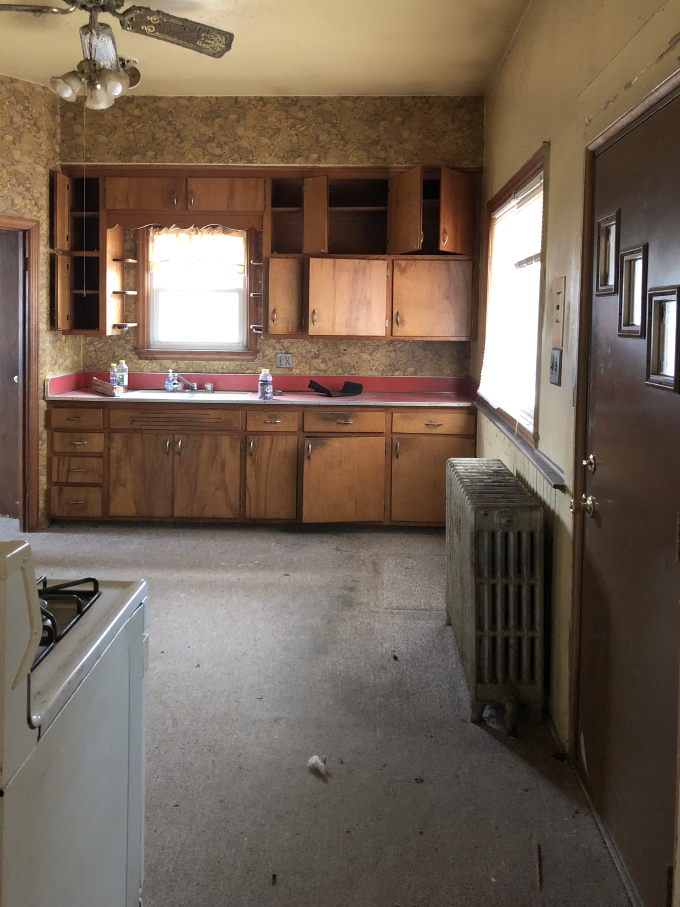
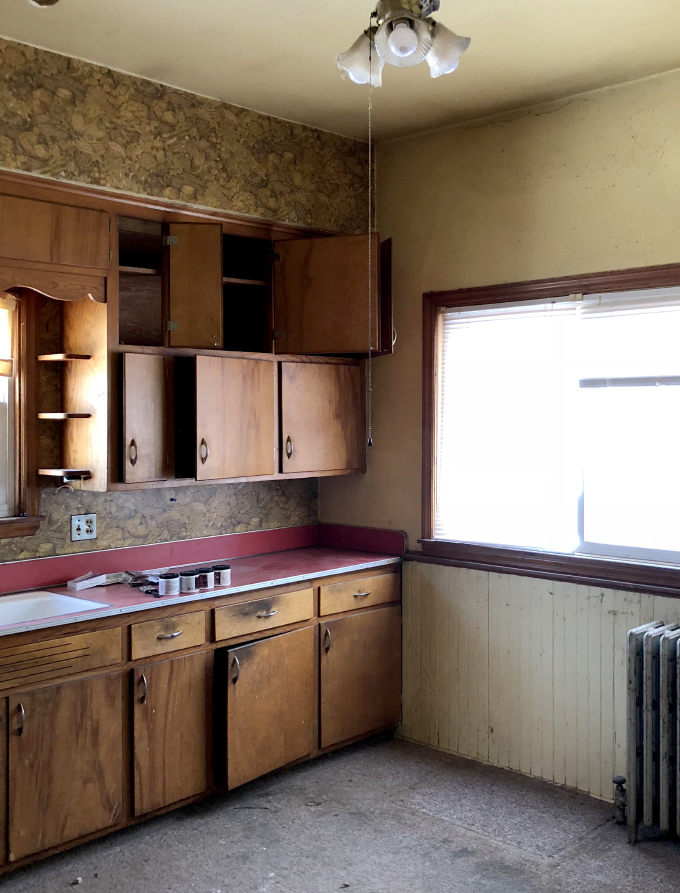
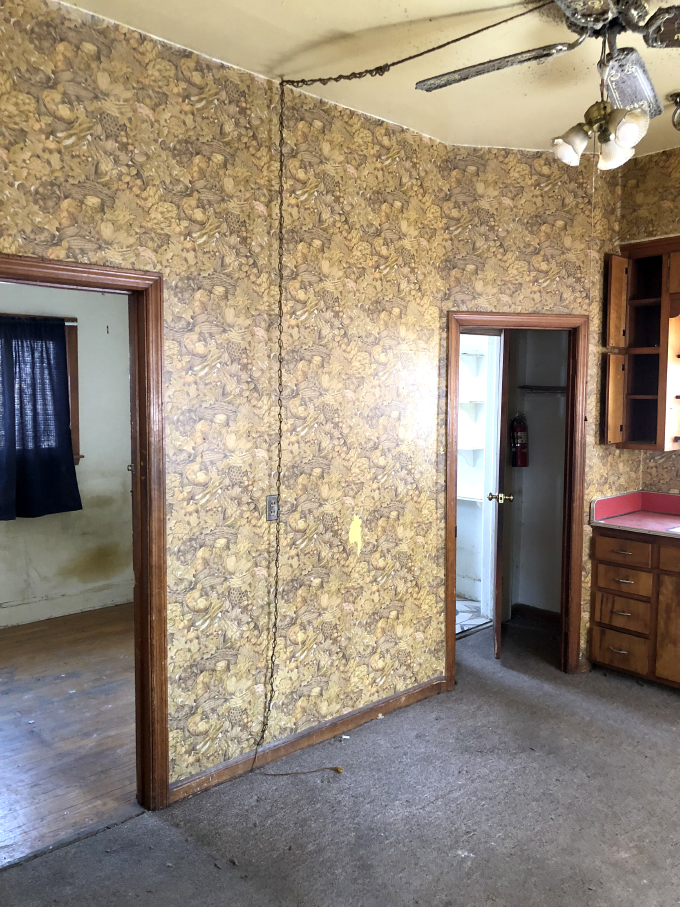
For those new to the renovation, the Milwaukee house was built in 1885 and had been converted into a duplex when I saw it. There had not been a ton of upkeep on the house, and let’s just say the former owners were “collectors”…but looking past all the stuff, I saw tall ceilings and a great layout, and immediately fell in love with the house, and knew it needed to my new renovation project! There is some beautiful original character in the house, but the kitchen was not one of those places, and it need to be gutted asap..kitchen carpet…YUCK!

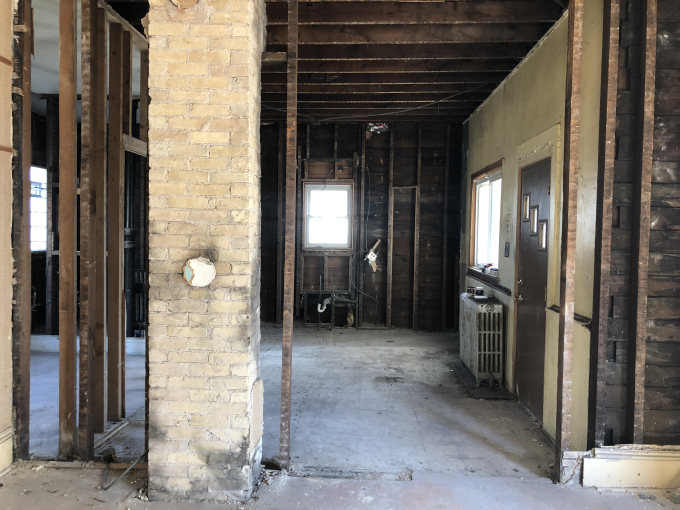 Sadly the original hardwood did not extend to the kitchen so the floors and interior walls were all torn out, and the radiator heat was removed and upgraded. The closet wall was taken out to create an open concept kitchen. A little surprise: the original chimney was hidden in the closet, blocking the view of the kitchen. It ran through all three floors in pretty inconvienict spots, so we decided to tear it down, and keep the bricks to use for another project in the house.
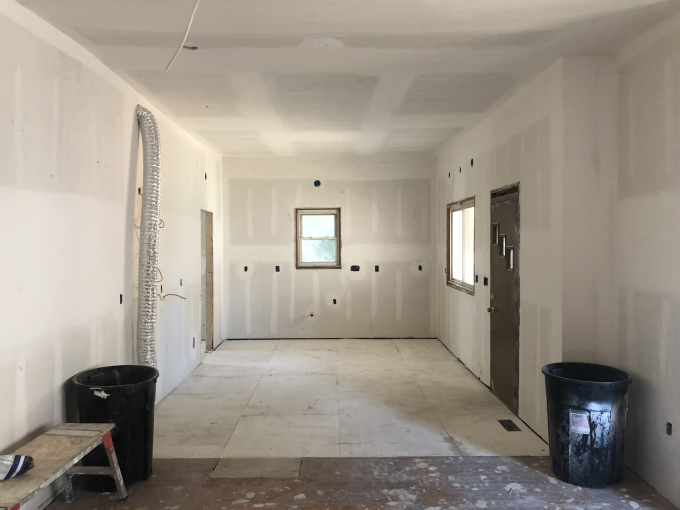
I mentioned the great layout before, which was a huge selling factor because we did not have to spend a ton of money reconfiguring walls. Once all the guts of the house were upgraded (electrical/plumbing/HVAC) the walls were closed back up and I had a squared off space to design the kitchen.


When designing the kitchen, budget played a big factor. Even I would have loved all new windows (like in my dream mockup above), the ones that were already there had been replaced recently, so it did not make sense to spend money on new ones. So I had to design within those parameters. I know, I know, the layout is similar to the kitchen in my last renovation, but the peninsula set up honestly works so well for hosting, and I just worked in the space. This original mockup was a bit more industial loft, which ended up changing as I starting finding decor items at antique shops (lights, stools, decor), and the look softened up a bit to fit the “Barnhouse” vibe.

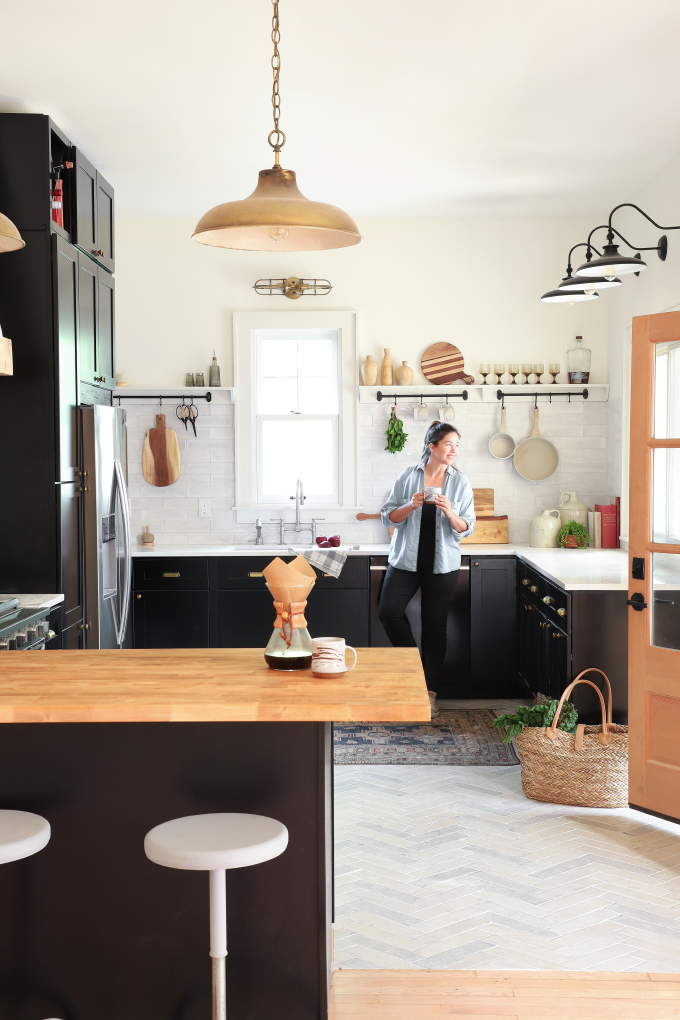
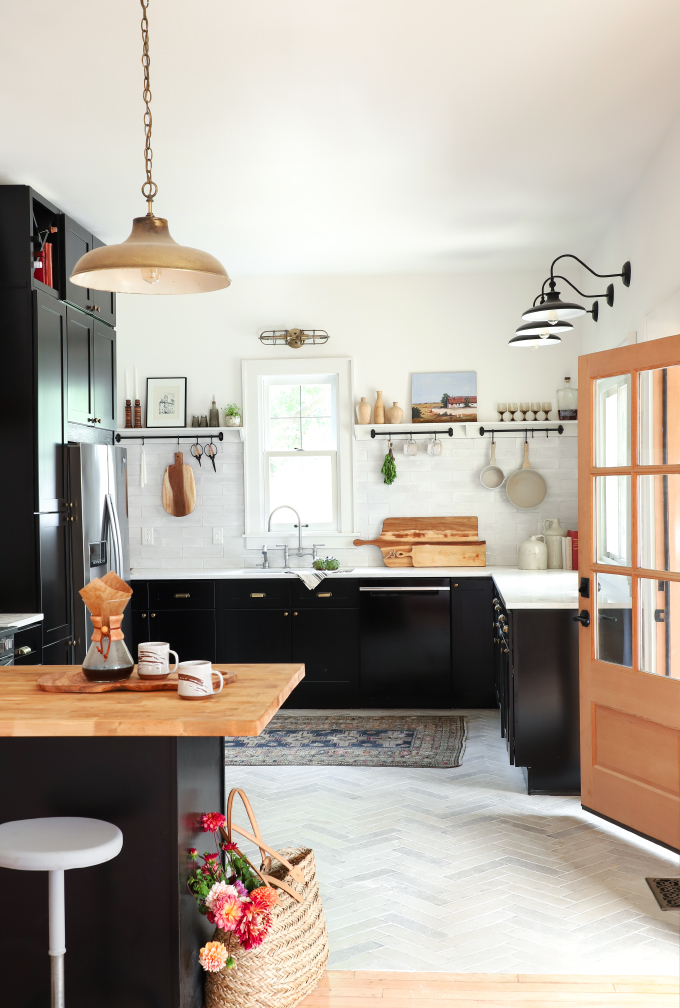
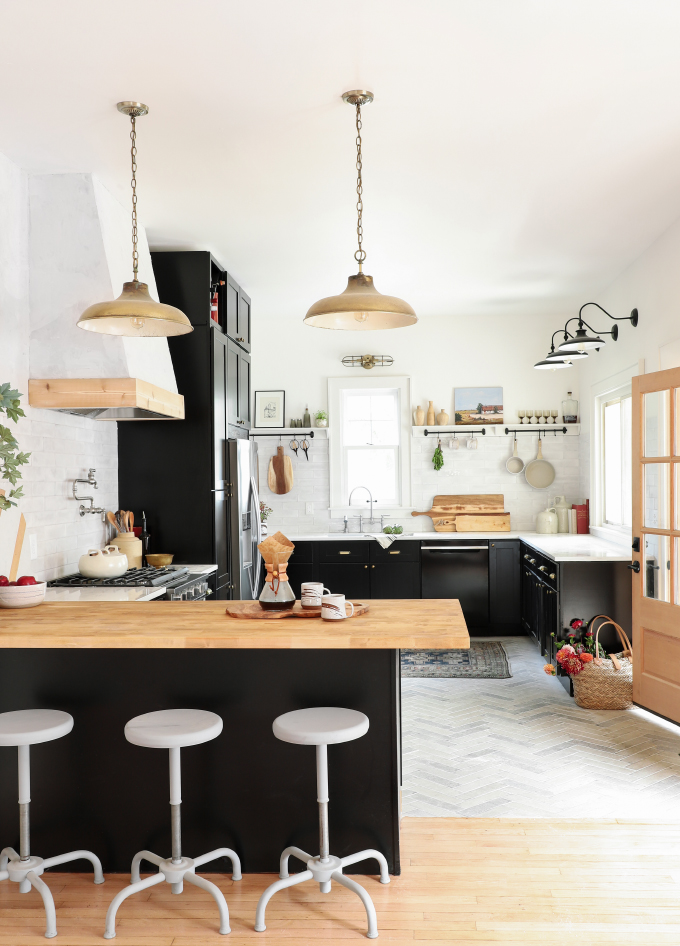 And here is the after!! As I mentioned above, the vibe changed as the process moved along, lighter, softer, warmer…and I am pretty darn happy!! One big change I made was instead of doing a brick back wall, I used a porcelain brick tile on the floor, and went with handmade looking tile backspash, with a DIY shelf and pot rack, which felt different from the opening shelving I’ve done in the past.
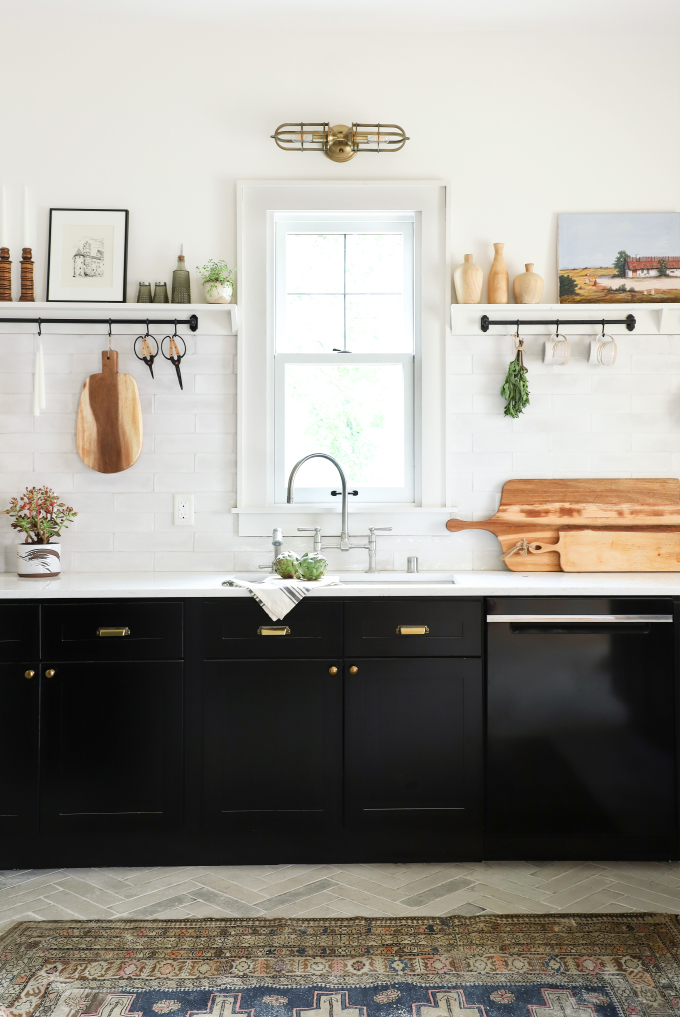 I am IN LOVE with this sink and faucet above and the pot filler below from Kohler. It’s been so amazing working with Wisconsin companies, and their support of me and my renovations has been so wonderful! I worked with Kohler on the bathrooms in the Barnhouse too, so stay tuned for future posts with more details. Also I’ll have a DIY post on the utility/pot rack shelf and the DIY hood cover soon!
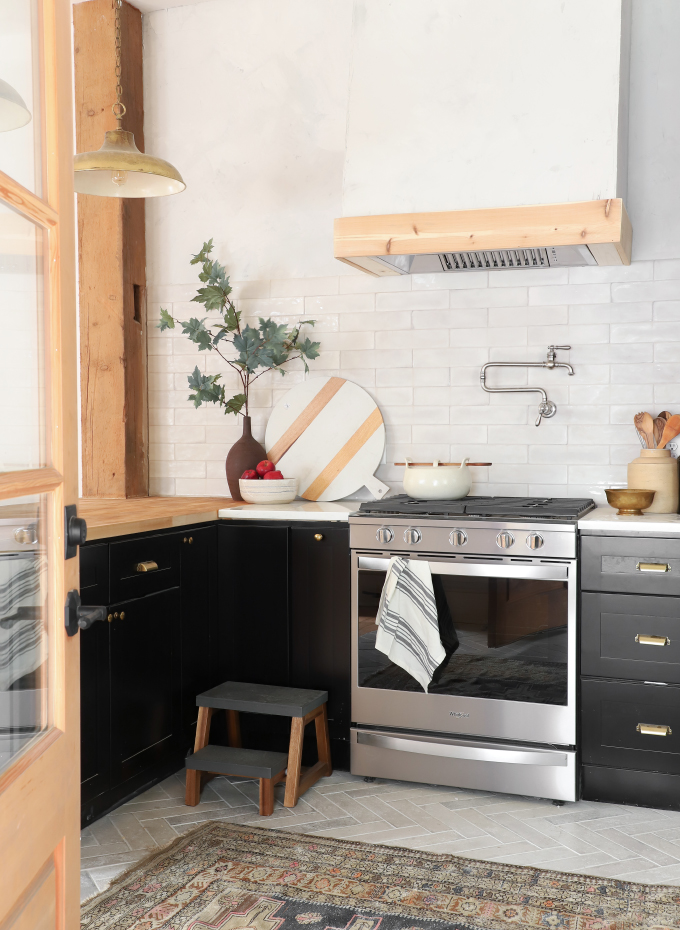


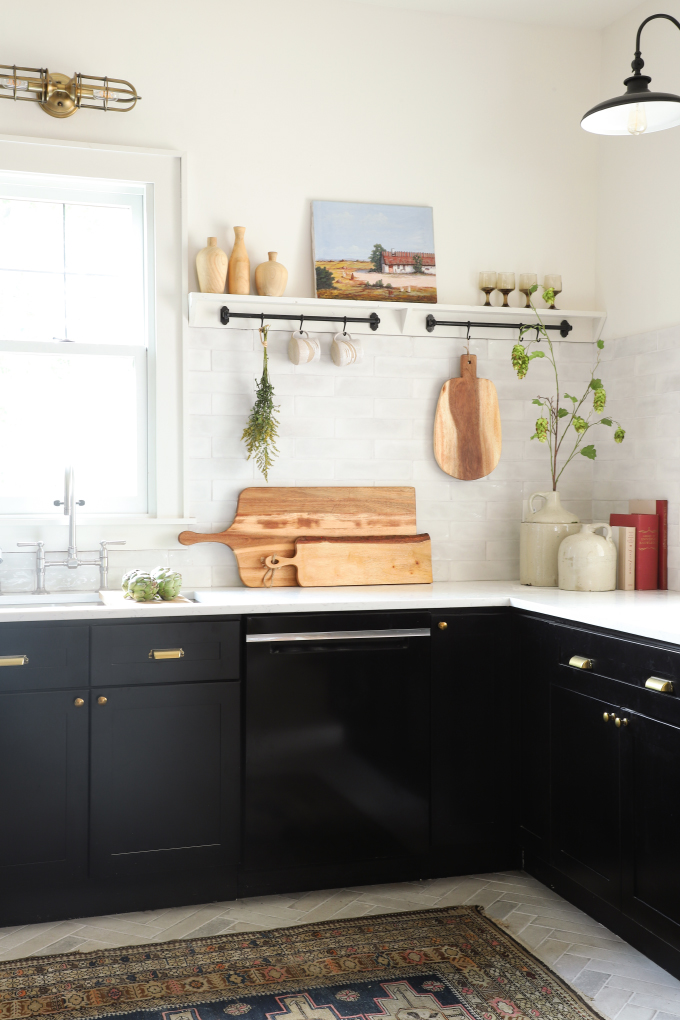
I’ll also be posting about ALL the appliances I chose for the house, and why I picked each. The black dishwasher was a last minute switch from stainless steel, and I am so happy with how seamless it looks with the black cabinets. Speaking of, I really love how the black cabinets look! It was a bit different for me, they were budget friendly from Cabinets.com, and look way more luxe with the brass hardware.


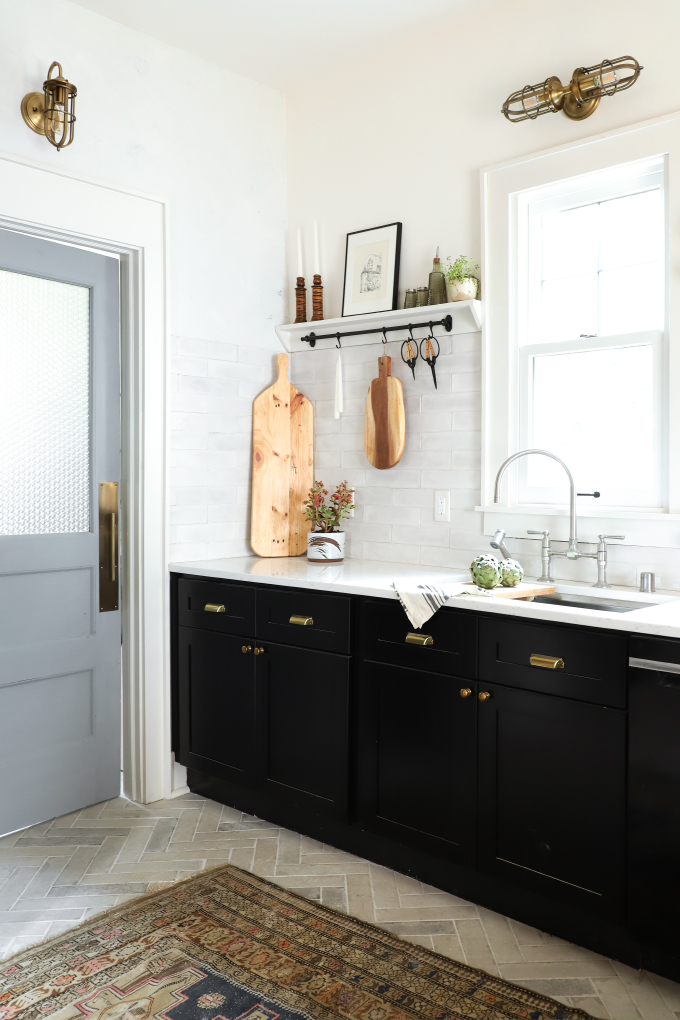
This corner was reworked, and what was once was a door to a bathroom is now a door to a pantry! I asked on Instagram what people thought of a bathroom off the kitchen, and I got a strong reaction against them, so we moved it. The pantry door was vintage door that I refinished, stay tuned for the DIY! And I still need to design the pantry, so many projects to still share with you all!
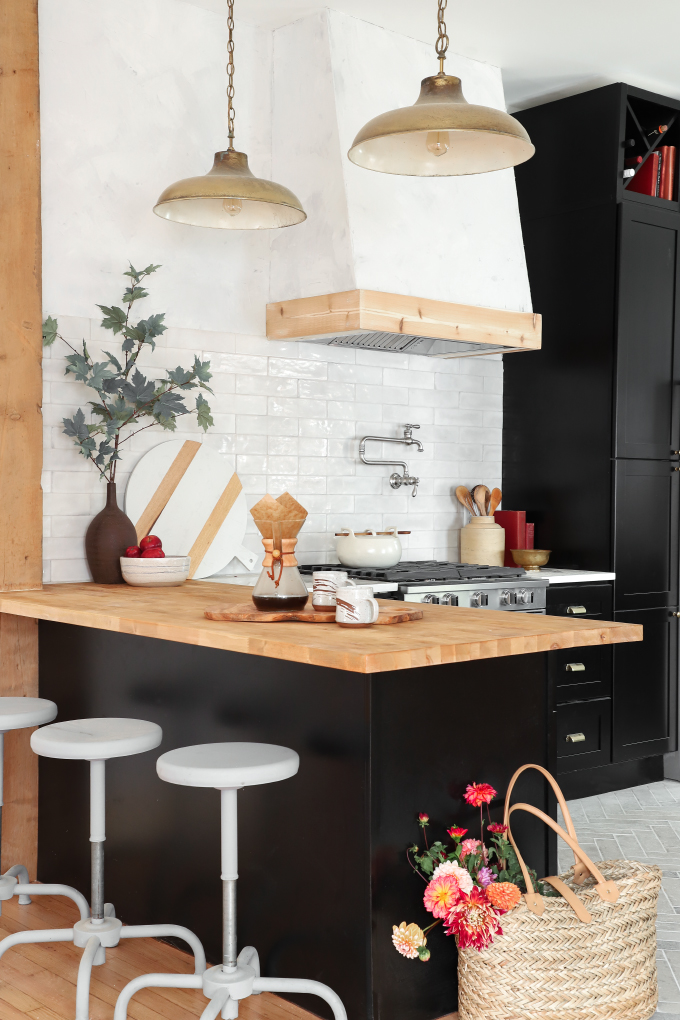 In “The Plan” I went with a darker walnut stain on the butcher block, but we ended up adding a lot more wood accents then planned. My guy and I pulled some beams out of a barn that was being demoed. We secured it to the wall to separate the kitchen from the dining room, then wrapped the butcher block around it. Then I got a great deal on a wood door, AND when the original floors were sanded down and refinished, it was A LOT of the same color wood, so I am going to sit with it as is for a bit and then decide if I should stain/paint any of the wood. What do you all think?!
I am sure there is things that I missed, so if you have anymore questions, let me know in the comments. I can’t want to share more of the renovation with you! SOURCES AFTER THE BREAK!
SOURCES:
BRICKLANE WHITE PORCELAIN FLOOR TILE – 3 X 12 IN
SPLENDOURS WHITE CERAMIC SUBWAY WALL TILE – 3 X 12 IN
Cashmere Carrara Quartz Countertop
World Market Large Round White Marble And Wood Paddle Cutting Board
World Market Large Raw Edge Wood Paddle Cutting Board
World Market Small Round Walnut Wood Paddle Cutting Board
World Market Extra Large Acacia Wood Paddle Cutting Board
Behr Wall Paint – Swiss Coffee
Behr Trim Paint – Cotton Knit
Ikea Utility Rail and Fintorp Hooks
Home Depot Feiss Urban Renewal 2-Light Dark Antique Brass Vanity Light
Home Depot Aedan 1-Light Black Swivel Wall Sconce Light
Home Depot Martha Stewart Living Awning 3 in. Bedford Brass Cup Drawer Pull
Home Depot Liberty Goblet 1in. Bedford Brass Round Cabinet Knob
Cabinets.com Shaker II Maple Ebony
Schlage CustomTM Door Hardware
The Loom House Rug
Kohler HiRise™ deck-mount bridge kitchen sink faucet – Brushed Stainless
Kohler Artifacts® wall-mount pot filler – Vibrant Stainless
Kohler Prolific® 33″ under-mount single-bowl kitchen sink with accessories
Chemex Coffee pot
Covet & Ginger Mugs
Home Goods Pans
DIY Hood Cover (steps coming)
DIY Wine Rack
DIY Plaster Wall Treatment
VINTAGE: Art, Light Fixtures, Jugs, Books, Glasses, Utensil holder, Stools
CONTRACTOR: 3rd Coast Construction
EXPLORE MORE: DIY PROJECT, Home DIY


I can’t see what the white countertop quartz is? Would you mind sharing?
Great question! Cashmere Carrara Quartz Countertop, I added a link!
Amazing work!
I actually like the amount and the color of wood in the pictures. I also like the green accents (herbs, plants, peppers?) and think they provide a nice balance to the color of the wood. I love the whole thing! Great job!
I love all the wood. I would leave it exactly as it is. It adds both warmth and softness against the black cabinetry. Looking forward to seeing your pantry design. I know it’s weird, but I love a good pantry
I’m so in love with this kitchen, what an incredible makeover!
https://www.makeandmess.com/
Absolutely gorgeous! So well thought out!
Great job! It looks amazing!! Will you share budget info? I always like seeing that aspect of it.
I would loooove to have a pot filler someday!
Hi Jenni, looks fantastic! About to embark on a Bayside 1928 Tudor reno and need to deal with a hydronic radiator. When you took your radiator out, what did you replace it with? Thanks!