5-Hour Treehouse Playroom Makeover!!
Before & After, DIY PROJECT
Yesterday, Mr. Yolo and I gave our friends a flash room makeover, and it was SO MUCH fun! Our friends have an attic room that they were previously using as storage, but after seeing our Camp Yolo Playroom they knew they needed a space for their four kids. They cleaned it out over the weekend, then we swooped in and created a space just for the kids in a few hours!

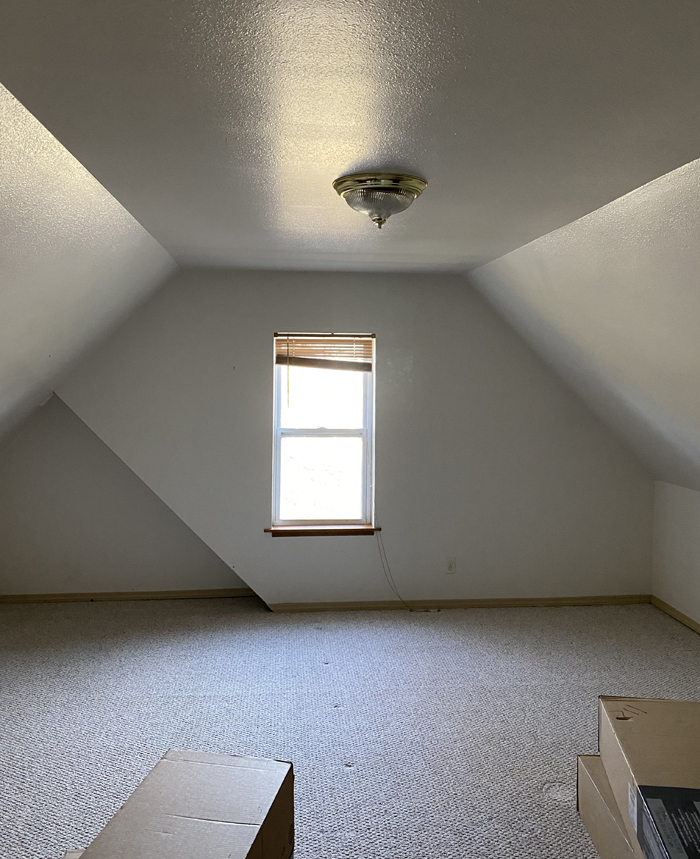
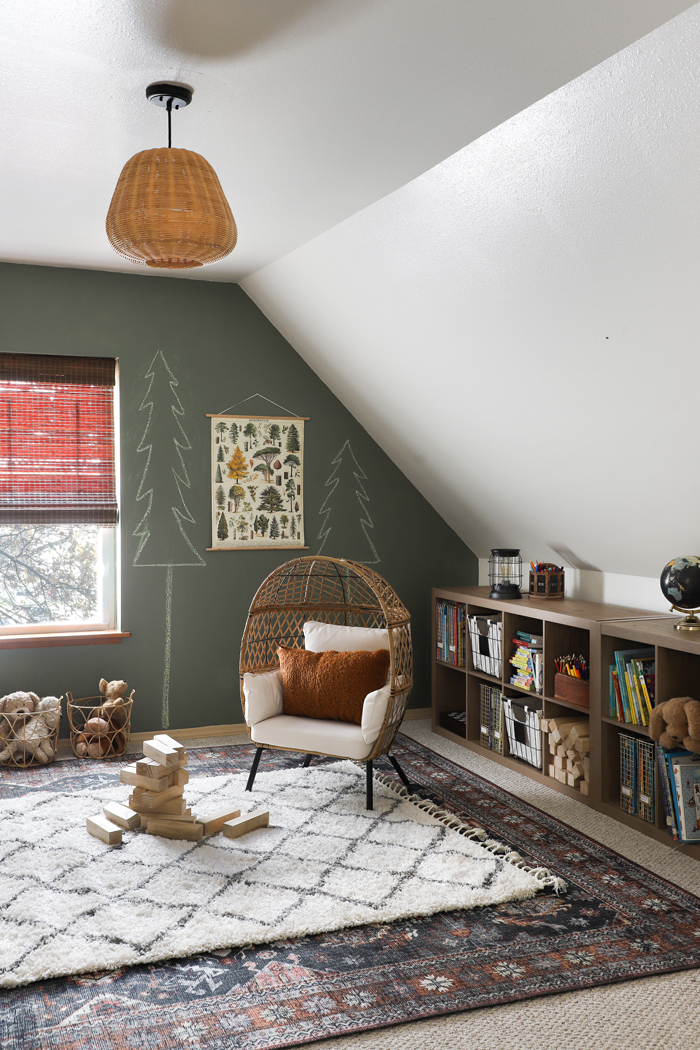
We started with a completely blank space with a few quirky features. Since we were working on a very tight turnaround, I knew I only wanted to paint the back wall because of dry time. Going dark green on one wall would have a big impact, without making the room too dark. I know, I have been using green paint a lot recently, but I wanted it to feel like this room was up in the trees. This time, for extra fun, I used Chalkboard paint!

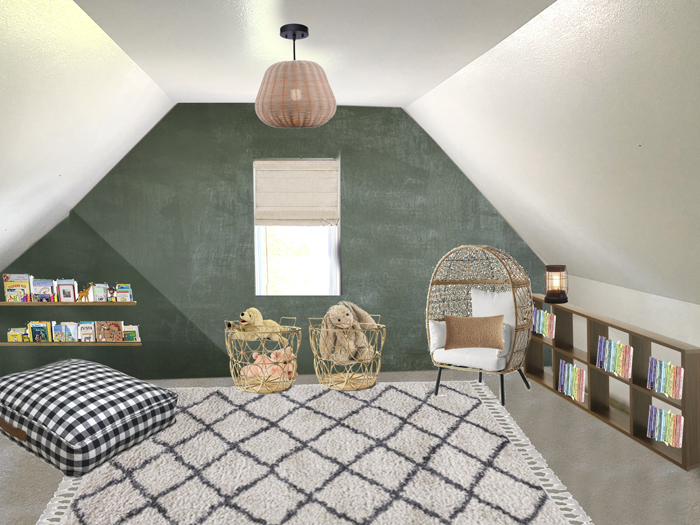
The family thought a tree house playroom would be awesome for their kiddos, so I created a simple mockup with items from my sponsor, Better Home & Gardens exclusively sold at Walmart. With the mockup, I had a clear starting point and then my plan was to figure out the rest once we got in the room.

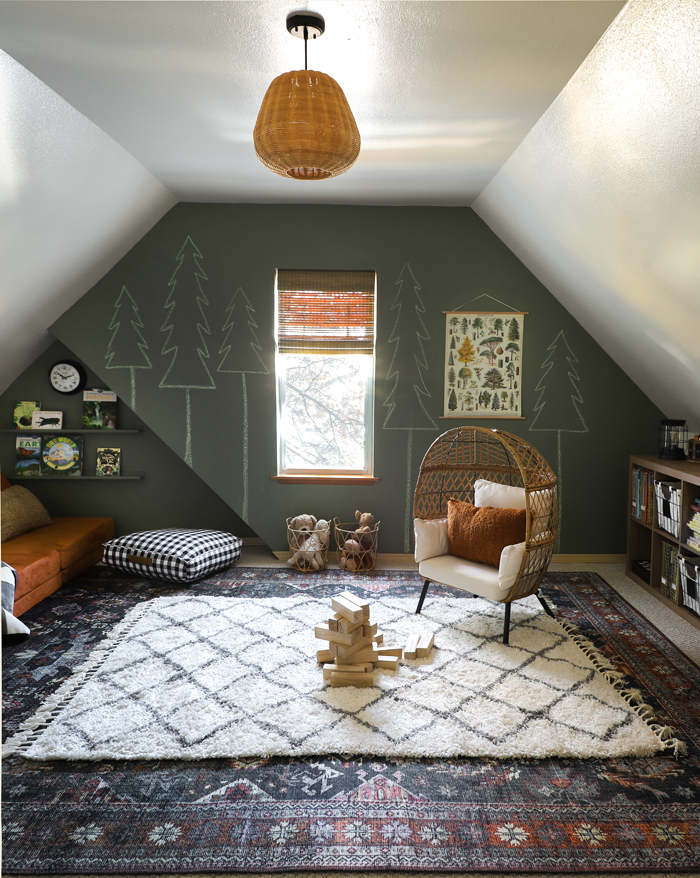
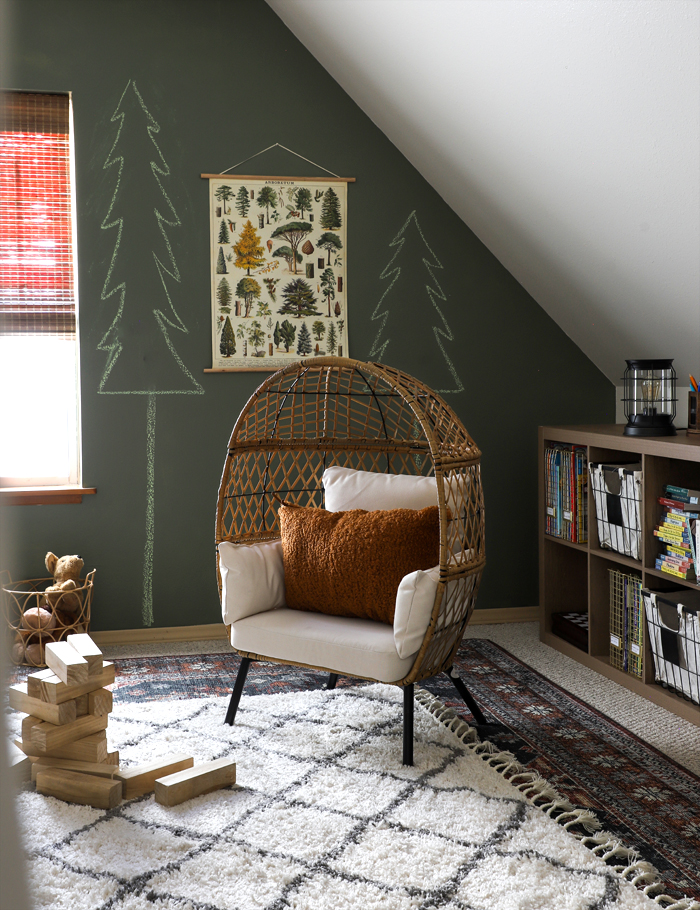
Ta-Da! The FINAL TREE HOUSE PLAYROOM! It took us just under 5 hours to finish, and we spent about $600 dollars in items from Better Homes & Gardens. I added a few items they had already, and a few things I had stashed in storage. My favorites in the room: The woven pendant and the kids Egg Chair
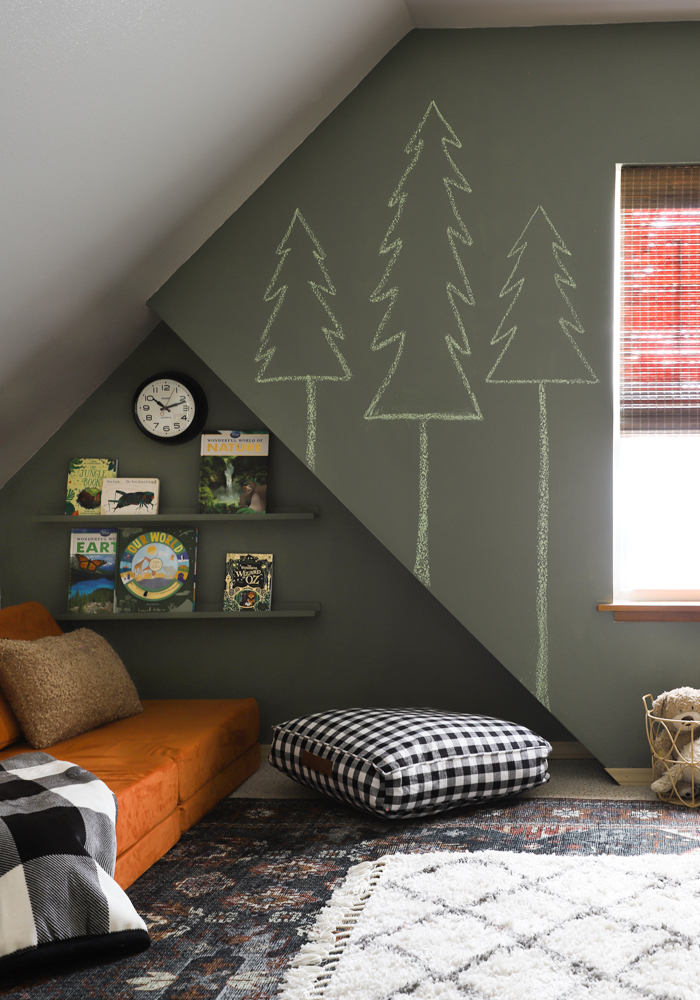
After we painted the wall with chalkboard paint, I thought drawing some trees would be an inexpensive way to bring some fun to the wall. I actually used a photo of the wall after the first day we worked on it, and then mocked up my plan for the trees. You can print it out and draw on it, or just use a drawing program on your phone or computer. A chalkboard wall is such a great way to create a theme in a room without spending a lot of money or time!
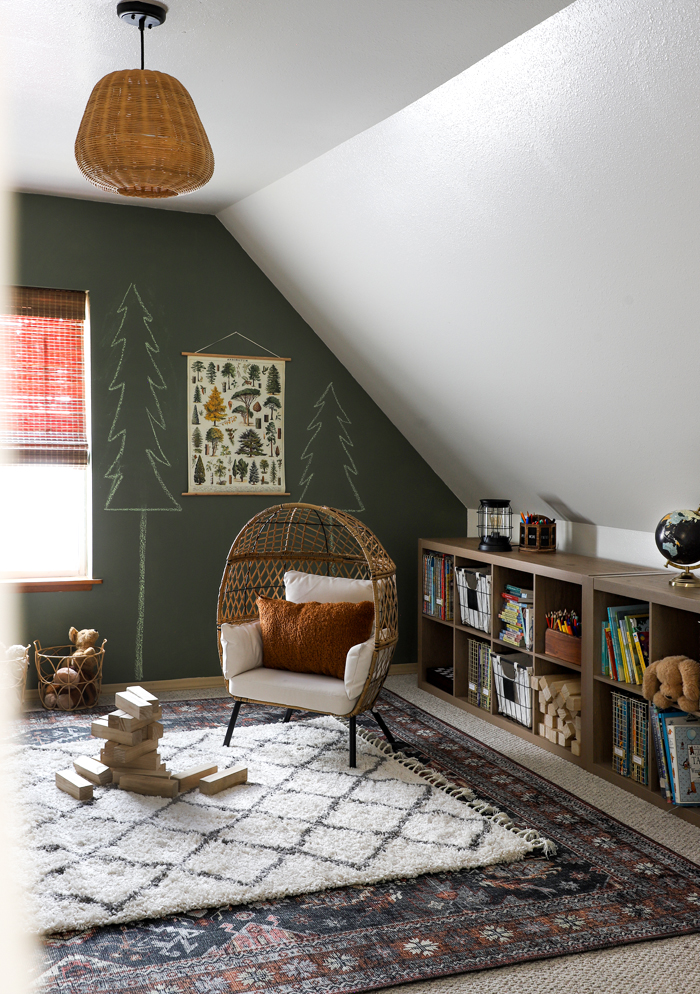
I ended up layering multiple rugs over the carpet because I wanted it to be as cozy as possible! Some of the kids can play on the floor while another reads in the egg chair or on the cushions. I wanted to create different areas that each child could play. And of course storage was important! Two cube shelves next to each other gave the kids cubbies to put their toys in.
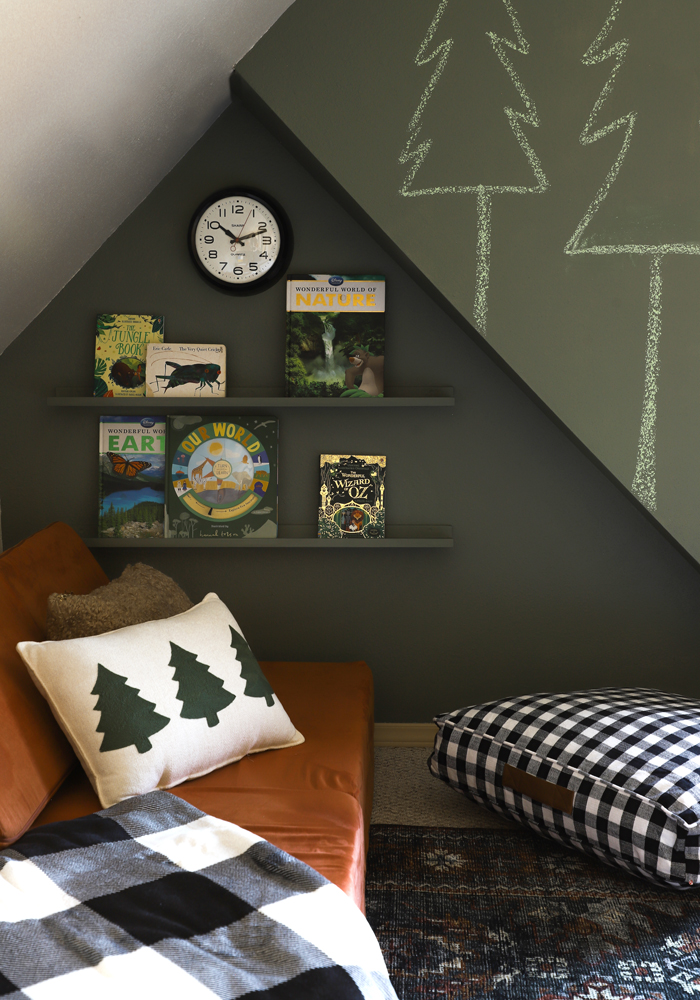
This random little nook had me stumped… But then I remembered how much their kids love to read! This became the perfect reading nook. The shelves will be a simple way to create something special in this little space. We got to see the kids reaction to their new space, and it was such a wonderful feeling!! I can’t wait to see them love and live in their new hideaway playroom! Thank you to Better Homes & Gardens for helping to give our friends this gift during the holiday season!
Shopping
Yarn Dyed Floor Cushion, Black and White Gingham
Kid’s Ventura Outdoor Wicker Stationary Egg Chair with Cream Cushions
Better Homes & Gardens Teddy Plush Throw Pillow, 14″ X 24″, Camel
Diamond Trellis Fringed Shag Rug, 5’3″ x 7′, White
(2) Better Homes & Gardens 8-Cube Storage Organizer, Natural
BHG Natural woven pendant
Modern Bronze Metal & Glass Edison Lantern
Medium Black Wire Basket Set With Chalkboard Labels & Liner
Poly Rattan Storage Basket Set with Handles, 2-Piece

EXPLORE MORE: Before & After, DIY PROJECT


Hard to believe it was all done under 5 hrs~ you are AWESOME!!!
May I know where the rug under the white is from, please? Thank you!!
Hi! The room is too cute. Can I ask where the big blue print rug is from? I didn’t see a link for that one. Thank you!!!
Loloi!