MY DIY | Shut Eye & Dream Pillow
DIY PROJECT, Home DIY

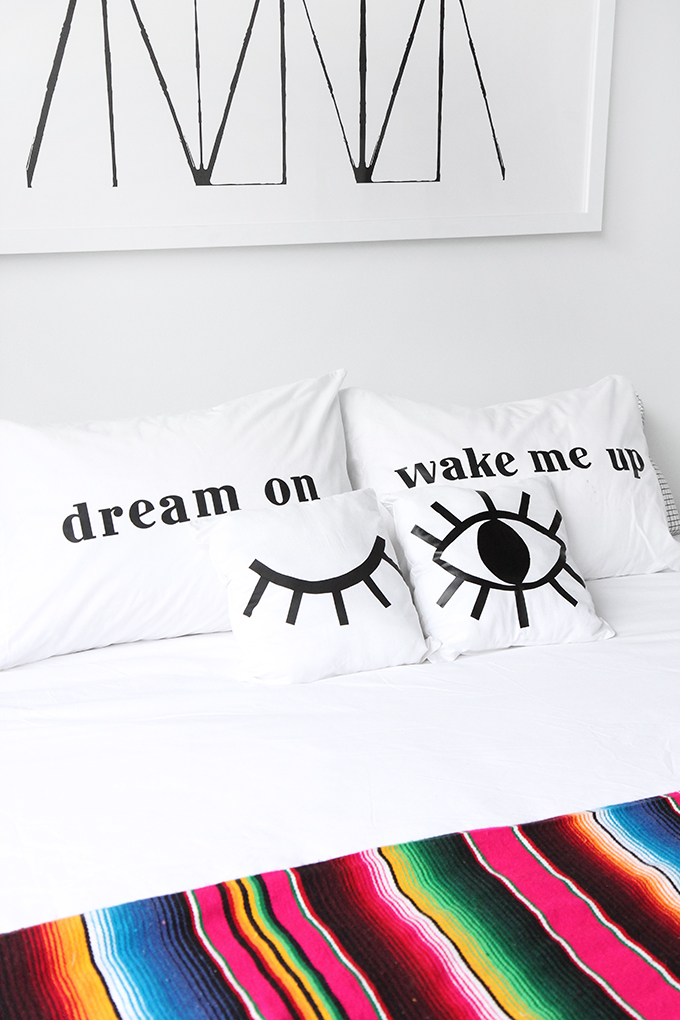
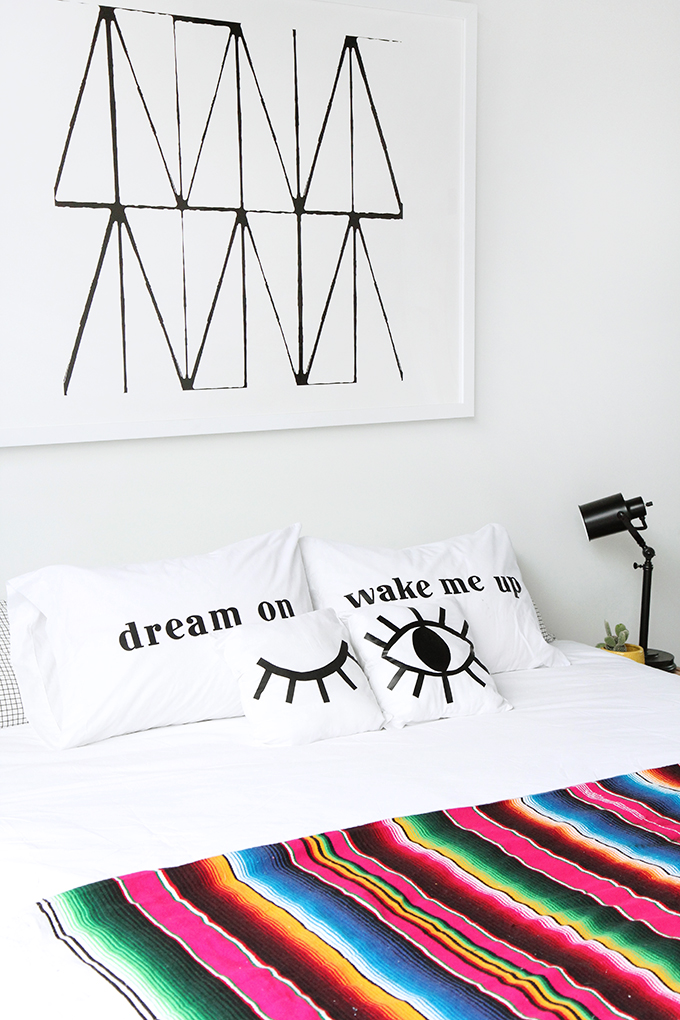
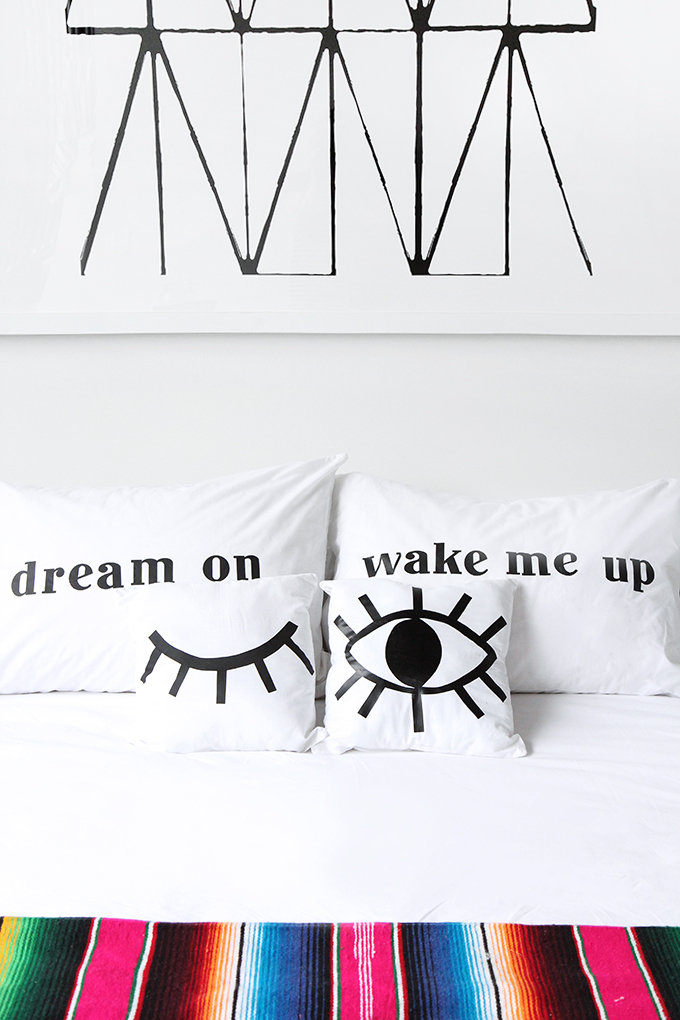
You all got a sneak peek into my apartment yesterday, now its time to show you some of the DIY projects! I knew the first on my to-do list was to decorate my bedroom and because I love to catch up on some zzz’s. My goal for this room was to keep it basic with a bit of summer camp vibe, adding a little splash of color with my blanket from Mexico. To further make my bed an oasis for relaxation, I created cute eye pillows to accent the room. I love to include white, crisp cotton fabric into my design because it goes with any decor and brightens a room up. Plus, cotton sheets are perfect for keeping comfortable on a hot summer night. They’re super soft, breathable and they guarantee a (desperately needed) good night’s sleep. For the steps and supplies check out the video below, and more details are after the break!
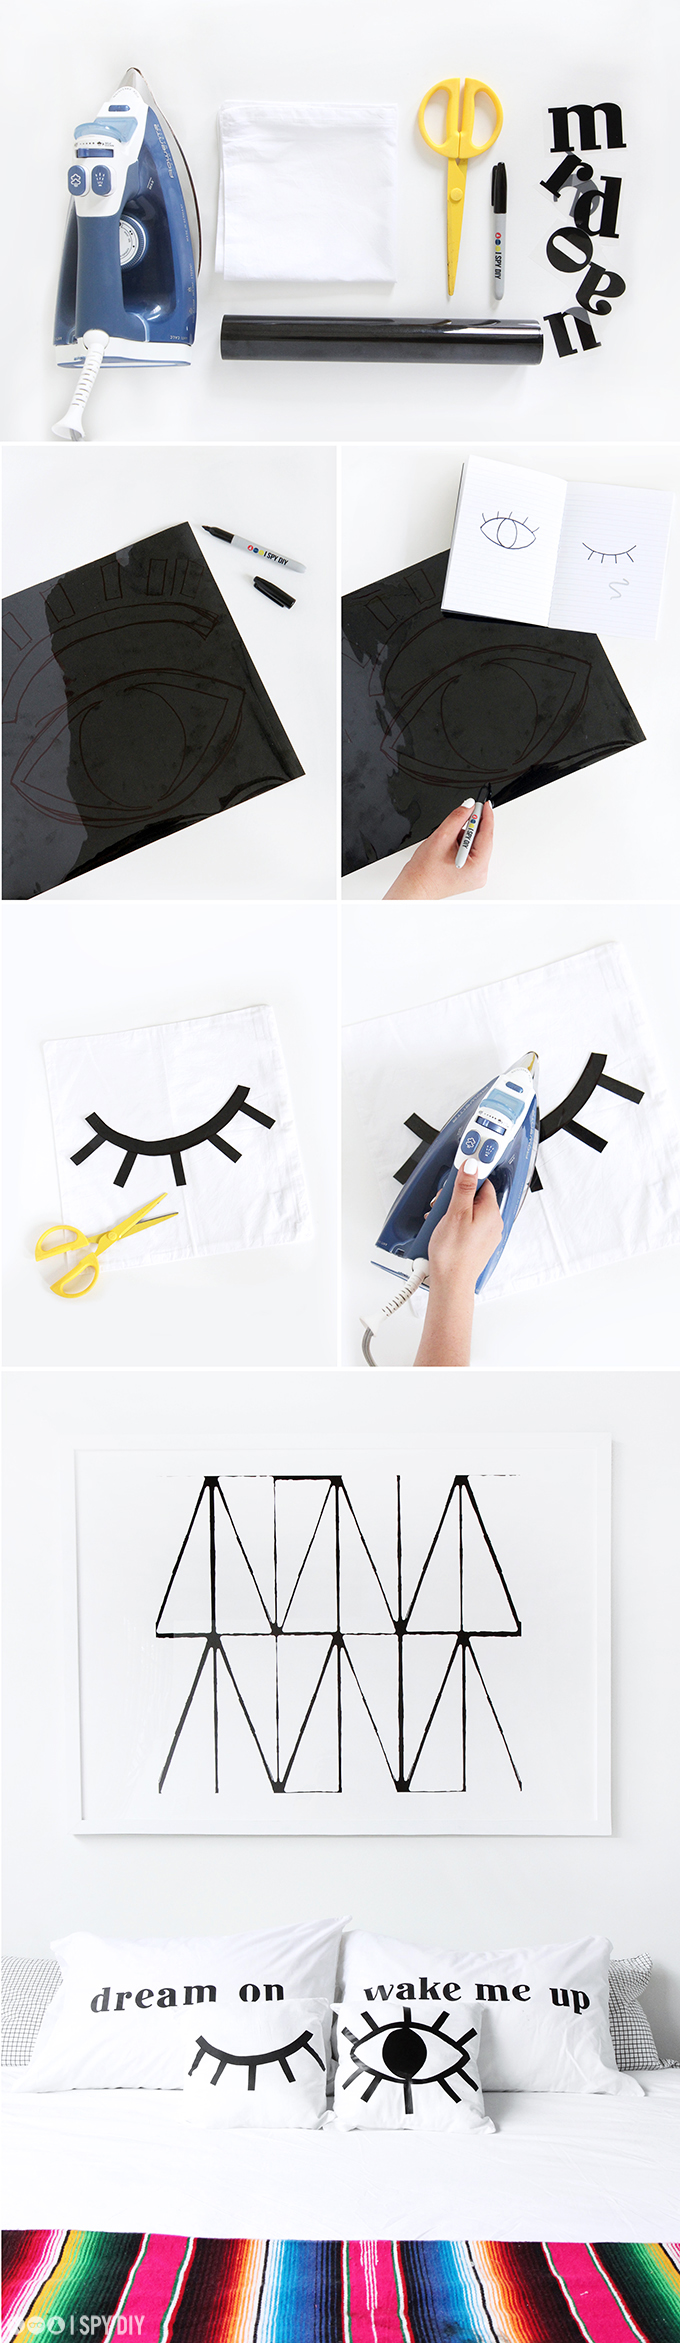
What you need:
White Cotton Pillowcases
Iron-On Fabric
Iron-On Letters
Permanent Marker
Scissors
Iron
What you do:
Step 1: Lay your piece of iron-on fabric on a flat surface with the film side up, and draw an open eye and a winking eye with a permanent marker. If you need practice perfecting your design, draw some practice sketches in a notebook first.
Step 2: Next, cut your images out and lay them on the pillowcase with the shiny, film side facing down. If you have individual pieces that overlap, make sure you iron on one layer at a time to ensure that every piece completely sticks.
Step 3: Set your iron to the ‘cotton/linen’ setting and iron the pieces to the pillowcase.
Step 4: Peel off the backing of the iron-on fabric to reveal your new pillowcases.
Step 5: To add text to a pillowcase, decide on the message that you want and arrange the iron-on letters on the pillowcase.
Step 6: Make sure that the iron is set to the ‘cotton/linen’ setting and iron the letters to the pillow case, then peel away the backings of the letters once they are attached.
Step 7: Finally, stuff your new pillowcases for a post-DIY nap.
This post was brought to you by Cotton Incorporated. Thank you for supporting my amazing sponsors who make I SPY DIY possible!
EXPLORE MORE: DIY PROJECT, Home DIY


