Grilled Flatbread & Steak Strawberry Salad
DIY PROJECT, Eats DIY

Grilled flatbread and Steak & Strawberry Salad has been on repeat at our house all Summer! So I thought I would shared our go-to recipes!

Grilled Flatbread
SERVES: 4
PREP TIME: 15 MINS
RISING TIME: 1 TO 2 Hours
GRILLING TIME: 6 MINS
Grilled Flatbread Ingredients (Recipe from Weber’s Way to Grill™ by Jamie Purviance)
1½ cup warm water (100º to 110ºF)
1 package (¼ ounce) rapid-rise instant yeast, 2¼ teaspoons
½ teaspoon granulated sugar
4½ cups unbleached all-purpose flour
3 tablespoons extra-virgin olive oil
2 teaspoons kosher salt
Grilled Flatbread steps
– In the bowl, combine the water, yeast, and sugar.
– Stir briefly and let stand for 5 minutes or until the top surface has a thin, frothy layer (this indicates that the yeast is active). Add the flour, oil, and salt. Mix until the dough comes together. Continue to mix until the dough is slightly sticky, smooth, and elastic, about 10 minutes.
– Form the dough into a ball and place in a lightly oiled bowl. Turn it over to coat all sides and tightly cover the bowl with plastic wrap.
– Allow the dough to rise in a warm place until it has doubled in size, 1½ to 2 hours.
– Prepare the grill for direct cooking over medium heat (350° to 450°F). Turn the dough out onto a lightly oiled surface and cut it into 12 equal portions.
– Using your fingers and the palms of your hands (oil them, too), stretch the dough to a length of about 8 inches. The first stretch will probably shrink back, but continue to pull and stretch using gentle pressure until you achieve the proper length. As needed, add more oil to the surface to keep the dough moist and pliable.
– Stack the pieces of dough between sheets of parchment paper. Brush the cooking grates clean. Carefully lay the pieces of dough, a few at a time, over direct medium heat and close the lid.
– Within 1 to 2 minutes the undersides of the dough should crisp, darken, and harden, and the tops will puff slightly. Turn them over and continue to cook until both sides are dark brown, about 6 minutes total, turning every minute. If desired, keep warm over indirect heat. Serve warm or at room temperature with the topping(s) of your choice.

Vietnamese Flank Steak
SERVES: 4
MARINATING TIME: 2 TO 4 Hours
GRILLING TIME: 7 TO 9 MINS
PREP TIME: 20 MINS
Marinade Ingredients (Recipe from Weber by Jamie Purviance)
¼ cup fish sauce
¼ cup fresh lime juice
2 tablespoons packed brown sugar
2 tablespoons vegetable oil
1 tablespoon soy sauce
4 garlic cloves, minced
1 teaspoon freshly ground black pepper
½ teaspoon crushed red pepper flakes1 flank steak, 1½ to 2 pounds and about ¾ inch thick, trimmed of external fat and silver skin
12 large scallions (white and light green parts only)
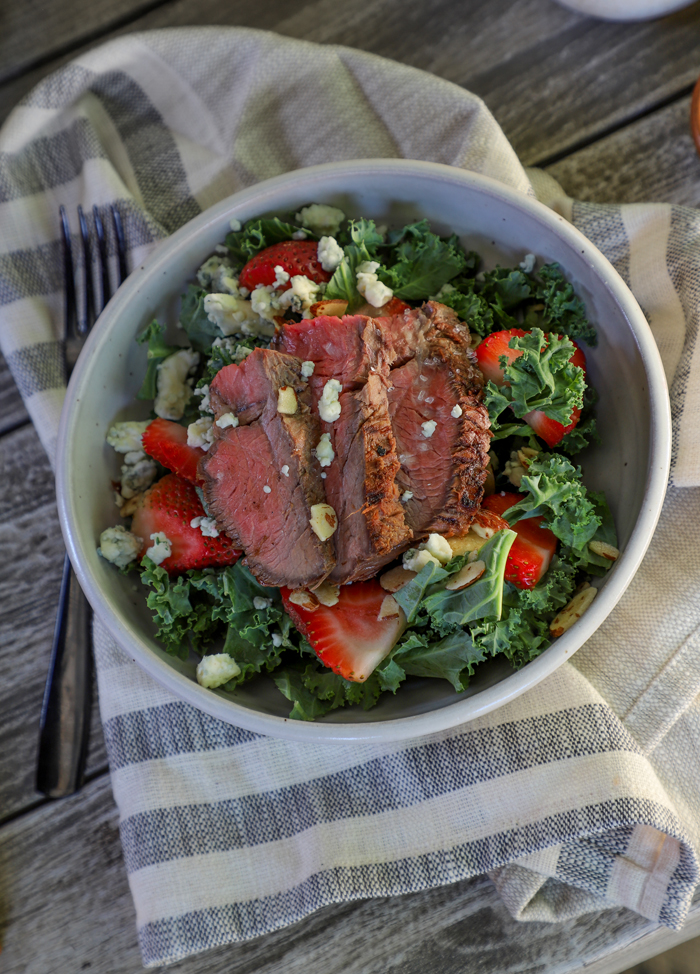
Toss a mixed greens with blue cheese, sliced strawberry, candied almond slices, and a balsamic vinaigrette. Top with Flank Steak.
Vietnamese Flank Steak Steps
-Whisk the marinade ingredients.
-Place the steak in a large, resealable plastic bag and pour in the marinade.Press the air out of the bag and seal tightly. Turn the bag to distribute the marinade and place the bag in a bowl. Refrigerate the steak and scallions for at least 2 hours or up to 4 hours, turning the bags occasionally. Allow the steak to stand at room temperature for 15 to 30 minutes before grilling.
-Prepare the grill for direct cooking over medium heat (350° to 450°F).
-Remove the steak and scallions from the bags and discard the marinade. Grill the steak over direct medium heat, with the lid closed, until cooked to your desired doneness, 7 to 9 minutes for medium rare, turning once or twice.
-Remove from the grill and let the steak rest for 5 minutes. Cut the steak across the grain into thin slices.
Toss mixed greens with blue cheese, sliced strawberry, candied almond slices, and a balsamic vinaigrette. Top with Flank Steak.
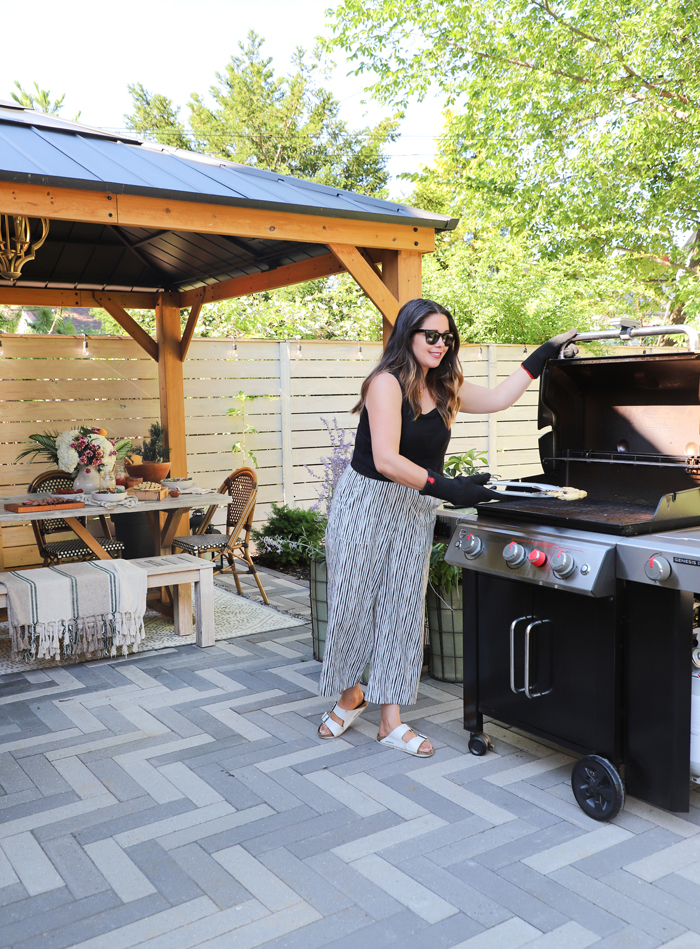
My favorite feature on our Weber Genesis EX 335 Smart Grill is connecting it to my phone to get alerts on when to flip, so I can spend more time hanging out with my family, aka chasing after Lil’ Yolo and our puppy, Odie!

EXPLORE MORE: DIY PROJECT, Eats DIY


