DIY Laundry Nook + Super Simple Shelving Tutorial
Before & After, DIY PROJECT, Home DIY, The Barnhouse
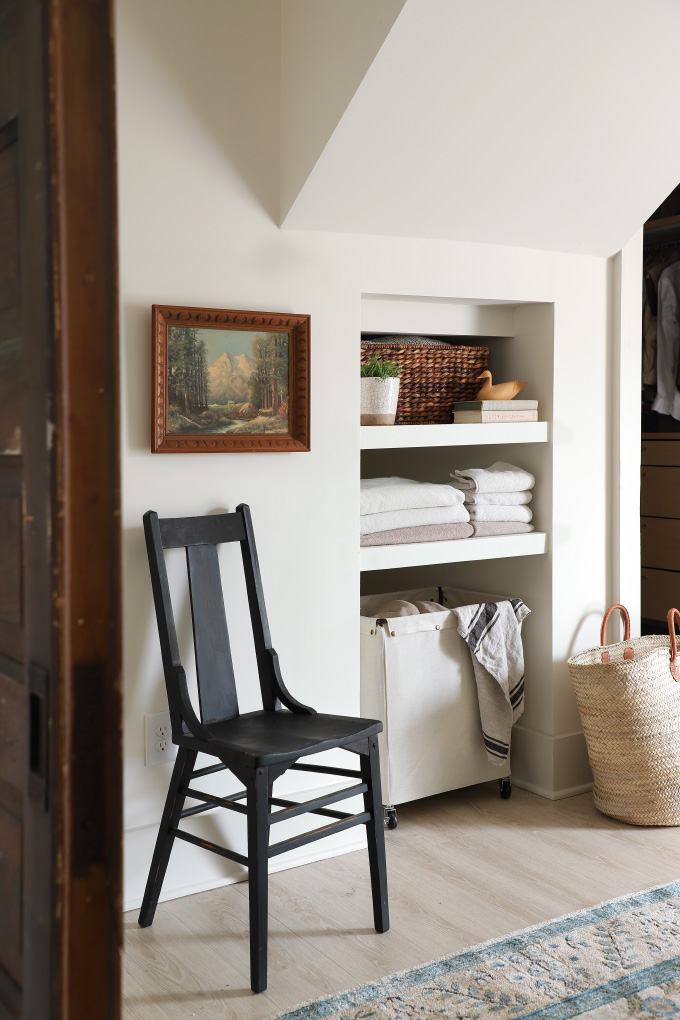
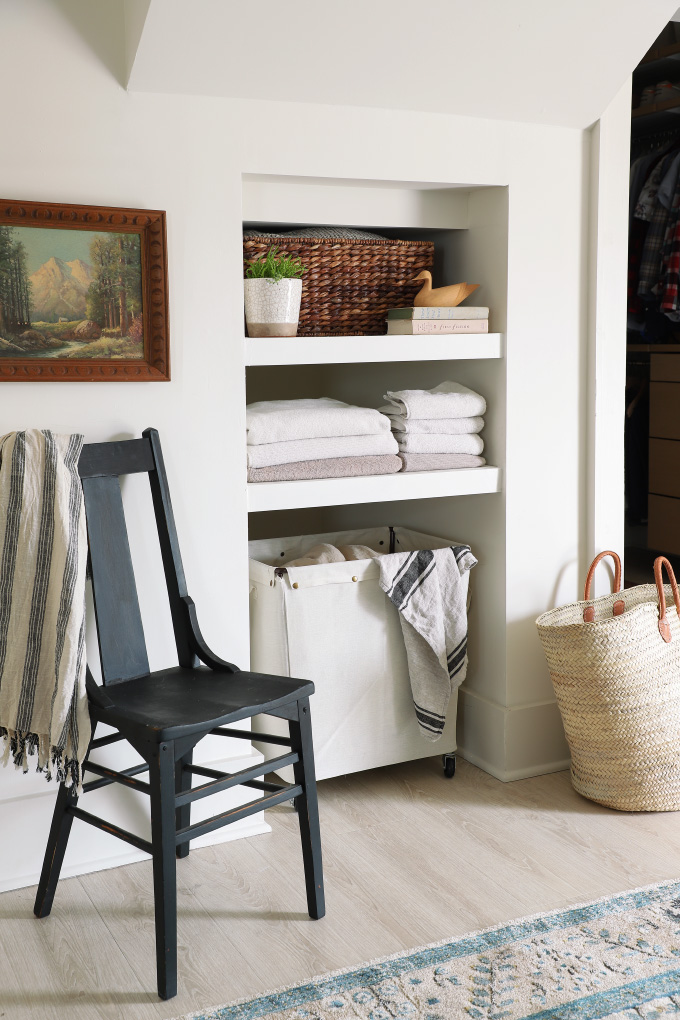
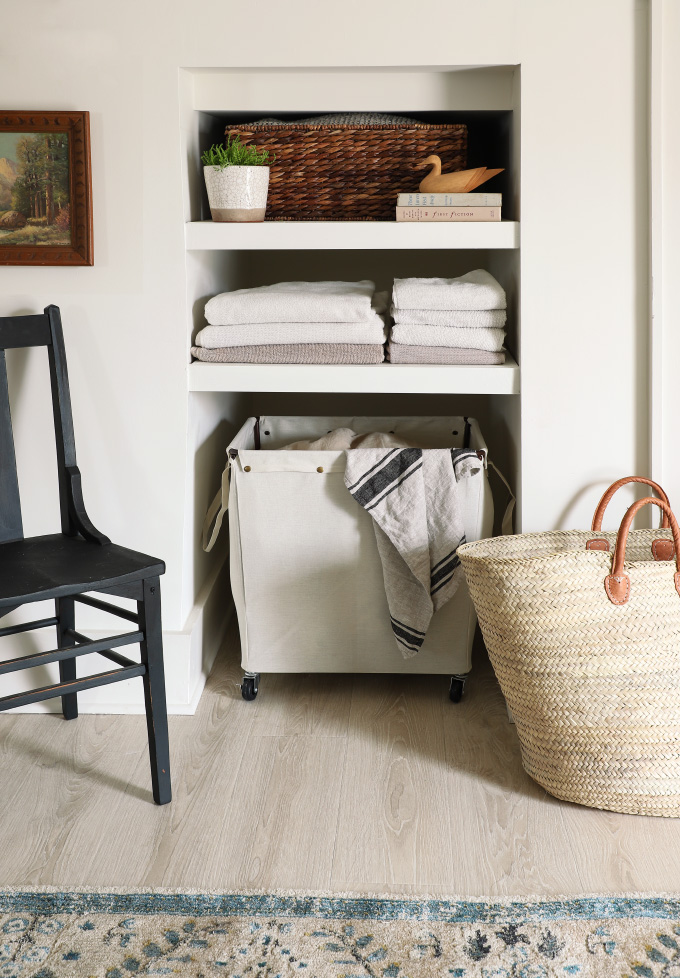
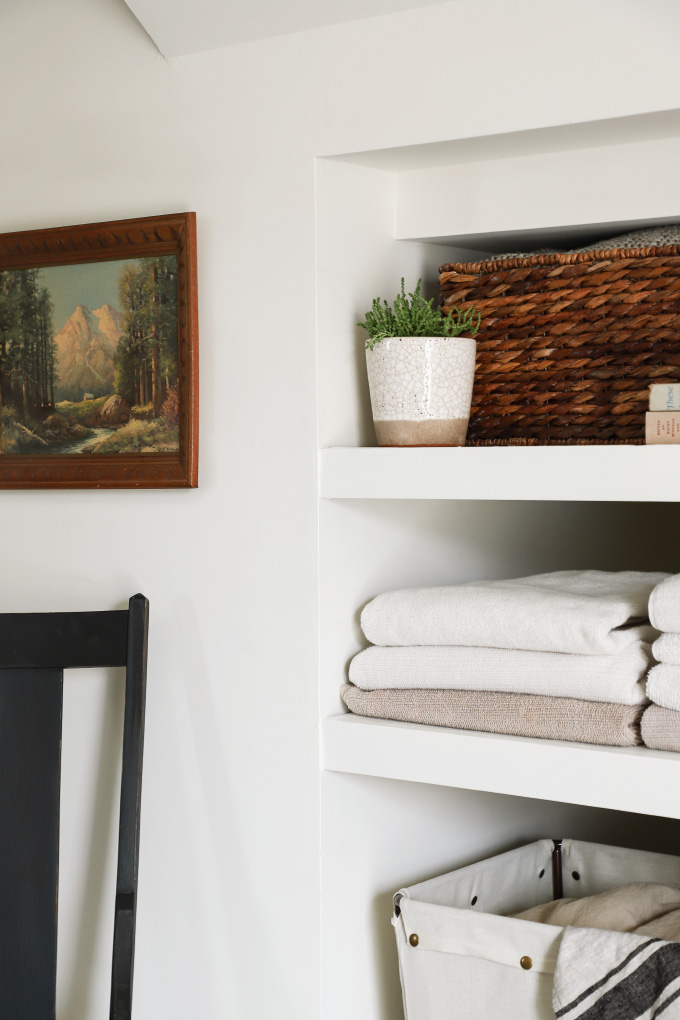
I am just putting a few finishing touches on our master bedroom at the Barnhouse, and one project on my list was turning this little space under the stairs into a laundry nook. On the second floor of the house I completely reconfigured the layout, and to fit everything in, including another bathroom, I had to give up a linen closet. Luckily the framers didn’t close up this little space under the stairs, and it became the perfect spot to store extra bedding, towels, and a place to tuck away the hamper!
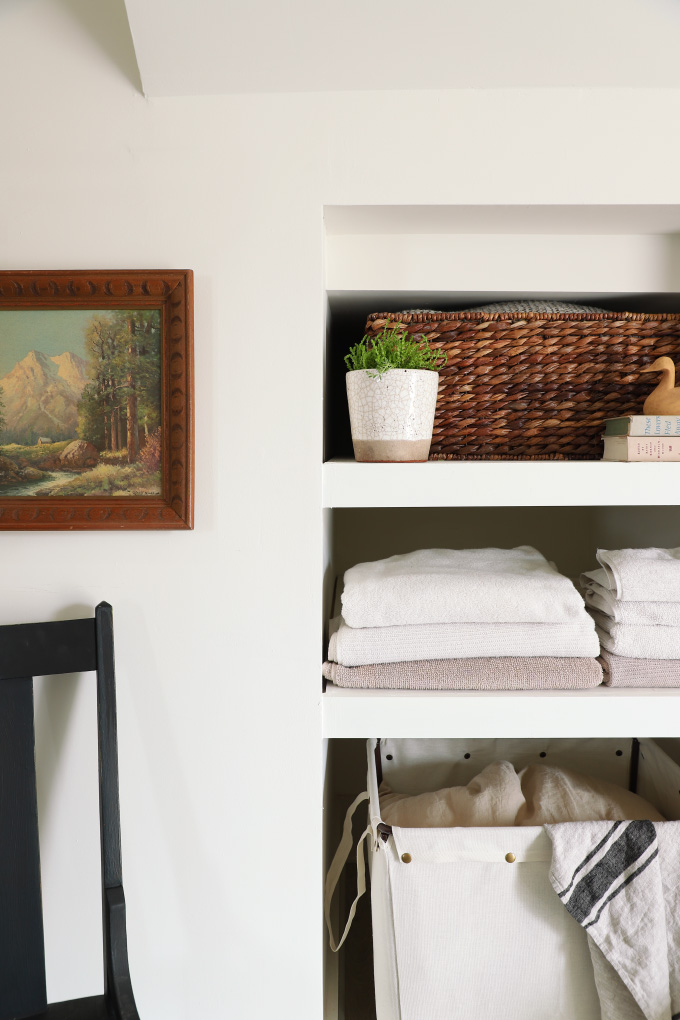
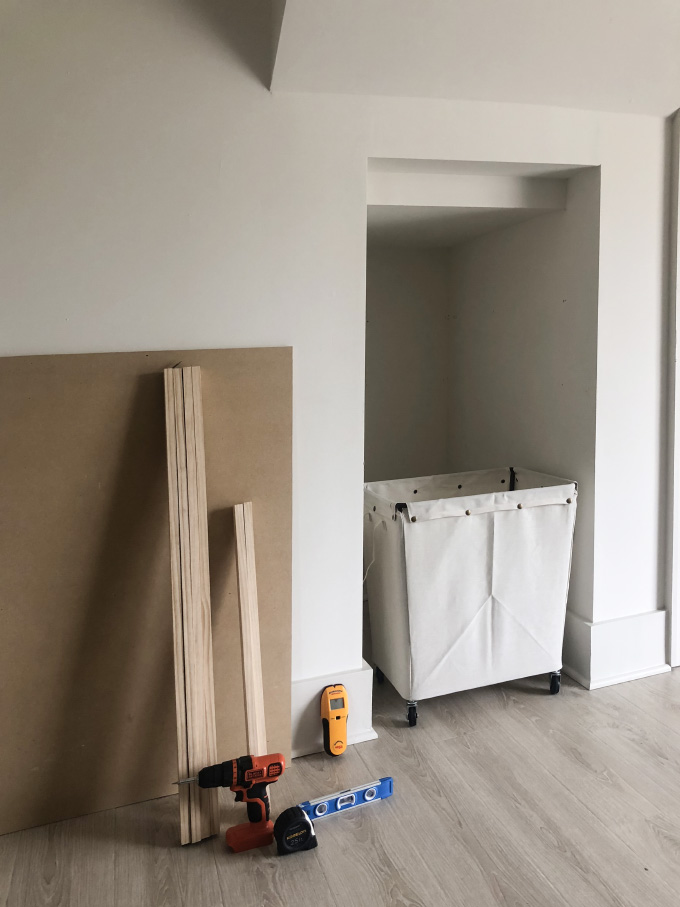
Adding shelves to the space was SUPER simple, an easy project to take on in an afternoon. The toughest pair is cutting the boards, and if you don’t want to do that yourself, take the measurements into your local hardware store and have them do it for you! You can use this tutorial (or the video steps over on IGTV) for nooks, closets or pantries all over your house! I just love how seamless the finished shelves look in the space!


All the steps for these simple shelves after the jump!
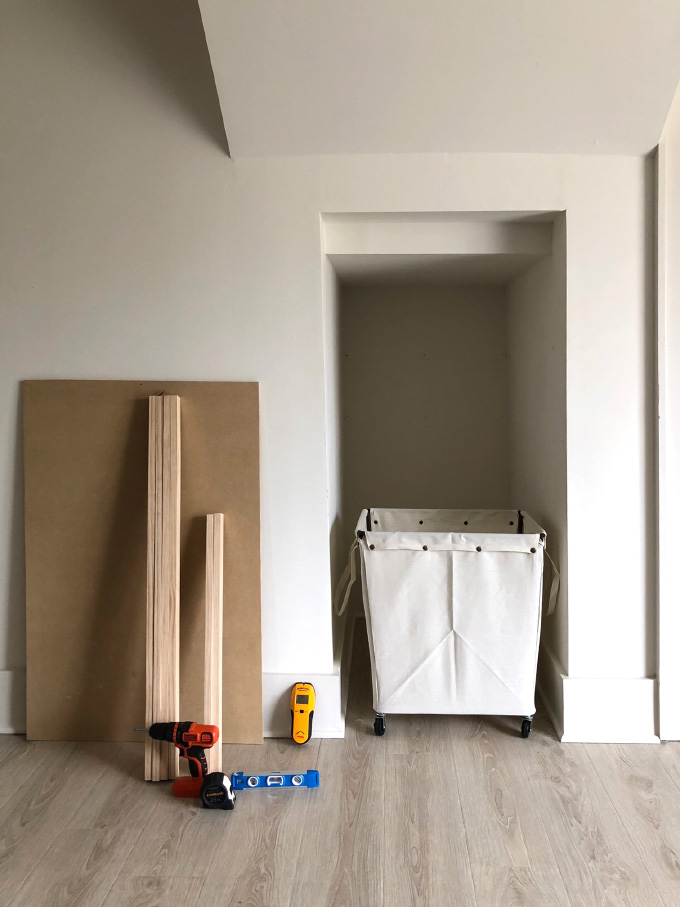
What you need:
1×2 wood- Cut the braces for for each shelf:
Two to fit the depth of the closet minus one inch (for the front piece of trim)
One piece the width of the back of the closet minus 2 inches (to fit between the above two boards)
1×3 wood- cut one piece the width of the front of your closet.
Note: Make sure to so separate measurement for the front and back. If your closet is old like mine, nothing is square so each had their own width!
MDF Panel 3/4 in thick – cut to fit the inside of the space minus an inch in the front for trim
Screws
Drill
Wood filler
Sandpaper block
Level
Nail gun
Stud finder
Tape measure
Paint
Caulk
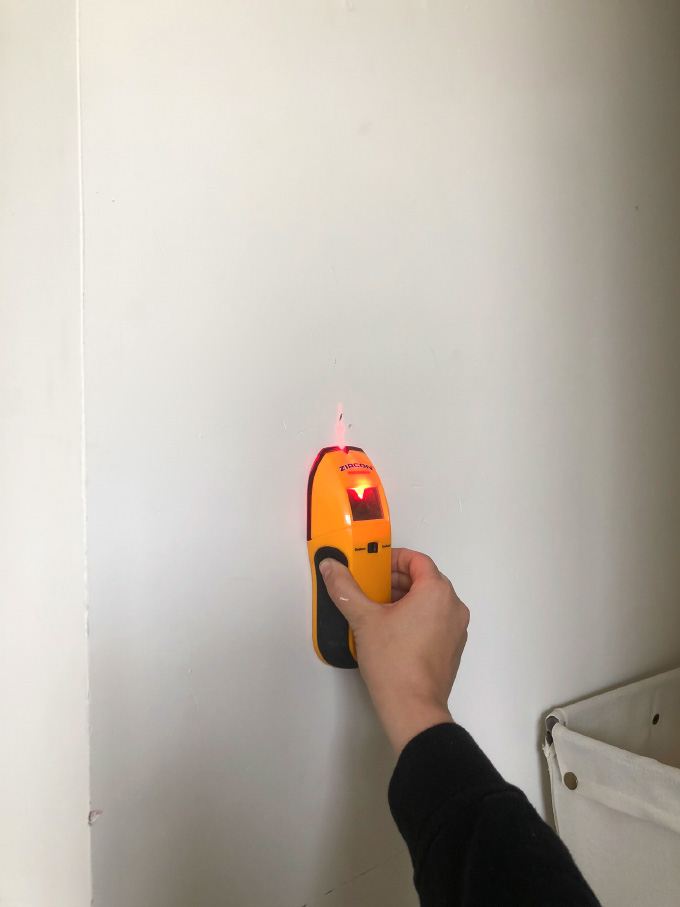
After your wood is cut, time to mark where the shelves will go. I wanted a little clearance above the hamper, so found the studs and marked about 8inches above the top of the hamper.
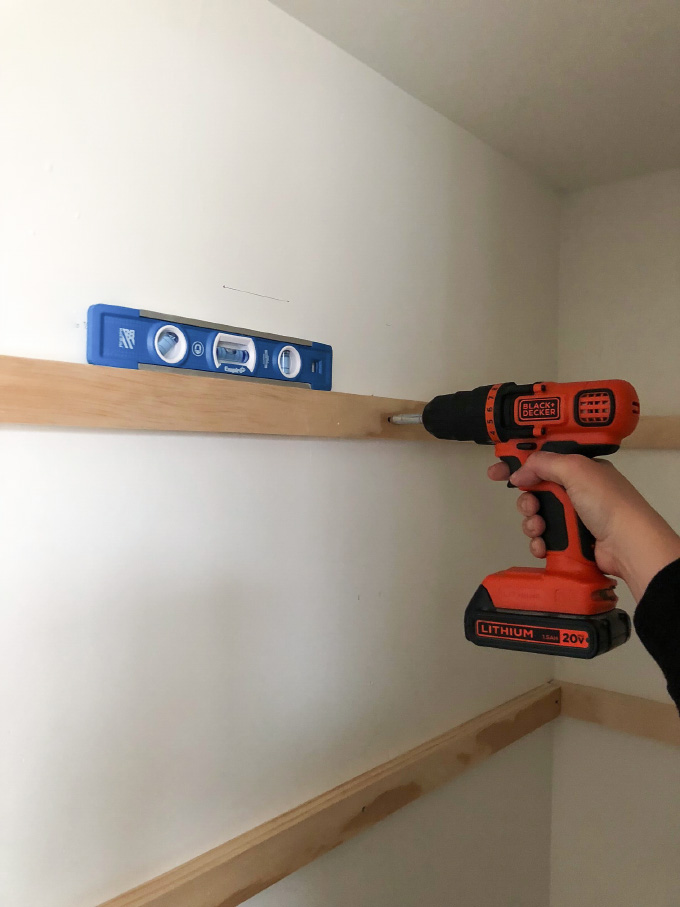
Next, screw in the 1×2 pieces of wood into the studs, starting with the center-most stud. After the center is screwed in, make sure the piece of wood is straight with a level, then drill screws into the other studs.
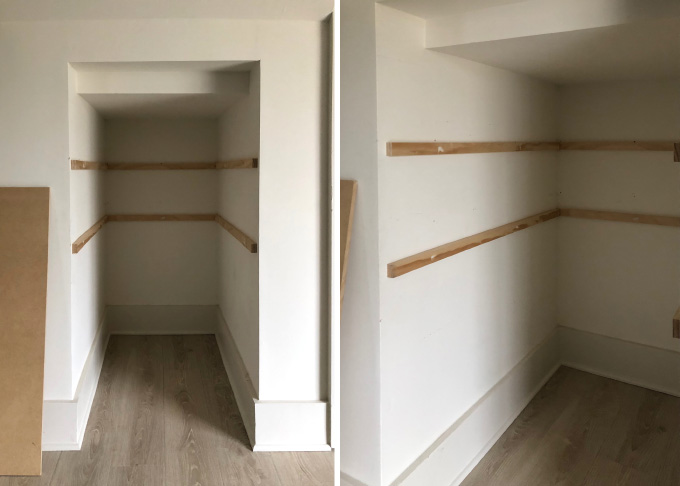
Attach the three 1×2 pieces (making sure they are level) to create the brace for each shelf.
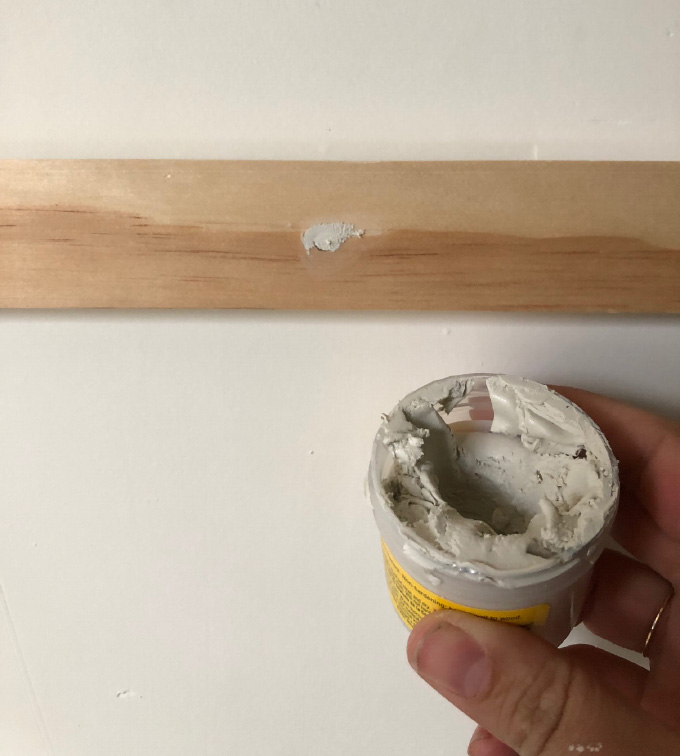
Fill in your screw holes with wood putty, let dry, then sand flat.
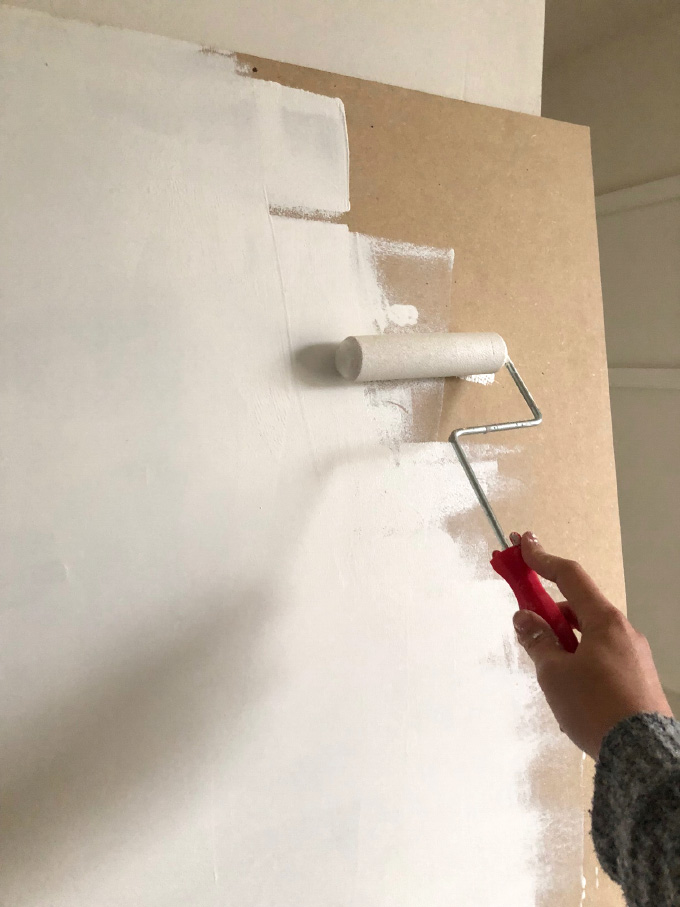
I painted the board and braces the same color as my walls, Behr Swiss Coffee.
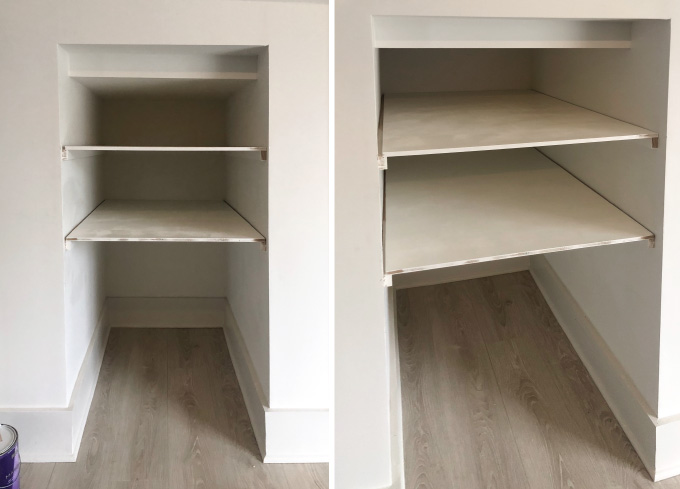
Once dry, slide the shelves on to the braces.
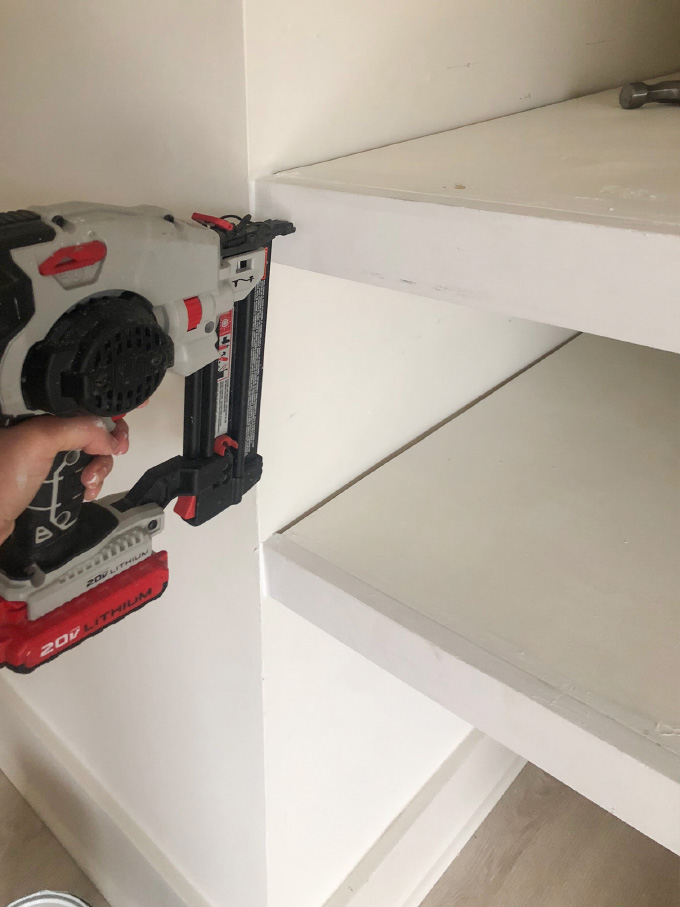
Use a nail gun to attach the front 1×3 trim into the brace on each side, and add a little wood glue in the center to adhere the trim to the shelf. If you don’t have a nailgun, you can use screws, and fill the hole with wood glue, sand then paint, but the tiny nails are much less visible. I caulked any noticeable seams and did a little touch up paint and done!
If you try this project, make sure to send me a pic @ISPYDIY on Instagram!
EXPLORE MORE: Before & After, DIY PROJECT, Home DIY, The Barnhouse


Looks beautiful! What flooring is in this room?
This looks so elegant, who knew that a laundry nook could look this stylish and organized?
https://www.makeandmess.com/
Love this Jenni! Here in the UK it’s not as popular to have a laundry room, so we don’t usually have space for them in our homes. This is the perfect solution to store towels and dirty washing though!
Looking forward to incorporating this into my design plans for my home renovation.
Thank you for the inspiration – I look forward to reading more of your posts.
Best wishes,
Emma at Ironmongery Experts