ROOM MAKEOVER | My Guest Room + DIY Barn Wood Picture Ledge
DIY PROJECT, Home DIY

My guest room makeover is done…for now! Ha! It’s funny how when we were shooting the HGTV pilot, I was able to stage this entire house in a day, but now it takes me 2 months to makeover one room. I’m sure it’s because the pressure is off, and I am trying to put things I truly love in the space. For all those that were following the process of putting up the board & batten wall treatment on IG, stay tuned because I will be doing a tutorial in another post AND tomorrow I will be showing you the steps for the faux map drawer dresser. Today, you’ll get all the credits and steps for one of my favorite parts of the room, the barn wood ledge that I made with Minwax! Pretty sure I will restyle that shelf once a week, but I wanted to show you it’s current state…well actually I have restyled it since taking these pictures…but is a room ever really done?! Credit after each picture, if I miss anything, leave me a comment and I’ll get back to you with a source!
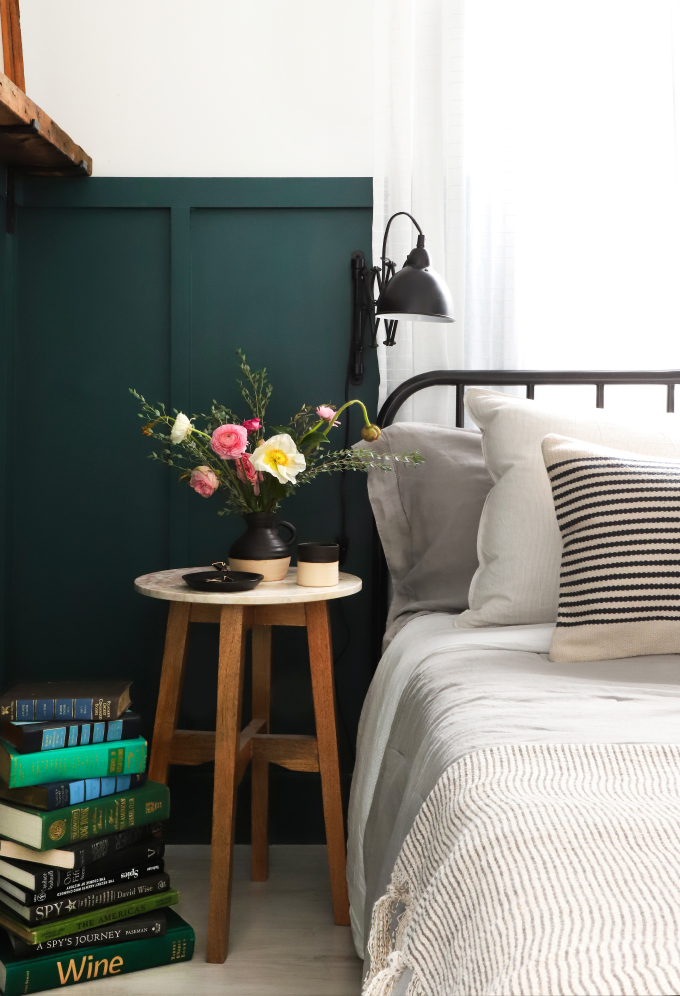
SHOP | Wall Color BEHR Hostaleaf – Rejuvenation Pillow – Hobby Lobby Throw – Brooklinen Twill Charcoal stripe sheets/pillow – Target Comforter – Target dish – Old Target Table – Similar Wayfair Bed – World Market Sconce – Vintage books
I had matching night stands, but wanted the room to feel a bit more eclectic, so switched them out for this little side table on one side, and a stump on the other (below). Since it’s a guest room, I was not too conserned with bedside storage.
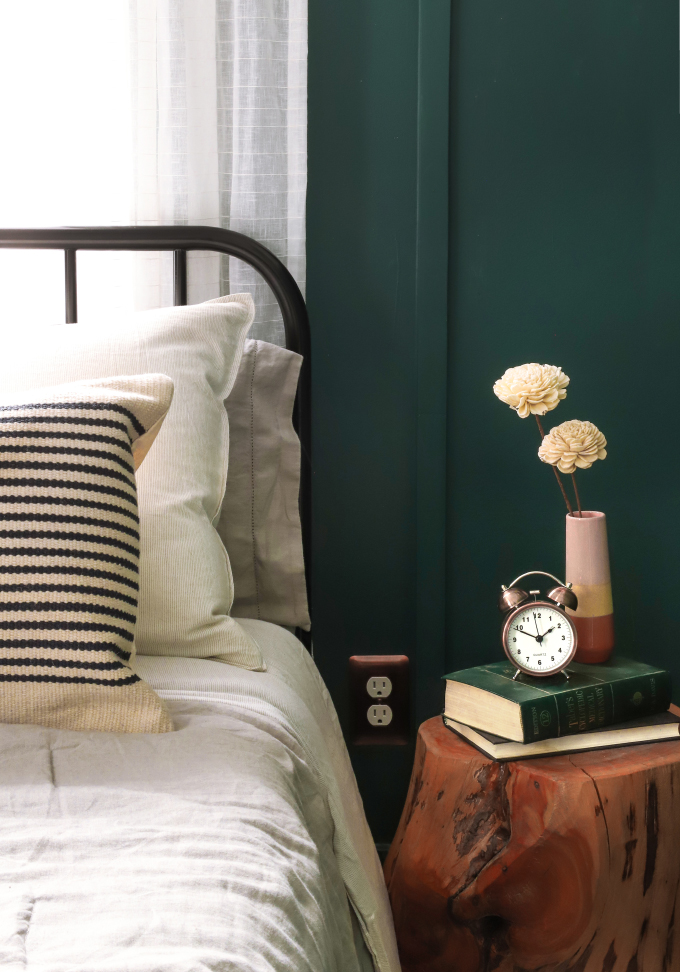
SHOP | Amazon alarm clock – Target Vase – Amazon Copper outlet plates
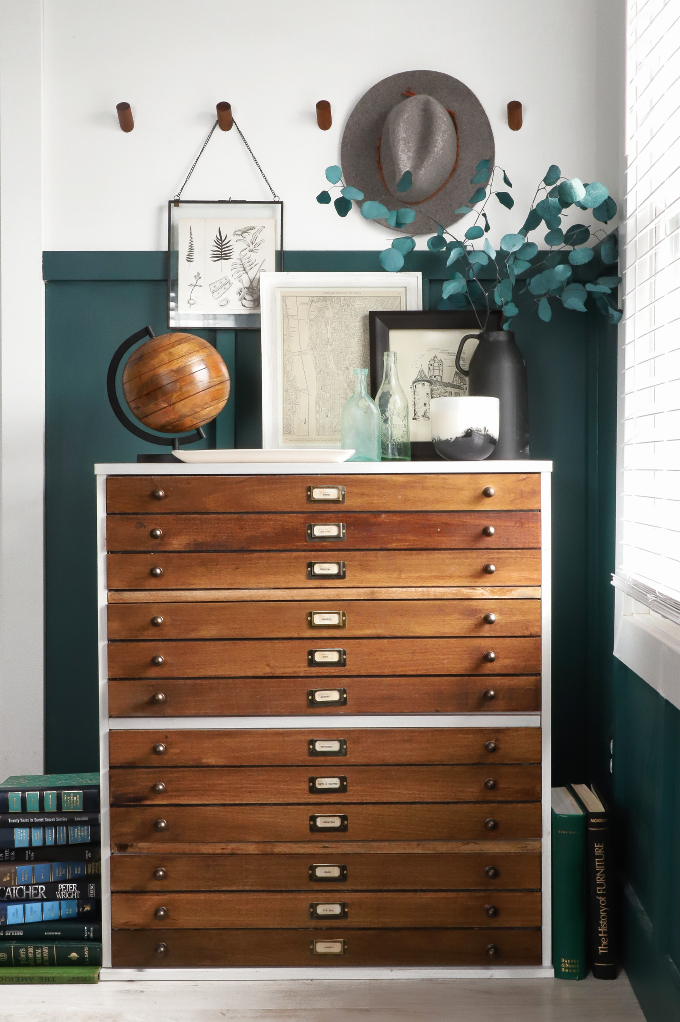
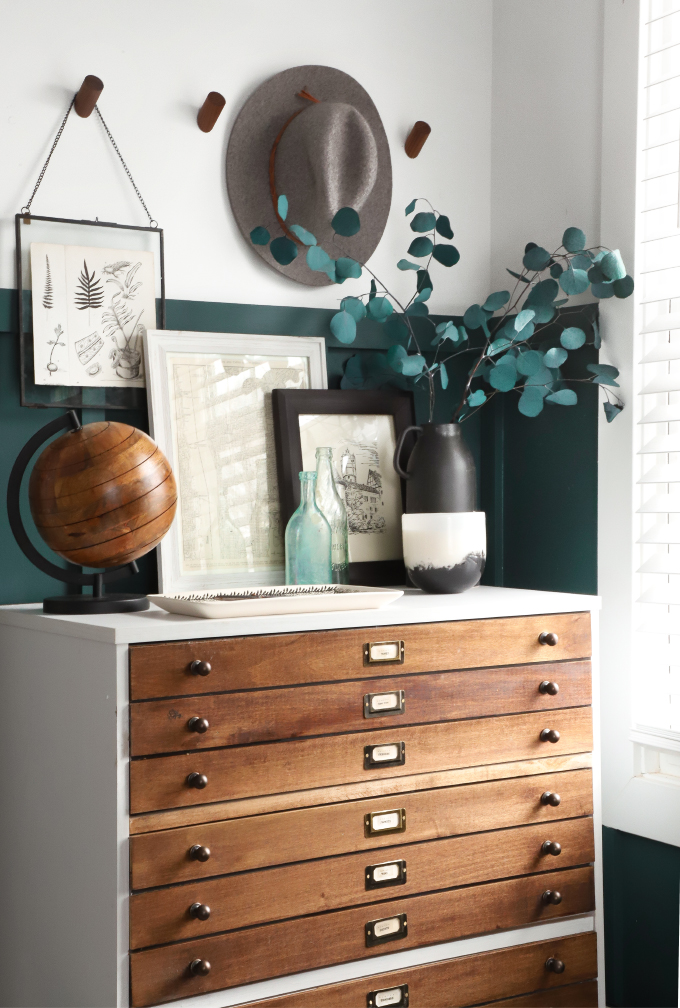
SHOP | Target Dresser (DIY coming) – Target Globe – West Elm Candle – H&M Home Vase – Amazon Wall hooks – Target hanging frame – Vintage bottles + Art
First I had a desk in the space, but ultimately need more storage for off-season clothes, so gave a Target dresser a makeover to look like a map drawer (steps coming tomrw). I am super happy with how this corner of the room functions now. And I have a place to display the thrifted art I have been collecting!
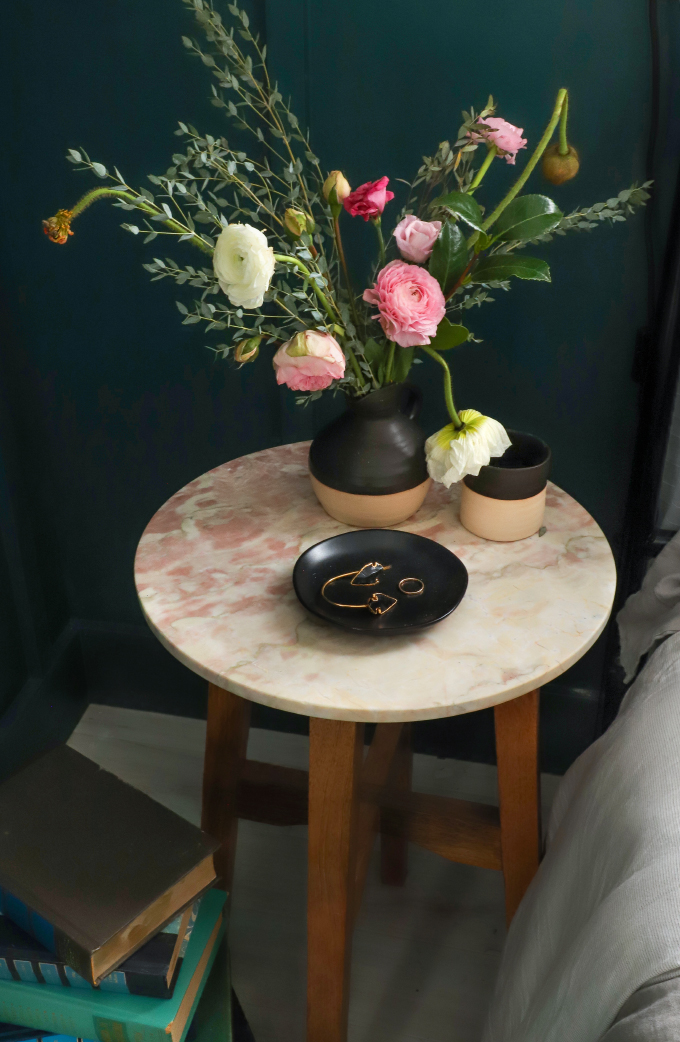
And HOW BEAUTIFUL are these flowers! My friend Jamie from Sweven Floral arranged them for me and I wish I could freeze them in time!
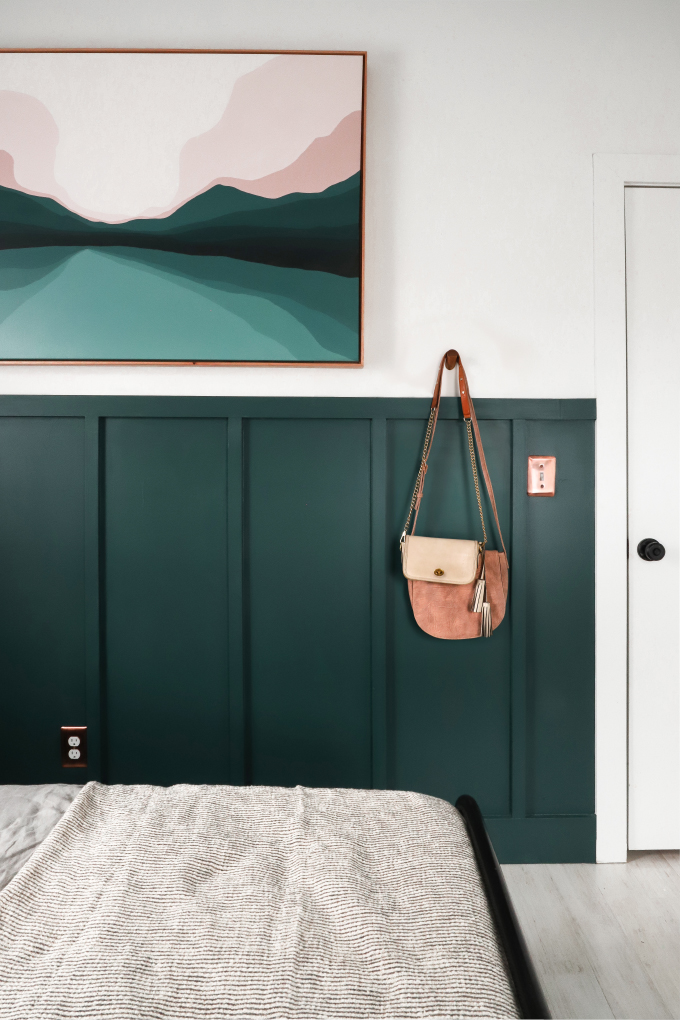
SHOP | Colleen O’Connor landscape art – Amazon light switch – Schalge door handle – Hobby Lobby Throw – Coach cream purse – Sole Society bag
The room is tiny, but the ceiling is vaulted, to this wall is SUPER tall, and I thought it would be fun to have a big piece of art to show it off. I worked with Colleen O’Connor, and she cutomized this beautiful work of art for the room. She even used the wall color – BEHR Hostaleaf so it would tie together. I LOVE it!
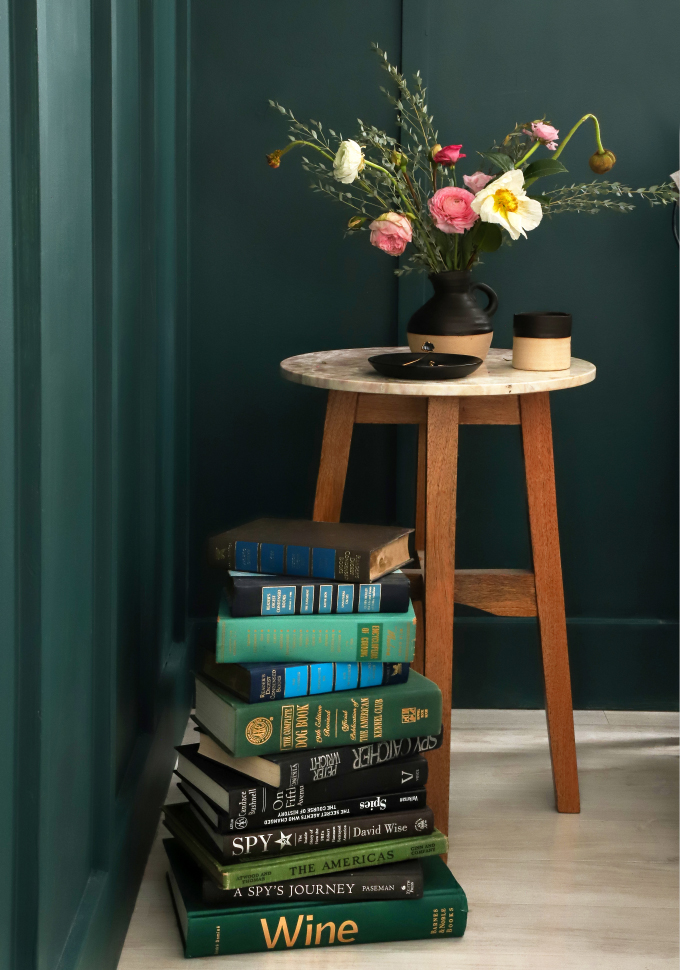
I have been making a point to shop more at the amazing local boutiques popping up all over Milwaukee! The little pitcher and cup set are from Orange & Blue. You must stop in there!
SHOP | Similar World Market Mirror – Similar Wayfair Bed – World Market Sconce– Pottery from Local shops – Vintage art
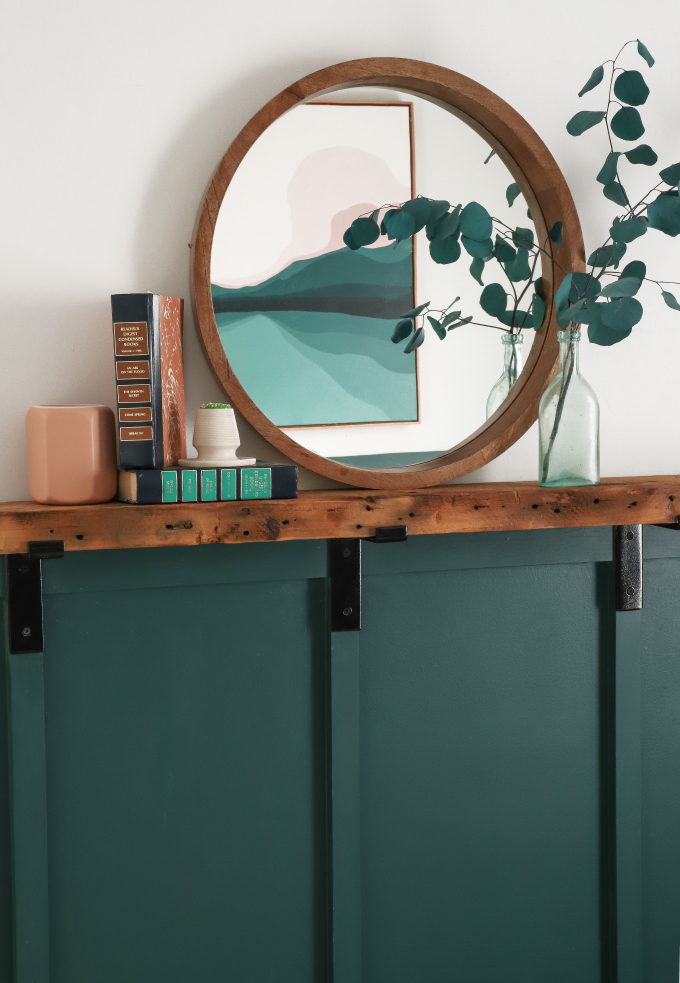
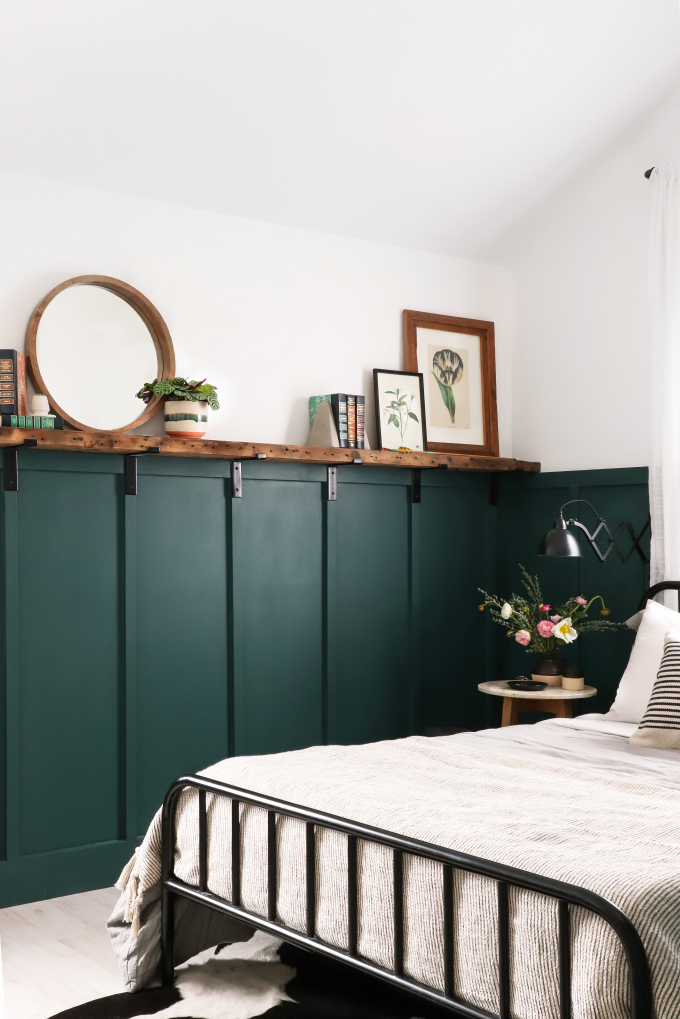
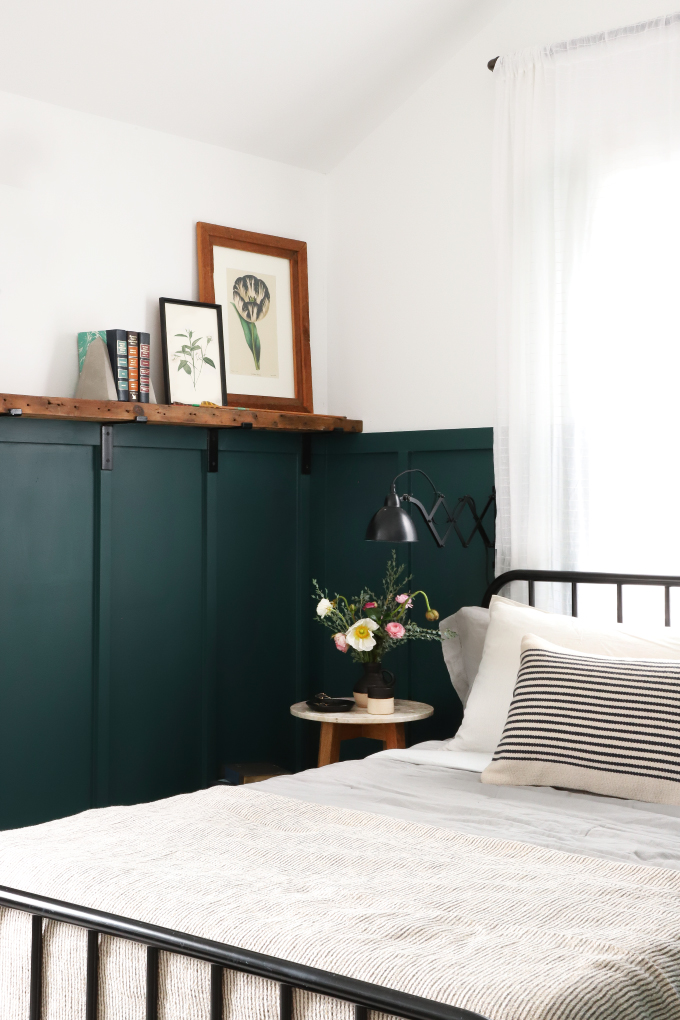
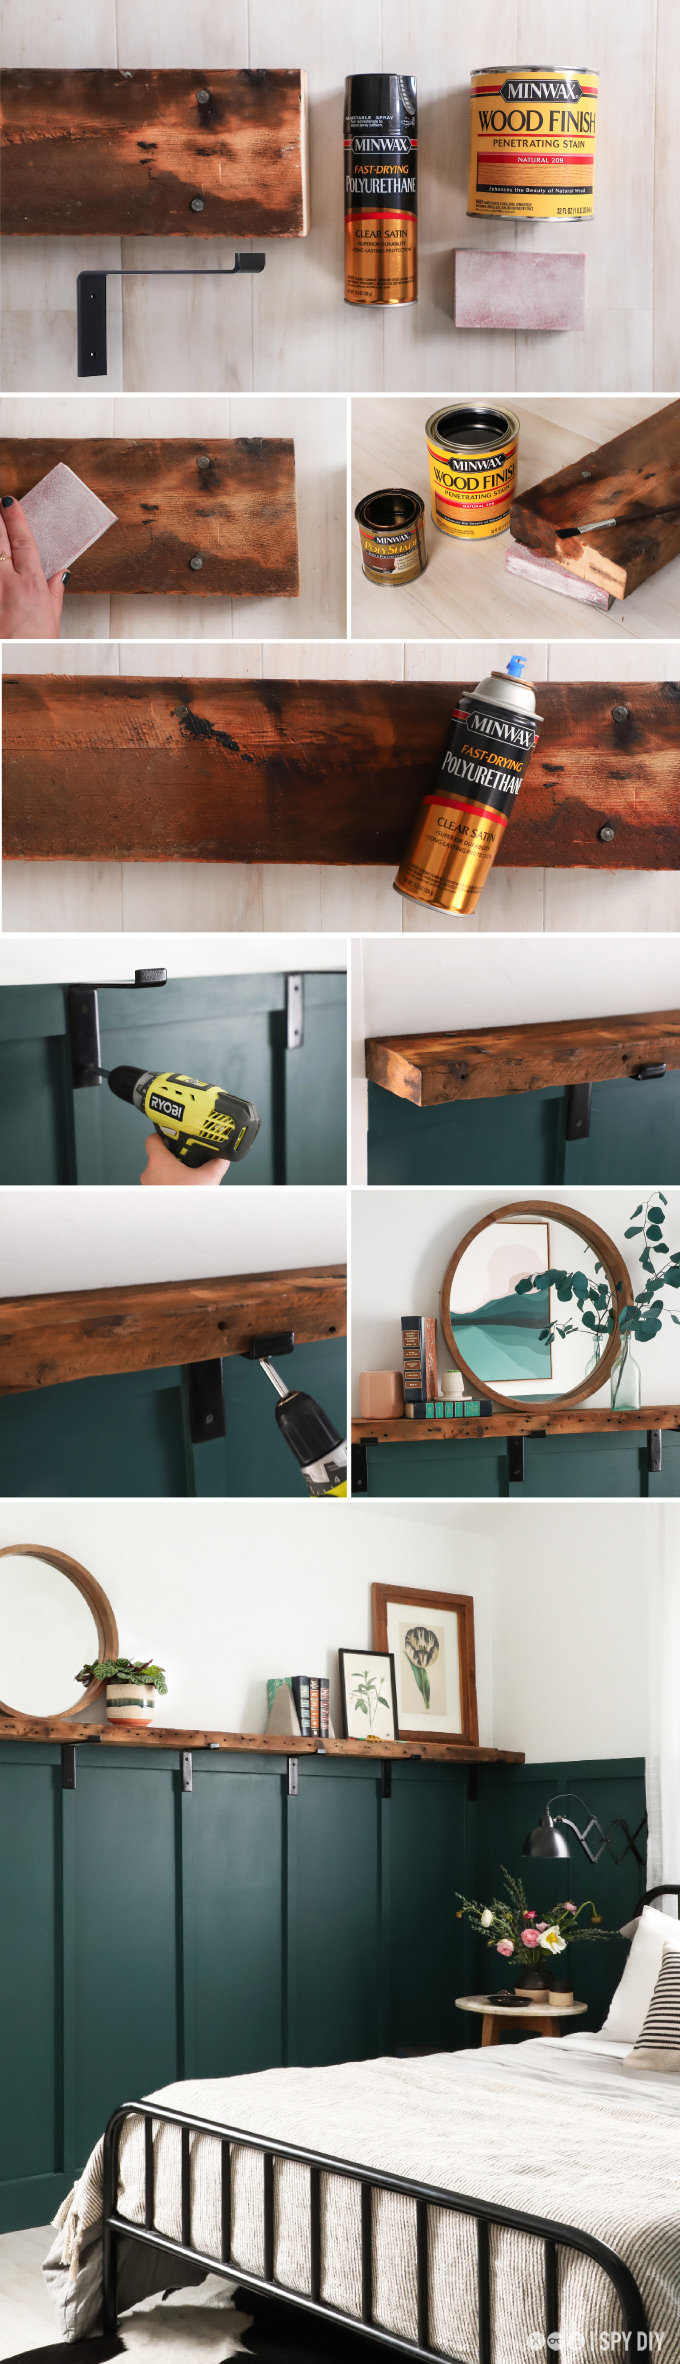
I just love seeing the reflection of the art in the mirror when you walk in the room! And the wood I used as a shelf was such an amazing find. It’s an old piece of barnwood, full of nails and holes and so much character! And since the room is so small, I like that it did not stick out too far, and fit perfectly in the 6in brackets. Steps and supplies after the break…
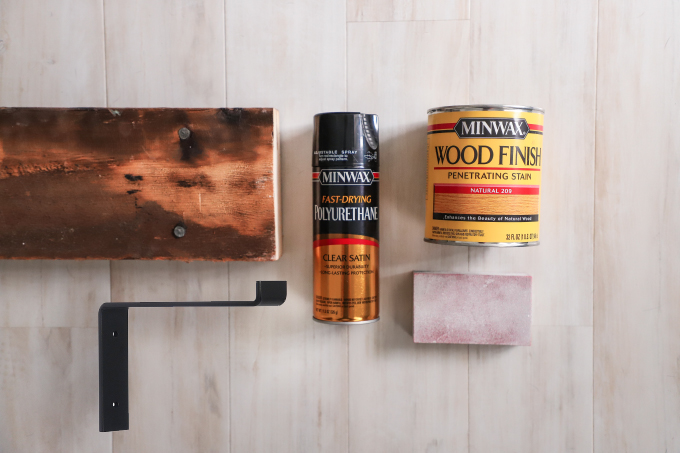
What you need:
Barnwood
Saw
6in Forged Steel Brackets
Minwax® Wood Finish Penetrating Stain – Natural
Minwax® PolyShade – Mission Oak
Minwax® Fast Drying Polyurethane
Wood Screws
Screw Driver
Sandpaper Block
Tack cloth
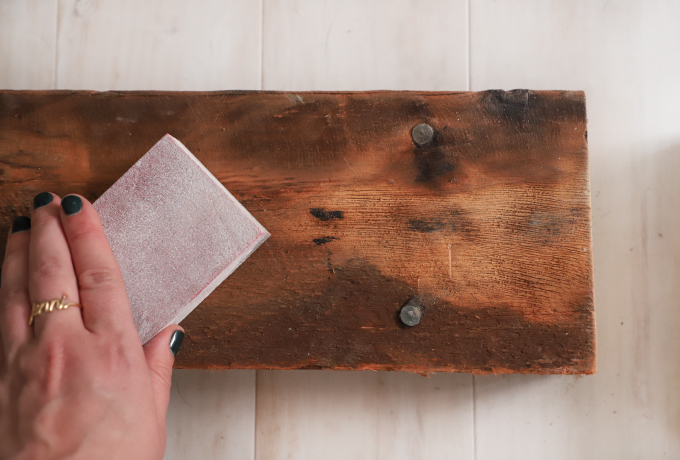
First, I started with the the sandpaper paper block. I wanted the wood to still look rough, but want to get rid of loose splinters. Then I wiped it down to clean off all the lose dust. A tack cloth works great for this.
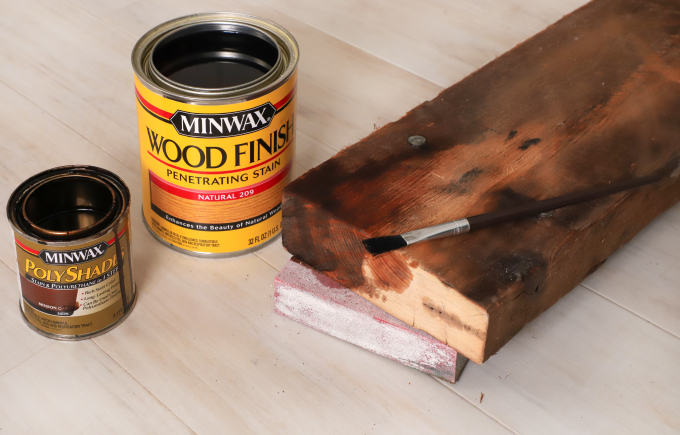
After cutting the wood to size, the exposed edge was not aged, so I ended up using two stains and a brush to paint on the stain to match the rest of the wood. I started with the Minwax® Wood Finish Penetrating Stain – Natural, and then added some darker spots with the Minwax® PolyShade – Mission Oak After it dried it looked totally seamless. *Follow directions on can.*
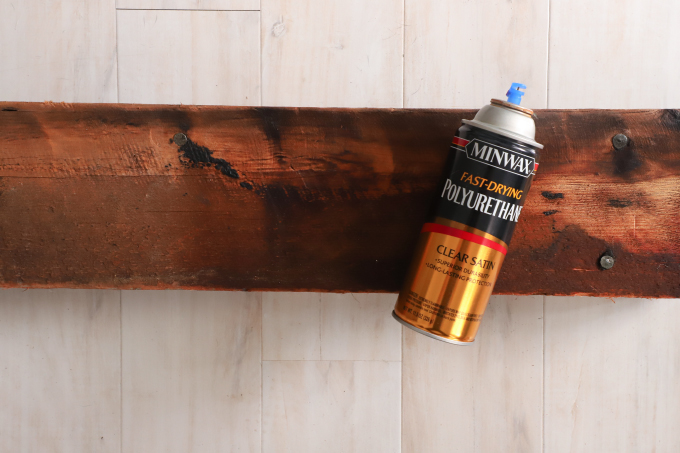
I have never used the spray fast drying Polyurethane before, but it worked amazing on the this project. The pic is right after I sprayed it, but it lighted up and pulled some beautiful grain out of the wood. Plus its super quick and dries lighting fast! I used satin, because I wanted to maintain the matte aged look, but still seal the wood. *Follow directions on can.*

Screw your brackets into the studs. Since the board & batten was already in studs, I just lines them up with the vertical boards.
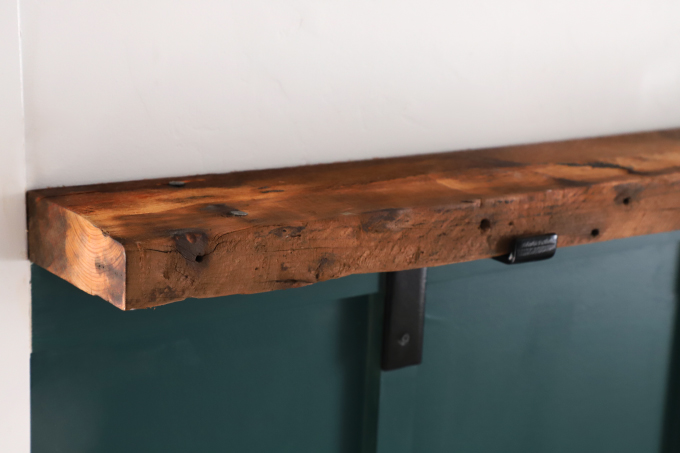
Lay your wood on top. Look at that matching edge!
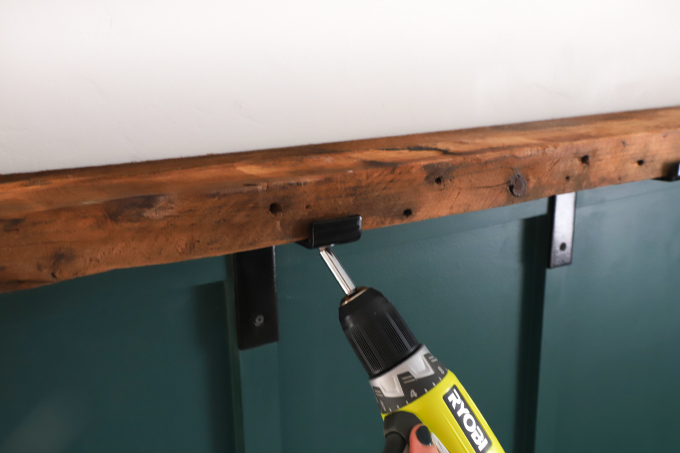
Secure by adding screws through the brackets into the wood from the bottom
*PIN THE STEPS BELOW*
This post was made in partnership with Minwax® Products. Thank so much for supporting my amazing sponsors who make I SPY DIY possible! For more woodworking/wood staining inspiration head over to the Mixwax Facebook page and “LIKE’ them!
EXPLORE MORE: DIY PROJECT, Home DIY


I love this! Thank you for the inspiration and the ideas 🙂
/Sandra ( http://kojatillslott.se )
DYING for that dresser DIY!! Love this reveal!
I was thinking today I’d like to DIY my own shelf, perfect timing. I love the entire style of this room! Out of curiosity, where do you suggest sourcing Barn wood?
Love the cozy vibe…and that map drawer!!
This is absolutely stylish, I love the bed and definitely that dresser!
https://www.makeandmess.com/
That green! Such a great choice. You have a great eye for design! I glad to read your post thanks, this amazing tutorial.
super sympa et inspirant !