MY DIY | Double Sliding Barn Door
DIY PROJECT, Home DIY
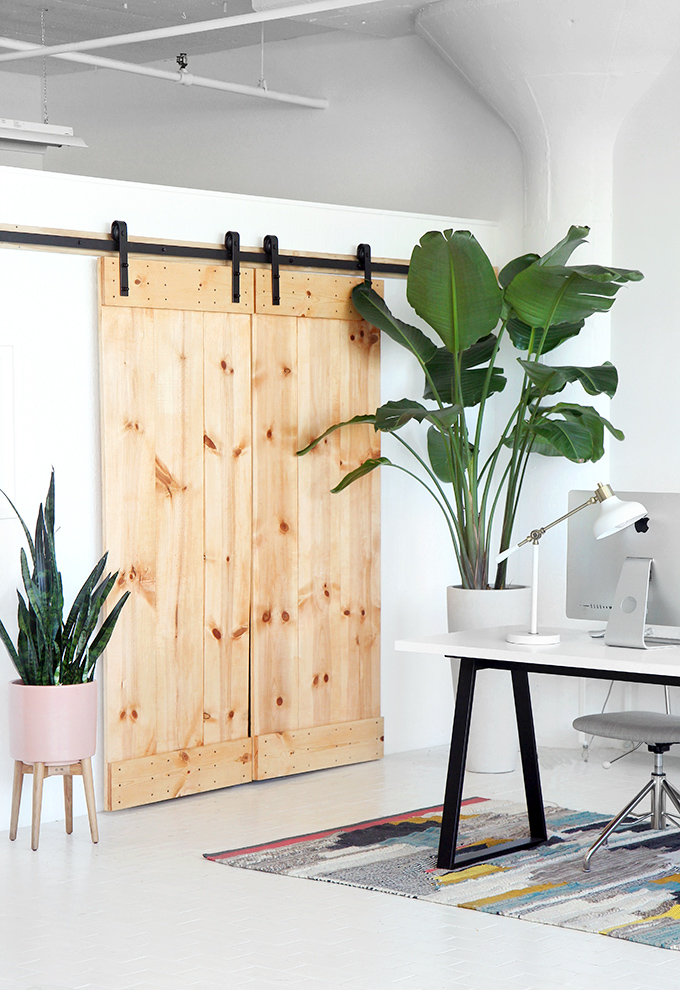
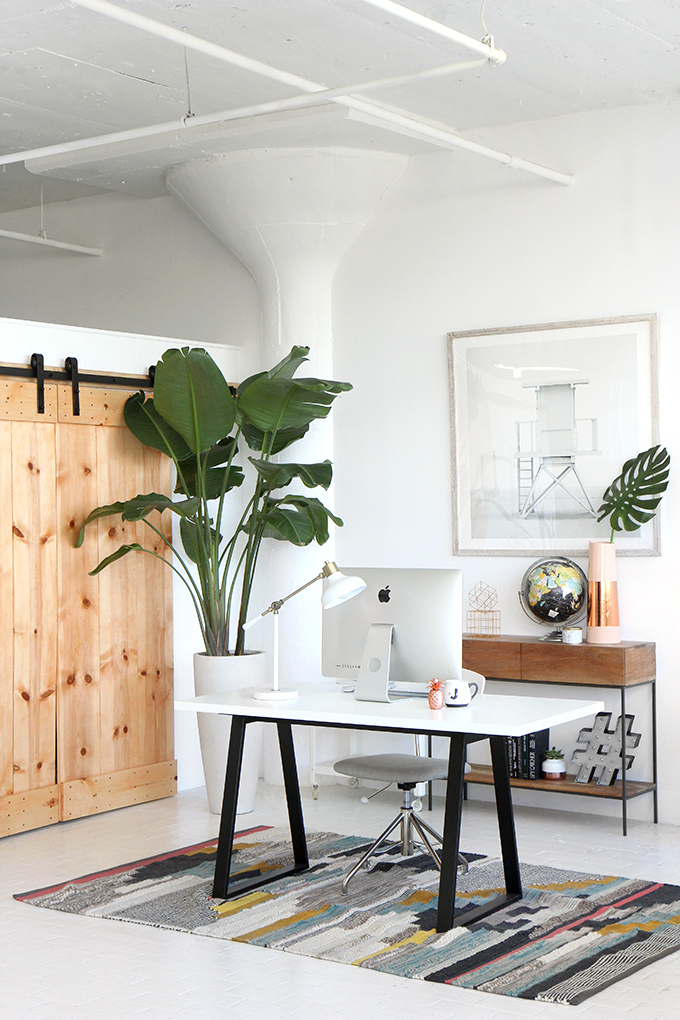
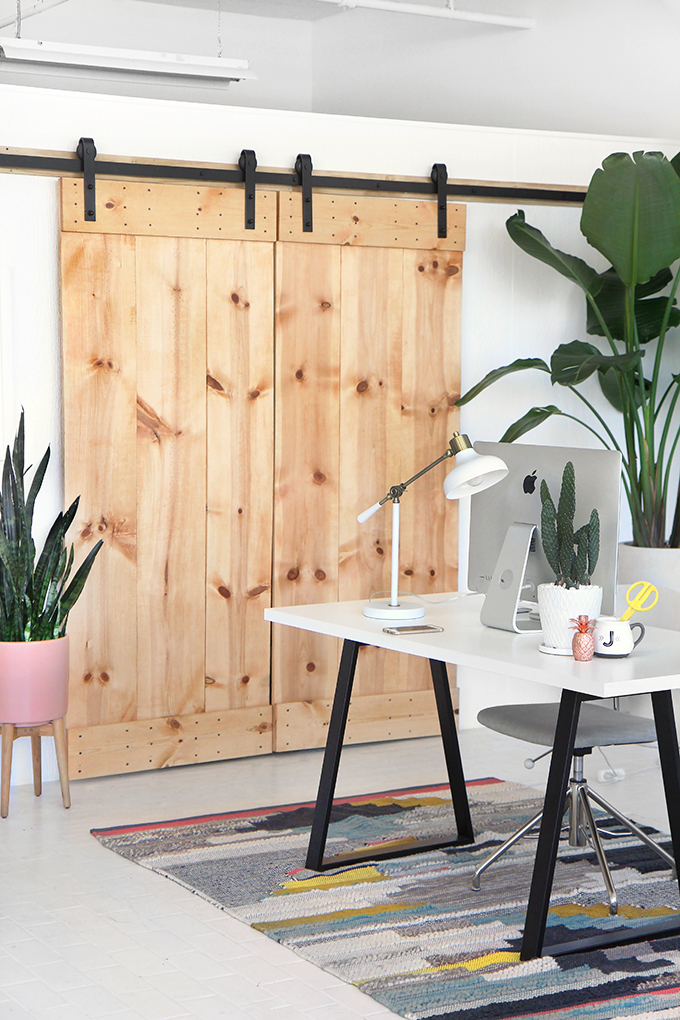
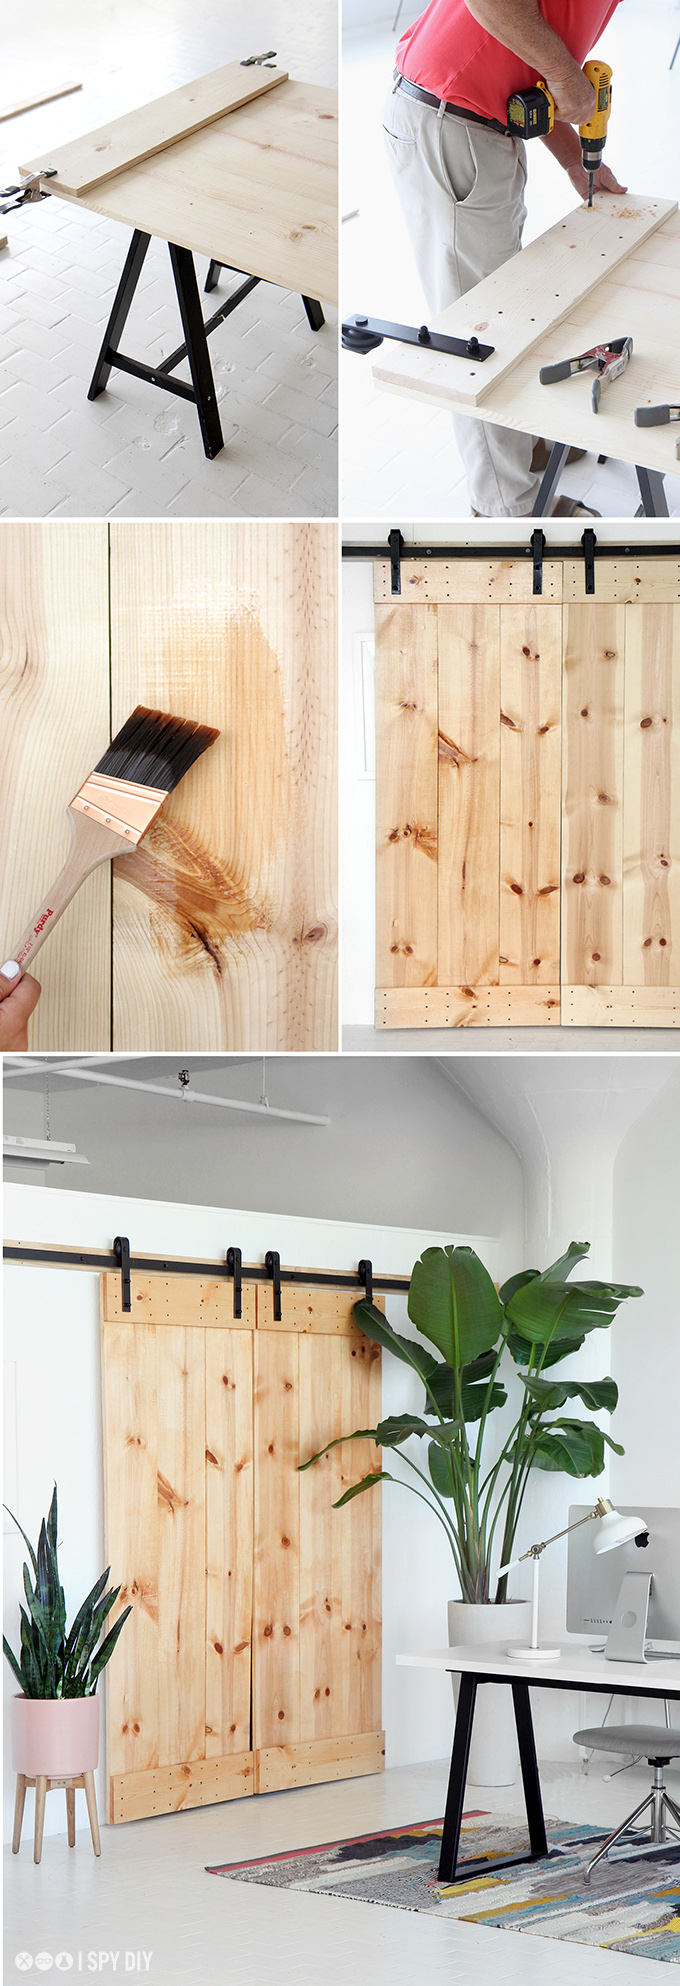
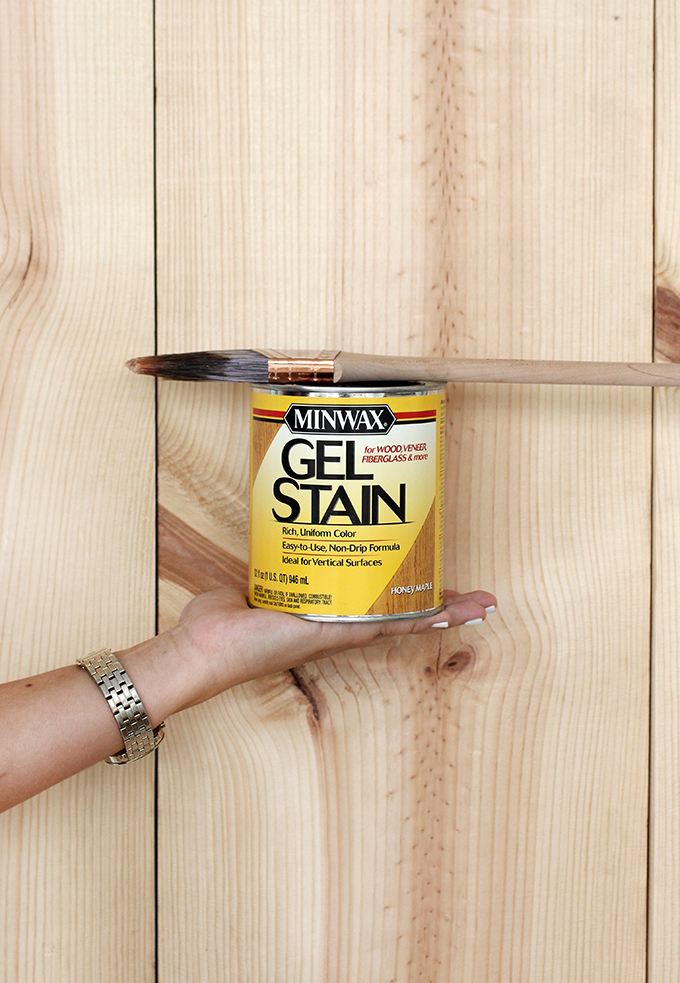
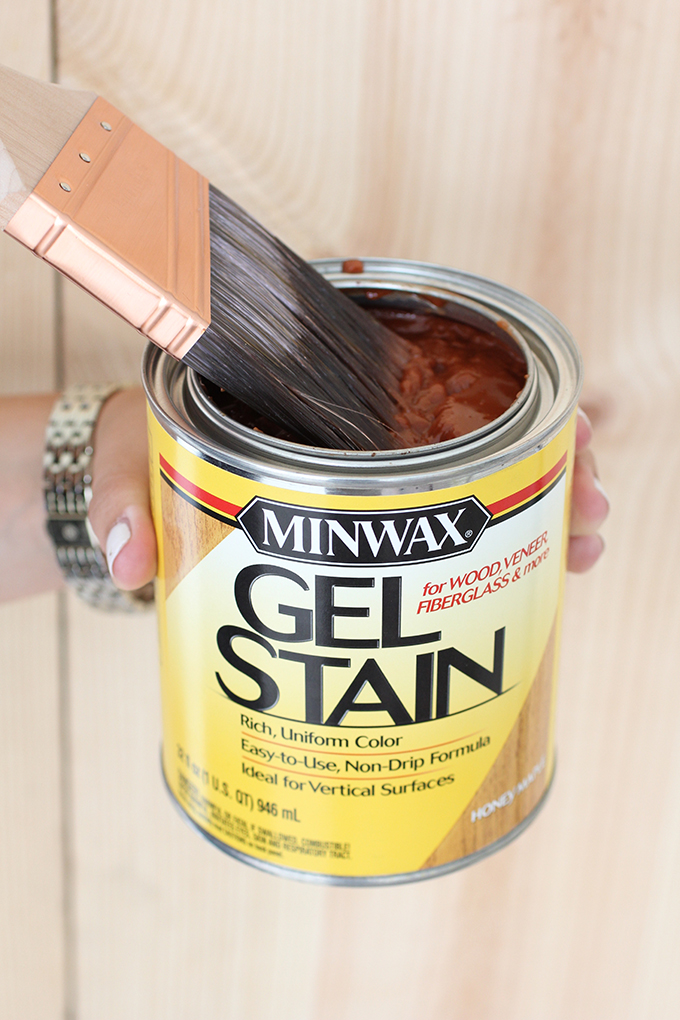
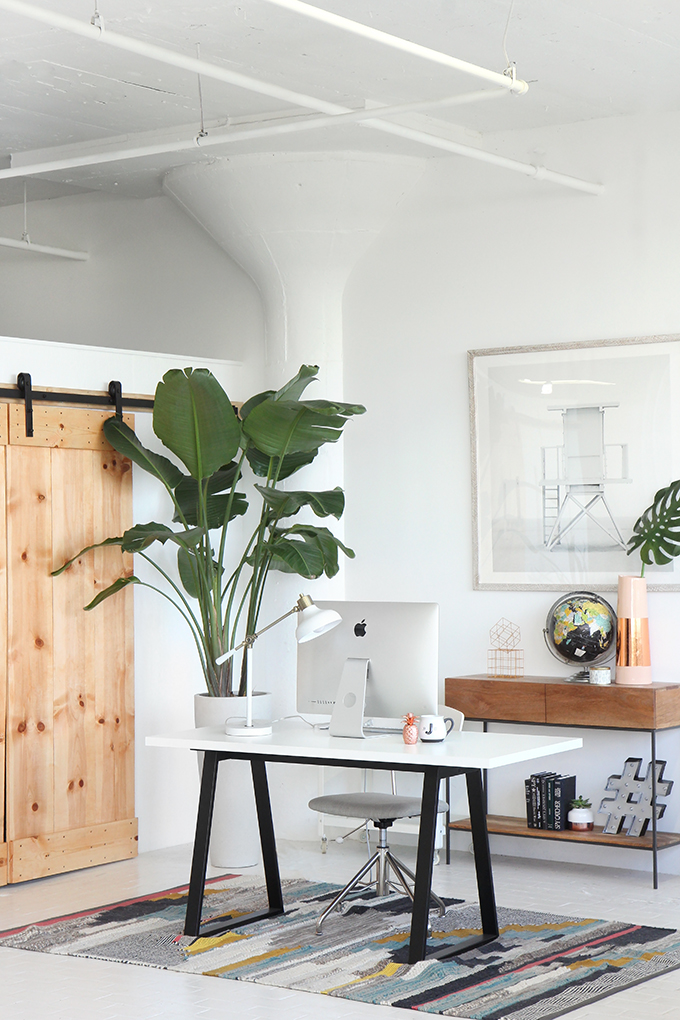
I gave you all sneak peek at my barn doors in this post, but I finally stained them and switched up my desk area a bit. If you all were following along on ISPYDIY Snapchat, you got a peek at my amazing parents helping me out with this project. The came back from Florida at the beginning of the Summer, and with a list of projects to be done before an open house, they were rockstars and worked till midnight one evening getting these doors done (they are the best:) In my head this was a couple hour project because I wanted a simple door design, but we ran into some complications because we could not find studs to nail the railing into…so we ended up adding the wood 2×4 behind the rail for support. Good new is, the actually building of the doors was not all that hard, and if you follow the directions on the hardware kit (I got mine on Amazon Here) and talk your Dad into helping you, it should just take an afternoon to finish. Next came deciding what color to paint the doors, I found so many great options here, but ultimately wanted to stick with something close to the unfinished look, but a little more polished. I was super stoked to find Minwax® Gel Stain for vertical painting because I could leave the doors hanging while staining, can’t get much easier than that! And the whole project came in at under $250 which was a bargain for double doors! Steps and supplies after the break.
What you need:
12 ft Double Sliding Door Hardware
Six 1 in. x 12 in. x 7 ft. Common Board
Two 1 in. x 8 in. x 6 ft. Common Board
Minwax® Gel Stain – Honey Maple
Wood nails
Drill
Clamps
What to do:
After I gathered all my wood, I had the guys at the hardware store cut it down to size. The height for my opening needed 7ft boards, make sure to adjust for your opening. Once the six vertical boards were cut to 7ft, I placed three next to each other, and measured the width, this is the measurement for the horizontal peice (12in boards are really closer to 11 and 1/4). Have them cut 4 horizaltal pieces.
Next lay out your 3 vertical pieces, with one horizontal at the top and at the bottom.
Then clamp the corners to stay in place. To confirm your doors are square, measure the diagonals to make sure they are the same.
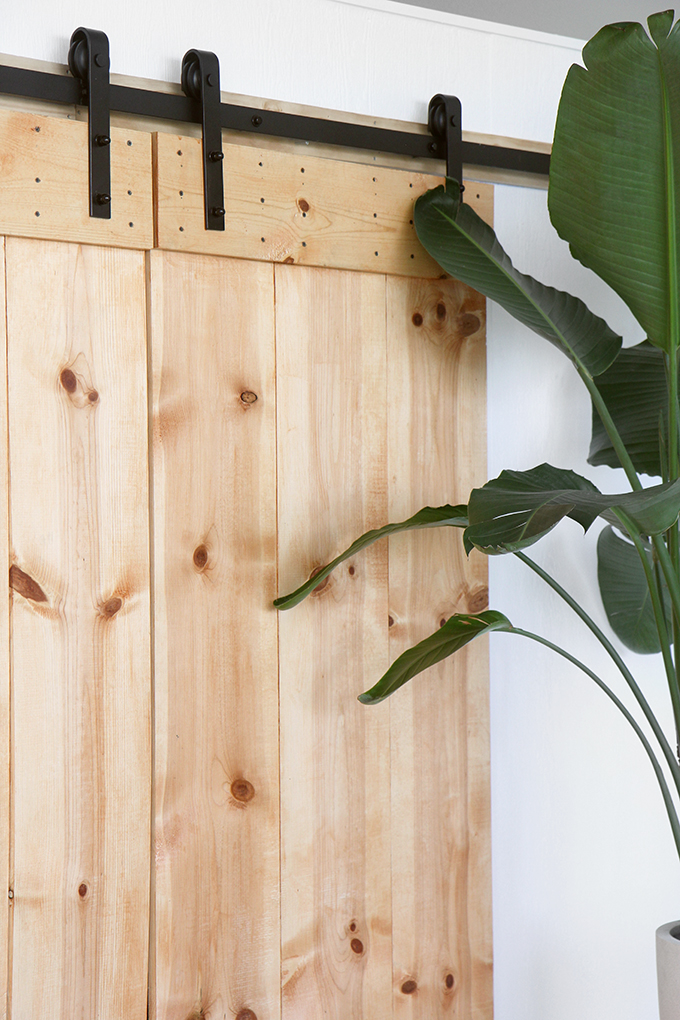
Next, I measured/eyeballed where I wanted the screws. I have six in each board mostly for looks, Four in the corners of each vertical board should hold just fine. Drilling pilot holes for the screws speeds up the process, and keeps the wood from splitting.
Then follow the instructions on the kit for the rail and slider hardware. It took a little bit of measuring, and trial and error to get them to hang (*almost) perfectly…definitely a two person job!
To stain:
Prep the surface by sanding with a fine grain sandpaper, then wipe clean.
Stir the Minwax® Gel Stain until creamy, and then apply evenly with a brush or clean cloth, wiping in the direction of the grain.
Allow to dry 8-10 hours between coats, and do not sand.
You can finish Minwax® Fast-Drying Polyurethane. Once dry, slide close and done!
This post was made in partnership with Minwax® Products. Thank so much for supporting my amazing sponsors who make I SPY DIY possible! For more woodworking/wood staining inspiration head over to the Mixwax Facebook page and “LIKE’ them!
EXPLORE MORE: DIY PROJECT, Home DIY


So cool! But it’s not possible in our home…
Such a pretty office space!
xo Jessica
My Style Vita
I absolutely love this! It completely changes the feel of the room, and it is a statement piece in and of itself!
XO
Nicole
http://www.bynicolegeorge.com
The doors look great, girl. Love the color.
The doors give such a awesome look to the room. I love it.
Sam from
http://EclecticElite.com
The doors look amazing! It adds a great touch to the room!
http://livingblissfullybalance.weebly.com/
These turned out so gorgeously! You would never know they weren’t store bought doors, and getting to put your own touch on them is the best. Thanks for sharing!
Julia – http://bunnybaubles.com
This looks so cool! I’ll definitely have to take some time to realize this DIY x
Jessica — WS Community
I would like to borrow your parents so I could do this. It looks great!!!
I love this kind of doors, they always look so nice and they are space savers, thanks for this great tutorial.