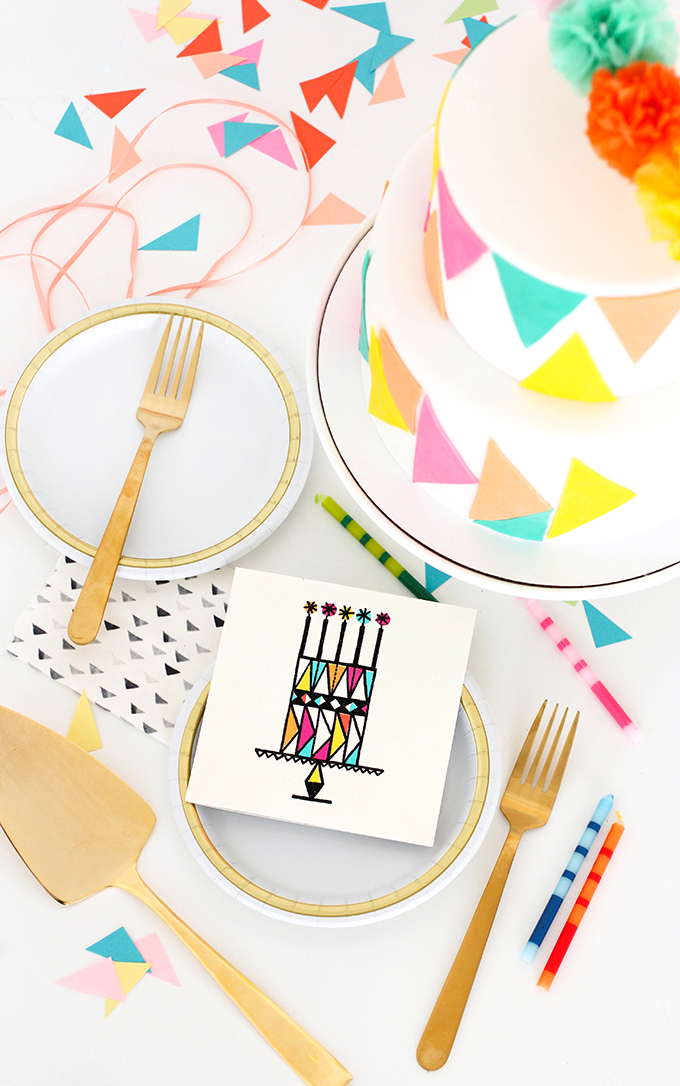
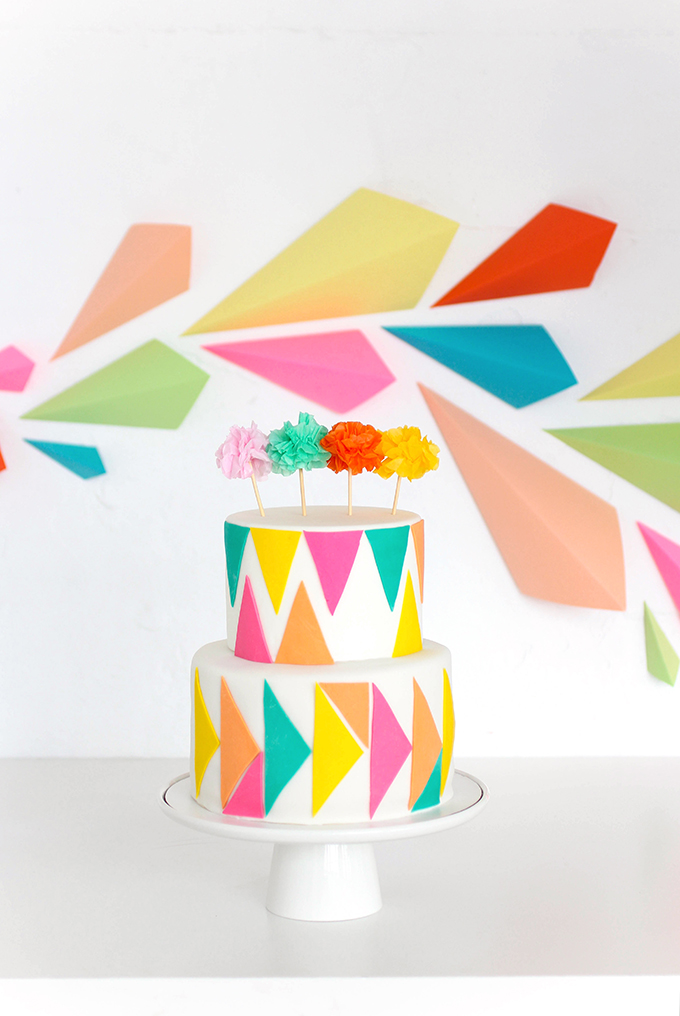
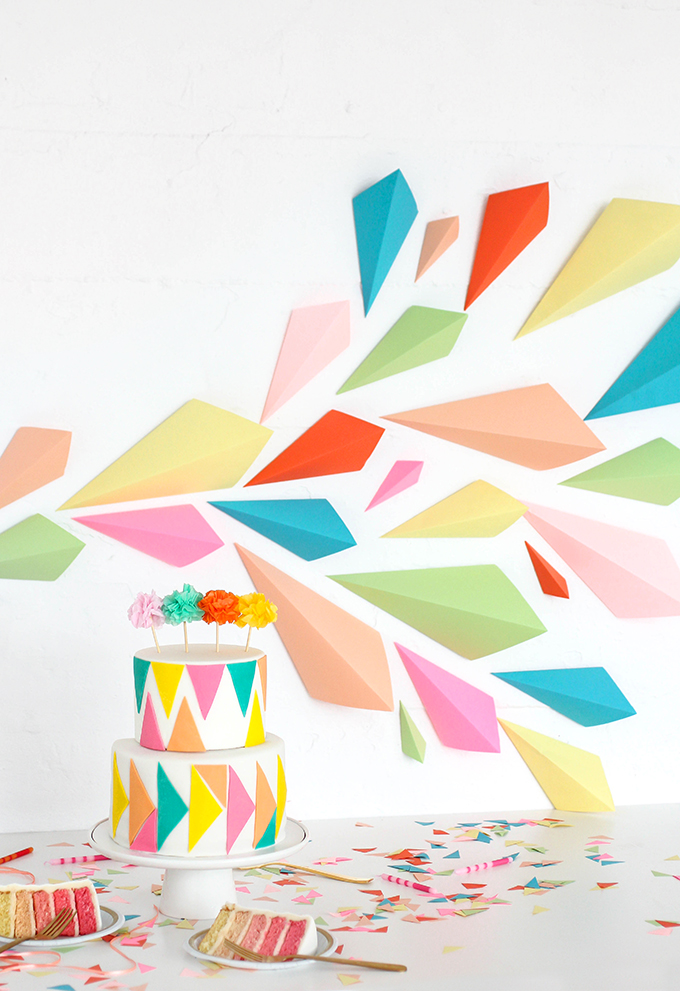
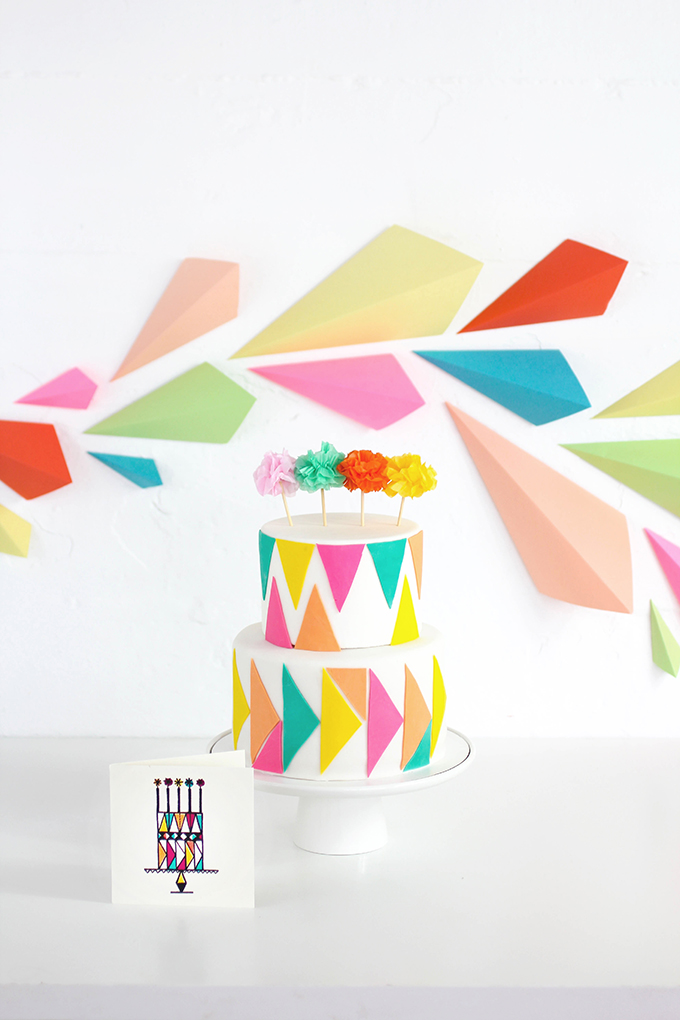
I’m back after a little Internet break, and we have a super fun birthday themed cake and backdrop to celebrate! It was my best friend’s birthday a couple weeks ago and as you all know, I love birthdays and try to go all out for the celebration. My BFF has a major sweet tooth, so what better way to celebrate her, than an adorable, elaborate cake! Every good cake needs an inspiration, and I based mine off Hallmark’s birthday cake card. We started by using the geometric triangles of the card as the inspiration for the backdrop. Using bright, vibrant paper, we were able to mimic the design of the cake onto the wall. Next, with the help of my friends at Yield Bakehouse, we created a two tiered cake with colorful layers, so that when she cut into it, there would be a fun surprise! Then we used different shades of fondant to replicate the geometric shapes from the card onto the cake. Finishing it off with some fun paper flowers as the topper, and this birthday cake was ready for a party! My best friend could not have been happier or more surprised when she saw the cake, it made my heart so happy! Check out how we created the display in the video below, and steps after the break!
Geometric Ombré Cake:
What You Need:
• 5 Cake Pans
• Pink, Teal, Yellow, Peach Food Gel
• 1.5lbs Fondant
• Frosting
• Rolling Pin
• X-Acto Knife
• Clean Paint Brush
• Small Dish of Water
Vanilla Cake:
(double recipe for 8″ round cake)
• 1 cup (2 sticks) unsalted butter, room temperature
• 1 tablespoon baking powder
• 2 1/2 cups sugar
• 3/4 teaspoon salt
• 2 teaspoons vanilla extract
• 1 teaspoon almond extract
• 5 large egg whites
• 2 3/4 cup cake flour
• 1 cup buttermilk (or whole milk)
How To:
1.) Preheat oven to 350 degrees. Prepare cake pans with cooking spray and flour.
2.) In a bowl or stand mixer; cream together butter, sugar, baking powder, salt, and extracts until fluffy. (scrape sides to make sure everything is incorporated.)
3.) With the mixer on low, carefully add in egg whites one at a time. Make sure each egg is mixed through before adding another.
4.) Then with the mixer still on low, add 1/3 cake flour. Then 1/3 buttermilk. Continue alternating between flour and milk until gone. (scrape down sides once more)
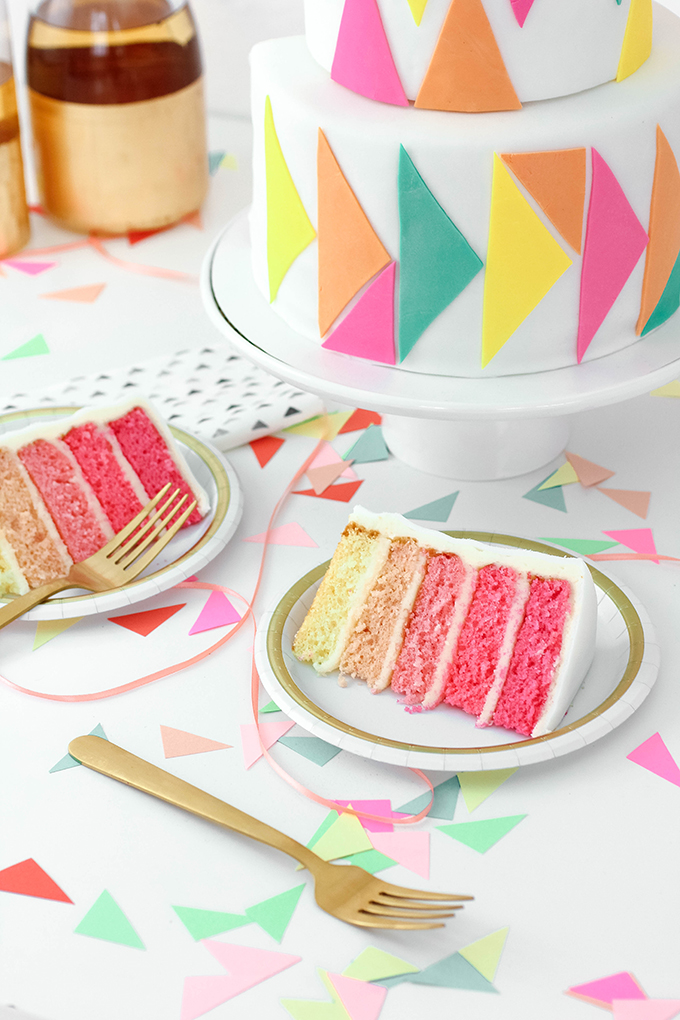
5.) Once all combine, divide batter into 5 bowls. (about 2 cups each) With the food gel color of your choice, start coloring each bowl of batter. Start with the darkest shade, and gradually get lighter. Make sure to leave one bowl plain for the lightest layer.
6.) Pour each batter into a separate prepared pans. (note: if you do not have 5 cake pans, no worries, you’ll just have to wait a little longer for each to cool before “reloading” your pans.) Bake for 15-20 minutes, and let cool for 10 minutes before removing.
7.) Once all 5 cake layers are cool, you can start stacking and frosting! You want just a thin layer of frosting between each layer for a good cake to frosting ratio. When the cake is completely frosted, place in the refrigerator for 20 minutes to chill.
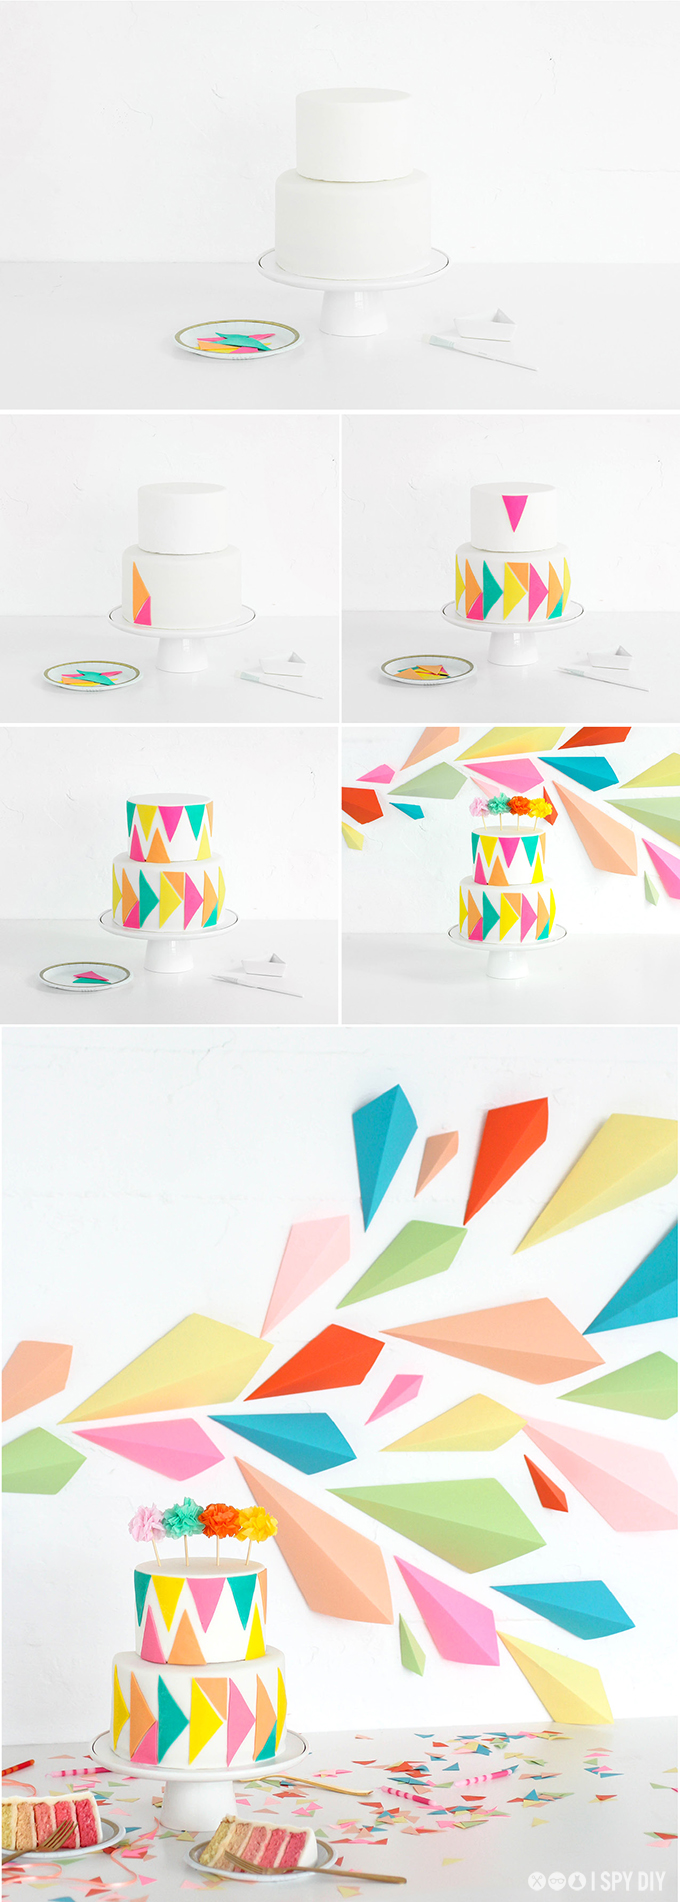
8.) While you’re waiting for the cake, roll out the white fondant using a rolling pin. You want it to be about 1/8 inch thick and the diameter needed to cover the whole cake. (note: you can use cornstarch or powdered sugar on your work surface, this will help the fondant not to stick.) When you’re ready, take the cake out of the refrigerator and cover with the fondant. Smooth down the top first, then work down the sides. You’ll want to work as fast as you can, fondant tends to dry out quickly.
9.) Cut off any extra fondant off the bottom once it is all smoothed out. (note: as long as the fondant does not have any frosting on it, it can be reused.) Set aside and begin to color smaller amounts of fondant for the geometric pieces. If you have a kitchen scale, you can weight them out. It will be about 3oz of fondant per color you use.
10.) Measure the height of the cake, that will tell you how tall to make your fondant shapes. Again, roll out each color to 1/8″ thick. Then using the X-acto knife, begin to cut your pieces! When you are ready to attach, using the paint brush and water, lightly wet the shape and attach it to the cake. You can go off this deign or create your own!
11.) Now cut into that pretty ombré treat and enjoy!!!
This post was created in partnership with Hallmark. Thank you for supporting the amazing sponsors who make I SPY DIY possible!

 I’m back after a little Internet break, and we have a super fun birthday themed cake and backdrop to celebrate! It was my best friend’s birthday a couple weeks ago and as you all know, I love birthdays and try to go all out for the celebration. My BFF has a major sweet tooth, so what better way to celebrate her, than an adorable, elaborate cake! Every good cake needs an inspiration, and I based mine off Hallmark’s birthday cake card. We started by using the geometric triangles of the card as the inspiration for the backdrop. Using bright, vibrant paper, we were able to mimic the design of the cake onto the wall. Next, with the help of my friends at Yield Bakehouse, we created a two tiered cake with colorful layers, so that when she cut into it, there would be a fun surprise! Then we used different shades of fondant to replicate the geometric shapes from the card onto the cake. Finishing it off with some fun paper flowers as the topper, and this birthday cake was ready for a party! My best friend could not have been happier or more surprised when she saw the cake, it made my heart so happy! Check out how we created the display in the video below, and steps after the break!
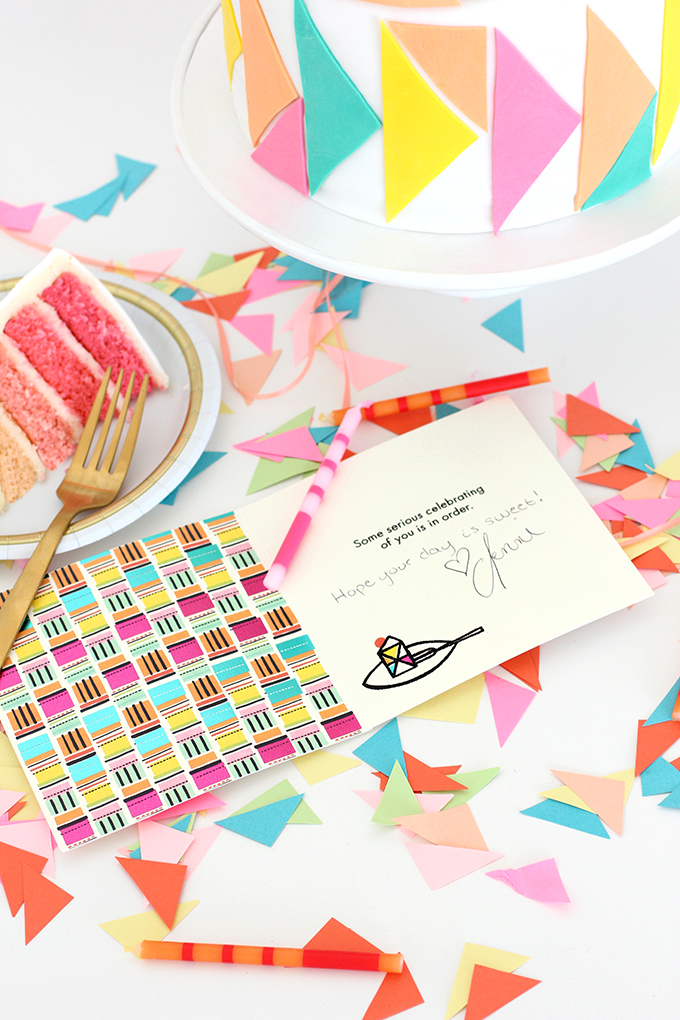


This is so awesome!
This is such a cute cake! Love it. X
http://www.thoughtsinstyle.com/
The inside of the cake is soo beautiful!
https://www.makeandmess.com/
The cake looks delicious.??❤️