DIY HOME | FAUX MAP DRAWER DRESSER
DIY PROJECT, Home DIY
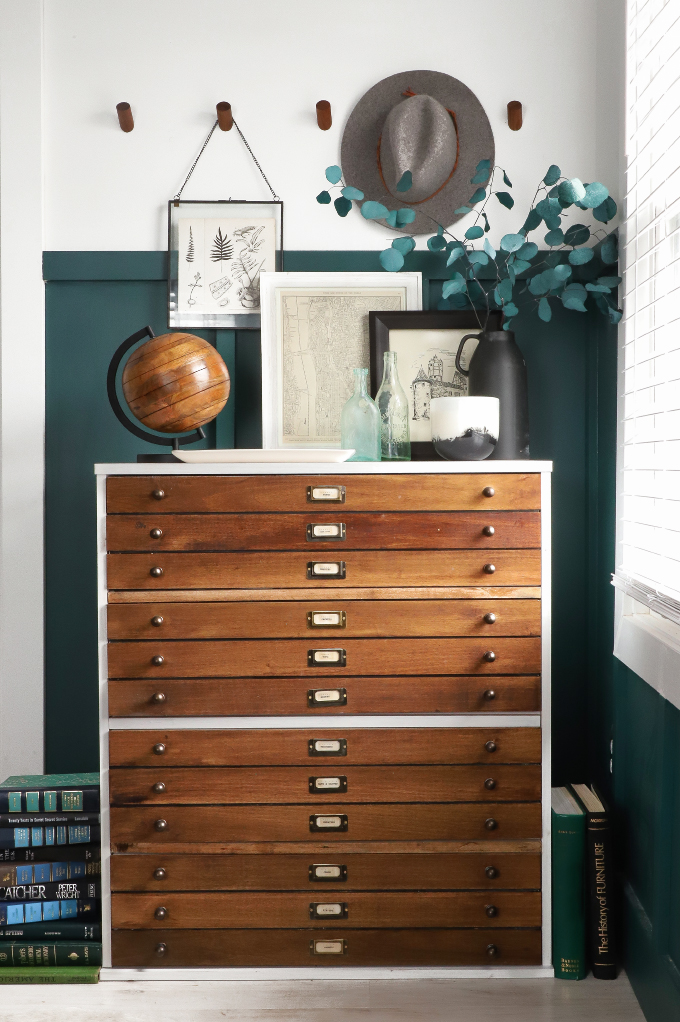
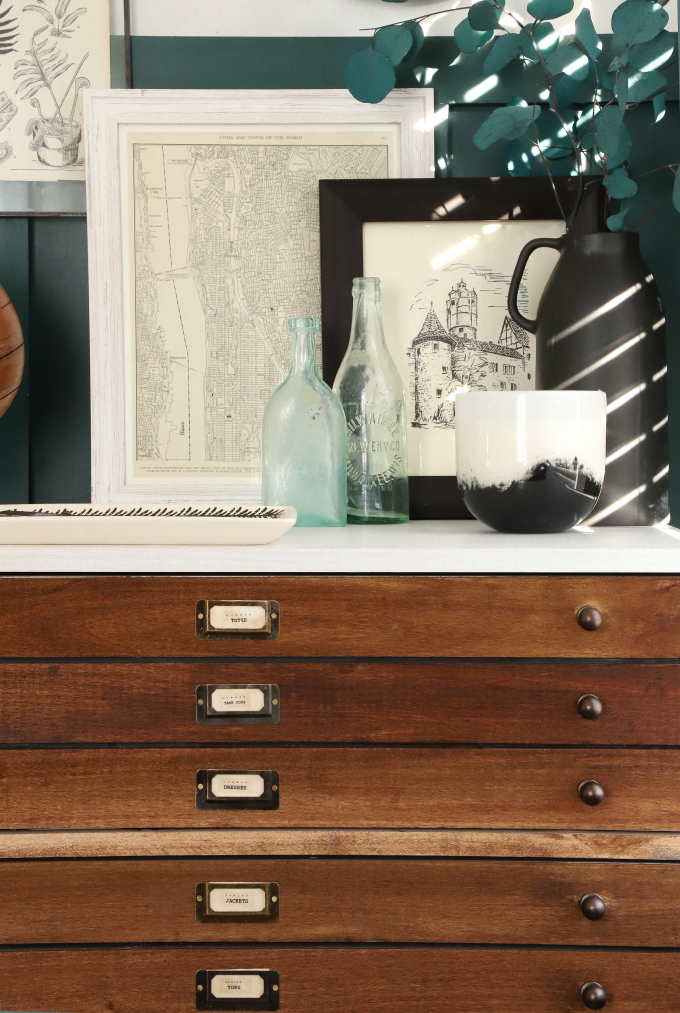
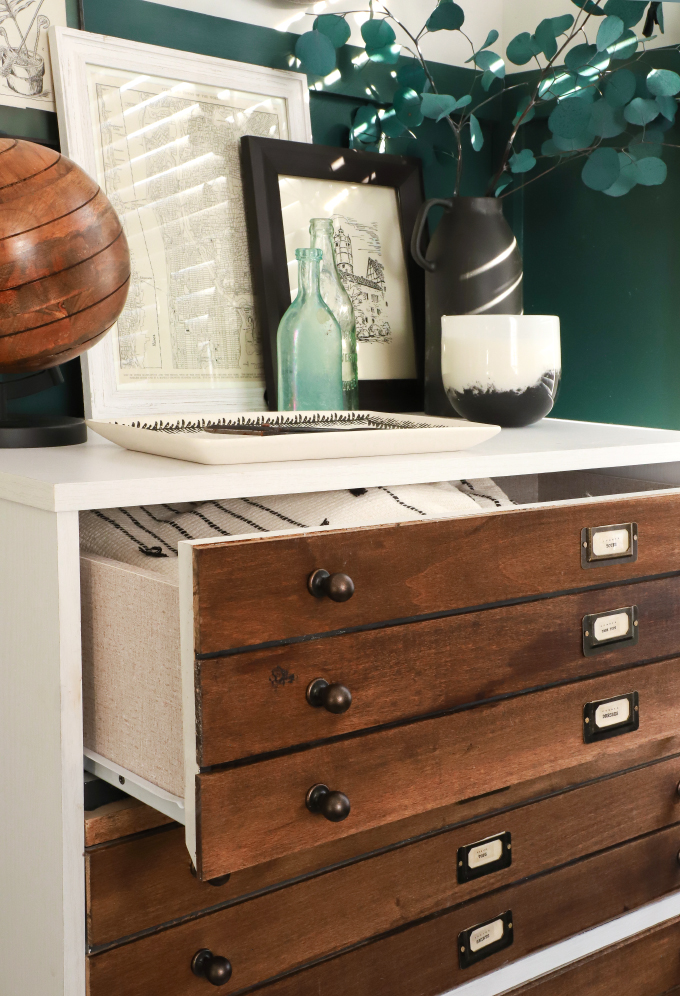
I gave you all a peek at my guest room makeover yesterday and promised I would share all the details on my DIY Map Dresser, so here we go! I initially had a desk in the space, but realized a dresser was way more practical because the guest room also serves as off-season clothes storage. I was searching for the perfect vintage piece, but was having trouble finding a piece that fit the space and my budget. So, I partnered up with Brother to create a custom faux map drawer using my favorite organizational tool: A label maker! You all are going to go crazy for the P-touch Cube. It lets you customize your labels on your phone with a ton of fonts and layout options, and then you can Bluetooth beam your design to the label printer– mind blown, right?! Ok, let’s back up and talk about making the dresser. This white four-door dresser fit the space perfectly, so I used that as a base, then made each large drawer look like 3 thin map drawers by screwing on strips of wood, then adding knobs and labels. You may have seen the process unfold on Instagram, and I had a fail when I attempted to make a no power tool version with balsa wood (a soft wood you can cut with a craft knife). It ended up being too flimsy, so I got out my miter saw and drill (side note: I was excited to hear how many of you wanted power tool projects on an IG poll). All the steps for the dresser are after the break!
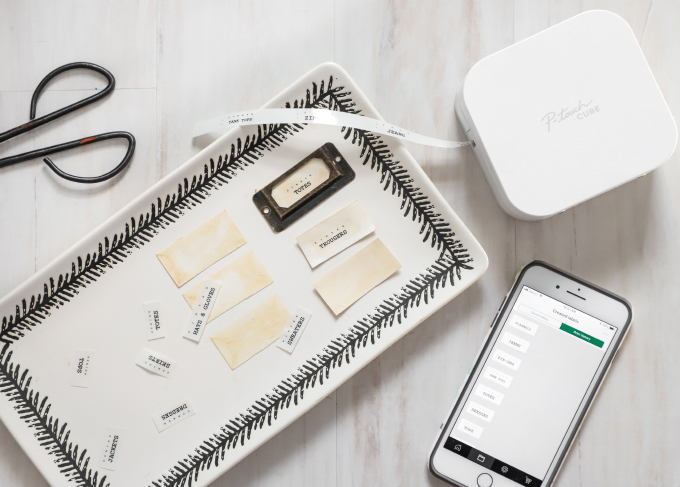
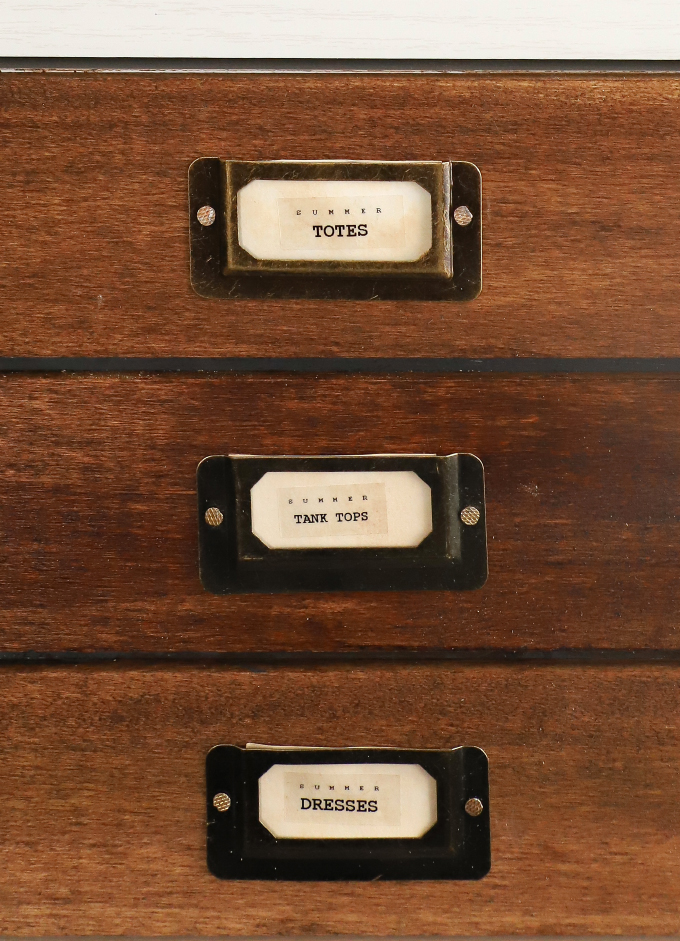
Now on to the labels. I wanted to give the little pieces of paper an aged look, so I cut up card stock and soaked them in coffee grinds with a little water for 5 min. After taking them out and washing each one off, let them dry out. I designed each label on my phone, organizing each drawer by season and what I would be storing in them. The P-touch Cube can print on clear tape, so when each label was dry I peeled off the backing and stuck in right on my coffee-aged paper, and ta-da! Antiqued labels!
What do you all think? If you try this project I would love to see! Tag #ispymydiy or send me a pic on Instagram!
All the steps for the dresser are after the break!
What you need:
1/4 in. x 3 in. x 3 ft. Poplar Board
Wood Screws
Miter Saw
Knobs
Stain
Label holders
Screw Driver
Cardstock
Coffee grounds

First, measure the front of the drawer and cut your boards with a miter saw to the exact width. I used 3 boards per drawer, but you may need to adjust if you use a different dresser. Then, stain the front and sides of each piece of wood (I used Mission Oak). Seal with a matte polyurethane and let dry.
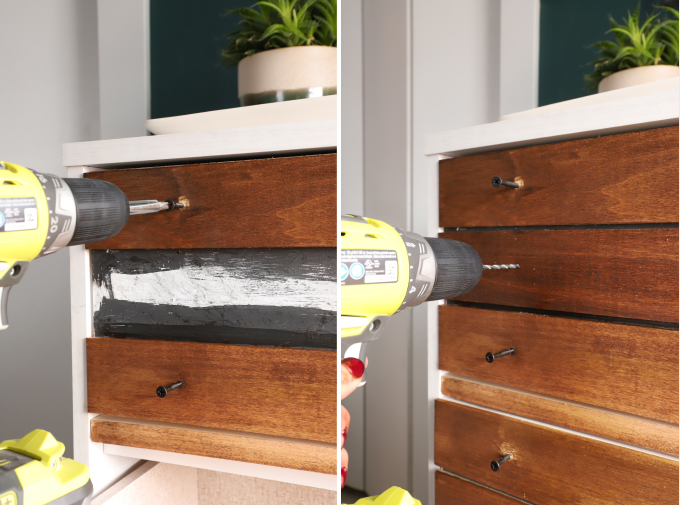
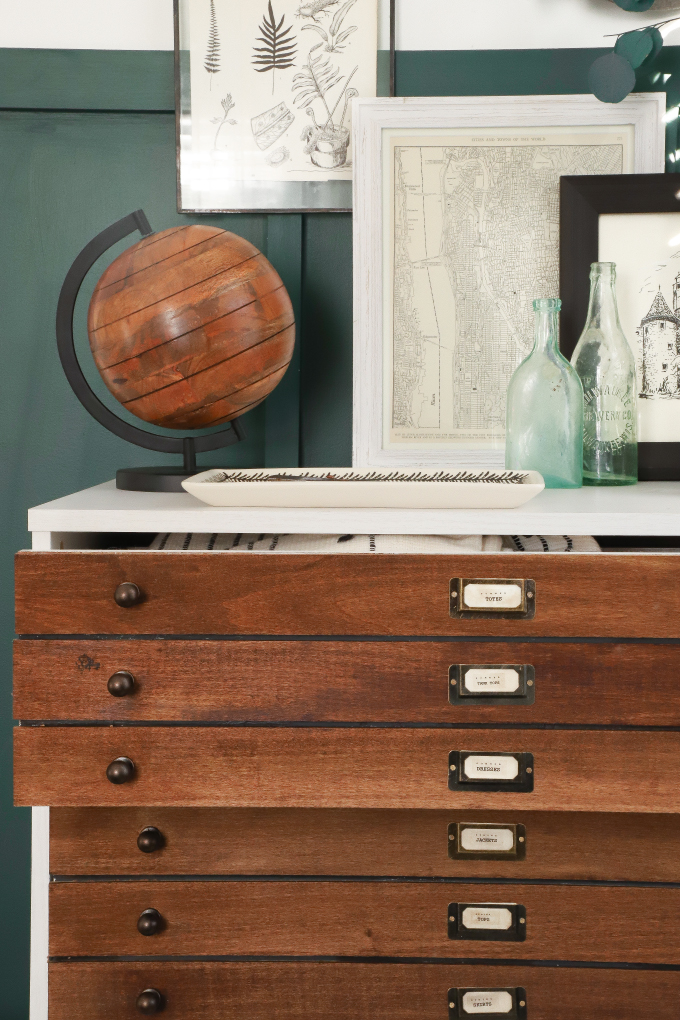
– When using three boards on each drawer, that left about a 1/4 inch gap between each piece of wood, so I painted the white drawer behind it with a dark chalkboard paint so it looked more like a shadow. Don’t skip the dark paint, it looks MUCH better when its done, and trying to paint it later is MUCH harder.
– The easiest way to add the wood to an already assembled dresser: Mark where you want the knob to go on the front of the wood (mine was 3.5″ in from each edge).
– Start at the top of the dresser, and line up the top corner of the wood with the top corner of the drawer front. Drill an pilot hold where the knob goes. Then, drill in a temporary wood screw to hold it in place.
– After you screw in the top and bottom piece, then screw the middle piece of wood to the dresser, that way it’s easier to center it the middle piece. Repeat on all 4 drawers. When all your temporary screws are in, make sure they line up vertically. This is your time to adjust, because it will be obvious when you replace the screws with knobs if they are not in line.
– I ended up adding a square dowel between each set of drawers, you can screw them in the dresser from the inside. I stained the top and bottom ones, and painted the middle one because I wanted to tie in the white boarder and make it look like two sets of map drawers stacked on top of each other.
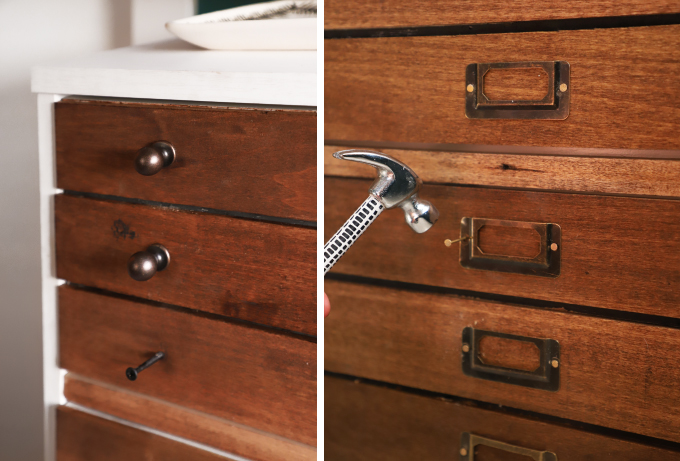
Replace all the screws with knobs. Nail the label holders in the middle each board.
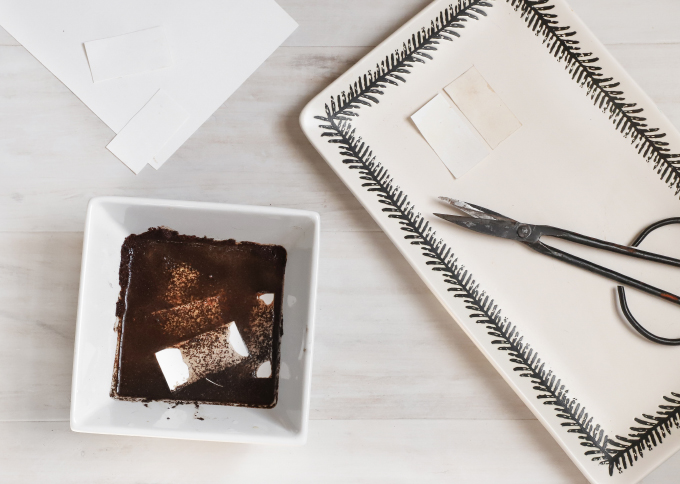
Cut card stock labels to size and the soak in coffee grinds (or tea works) for 5 minutes. Let dry.
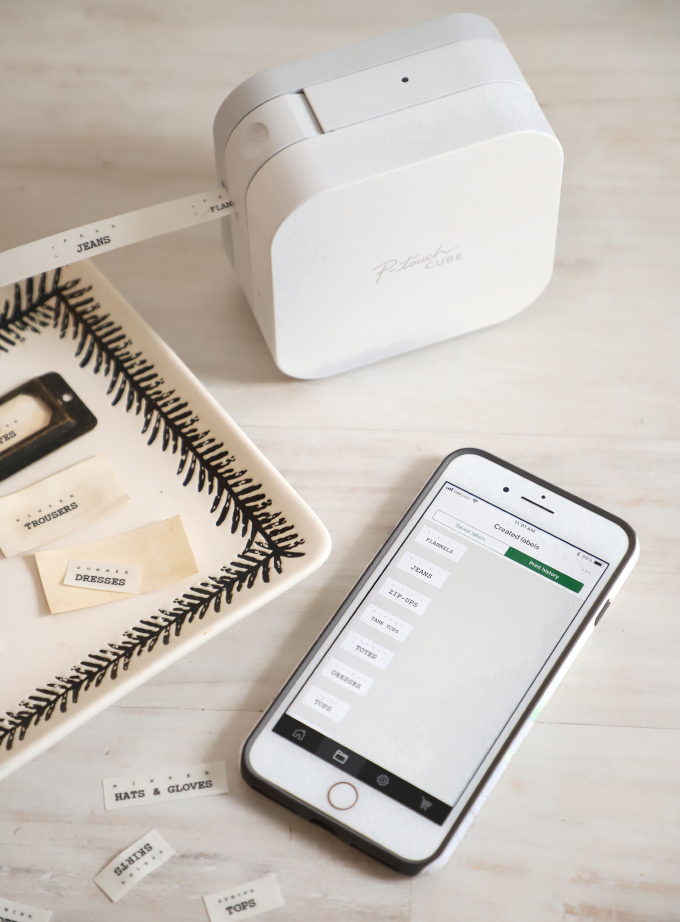
Make and store all the labels on your phone and print on the P-touch Cube! Done!

This post was sponsored by Brother. Thank you for supporting my amazing partners!
EXPLORE MORE: DIY PROJECT, Home DIY


This dresser is so gorgeous, I love the industrial style!
https://www.makeandmess.com/
I love how it turned out. It is so cute.
http://sugarcoatedbears.blogspot.com/
This looks so lovely!
http://www.thoughtsinstyle.com/
O love the dresser – – would love to try it – but have no room for it. Anyway I love it and think you are amazing – –
It looks like on the top drawer gap you’ve painted the strip to match the drawers but not on the second one (it’s still white). Did you put a strip of wood in there or just paint it? Reason why you painted one and not the other? Super cute. Just wanted clarification.
I ended up adding a square dowel between each set of drawers, you can screw them in the dresser from the inside. I stained the top and bottom ones, and painted the middle one because I wanted to tie in the white boarder and make it look like two sets of map drawers stacked on top of each other.Hope that makes sense!
Beautiful deco,i love this DIY
https://thepinkpineappleblog.blogspot.com/
Love the dresser!!! So creative! Wondering if you modified the bottom of the dresser because the original dresser at target looks to have a foot on the bottom.
I didn’t end up screwing those in because they did not quite fit the vibe. They are a separate piece so easy to add or take off!
I love this idea and can’t wait to try it! Thanks so much for sharing!
Yay, if you try make sure to send a pic!
Love this!!
Wow this is insane! Off I skip to the reclaimed wood yars aka the bottom of my garden (we kept all the wood from our house demolition). Thank you for sharing xx
@scrumblesliving
good a blog!
OMG this looks amazing! I love it!
Katie | katieemmabeauty.com
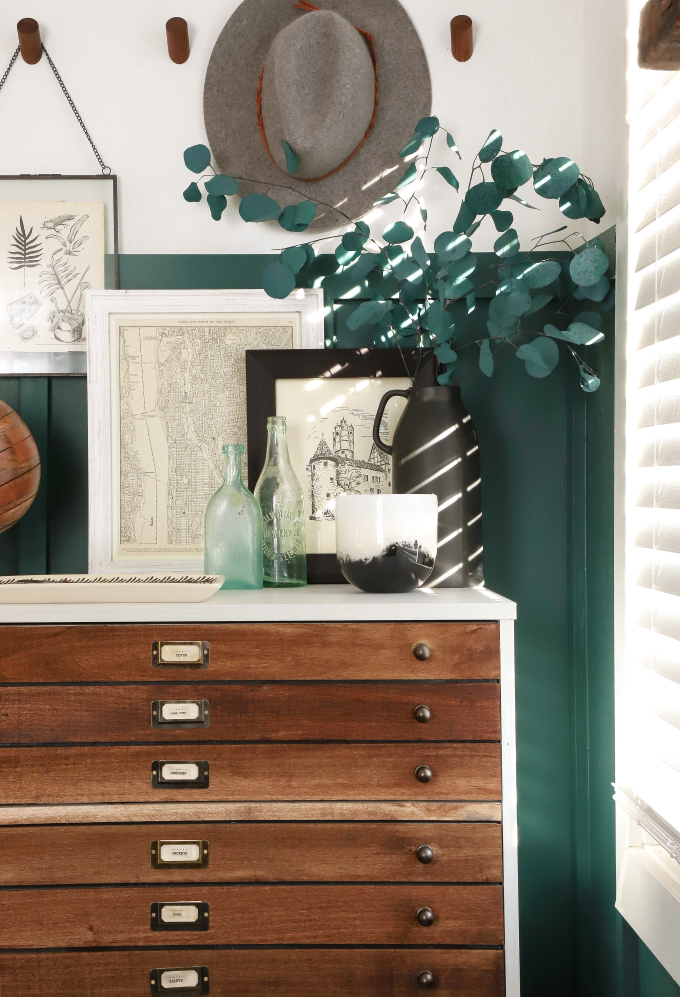
This is so creative, I love it! What color is the green paint? It’s so beautiful, especially when combined with the Poplar wood. Thank you for a great idea 🙂
http://www.daleetspectordesign.com