DIY HOLIDAY | Thanks Centerpiece
DIY PROJECT, Holiday DIY, Home DIY

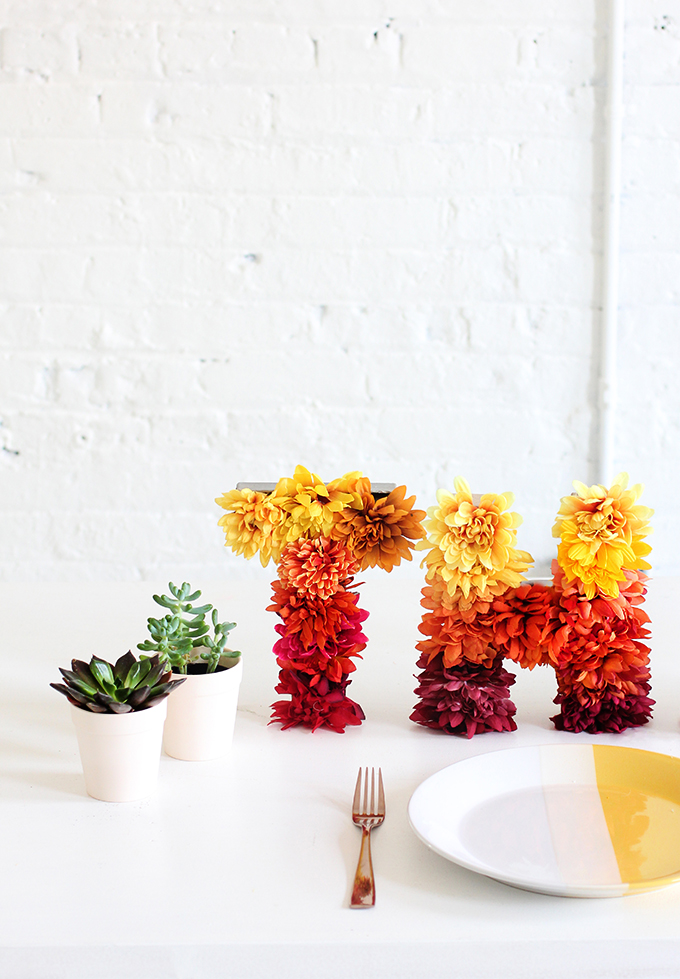


Somehow November is flying by, which means that the holiday season is quickly approaching! This year my little sista and I are Thanksgiving orphans, fending for ourselves in the cold while our siblings are traveling, and parents are enjoying the sun in Florida (We will not forget this Mom and Dad….) I am officially getting into the spirit, and am inviting some people over for my first Friendsgiving, which means I’ve already made some DIY decorations to kick off my first holiday hosting attempt! I am leaving the cooking to my sis, and sticking to things I can handle…like creating a centerpiece. I have become a bit obsessed with these paper mache letters (check out my marquee sign) so figured why not stuff them with Fall flowers and set them out to remind us to be thankful. Don’t worry, it won’t wilt…this time I stuck with faux flowers to lengthen my thief life. Steps and supplies after the break…
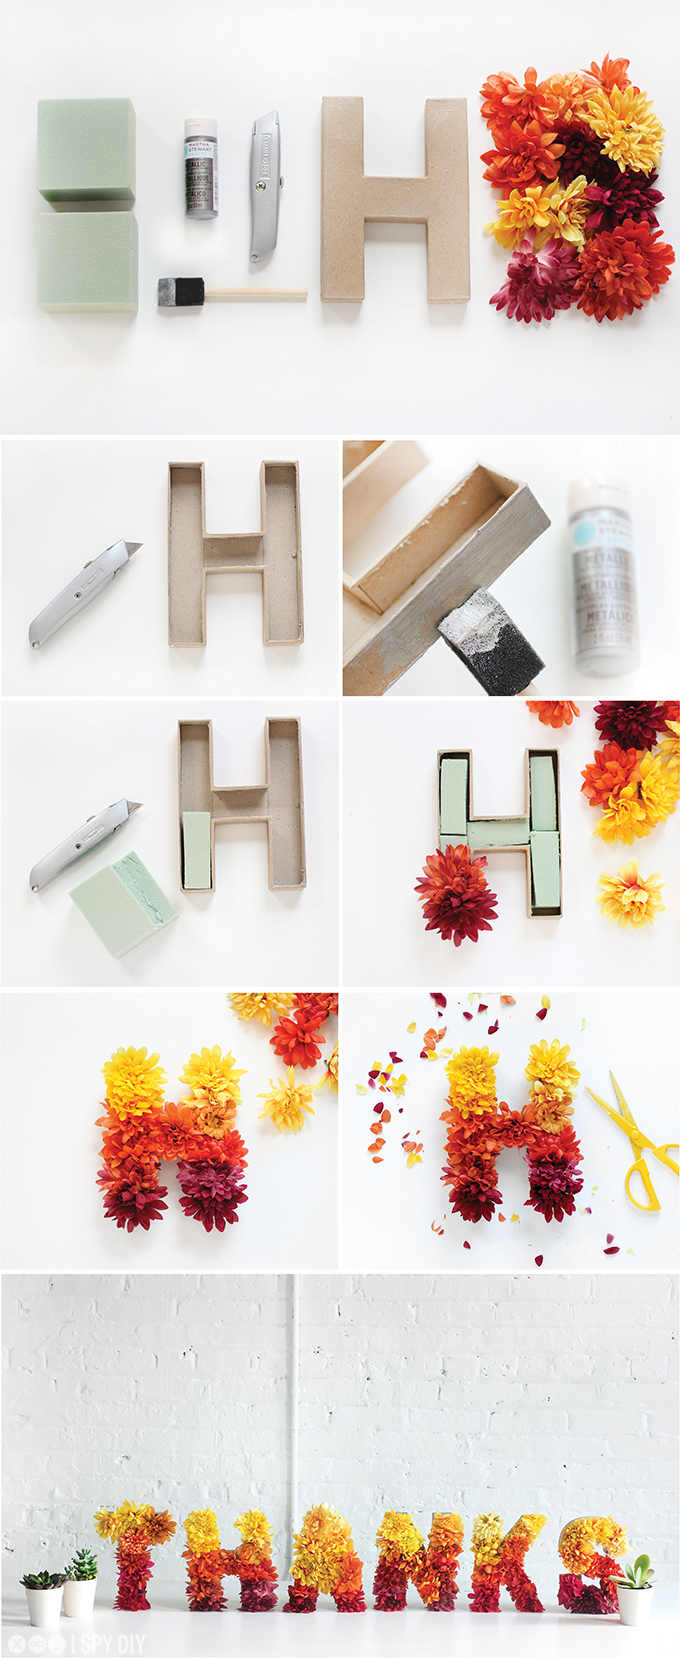
What you need:
Paper Mach letters
X-acto knife
Silk faux flowers
Floral foam
Silver paint
Foam brush
GET ALL THE SUPPLIES HERE IN A DARBY SMART DIY KIT!
What to do:
Remove the front of the letter by cutting around the edges using an X-acto knife.
Cut the floral foam to size so that it fits snug in the letter.
Arrange your favorite silk flowers by placing them in the floral foam.
EXPLORE MORE: DIY PROJECT, Holiday DIY, Home DIY


