DIY EATS | Chocolate Candy-Filled WaterColor Eggs
DIY PROJECT, Holiday DIY, Home DIY
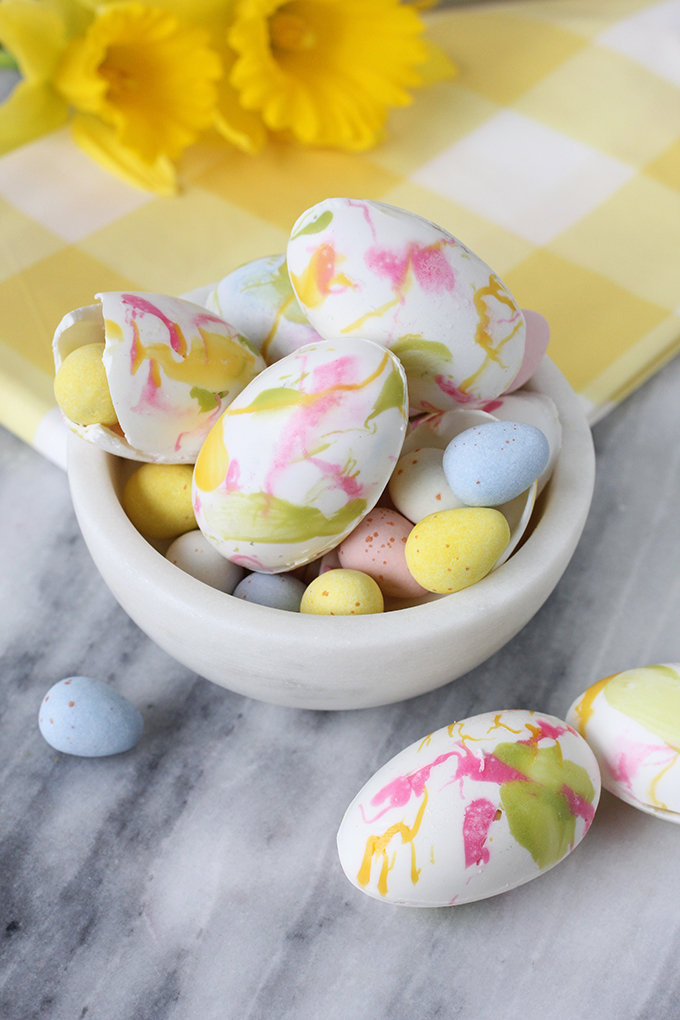
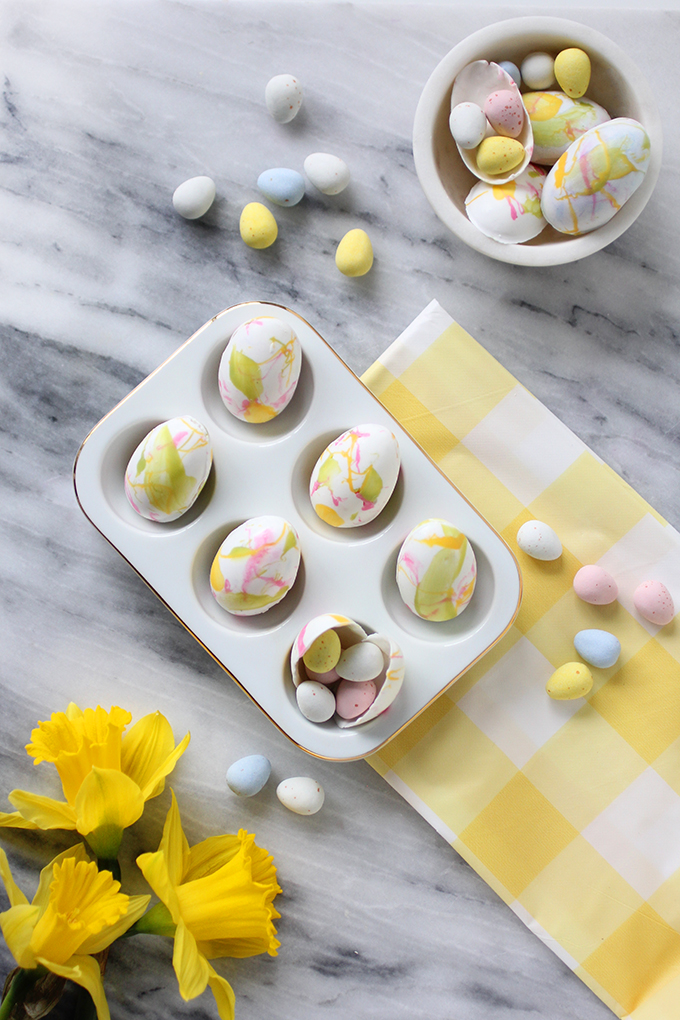 I have been down and out with the flu for the last two days, but wanted to stop in and post my Easter projects before Sunday. And I figured a little chocolate makes everyone feel better, right? My friend, Alexis from Yield Bakehouse, taught me how to make these gorgeous eggs filled with even more delicious treats. It was way easier then I could have imagined! Recipe and steps after the break…
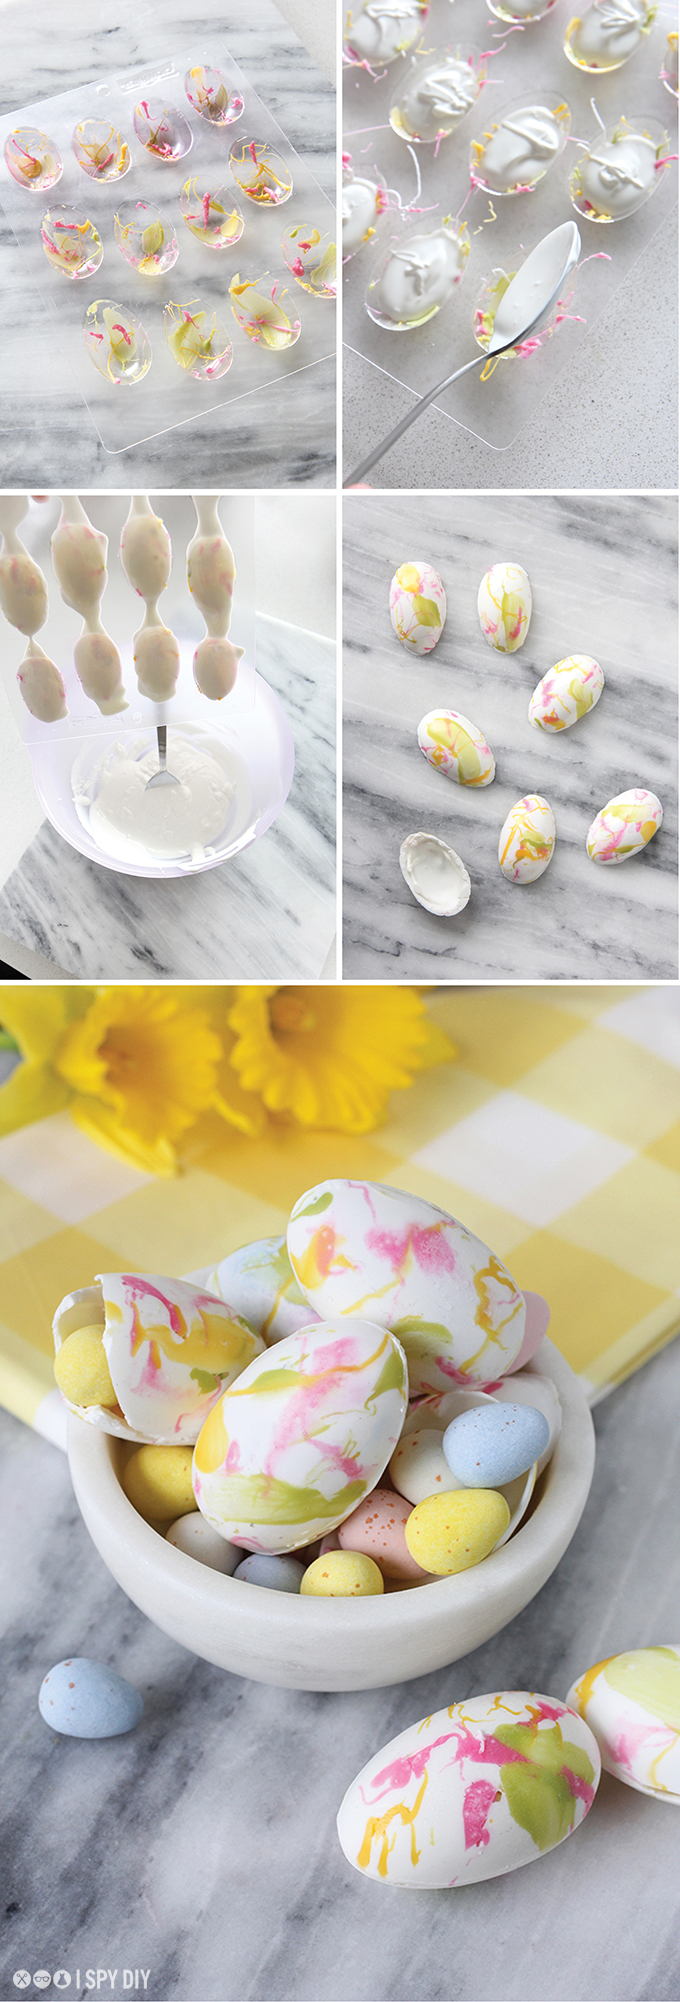 What You’ll Need:
Candy Melts (1 bag each of bright white, pink, green, and yellow)
Easter Egg Candy Mold
Small paint brush
4 microwave safe bowls
Small candy eggs
Bench scrape
A piece parchment or tin foil larger than candy mold
Small nonstick pan or flat grill pan
What to do:
1. To start, wash the candy mold and dry completely. Once dry, use a cotton ball to wipe each egg cavity clean.
2. For the graffiti, you’ll want to work with one candy melt color at a time. To melt, place about 1/2 of the bag into a microwave safe bowl. Heat in the microwave for intervals of 15 seconds, until smooth and creamy.
3. Using the non-bristle end of your small paint brush, dip the brush into the candy melts and splatter into the egg mold. (You can also use your finger to swap the cavity for an added design.) When you have enough of one color, slide the bench scrape along the top to remove any excess.
4. Repeat steps 2 & 3 with two more colors, other than the white. Then leave to dry for about 10 minutes.
5. Now melt the white candy melts until smooth. Using a spoon, fill each cavity to the top. When each cavity is full, give the mold a few light taps against the counter. This will remove any air bubbles in the candy melts. Bench scrape across the top of the mold once more.
6. Over the bowl that you used for your white melts, invert the mold, letting the candy melts drain slightly for about 10 seconds. Then flip the mold for another 10 seconds, so that everything drains evenly. Scrape the mold once more.
7. Lay the candy mold upside down on a sheet of parchment paper or tin foil. Wait about 5 minutes, and then transfer to the refrigerator for 20-30 minutes.
8. When cooled completely and properly, the candy eggs should release from the mold when lightly pulled.
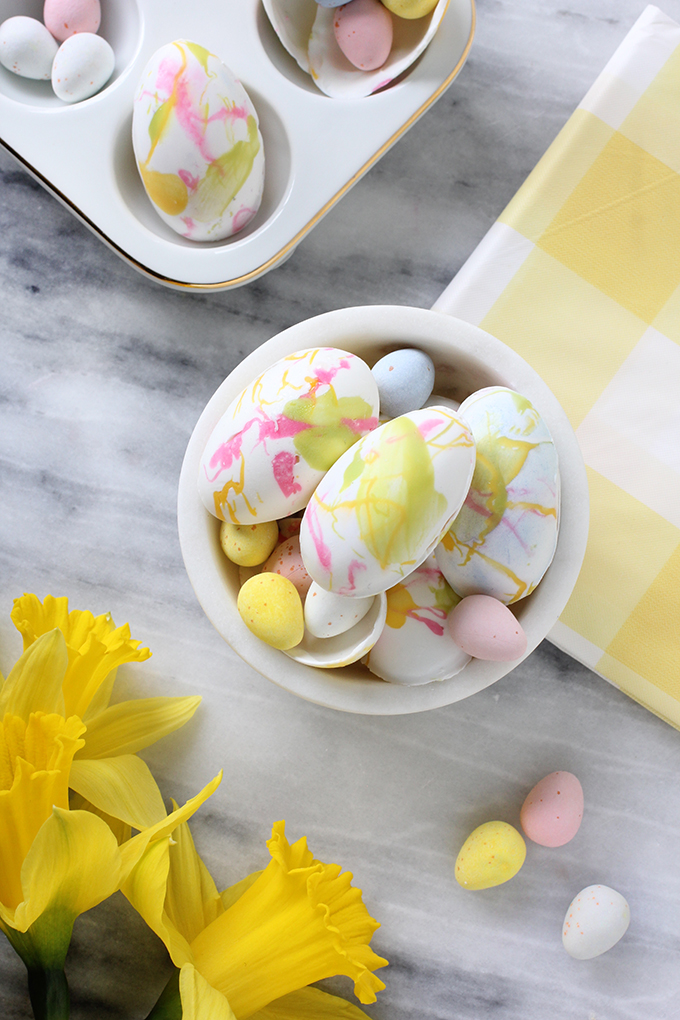
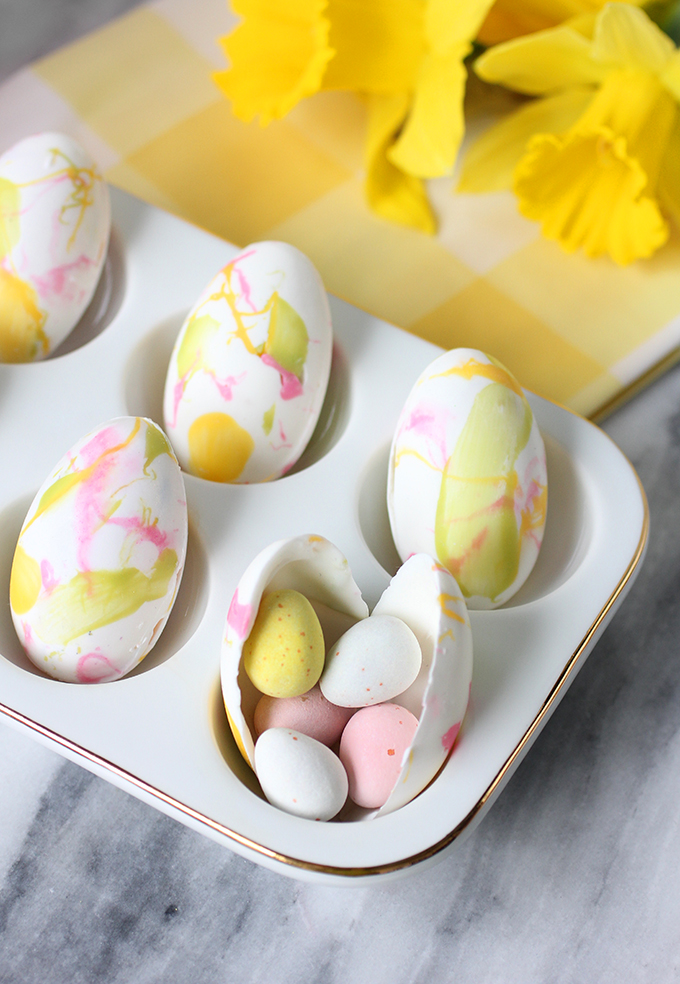
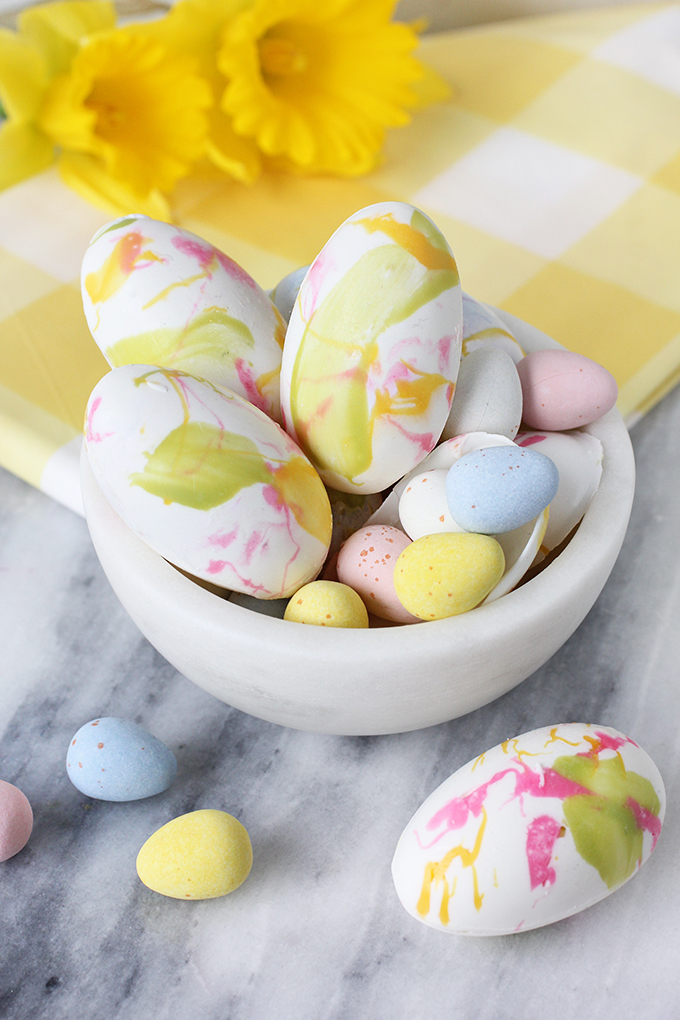
9. In a small nonstick pan or flat grill pan, on low heat, carefully lay two egg sides face down into the pan for 2-3 seconds. Quickly fill one half of the egg with the little candies, and then place the other half on top. Smooth out any lines using your finger, and then set aside to dry.
Enjoy!
EXPLORE MORE: DIY PROJECT, Holiday DIY, Home DIY


Looks delicious. Hope the chocolate makes you feel better.
I hope you feel better soon! These eggs look so cute, and I really like the watercolor effect!
https://www.makeandmess.com/
Awesome idea!
http://www.bluelabelsboutique.com
http://www.fashionnotfear.wordpress.com
Your eggs are simply gorgeous!
These are so fun! Thanks for the inspiration!
countryclassdiy.blogspot.com
These eggs are so pretty! I love them!
Paige
http://thehappyflammily.com