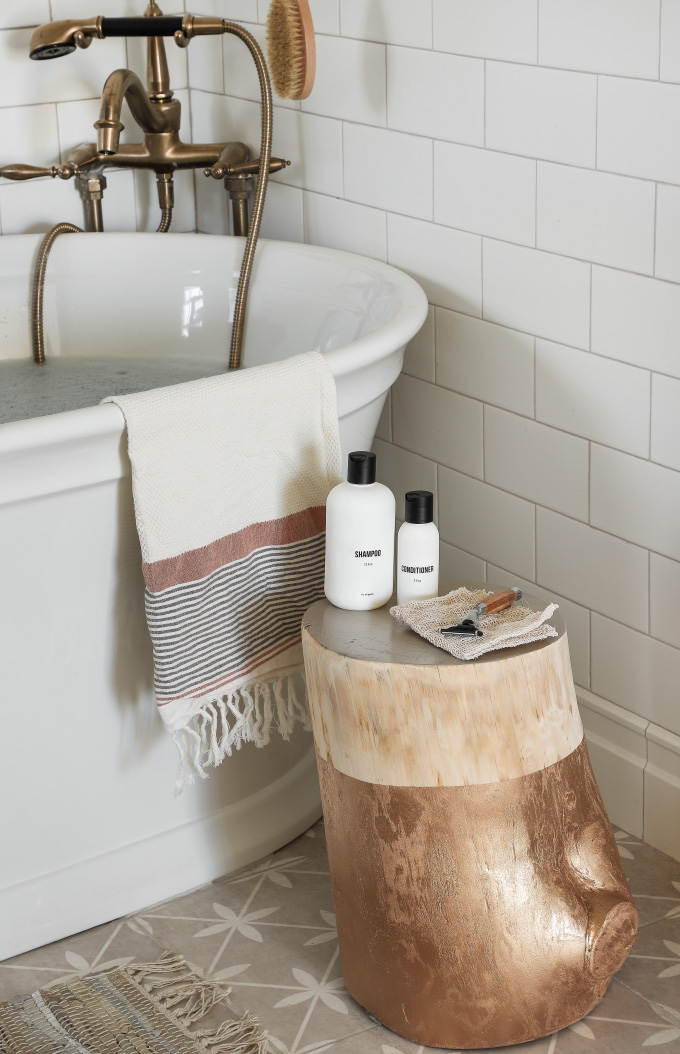
MY DIY | Gold-Dipped Side Table Stump
DIY PROJECT, Home DIY
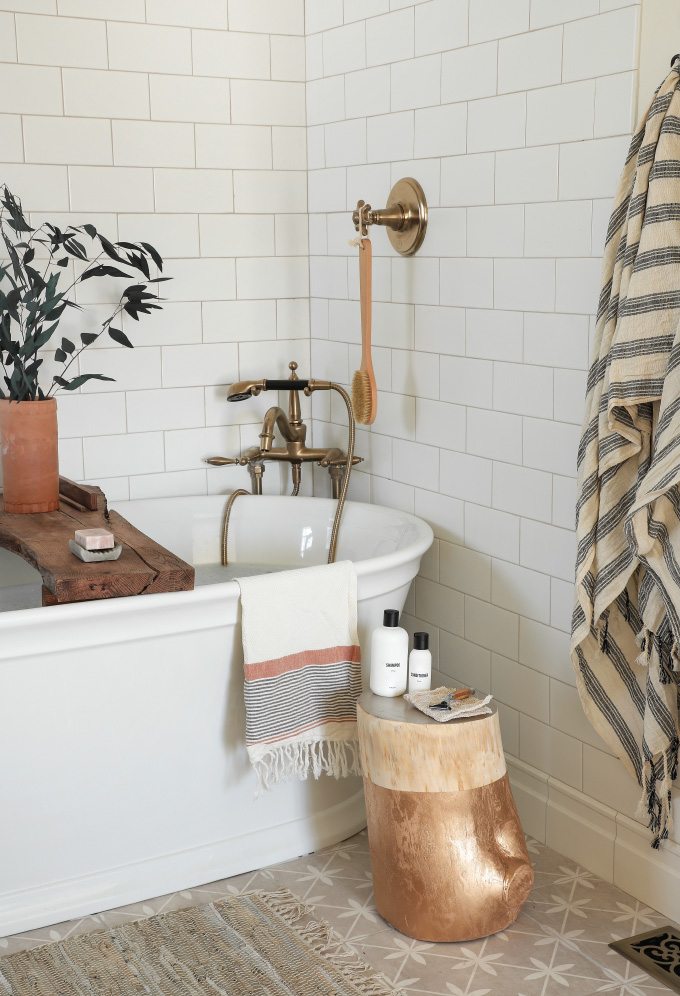
My family cut down a tree last summer, and I volunteered to take the stumps because I knew I wanted to try to make gold dipped side tables using spray paint from my amazing longtime sponsor Krylon® Brand! I honestly thought this was going to be a huge undertaking, I’ve seen the high price tags of stump side tables in stores, so thought they had to be impossible to make, right?! Not at all! I was blown away at how quickly we were able to strip the bark and sand with the right tools and some elbow grease. The key is drying out the stump as much as possible, I had mine sitting in the basement all winter, but since we are in Wisconsin, I still saw a little dampness when we took off the bark. I sat the stumps in front of a couple electric heaters overnight once the bark was off, and it was good to spray paint the next day with Krylon ColorMaster®Paint + Primer – 25% More Metallic Gold and Krylon ColorMaster® Paint + Primer – 25% More Matte Greige.
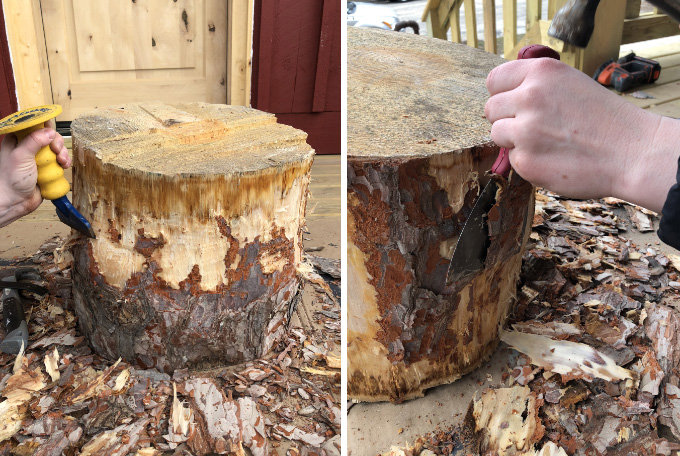
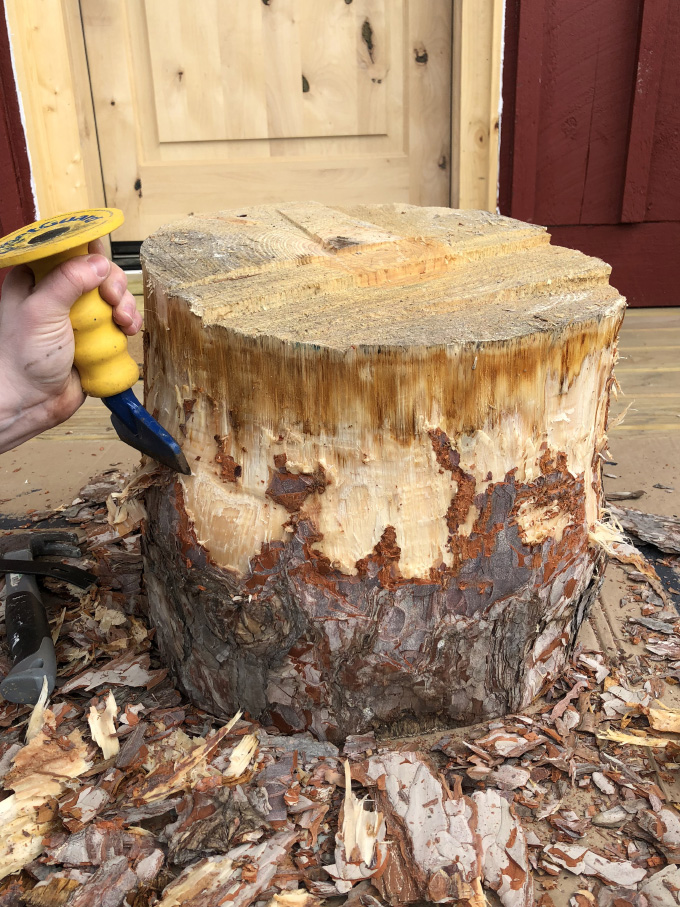
Tips for taking off the bark: We tested a couple different techniques, the chisel and hammer worked great, just be prepared for an arm workout, ha! And the hand guard was a game changer because you can hammer away without smashing your fingers. After we got the big chunk of bark off, I used the putty knife as a chisel to take off a thin layer of wood to really clean it up, and it worked great (note that under the bark was damp, and a putty knife might not work as well on dry wood). Next experiment was using an electronic grinder with a flap disk attachment, which just blasted all the bark off (power tools are cool!) If you have a grinder or want to make a bunch of these, this way was quicker, and made the sanding process faster.
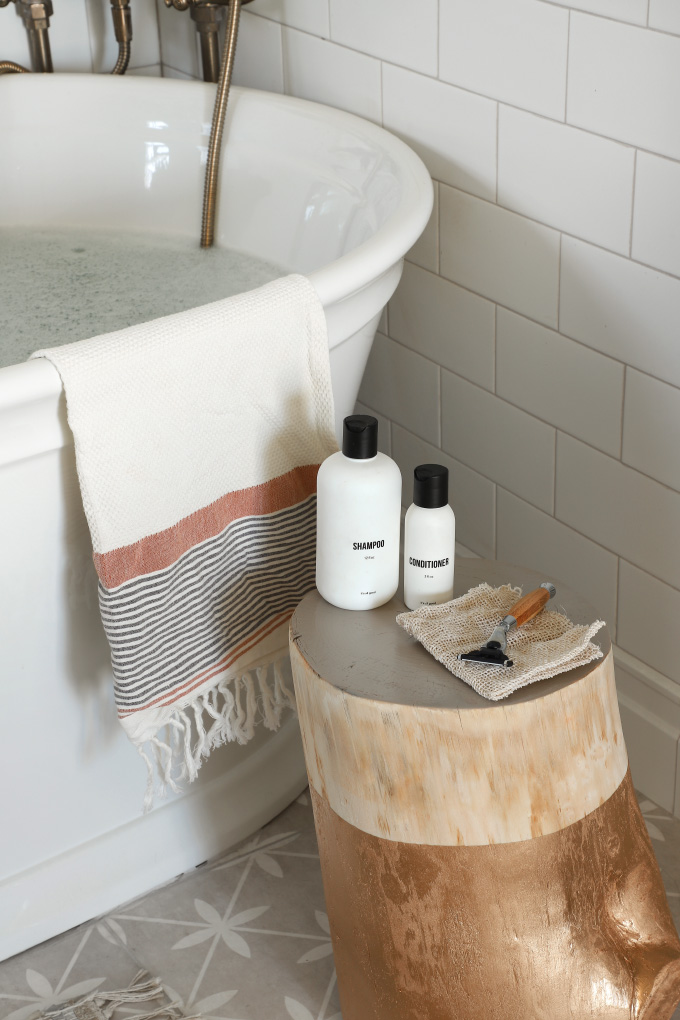
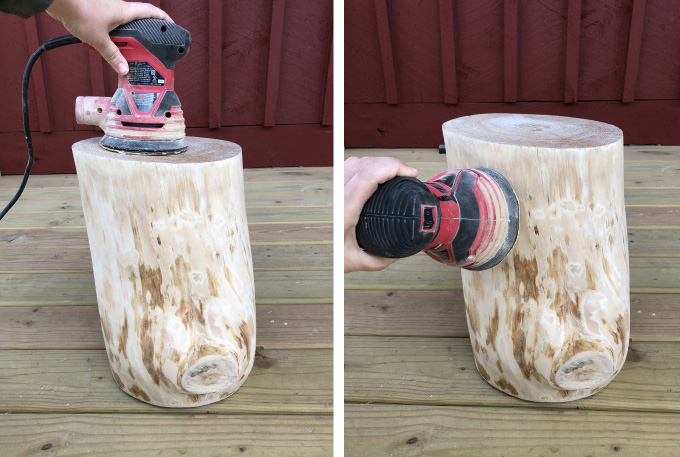
Tips for sanding: I used both an orbital and palm sander, and the orbital with a rough 60 grit worked great for smoothing down all the bumps, and then finished up using a palm sander with a 220 grit to smooth it out before painting. The stripping of the bark and sanding took about an hour and a half total (less when using the grinder), and the spray painting about 15 min. So it is a totally doable project!! I wanted to use this stump in my bathroom to hold my shampoo and conditioner, and thought spraying the bottom part gold would make it look super luxe, and I am SO happy with how it turned out! I love that some of the original stump is peeking out creating a cool contrast between the metallic and wood. The top was not cleaning up a nice as I hoped, so tried out the Matte Greige (Grey/Beige) and LOVE the neutral color! We have a few more stumps and I think we might spray one entirely Greige.

Project Time: 2.5 Hours
What you need:
Stump
Chisel (with hand guard)
Hammer
Putty Knife
Sander
60 Grit sandpaper
Safety glasses and mask
Painters tape
1 can Krylon® ColorMaster® Paint + Primer – 25% More Metallic Gold
1 can Krylon®ColorMaster® Paint + Primer – 25% More Matte Greige
Check out all the steps and supplies after the break!
 What to do:
Start with a stump that can been dried out. Mine were in the basement over the winter, but still were damp once I took off the bark. After the bark was stripped, I set in front of an electric heater overnight to dry it out.
To remove the bark, use a chisel and hammer. We had this 3in chisel which worked great! Make sure to use a hand guard, it speeds up the process when you are not worried about hitting your fingers. We started on the bottom side to get the hang of wedging the chisel between the bark and stump and then hammering down to chip off the bark. Then I flipped and repeated on the top side.
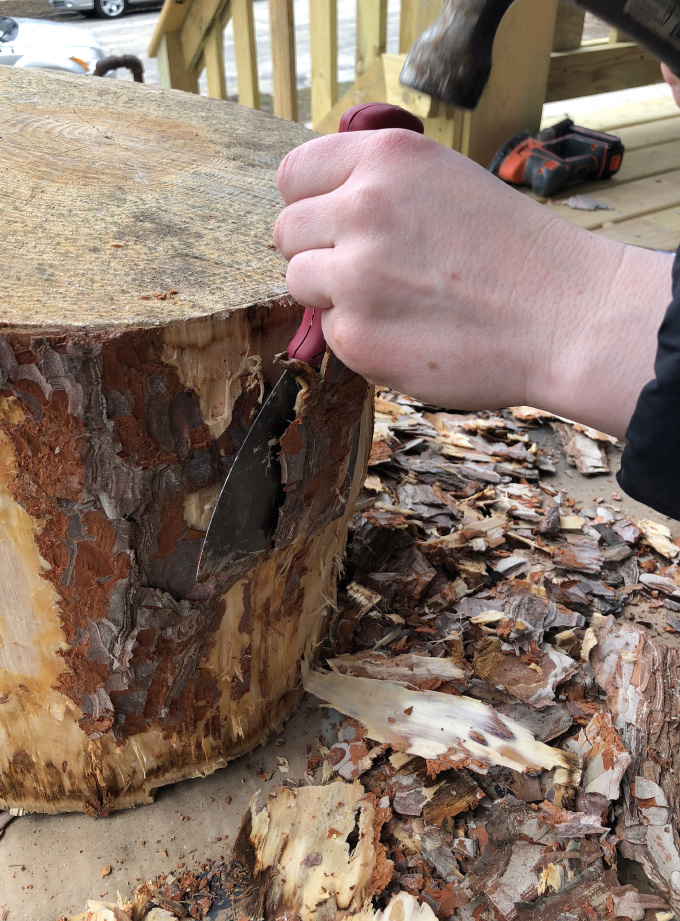
Once we got most the bark off, use a metal putty knife (like a chisel) to take off any remaining bark.
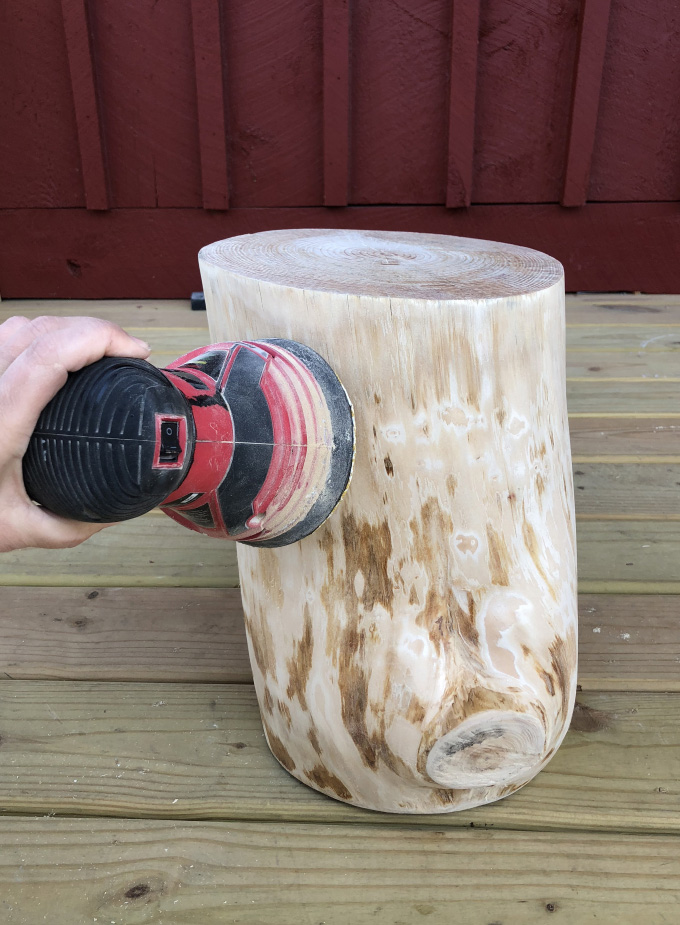
If it’s dry under the bark, it’s time to sand! Use a rough 60 grit to start to take off any dark spots and to even out any edges. Once you have all the bark off, you can go over with 220 grit to smooth it out.
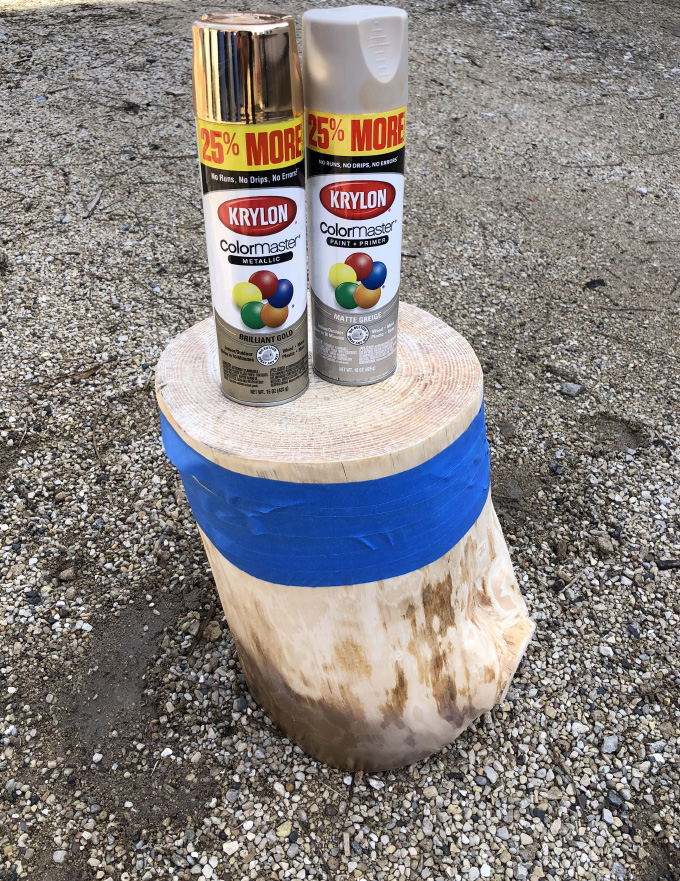 It’s time to spray paint! Make sure to paint in a well-ventilated area, and read the back of the can’s safety instructions before spraying. Next, tape off the top ¼ of the stump, then spray on the first coat of Krylon ColorMaster® Paint + Primer – 25% More Metallic Gold spray paint. Hold the can 10-12” from the stump, and spray in a back and forth motion. Let it dry between each coat. Multiple thin coats is important to keep the paint from dripping! I sprayed 3 thin coats.
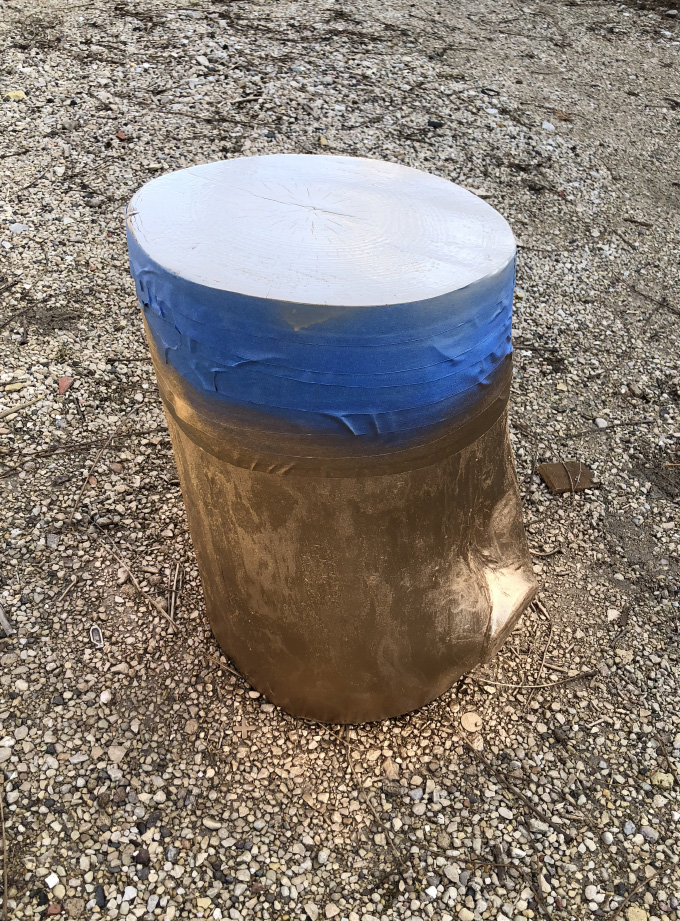 Then spray the top of the stump with 1 can of Kryon ColorMaster® Paint + Primer – 25% More Matte Greige, using the same steps as the gold spray paint. The top may absorb the paint, so you may need more coats.
Before the last coat of paint dries, remove the tape for a crisp line! Let completely dry, done!
Note: One concern I had is bugs in the wood, once you take off the bark and inside is dry, it’s not a desirable home for bugs. If you see any termite damage, pass on that wood. If a living tree was cut down, I would let it sit in a dry place for a few weeks so the buggers leave. If you are still concerned when you finish, you can cover the whole stump with a clear coat.
This is a sponsored post was made with Krylon® Brand, thank you for supporting my amazing sponsors that make I SPY DIY possible!
EXPLORE MORE: DIY PROJECT, Home DIY


It’s amazing how something so simple can look so beautiful! Absolutely love this x
Shannon | https://shannonmichelle1.blogspot.com
It looks so beautiful, wow!
https://www.makeandmess.com/
We had a tree come down last summer and now I’m kicking myself for not saving the stump!!!! These are fantastic.
Thank you for this awesome DIY! I too have a few stumps begging to made into a gold-dipped side table. Also, can you tell me why makes your beautiful bath tub? Thanks!