DIY Install an Apron Front Sink with a Butcher Block Countertop
DIY PROJECT
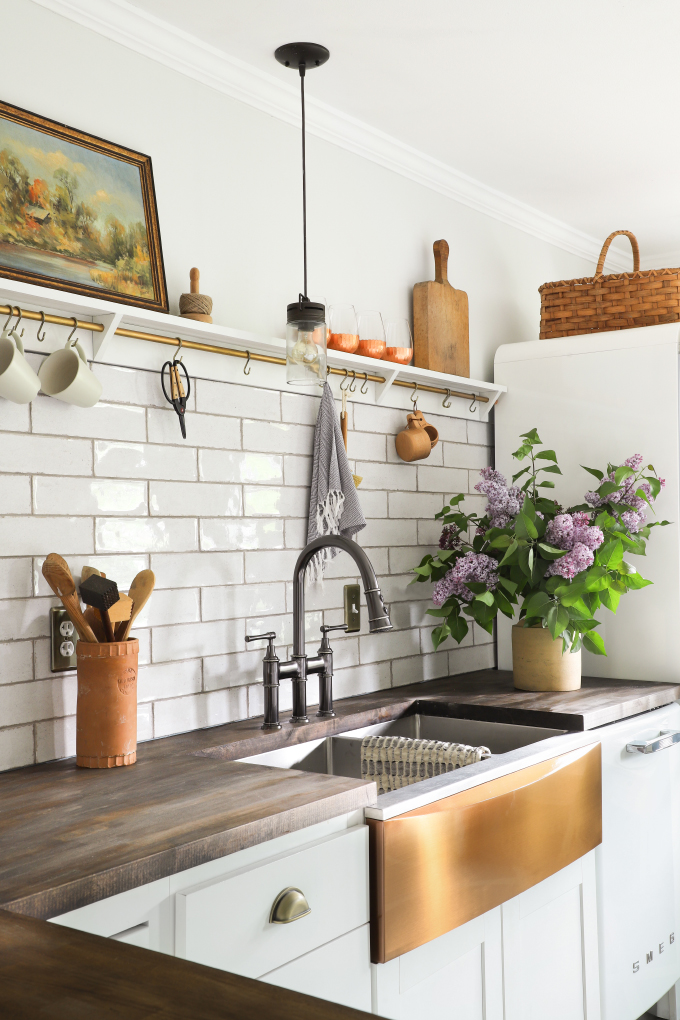
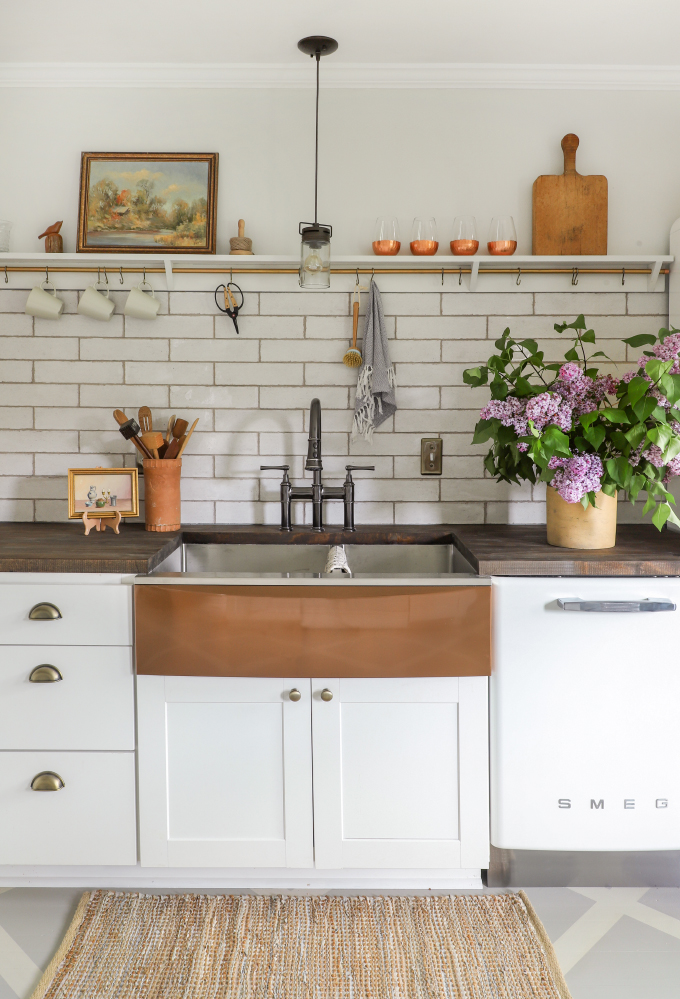
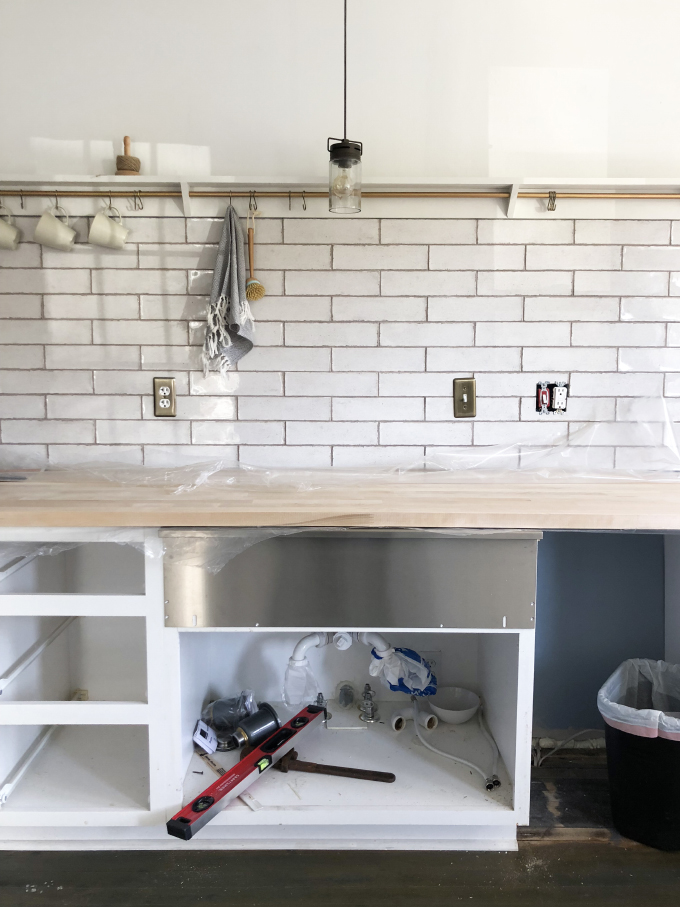
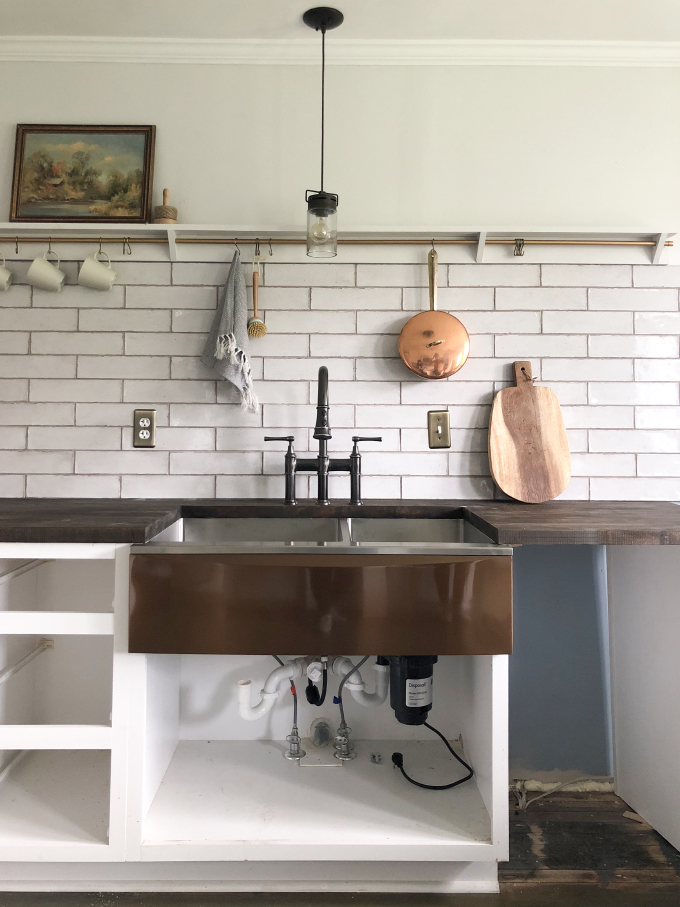
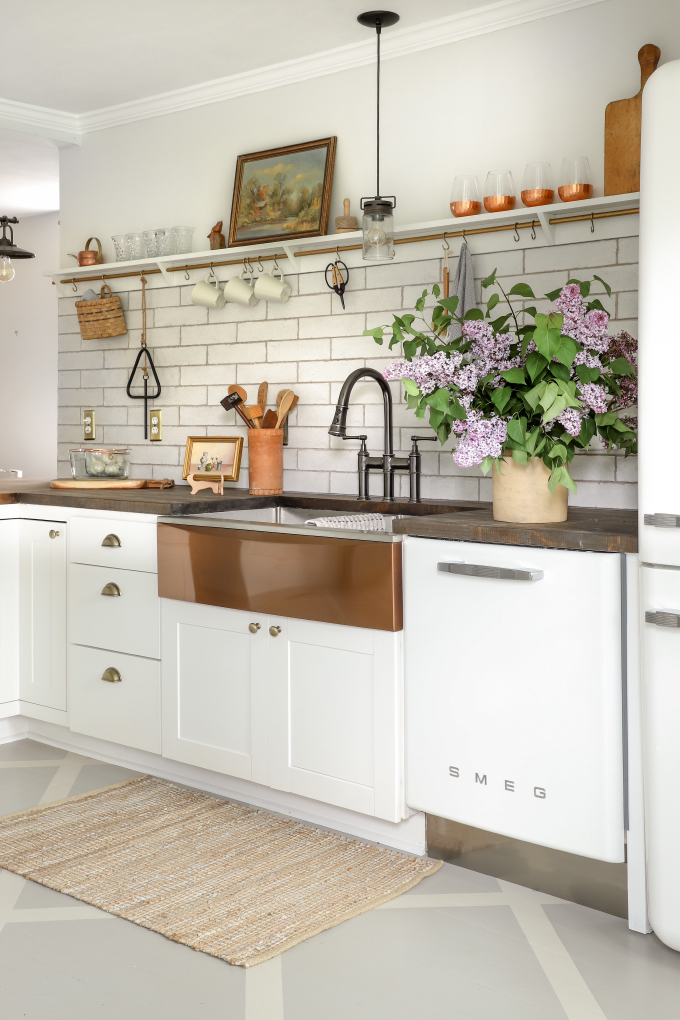
It all started with a sink! I fell in love with this Crosstown® Stainless Steel Farmhouse sink a while back, then Elkay® reached out to see if I had a spot for it in one of our renovation homes. And my response was: I’ll make a spot! Since we were already working on the kitchen renovation at The Bayview Bungalow, the timing was perfect. And I am so excited to partner with Elkay on this project to show the whole process of cutting the countertops and installing, because we get SO MANY questions about butcher block countertops. And now we have an info-packed post about it!
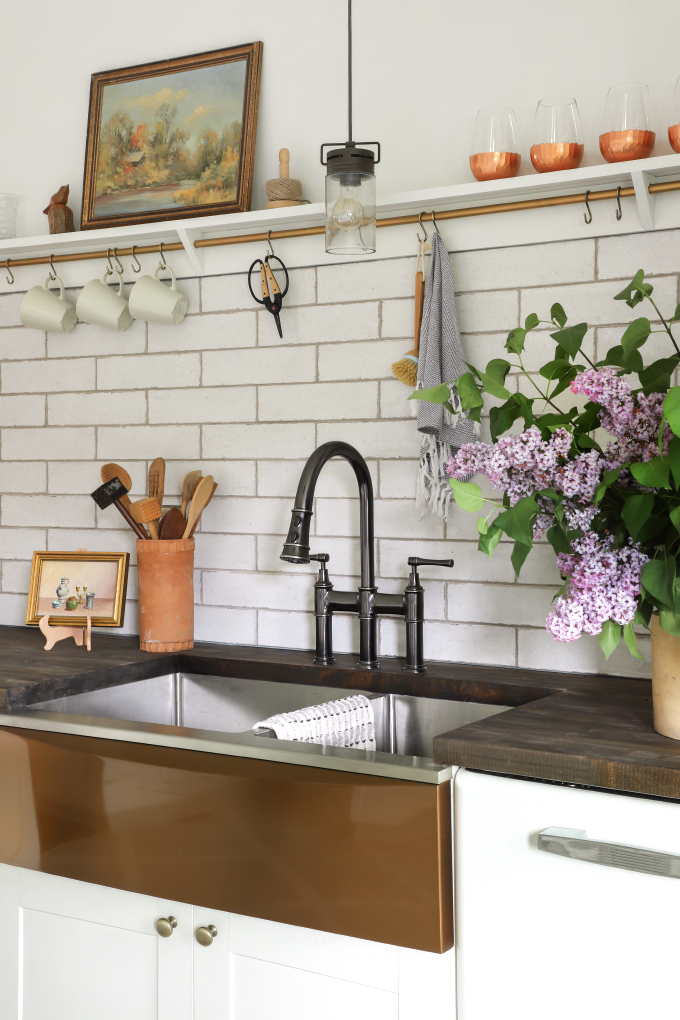
Before we dive in, let’s shine some light on the Elkay Crosstown sink. For all the indecisive minds out there, this is for you because the front apron is interchangeable! The colors range from a copper color called Sunset, to a Scarlet red or Sapphire blue – tons of options! I spent a while debating between the Sunset and Champagne, but ended up going with Sunset because I wanted a mix of metals in the kitchen. Speaking of mixing metals, I also added in some antique steel using Elkay’s Explore Bridge faucet. It elevated the whole kitchen, making it so beautiful! The faucet worked in the space because of the darker finish on the lighting. Generally speaking, I like when metals have a buddy. I used copper, gold, stainless steel, and antique steel in the space, but I made sure that each metal showed up a couple of times throughout the kitchen so it does not stand alone. The utensils and art in the kitchen also help tie it all together!
Now I will throw it over to Mr. Yolo who will answer all your questions about installing the sink with a butcher block countertop!
Mr. Yolo here. I am going to explain some of the finer points of installing an apron front sink in a butcher block countertop. Before we get started, a couple things. 1) I am a big fan of butcher block countertops. They are one of the only countertops you can do yourself, and the easiest. But you don’t sacrifice aesthetics. 2) There is a popular misconception out there that says one would use a butcher block countertop more like a butcher uses a butcher block and less like a normal person uses a countertop. Or, as a friend asked me once, “Do you cut meat on the countertop?” And the answer is of course NO! It’s a countertop. Nobody prepares chicken on their granite countertop. We use cutting boards for that. Same thing for butcher block. The sealers say they are “food grade” or “food safe” because they market the same products for cutting boards. But there is no butchering on the butcher block.
Reader Questions
How do you stain the countertop? What did you seal it with?
You apply a stain before installing the countertop. We brushed on a mix of Minwax Dark Walnut and Varathane Special Walnut, then wiped off the excess. Note: We ended up using two different kinds of butcher block woods for the countertops so had to mix the stains to get them to match, more details on BUTCHERBLOCK highlight on @ISPYDIY.
There are three ways I know of to seal.
1) Butcher Block Oil This is what I used on my first butcher block countertops. It has the consistency of baby oil, and its entire purpose is to clog the pores of the wood so moisture and stains are kept at the surface. This method requires the oil to be reapplied monthly. But once converted to a rental, we probably went 3-4 months between reapplications. There was definitely some staining (wine and marker) and water rings. But 220 grit sandpaper got rid of 95% of issues. For one spot, I had to use 120 grit and then 220 grit, but note that they were not stained at the time, so it was easy to spot sand.
2) Polyurethane My buddy bought dark butcher block for his condo and applied one coat of polyurethane. Poly repels water and stains and makes for easy clean up. But it will scratch when the coffee maker is slid across the counter. Also, as stated in the intro, butcher block is just the name, and does not imply one should practice knife skills on the countertop. Especially with a polyurethane coat.
More after the break!
3) Watco Butcher Block Oil and Finish At our duplex, we white-washed the butcher block, then coated it with Watco Butcher Block Oil and Finish. I am not a chemical engineer, but I would say this option is halfway between Butcher Block Oil (#1) and Poly (#2). It seals the surface more than the Oil and is more flexible than Poly. This Watco products is also food-safe if you seal an unfinished piece of wood, but we stained ours…and once again, Butcher Block countertops are not for prepping food. We used Watco Oil and Finish in this kitchen because we want the countertop to be resilient to guest use at this short-term rental house.
Jenni here! Adding one more: At the Barnhouse I stained the Butcher Block Dark Walnut then sealed with a natural Beeswax/oil sealant. It’s held up great! No stains! Even when I *occasionally* set water glasses on it.
What tools do I need to cut the countertop?
- Circular Saw (with finish blade. More teeth so it won’t splinter the edges)
- Jig Saw
- Sand Paper
- Clamps
- Straightedge
- Tape Measure and Pencil
How durable are butcher block countertops?
Depends on your definition of durable. They will show damage more readily than quartz or granite, but they can also be easily fixed with sandpaper. In my opinion, butcher block countertops are plenty durable for residential use. We have butcher block in 3 of our houses and have been really happy with how they hold up. This house was seeing the most wear and tear because the countertops were unfinished and had the most renters. But using 220 grit sandpaper, we never saw anything (wine stain, watermark, etc) that wouldn’t come out. Now that they are stained and sealed with the Watco Butcher Block Oil and Finish, we should not see any blemishes. We have a similar stain/seal combo on the Barnhouse peninsula and it’s held up just fine.
Does the butcher block come in multiple sizes?
Yes. At most stores you can get 4’ and 8’ lengths of counter width (25”) and a 6’ length of peninsula width (36”).
Is this something a beginner could install?
Yes. I was a beginner the first time. It was stressful to view the butcher block as a countertop. But once I just viewed it as wood, it became a lot easier. The toughest cut is for an undermount sink, since all edges are exposed. It probably could be done with only a saw and sandpaper, but I used a router to get the outline exact. But a farmhouse sink is 3 straight cuts. And a drop-in sink is the easiest. You can be off by ½” in any direction and the sink will still work.
How much does the butcher block cost?
Not much by comparison. We got ours at Menards for $180 for a 96”x25” piece. But all hardware stores sell it. We used 3 pieces so total cost for countertops in this kitchen = $540
How do you seal between the sink and butcher block?
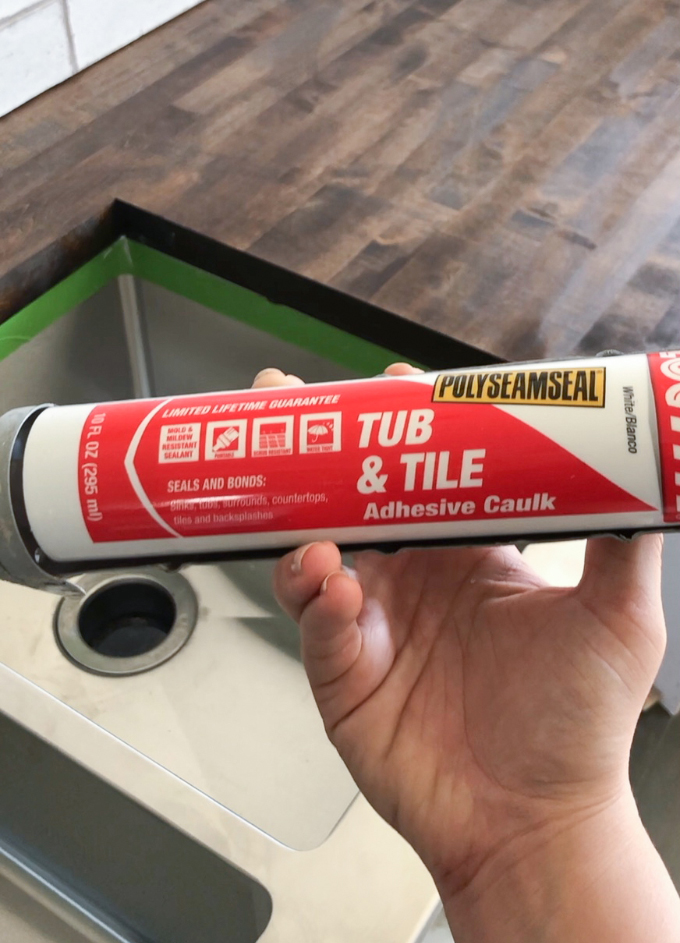
When I installed the sink, I sandwiched a bead of adhesive caulk between the bottom of the butcher block and the top lip of the sink. That would probably be enough, but just to make sure, we installed another bead of clear silicone to the exposed gap between sink and countertop. We used painter’s tape to get clean lines on top and bottom.
Tutorial
Step 1 – Layout
Simple in concept, the layout is the most important part of this whole thing. Some sinks come with a template for where to cut, and others just give dimensions. For drop-in sinks, the layout does not have to be spot-on. But for an undermount or apron front sink, being off an ⅛” is noticeable. I recommend measuring a bunch of times from different directions. I would also measure the sink opening from both sides as a double check. Once you feel confident in your sink layout, put a strip of painter’s tape along the outline and then use a straightedge to make your pencil lines. The tape protects against splintering from the saw.
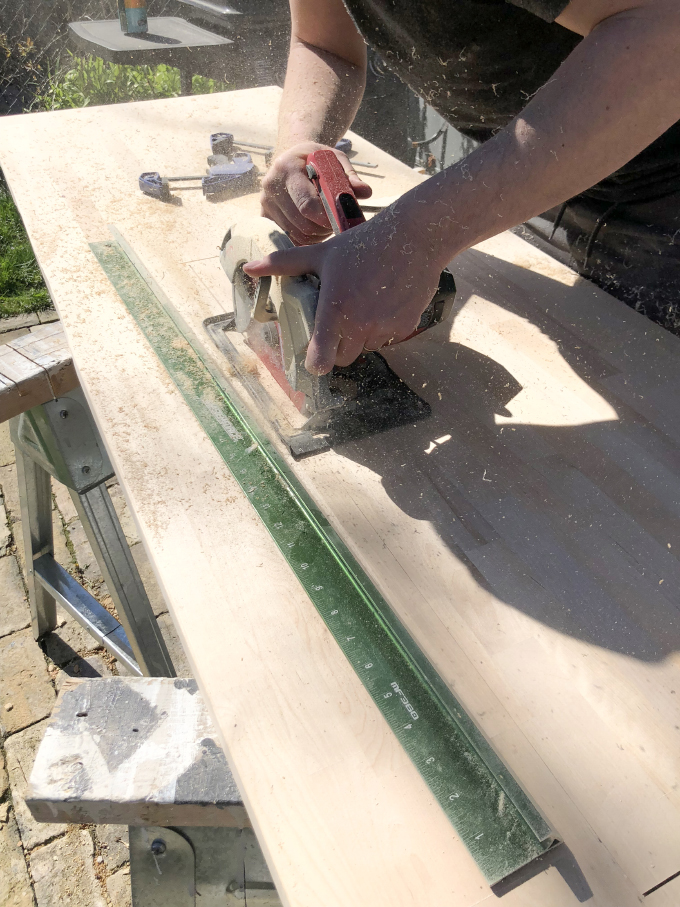
Step 2 – Cutting
Get a Finish Blade on your circular saw (60 teeth is what I used), then measure the distance from the fence to the blade. An easy way to do this is to clamp a straightedge to a piece of scrap wood, then run your saw fence against the straightedge and make a shallow cut. That distance is what you can set the straightedge to on the butcher block. IMPORTANT NOTE: Be aware of which side of the blade your measurement is on. The blade width is ⅛”, and you want to make sure that is accounted for.

The style of sink will determine the cuts. For this Crosstown Farmhouse sink with the interchangeable apron front, I made both side cuts first, making sure to stop the blade just before the line for the back cut. For the back cut, I plunged the blade in ½” or so before my line just to get rid of the material where the sink would end up. It wasn’t a clean cut, I just wanted to get close to my line so I could apply the clamps. When making the back cut, I stopped the blade early on each side, then used the jigsaw to finish. After cutting, I was pretty pleased with the look, but it wasn’t finished. I went back with sandpaper to clean out the corners and smooth out any rough spots.
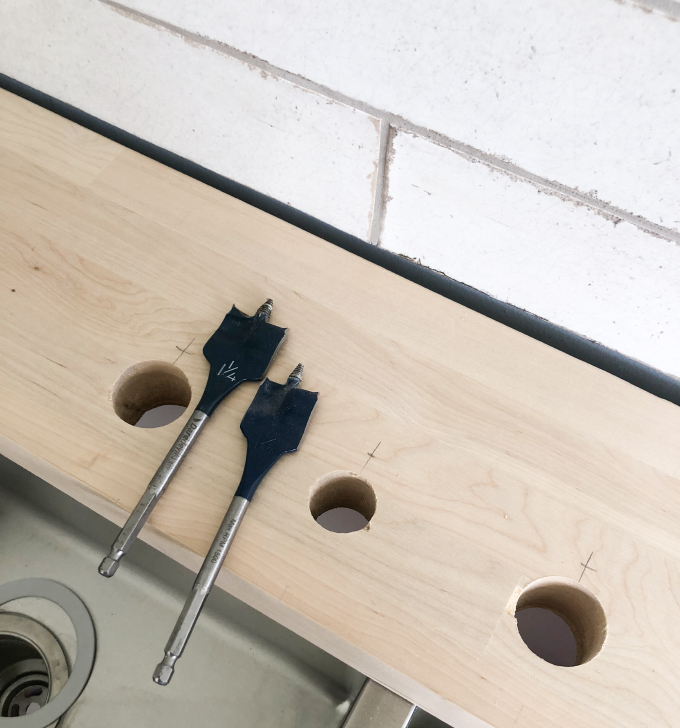
Layout the hole(s) for the faucet (anywhere from one to four holes). Use a spade bit or hole saw and drill the hole(s). Select the size so the body of the fixture passes through but the hole is covered by the escutcheon.
Step 3 – Stain and Seal
(Full Disclosure, we didn’t actually stain and seal at Step 3. We stained first, and then we restained the lip of the sink after cutting, and then I just went ahead and installed the sink, so sealing was actually the last step. But that makes us sound crazy if I actually recommend doing it that way.)
Lightly sand the surface and wipe it down with damp cloth to remove all the sawdust, then stain. Brush on the stain in the direction of the grain, and wipe off the excess in the same direction to avoid streaking. Also, get all four edges and the underside of the front edge, since countertops overhang the cabinets. Once dry, apply the Watco Butcher Block Oil and Finish with a clean rag. We did two coats of sealant, sanding lightly between the coats. See Q&A above for additional sealing techniques.
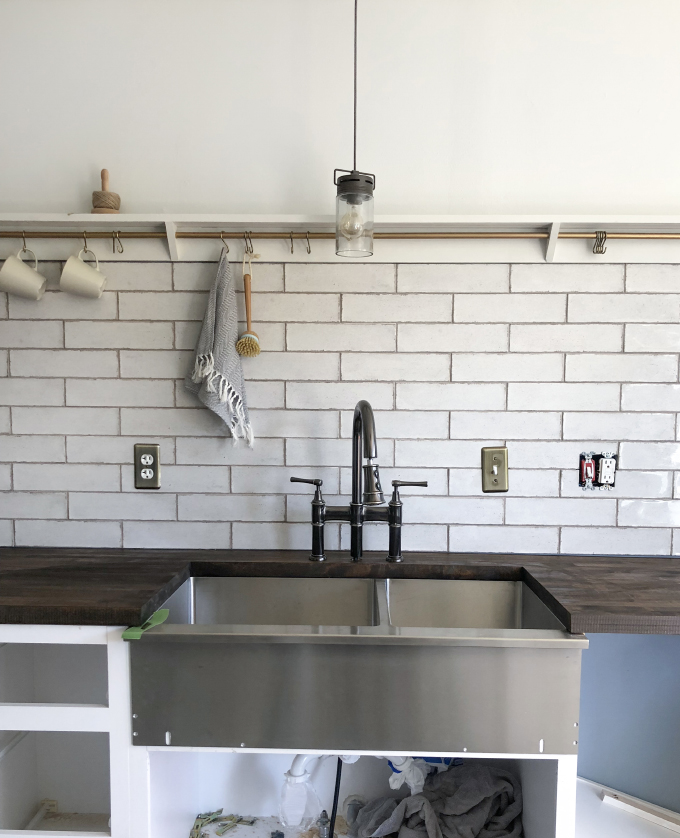
Step 4 – Install Sink and Faucet
These steps can feel intimidating if you’ve never installed plumbing fixtures, but it is easy. A life hack my dad taught me is to flip the countertop upside down and install the sink and faucet first. Way easier than hanging half your body out the cabinet after the install. Apply sealant first and set the sink. Then, install the drains, faucet, and garbage disposal.

Step 5 – Set Countertop
Flip the countertop and set in place. Check for level and a tight fit. Shim if necessary. Then, screw down the countertop. I pre-drilled holes through both the cabinet edge wood and the countertop and used 1.5” wood screws. For a full 8’ piece of countertop, I’ll use 8 screws (4 front and 4 back). Also, in our kitchen, the countertop with the sink abuts the peninsula countertop, so I glued those edges together and pre-drilled through both pieces at an angle and installed 2 screws to keep that joint tight.
Step 6 – Make Plumbing Connections
Connect water and drain lines. Instructions will guide you through these. Test for leaks and then you are done!
Notes:
-One item left out of here was the cabinet doors. The new apron front sink interfered with the doors by about 1.5”. I took the doors apart, cut out 1.5” and glued them back together.
-Plumbing is an easy concept that gets a bad rap for being difficult. And since it’s all visible, meaning you are not burying the plumbing in walls and hoping nothing goes wrong, it’s a low risk installation.
-One thing I learned was to not stress out about the cuts. Don’t let the fear of messing up stop you from this project. Definitely measure three times to ensure you are correct and even try a practice cut on a scrap piece of wood. The worst thing that can happen is you have to drop another $200 on a new 8’ piece. And you’re still thousands of dollars ahead for a new granite countertop.
There you have it! If you have questions, let us know in the comments!
The post was made in partnership with Elkay®, all opinions are my own. Thank you for supporting my amazing sponsors!
EXPLORE MORE: DIY PROJECT


I love it. The sink rocks. How do you join the two pieces of butcher block at the turn? Is it doweled and glued? Biscuits? What’s the best way to marry to pieces of butcher block?
It looks beautiful but too much work and very complicated for me. My attention span is very short.
You did a great job.
Really nice design.