MY DIY | Print Potted Plant
DIY PROJECT, Home DIY

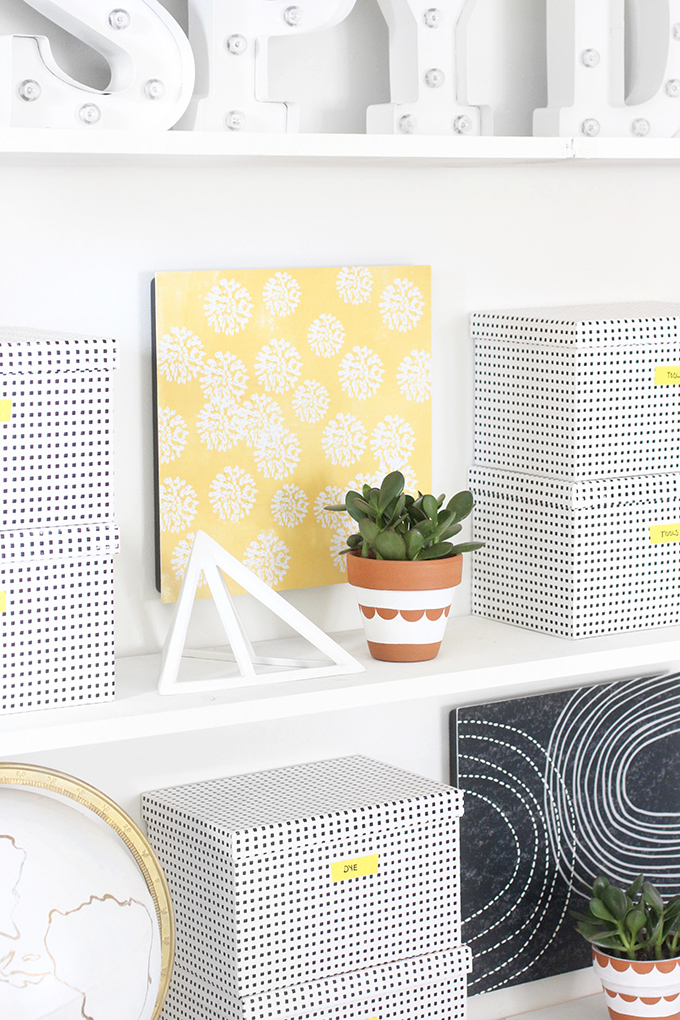
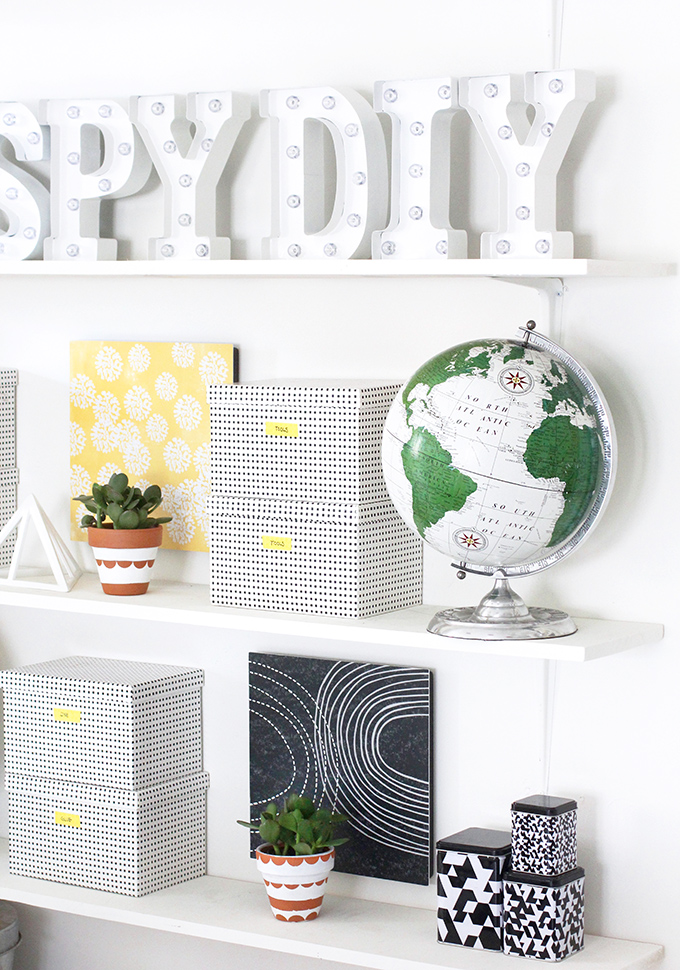
The decluttering started in my apt, and now it’s time to take on I SPY DIY Studio! It’s truly amazing how much I have collected in the last year…wowza…it’s time to let a lot go. I am working my way through the space, starting with the most visible areas because it’s always encouraging to see change! I cleared off the shelves and just added a few of the essentials back on with a couple decorations, including my newly painted pots and a little pop of color for the backdrop, then stepped back and snapped a #shelfie! Details after the break…
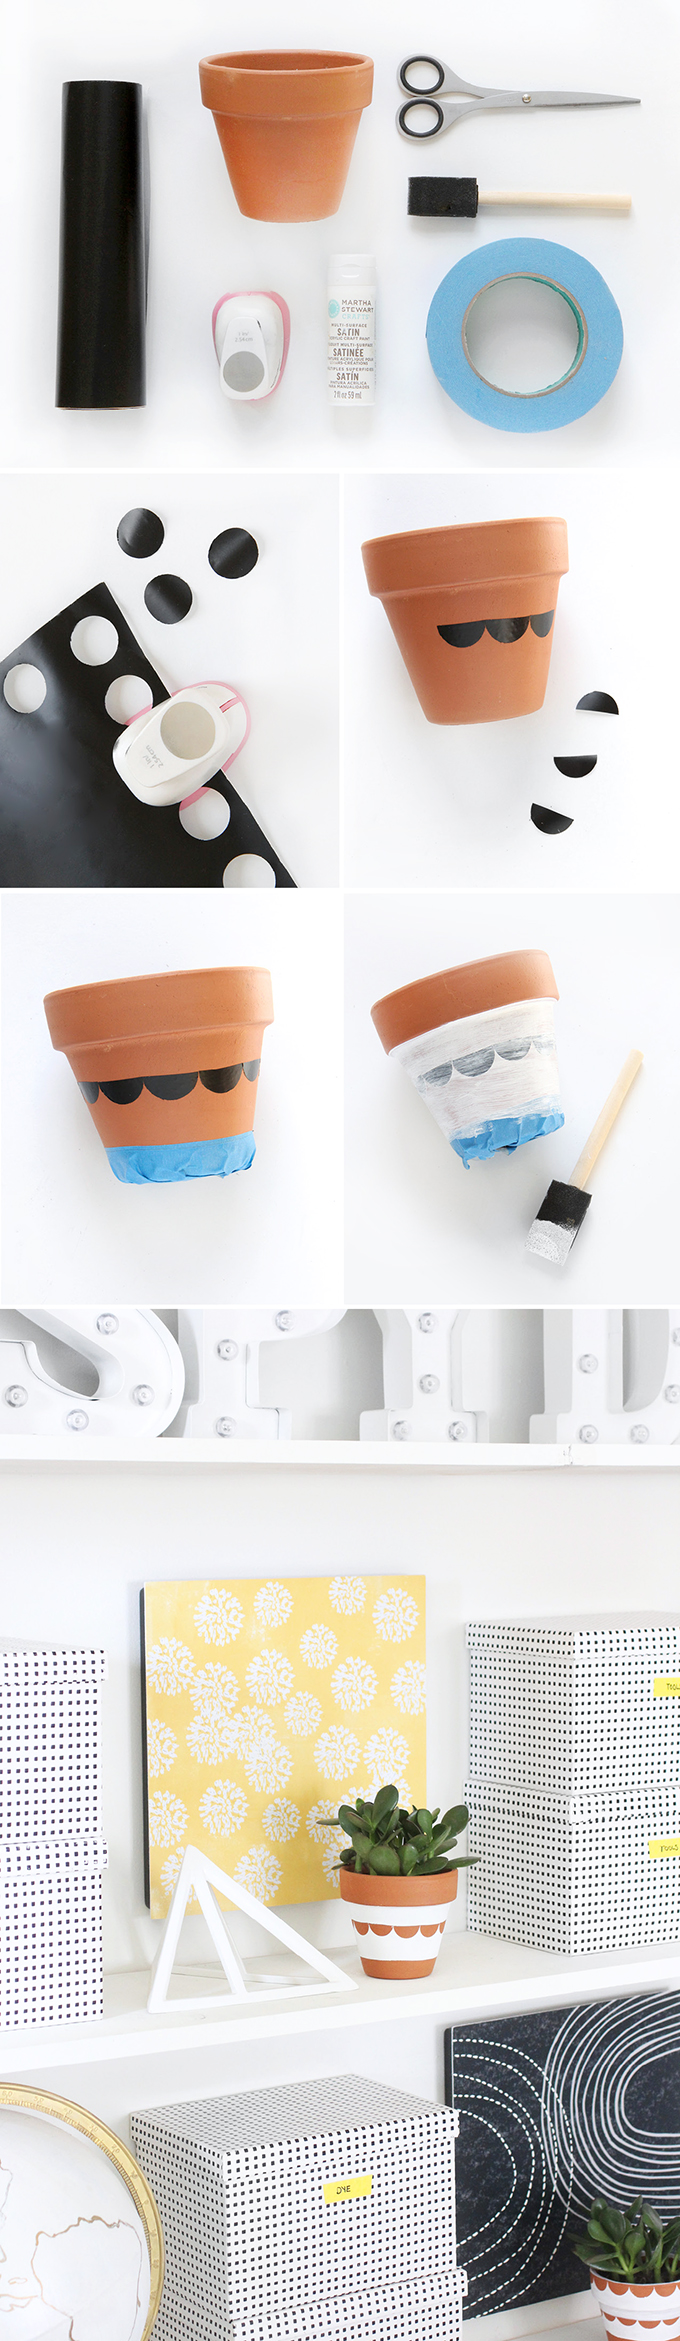
What you need:
Contact paper
Flowerpots
Circle paper punch
Scissors
Foam Brush
White Paint
Painter’s Tape
1 Command™ Décor Dandelion Wall Tile
1 Command™ Décor Grey Shadows Wall Tile
What to do:
1. To decorate the flowerpots, use a circle paper punch to cut several circles from the contact paper. Cut each circle in half with scissors until you have enough half-circles to cover the perimeter of the flowerpot.
2. Remove the contact paper backing from the half circles and adhere them in a horizontal line around the center of the flowerpot.
3. Add a piece of painter’s tape (approximately half an inch thick) around the bottom of the pot. Using the foam brush, add white paint over the half circles and let dry completely, following the manufacturer’s instructions on the paint can. Then, remove the painter’s tape and half-circles.
This project was created in collaboration with Command™ Brand, thanks you for supporting my amazing sponsors who make I SPY DIY possible!
EXPLORE MORE: DIY PROJECT, Home DIY


What a cute and easy idea to give an ordinary flower pot a new face, I really like it!
https://www.makeandmess.com/
I really like this DIY! X
http://www.thoughtsinstyle.com/
Love this DIY. Wait… I love every DIY in this blog! :O
Thanks for the idea!
http://www.wwonderlandia.com
These are really cute! What an instant gratification project!
Those command people are geniuses! I had no idea those tiles existed!
Cute DIY project. I love plants.
How cute – that could make really good gift ideas for kiddo gifts for Grandparents!
http://www.enchantinglyemily.com
That pot is so cute! I love what you did with it!
Paige
http://thehappyflammily.com
Absolutely adore this project. So simple!!
Love,
Julie | http://www.xfallenmoon.com/
I am loving this D.I.Y.! So easy and fun! I am totally obsessed with your whole apartment makeover!
xoxo Annie
http://www.somethingswellblog.com/
What an easy and fun way to decorate flower pots! Thanks for the ideas. The pots look very interesting.
http://www.carpetcleaningtwickenham.co.uk
Super cute and easy! Love it!