MY DIY | Chalkboard Key Holder
DIY PROJECT, Home DIY
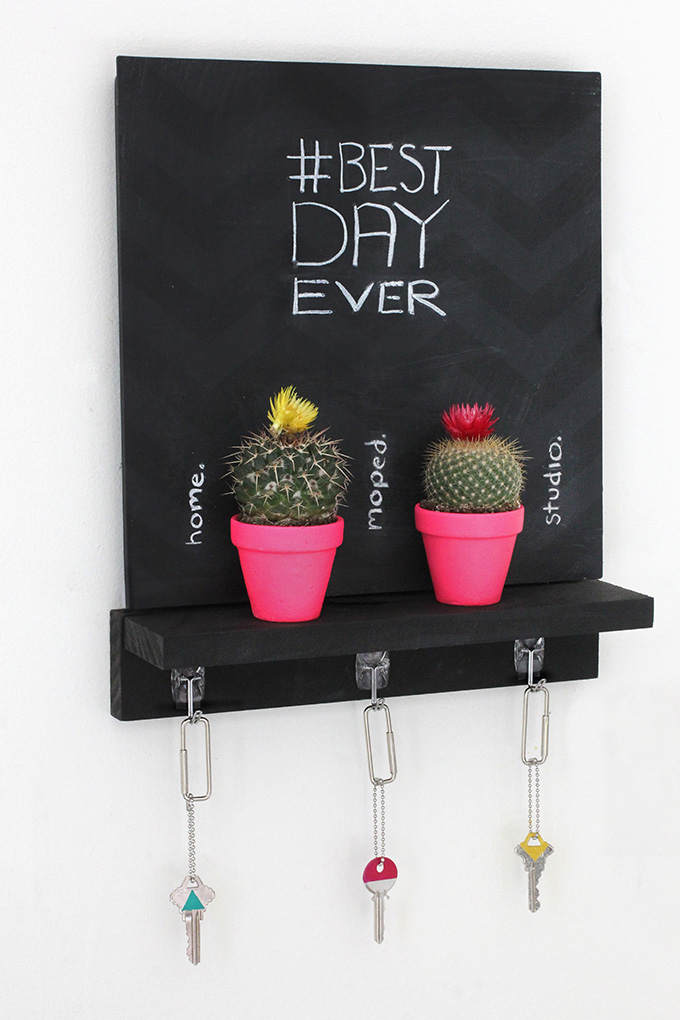

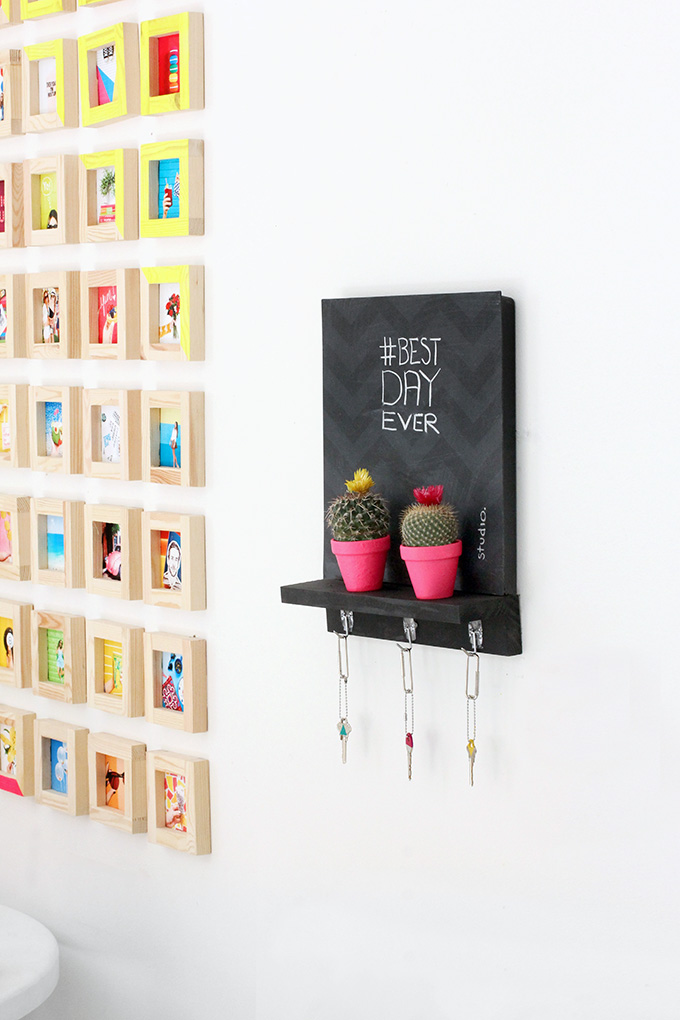
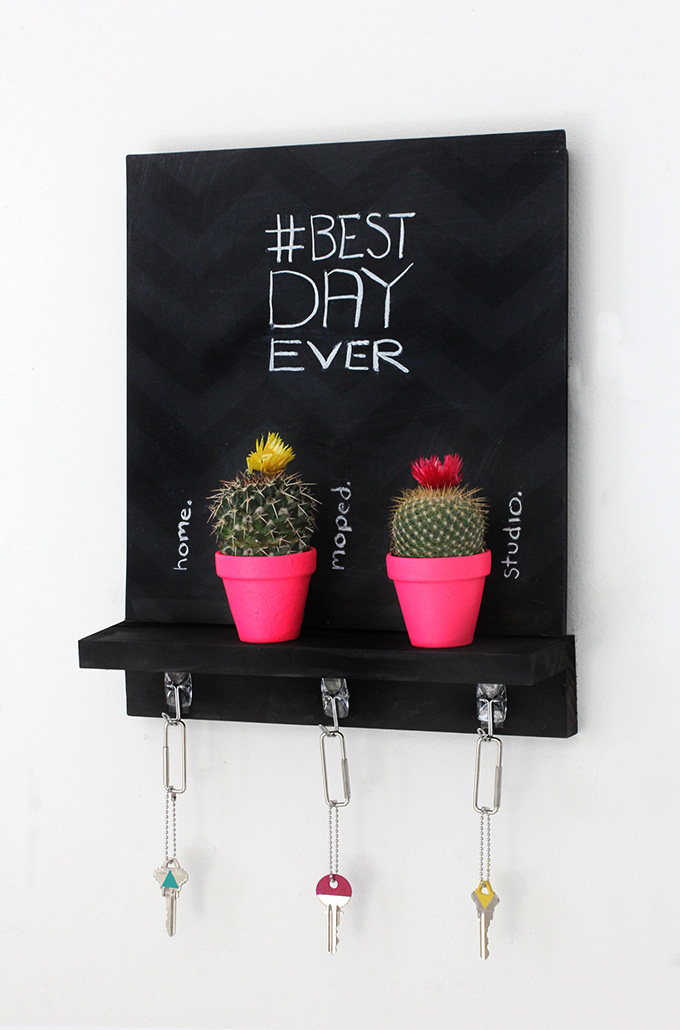
I am in a constant state of looking for my keys, it’s actually pretty amazing how quickly after I walk into a room, I am able to misplace them. My latest endeavor was to create a shelf with hooks that would be too cute to overlook! And what could be more adorable then a chalkboard, chevrons, and 3 cacti…not much in my world. With just a few nails, I created a simple shelf, then added a Command™ Décor Damage-Free Chalkboard Tile to note where my many keys should hang. My out-the-door time is now on the decline! All the supplies and steps after the break…
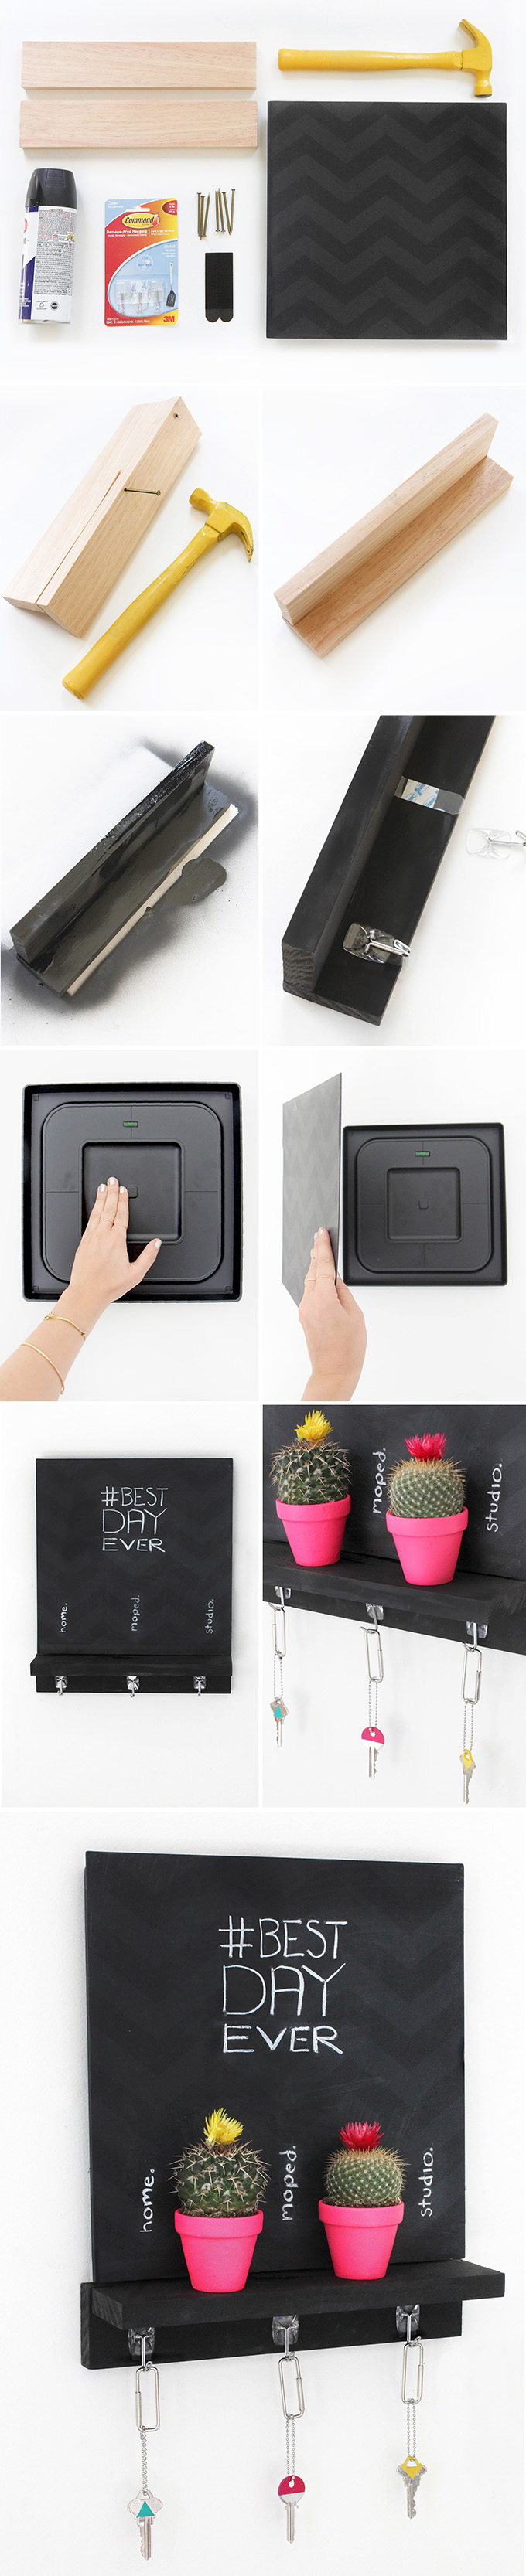
What you need:
2 Pieces of Wood that measure 3/4”(h) by 2.5”(w) by 12.5” (l)
Nails
Hammer
Chalk
Chalkboard Spray Paint
Wood Glue
Command™ Décor Damage-Free Chalkboard Tile
3 Command™ Small Wire Hooks
What to do:
Step 1: Cut your pieces of wood to measure 3/4”(h) by 2.5”(w) by 12.5”(l). Stop by your local hardware store’s lumber section for assistance.
Step 2: Nail the two pieces of wood together to create a right angle. This will be the shelf. If you’d like to add extra reinforcement to the shelf, glue the wood together before you hammer in the nails.
Step 3: Spray paint the shelf with chalkboard spray paint. Let dry.
Step 4: Attach the 3 Command™ Small Wire Hooks onto the front of the shelf.
Step 5: Next, nail your shelf to the wall.
Step 6: Attach the base of the Command™ Décor Damage-Free Chalkboard Tile above the shelve by using the Command™ Picture Hanging Strips that come with the tile. Add the strips to the back of your tile by pressing on it until you hear it lock.
Step 6: Next, attach the base to the wall by pressing the middle of the tile onto the wall firmly for 30 seconds. A picture hanging level is built into the inside of the base to ensure perfection.
Step 7: Snap on your customized front, hang your keys on the hooks, and write a fun message on the tile with chalk that will guarantee that you’ll have the #bestdayever!
This project created in partnership with Command™ Brand, thank you for supporting my amazing sponsors who make I SPY DIY possible!
EXPLORE MORE: DIY PROJECT, Home DIY


