MY DIY | Gift Wrapping Station
DIY PROJECT, Holiday DIY, Home DIY
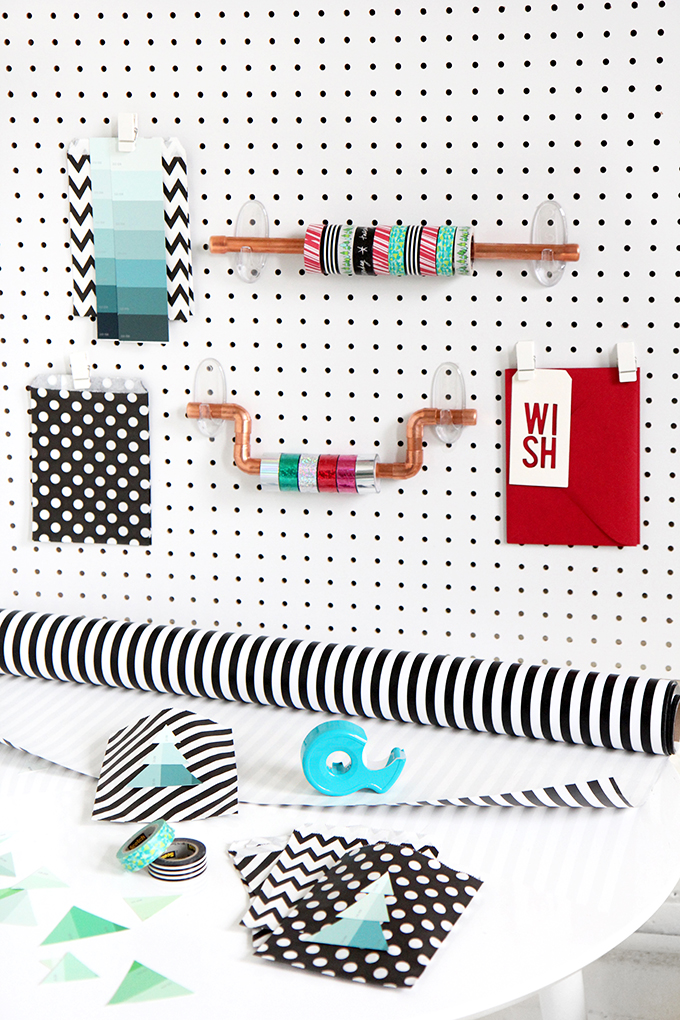
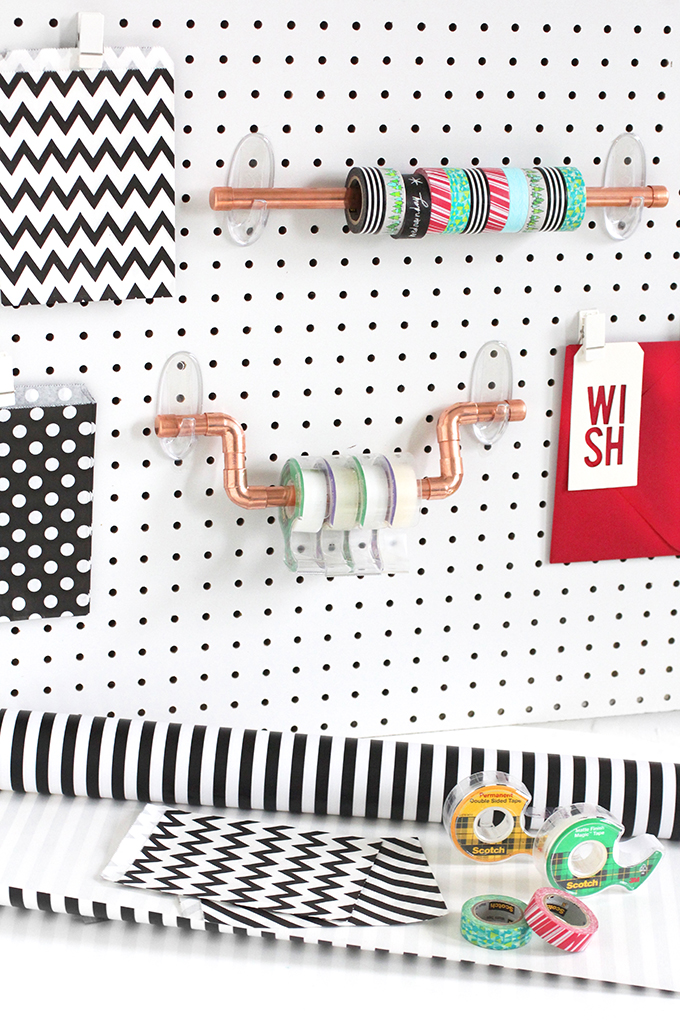
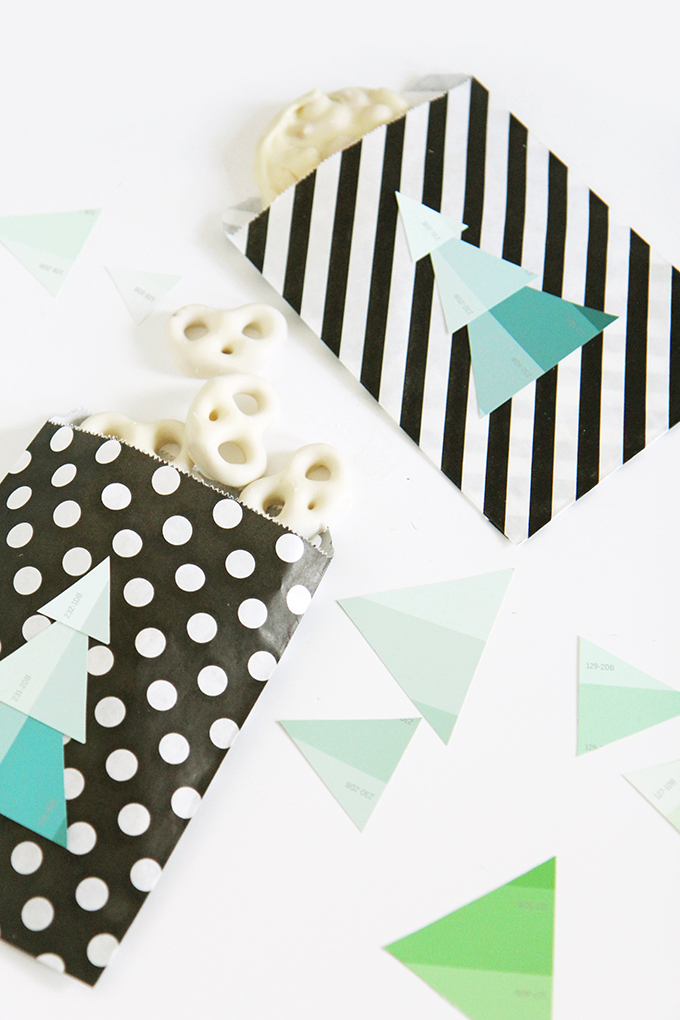
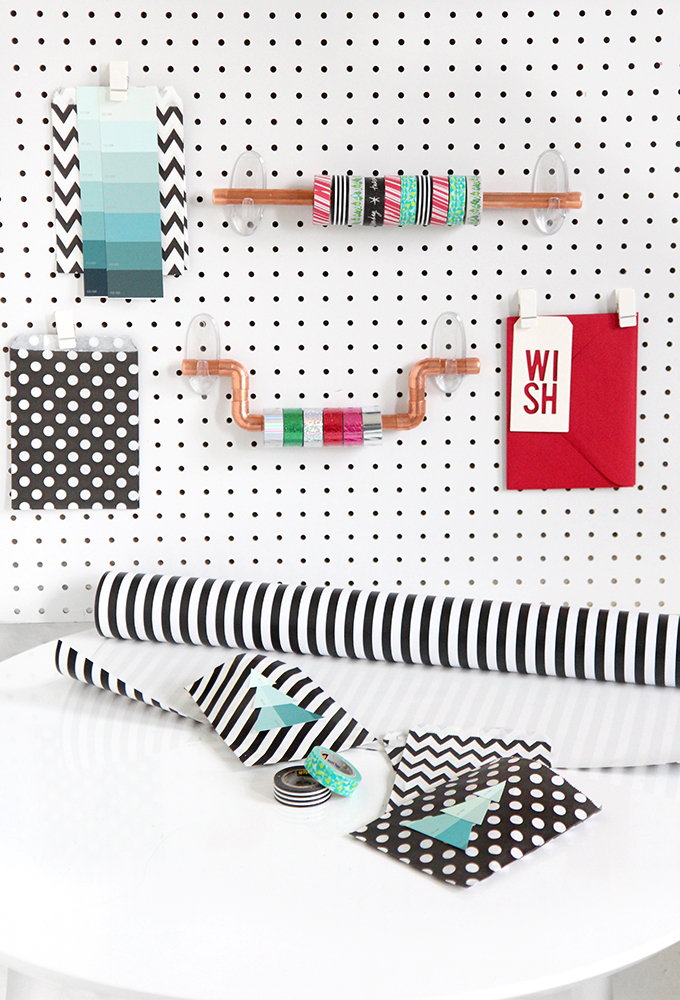
Somehow it’s already December!! Can you believe it?? Time to switch into holiday mode, and what better way to kick-off the season than creating a DIY holiday wrapping station to organize my materials, so when the gift wrapping begins, it’s stress-free! I have been using copper piping in more of my projects (two of my favorites are here and here) so thought it would be fun to use some left over pipe to display my tapes…they are just too pretty to store them in a box #addictedtowashitape. DIY Wrapping idea: Use free paint chips from the hardware store to create colorful trees to add to presents or gift bags. Steps and supplies after the break!
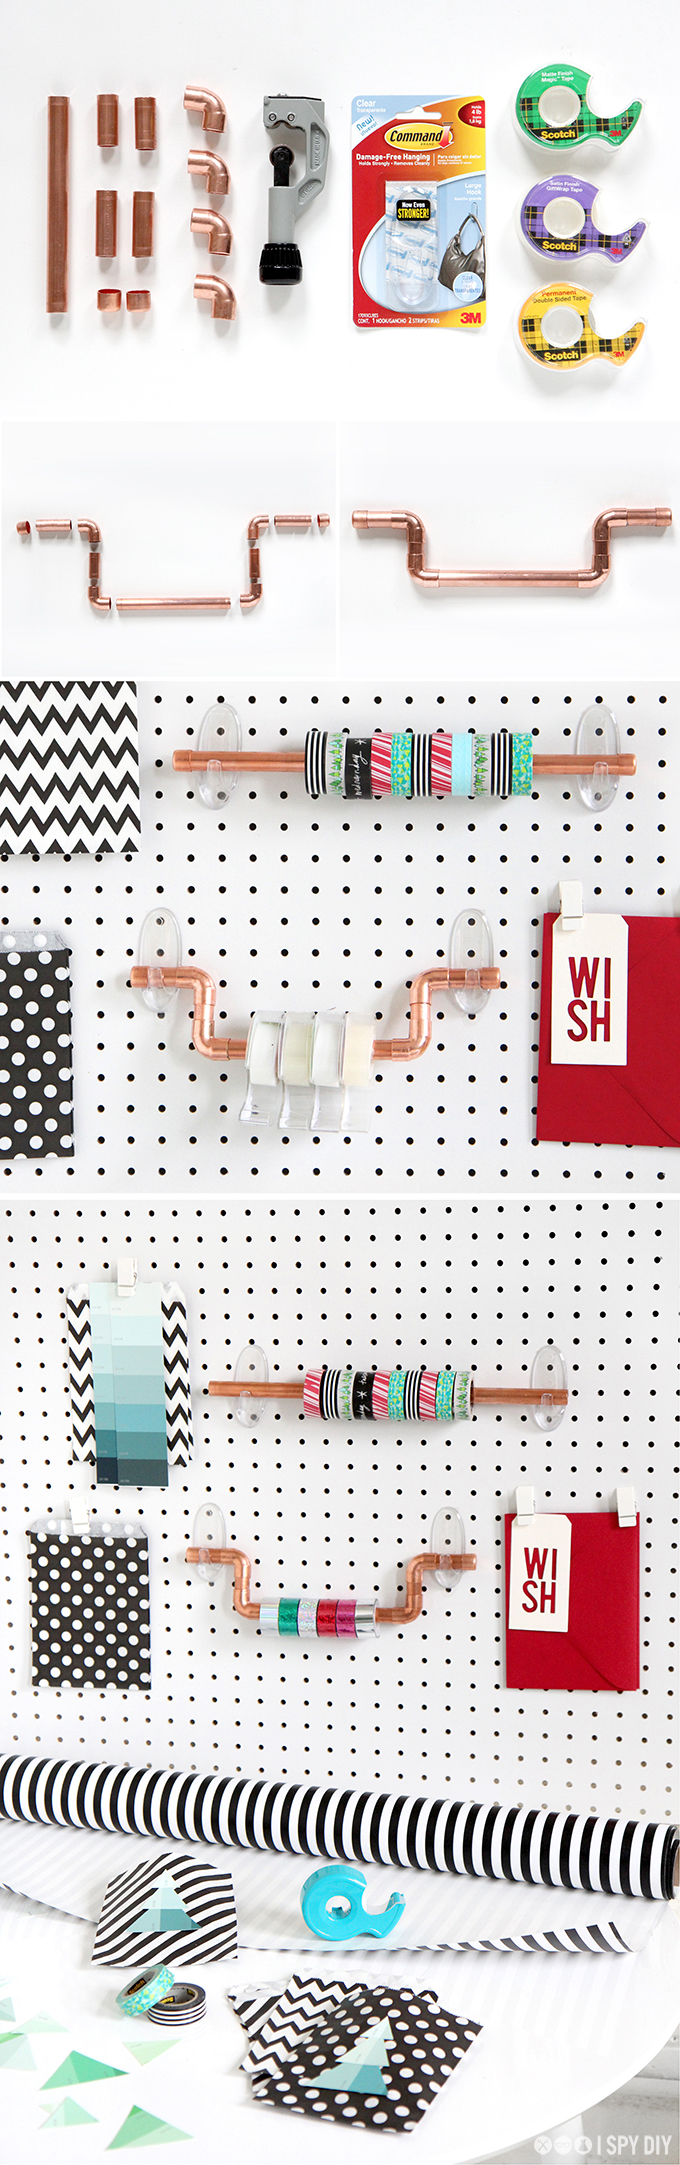
What you need:
3/4″ copper pipe
Four 3/4″ 90-degree copper elbows
Metal glue
Pipe cutter
3/4″ pipe caps
2 damage-free large clear hooks
4 damage-free spring clips
Decorative paper bags
Paint chips
Holiday cards and envelopes
Scotch® Magic™ Tape
Scotch® Giftwrap Tape
Scotch® Double Sided Tape
What to do:
Note: Follow all Scotch™ Brand package instructions for proper application and approved surfaces.
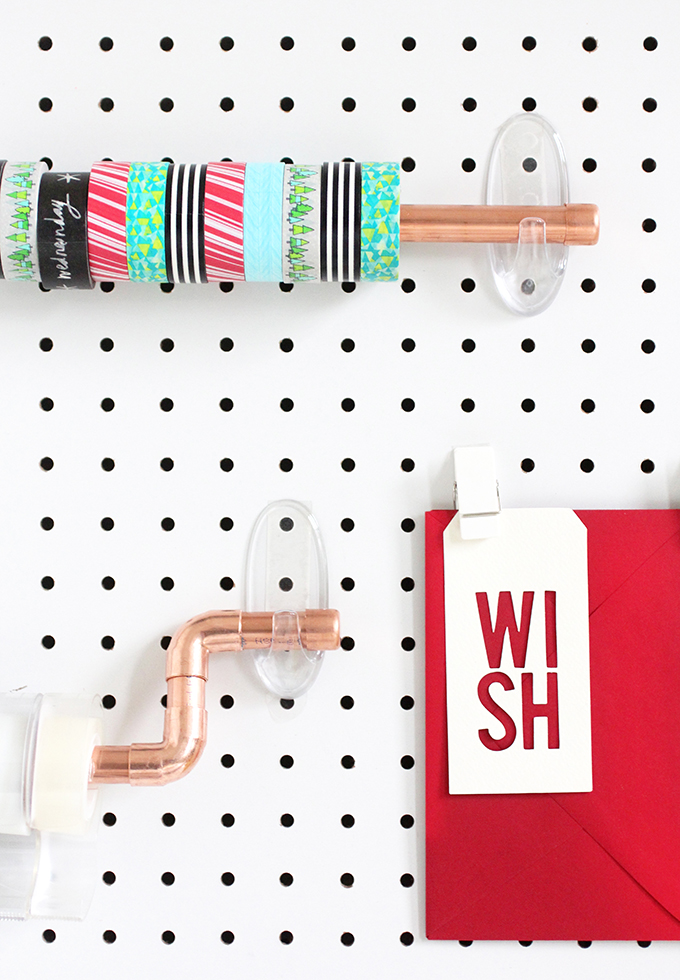
Step 2: Arrange the 5 pieces in a handlebar shape as shown above.
Step 3: Once you fit all of the pieces together, take them apart and add metal glue to the inside of each piece, with the exception of the two end pieces. Reattach the copper pieces as you did in Step 2.
Step 4: Insert rolls of Scotch® Magic™ Tape, Scotch® Giftwrap Tape and Scotch® Double Sided Tape onto the unglued end pieces of the tape hanger, that way the tape hangs and is easily accessible while giftwrapping. Add the two end pieces to the tape hanger.
Step 5: Adhere two damage-free large clear hooks the length of the tape hanger to the wall and hang the pipe from the hooks.
This post has been made in collaboration in Scotch Brand, thank you for supporting my amazing sponsors who make I SPY DIY possible!
EXPLORE MORE: DIY PROJECT, Holiday DIY, Home DIY


This is a great idea.
OMG what a cute idea!!! In my imaginary dream home there is an entire room dedicated to gift wrapping , but this wall station would do for now! lol
Xoxo
Annie
http://www.somethingswellblog.com