Before & After Kitchen | Ep #1 My Flippin’ Friends
Before & After, DIY PROJECT, Home DIY
Time for my favorite part of the renovation: The Kitchen! Figuring out this space definitely kept me up a few nights. There are so many moving parts and big ticket decisions to make, and we were working on a 3 month deadline for the whole house, so there was no time to make changes or second guess decisions. We started with a blank slate after we gutted the whole first floor, and just had to work around the header for the little addition that was added years ago on the left, and it’s low slanted ceiling. I played around with a million layout options, debating weather or not to do upper cabinets, and figuring out where that darn fridge would go! The cabinet guys laid out the kitchen with the fridge on the back or right wall with uppers around the whole kitchen…but knowing this is a starter home for a small family, I picked windows over cabinets. It’s a small space and the windows make all the difference! I moved the fridge to the slanted nook and surrounded it with pantries which gave the kitchen a good amount of storage. I was super happy with the final layout, and the flow of the kitchen works great for cooking and entertaining!
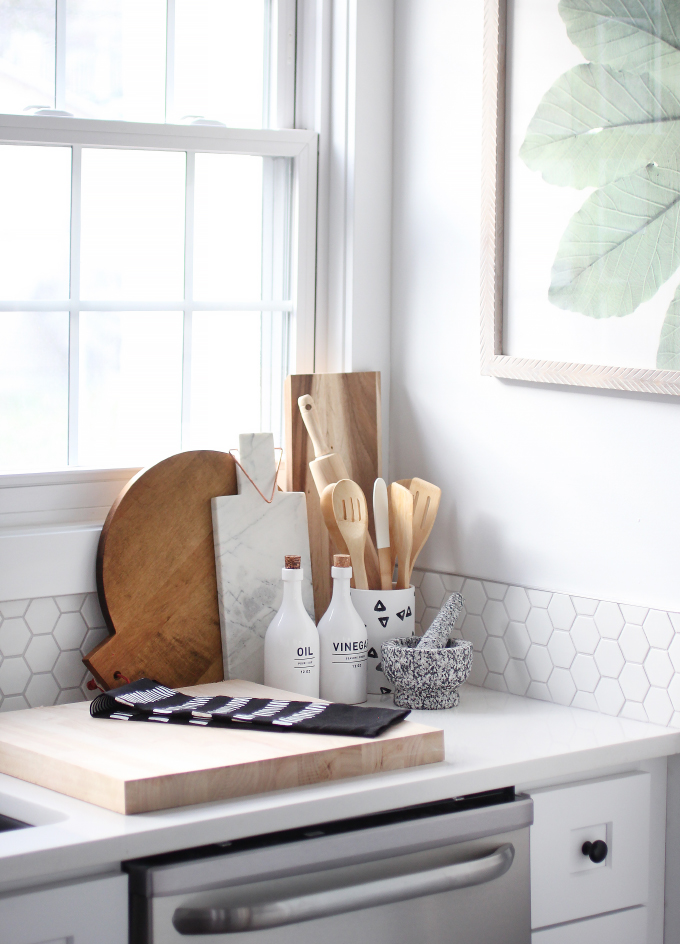
Oh, this backsplash! I went back and forth about doing a statement black and white tile, or subway tile…but ultimately decided a bold tile could be a bad move for resale, and subway tile is a bit overdone right now (trust, I still love subway tile, and used it in both bathrooms). I am a huge fan of all things hexagon, and loved this tile…but beware, it’s a pain to install! If you use it, make sure to stick with a light grout, unless you want to pull them all off the mesh backing. It’s a headache getting the spacing even, and dark grout will amplify that.
The original plan was to put shelving along side of the hood all the way to the top, but it started to get really busy vertically, so we stopped at one on each side. And a set of vintage copper container I found thrifting fit perfectly on them. It was meant to be!

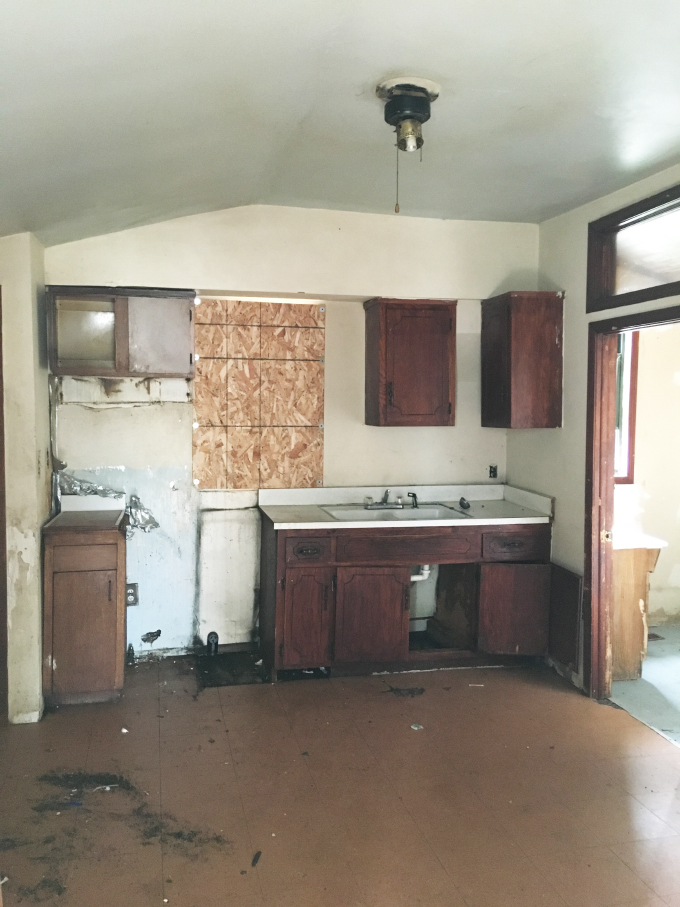
The before kitchen was definitely one of the grossest I have ever seen! Thousands of dead cockroaches, electrical fires, water damage, and rodents had chewed through the support beams…it was a nightmare!

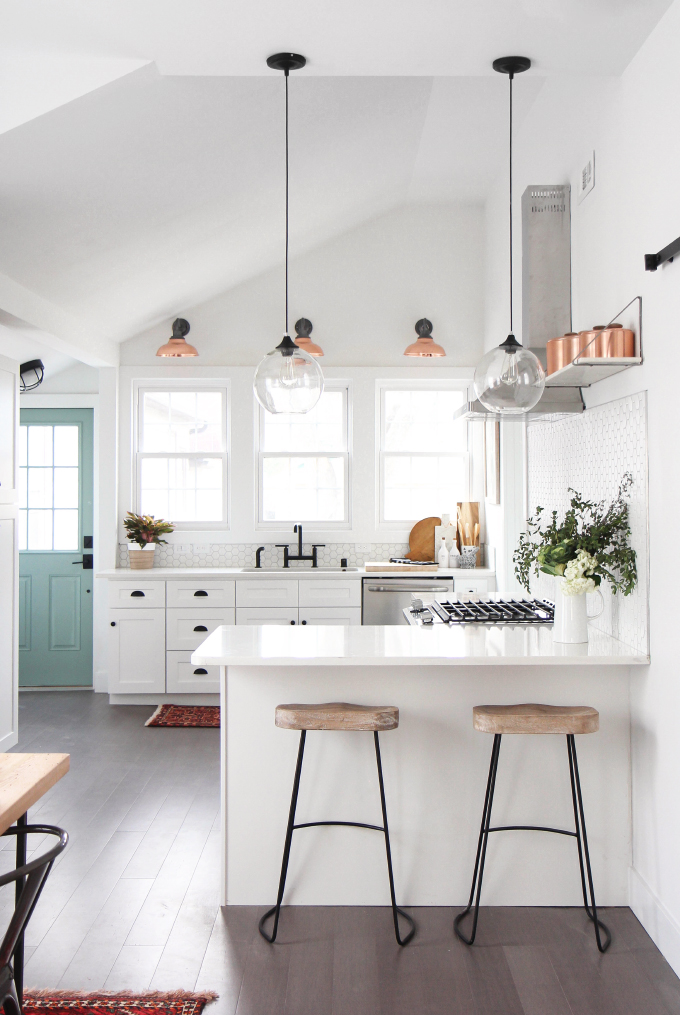
So much happier…and cleaner, ha! I splurged on the copper lights on the back wall because I really wanted all copper and matte black in the kitchen, but saved on the clear globe pendants, a steal at $65! I originally had heavier industrial pendents, but knew even before they were hung that they were wrong, and had the clear ones on the way. I love how the two lighting styles work together!
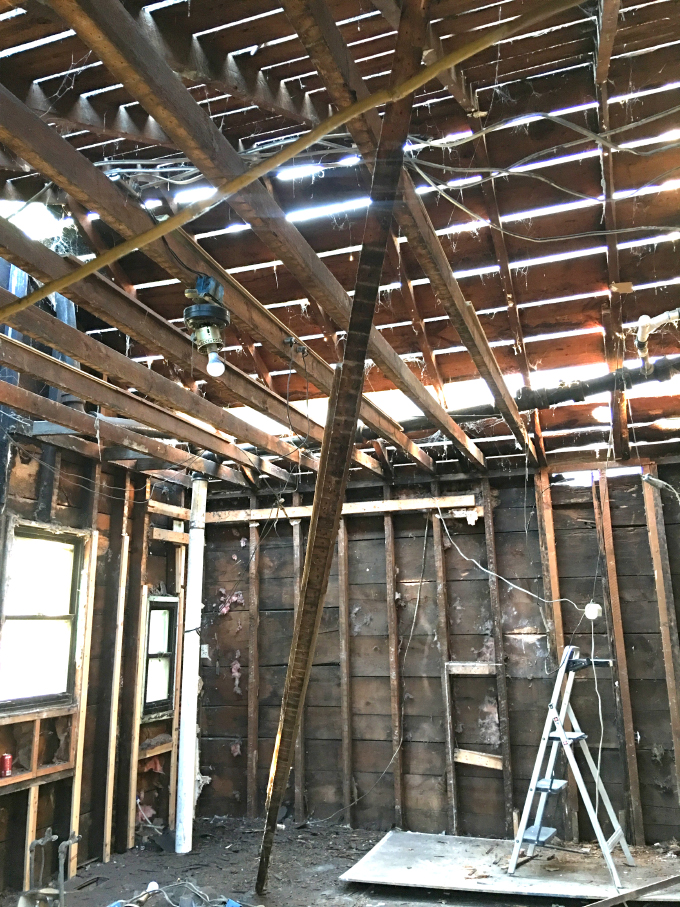
We ended up completely gutting the kitchen to repair all the structural, electrical and plumbing problems…it was pretty crazy to see it striped down to the original 125+ year old structure. This is also were the budget took a pretty major hit, which sadly came out of the exterior. My grand landscaping plans got the axe, but at least we know the inside is safe for future owners.

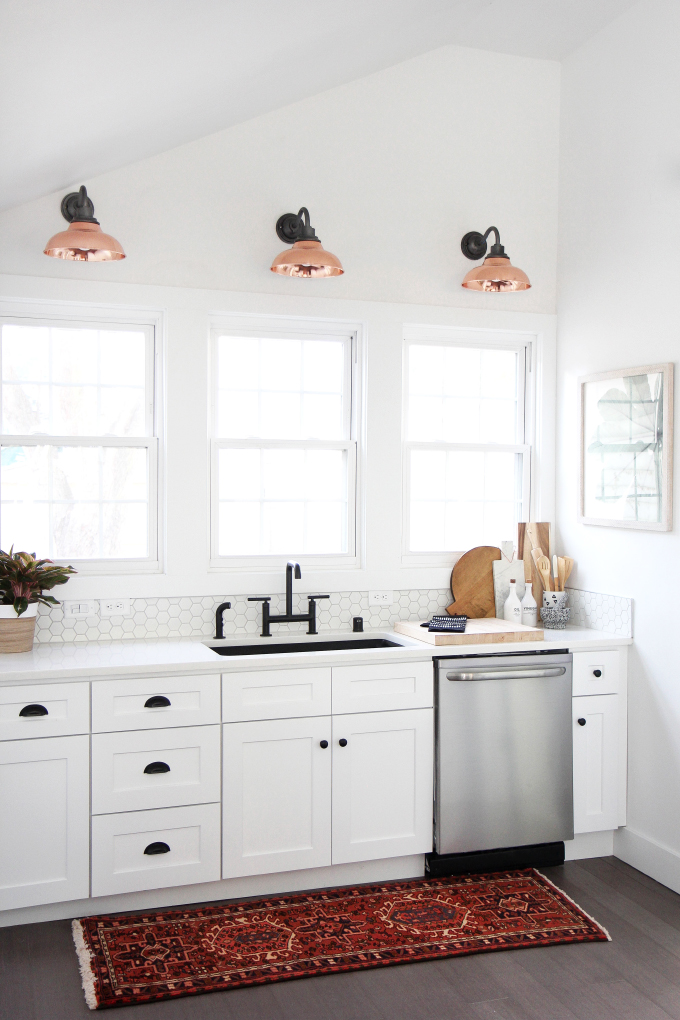
There were a lot of suggestions to do a farmhouse sink, but they are just SO popular right now, I wanted to do some thing a little different, and I was so excited with how slick the matte black faucet and sink looked in the white kitchen. For real, how sexy is that faucet!
There you have it, the kitchen! I hope you love it as much as I do 🙂
SHOPPING INFO:
Rejuvenation Copper Carson 12″ Wall Sconce
The Tile Shop 2″ Matte White Hexagon Tiles
Kohler Matte Black Purist faucet and Cairn double bowl sink
GlideRite Hardware Classic Cabinet Bin Pull
Cosmas Flat Black Cabinet Hardware Round Mushroom Knob
CR Light Edison Style Industrial Vintage Creative Pendant Lamp
The Loom House Rugs
HGTV HOME by Sherwin Williams – Desert Lake
Cali Bamboo Hardwood flooring-Vintage Moonlight
Minted Leaf in Green Art
Schlage Century Single Cylinder Handleset and Latitude Lever
Leave a comment with any other questions!
EXPLORE MORE: Before & After, DIY PROJECT, Home DIY


Love this kitchen! What material did you use for the countertops?
We used a snowy quartz!
Wow it looks absolutely amazing!
http://www.thoughtsinstyle.com/
Wow, what a change! Absolutely wonderful kitchen!
https://www.makeandmess.com/
I can’t even decide which part I like the most! It’s completely my dream kitchen. Amazing work!
…what camera do you use? I’m in the market for a new one.
http://www.katelately.co
Yes, tell us what you used for the counter tops please!
I was originally going to go with butcher block but the cabinet guy gave us a great deal on some quartz. Its a lot of white, but much more durable than the butcher block!
This is amazing!! The before is just totally ridiculous. Great job!
wow!!
http://www.thewonderlanders.com